CARAMEL COVERED CINNAMON ROLLS

My mom usually makes these for special brunches, but these are so good they should be shared with all of you! You must make the dough OVERNIGHT – sorry! But the good news is you’ll just pop them in the oven, make the caramel sauce while they bake, and have the yummiest smell filling your home! It’s Christmas Eve, and I just put the rolls into the fridge to rise overnight. Cannot wait to bake them tomorrow!


CINNAMON ROLL INGREDIENTS

2 packages of yeast (or 4 1/2 tsps)

5-6 cups bread flour

1 1/2 tsp salt

1/2 cup sugar

1 1/2 cup very hot water

1/2 cup softened butter

2 eggs


FILLING INGREDIENTS

1/4 cup melted butter

1/2 cup sugar

2 tbsp cinnamon (mix with the sugar)


CARAMEL SAUCE INGREDIENTS

1/2 cup butter

1 cup sugar

1/2 cup buttermilk

1/2 tsp baking soda

1 tbsp karo syrup (you can sub maple syrup)


MAKE THE DOUGH THE NIGHT BEFORE:

Combine TWO CUPS of the flour, yeast, sugar, and salt.

Add hot water to dry ingredients all at once.

Beat with electric mixer at medium speed for 2 minutes.

Add butter.

Add eggs one at a time,

Stir in remaining 3-4 cups of flour gradually. Use just enough to make soft dough which leaves the sides of the bowl.

Turn onto floured counter and knead 5-10 minutes or use a bread dough hook and mix for 3 minutes.

Cover with plastic then a towel and let it rest for 20 minutes.

Roll dough into a about a 12×24″ rectangle.

Spread melted butter then sprinkle the sugar-cinnamon mixture on top.

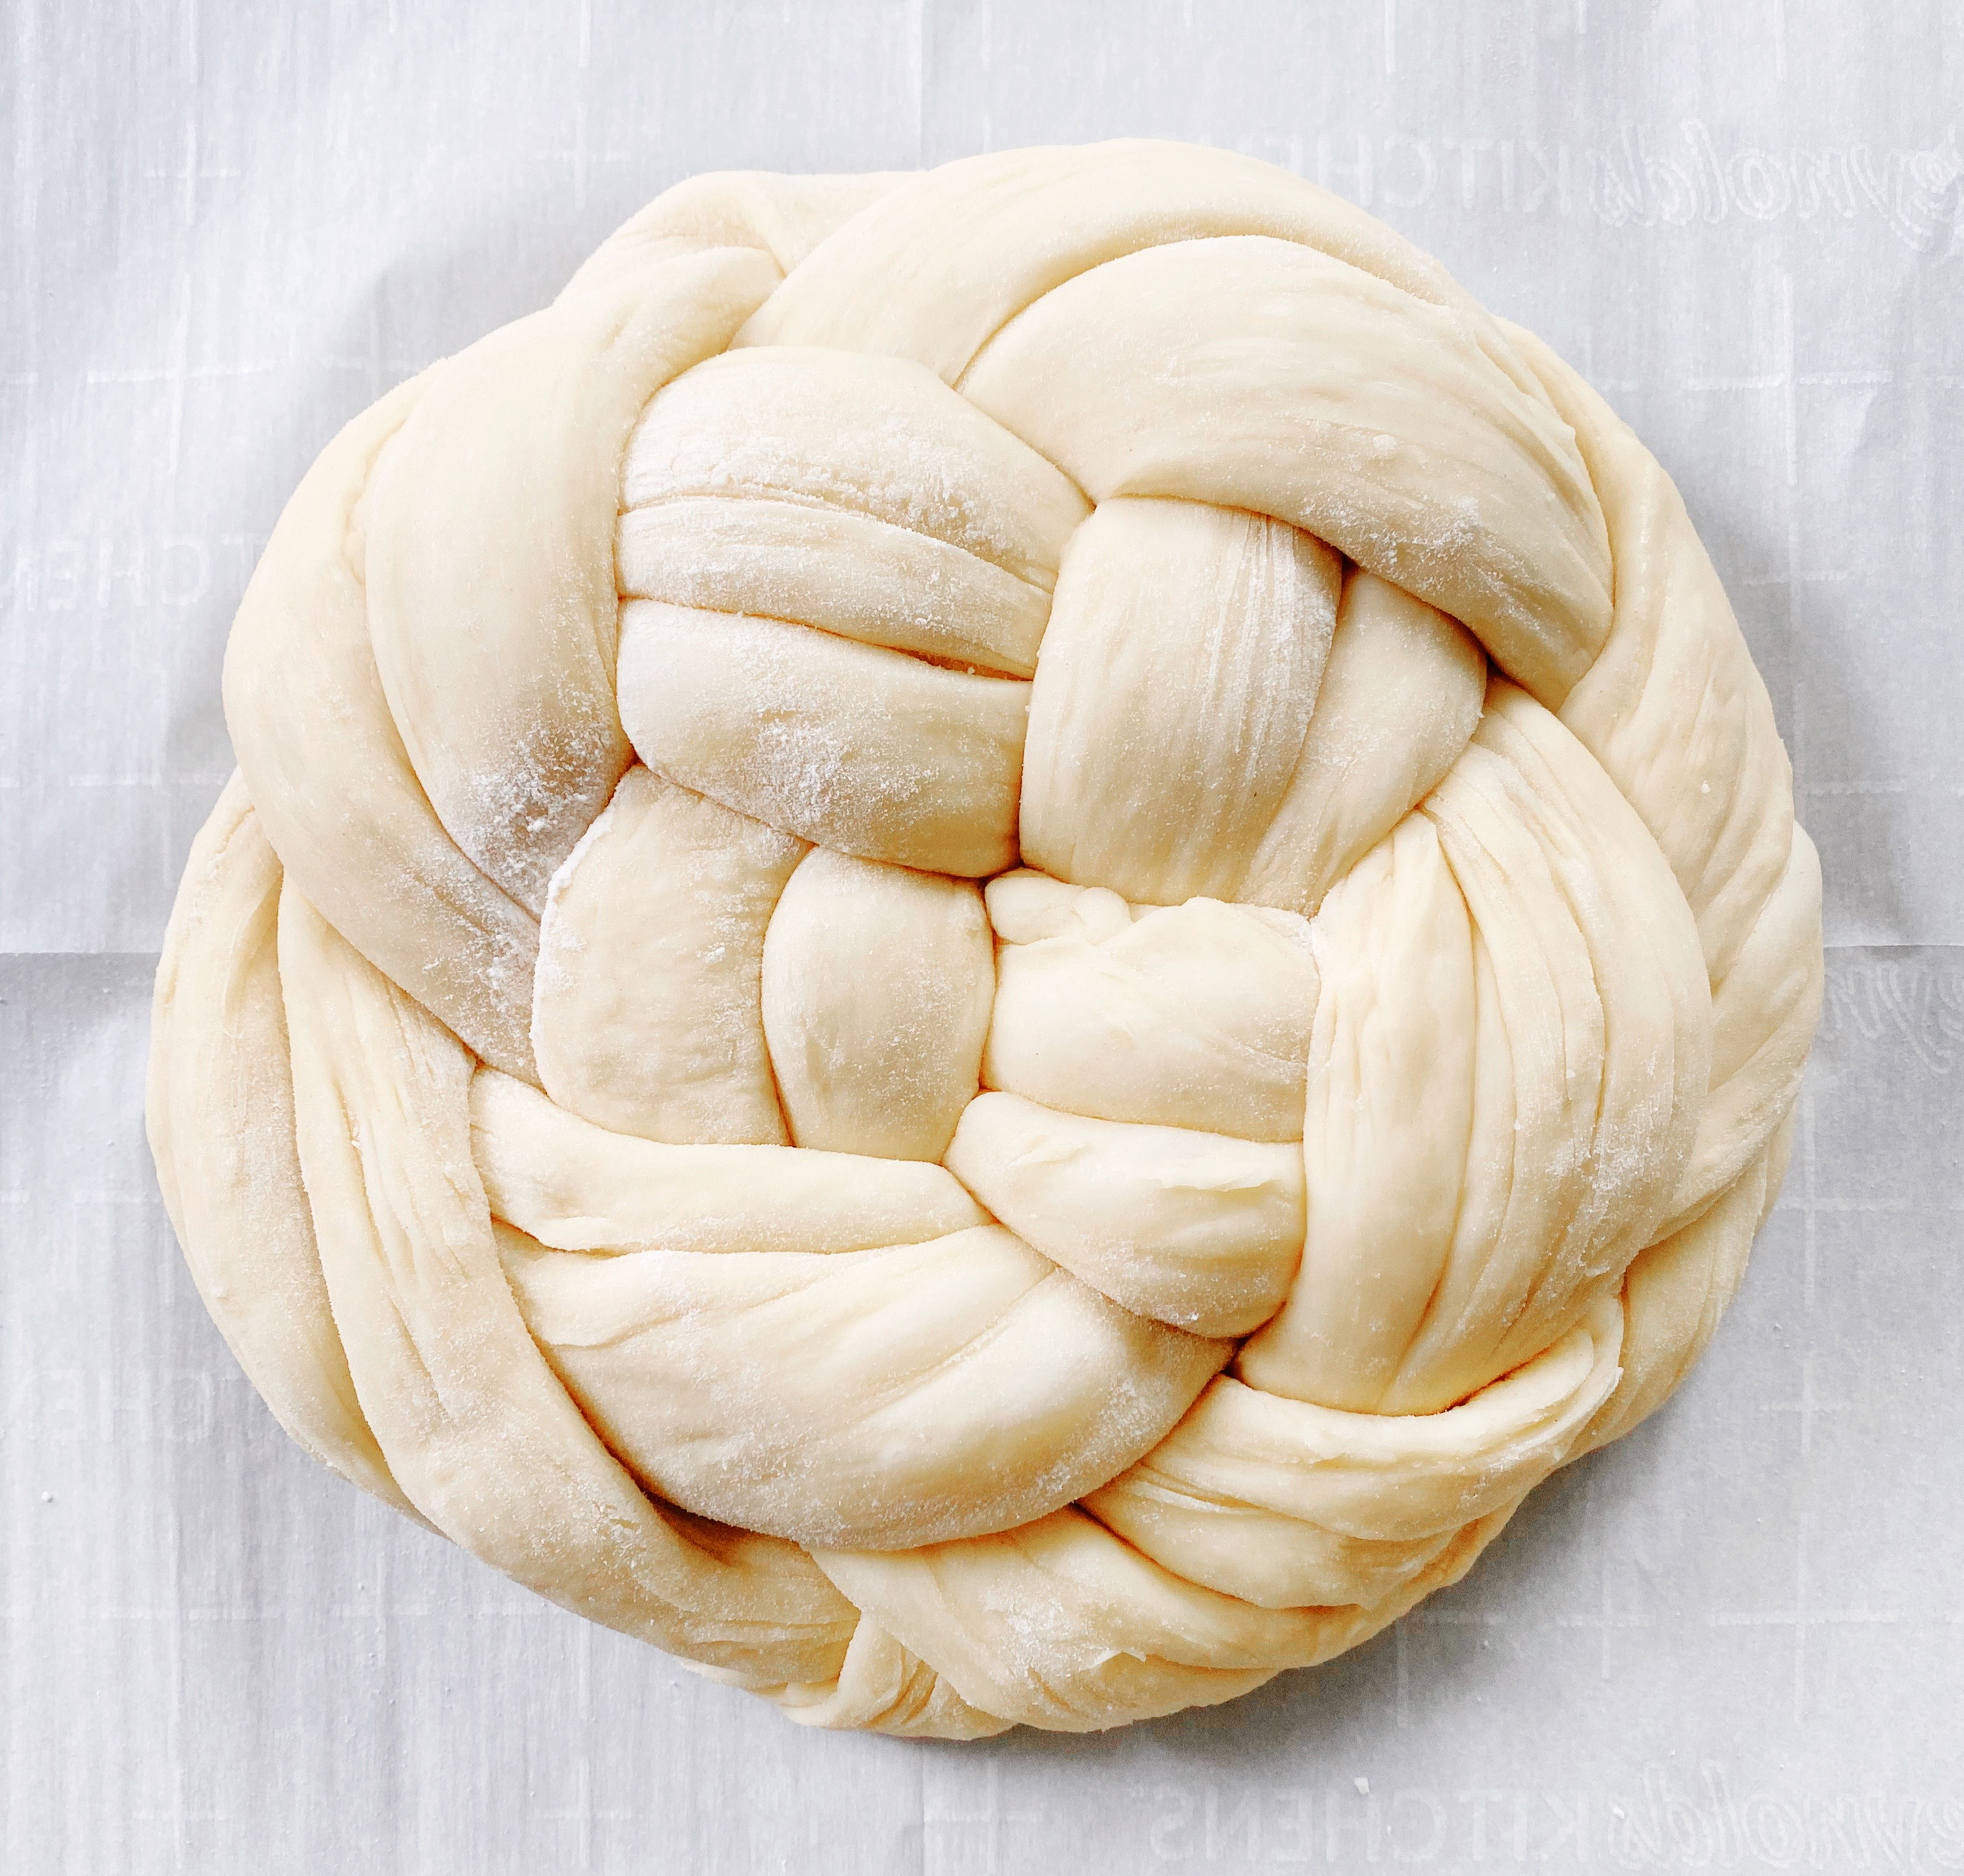
Roll up length wise (on the 24″ side).

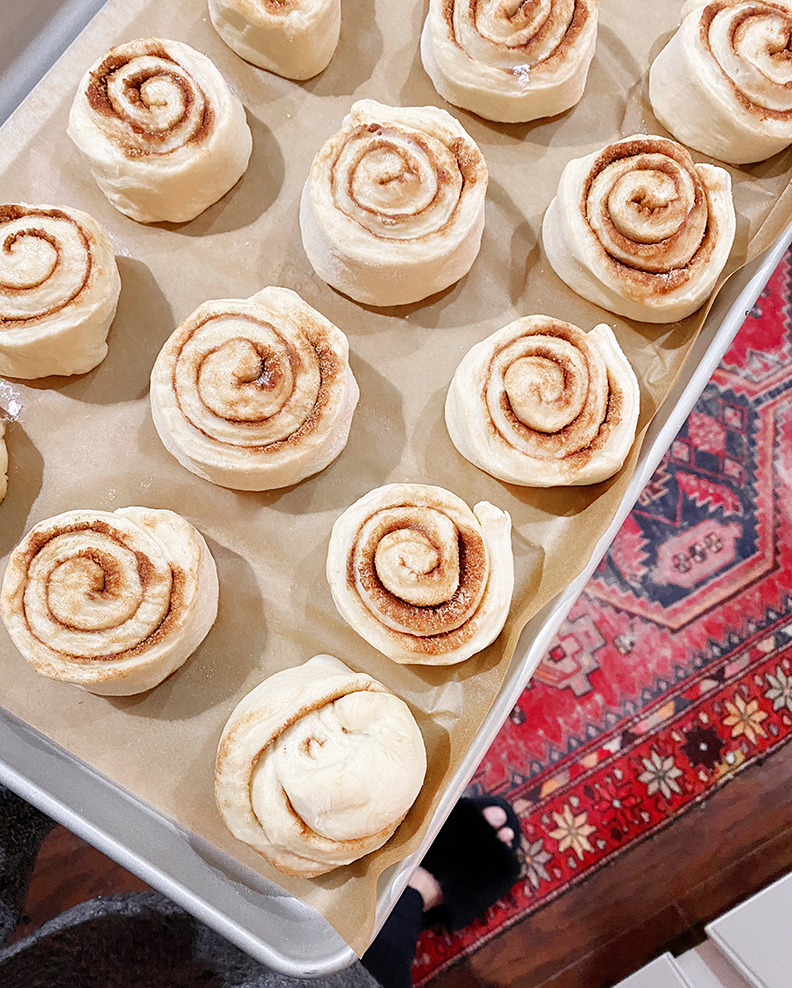
Cut with a serrated knife into about 12 slices (see my ugly little bun on the corner? That was the two ends of the roll mushed together lol.

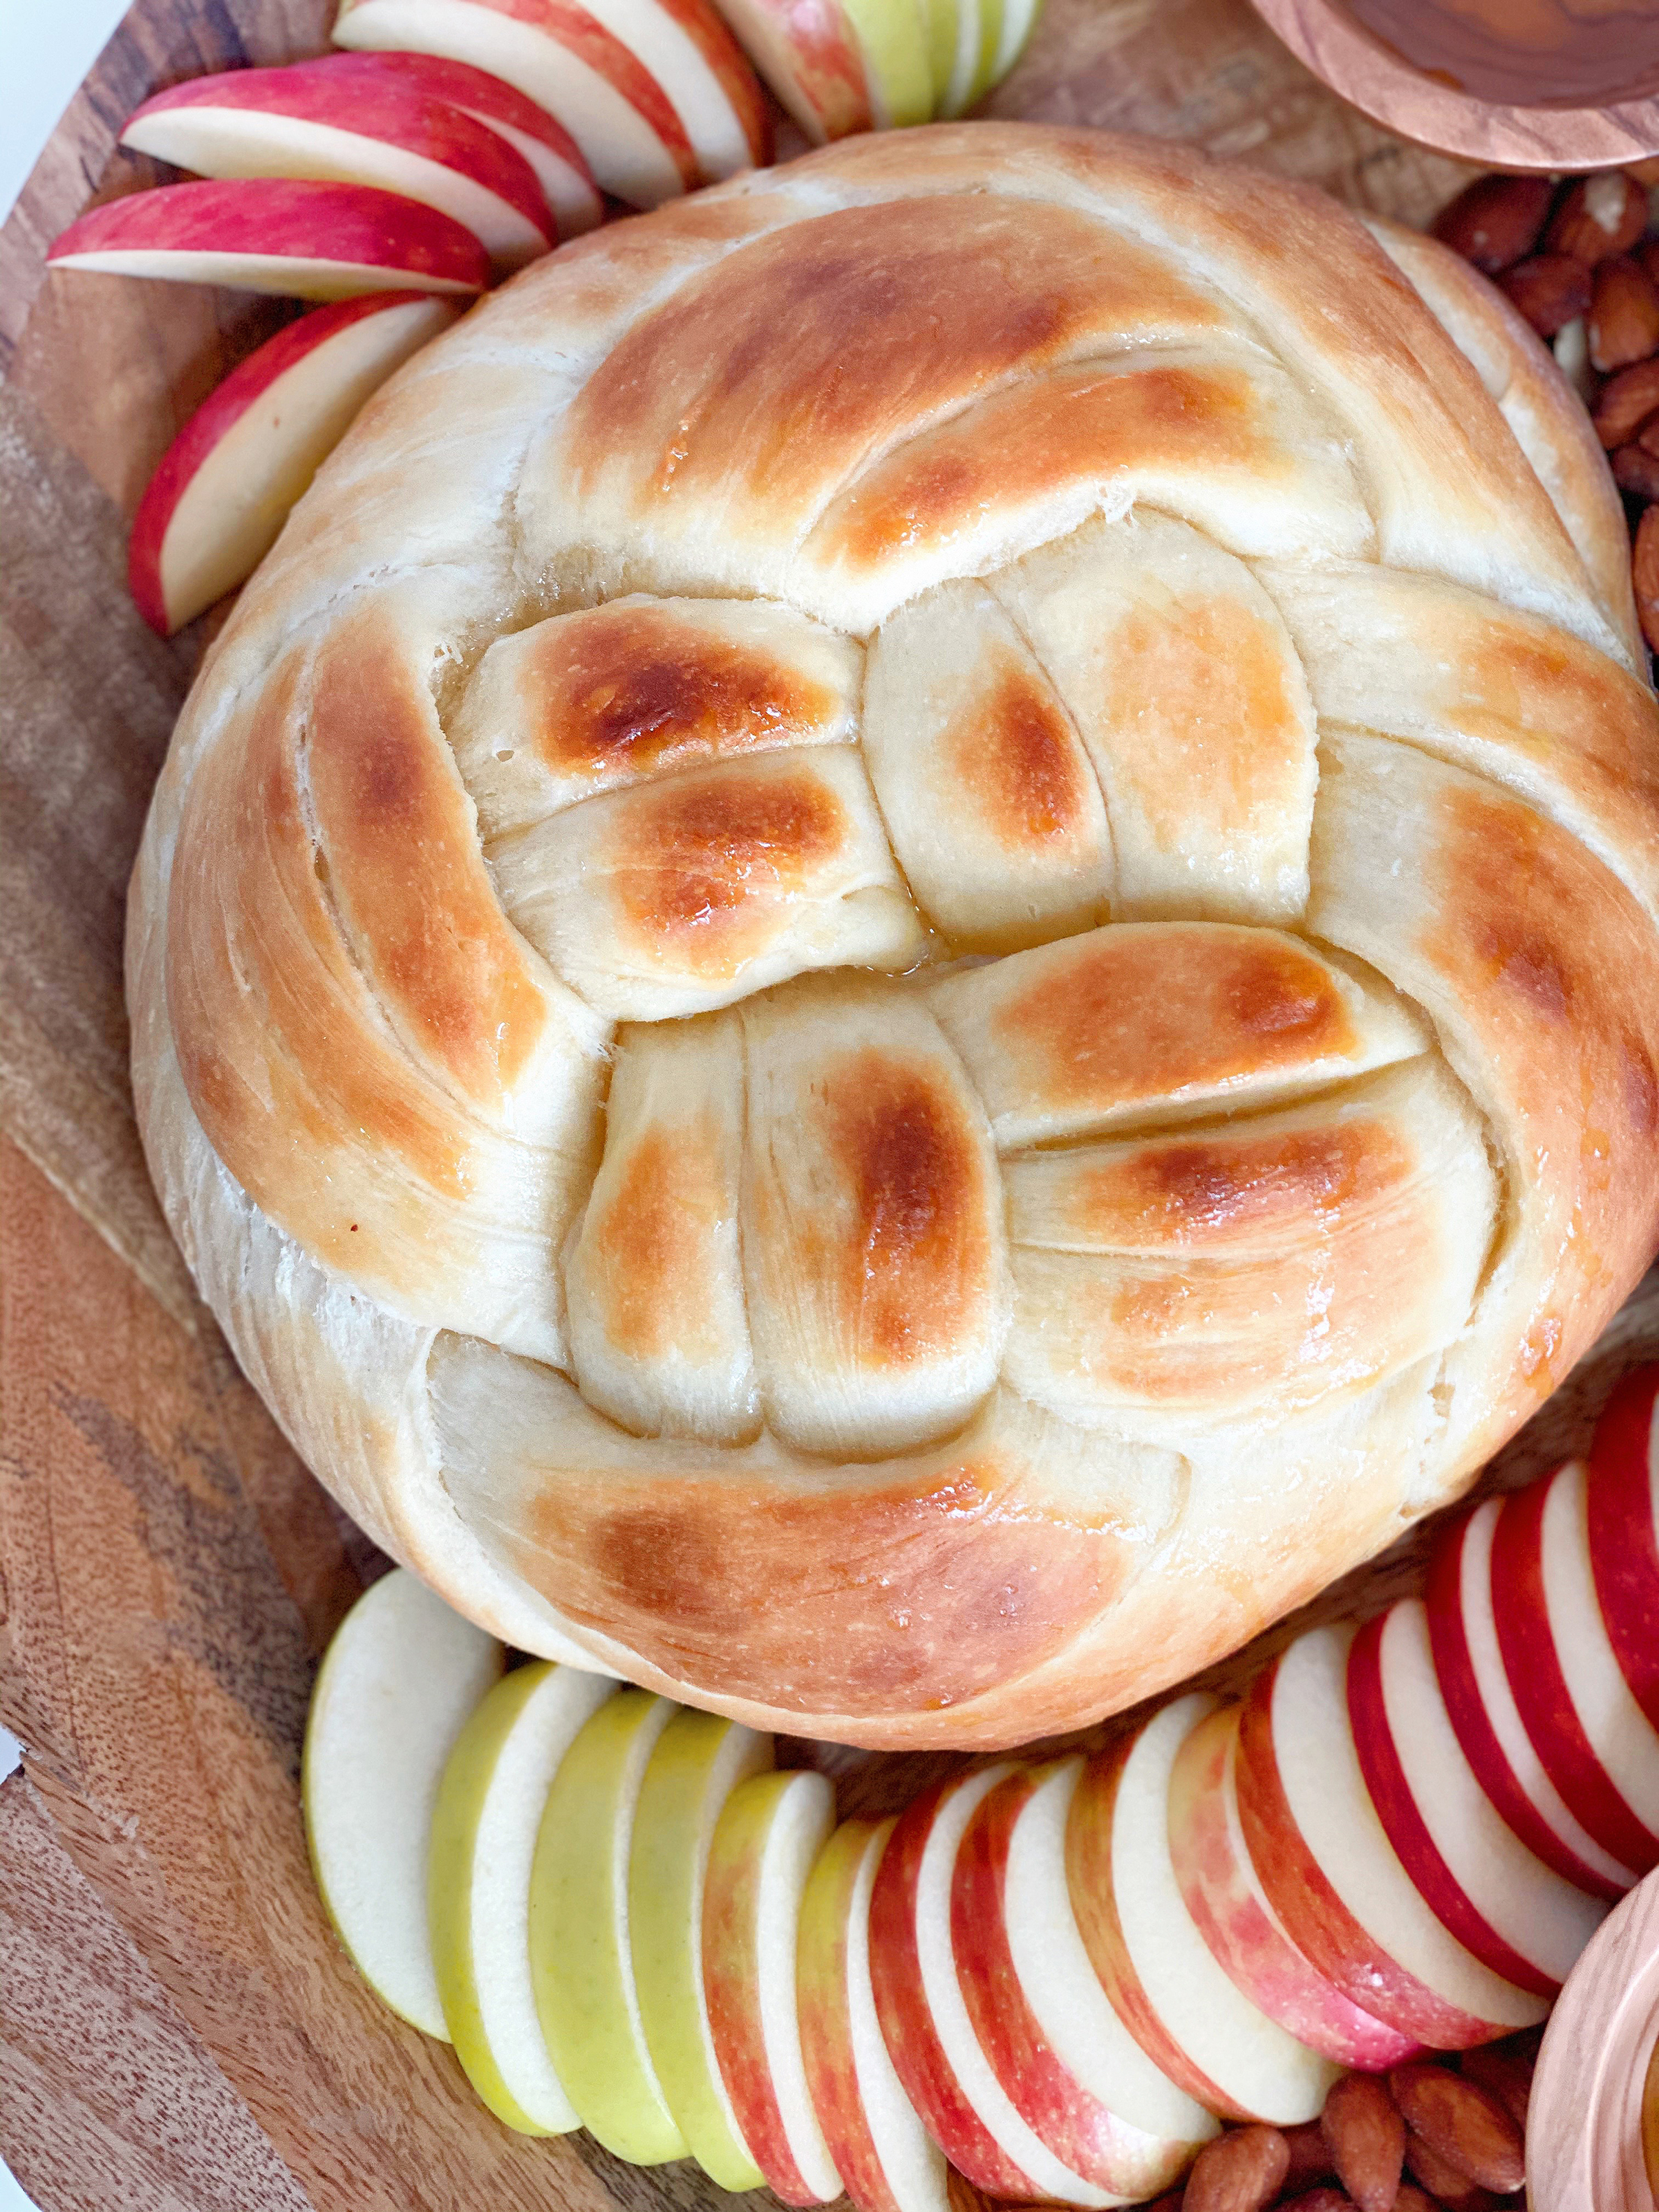
Place face side up on a parchment paper lined rimmed baking sheet WITH SPACES in between. They will puff up lots and fill up most of the space on the tray. Made that mistake before and OMG they were massive and weird looking.

Cover with plastic wrap and refrigerate overnight.


When ready to bake, remove from the refrigerator, uncover, and let stand 10 minutes while preheating the oven to 375 degrees.

Puncture any surface bubbles with a greased toothpick.

Bake 20-25 minutes. (check centers with toothpick until comes out just clean. Rolls will be slightly browned but don’t overdo it! I would always rather they were a little gooey than a little dry!


MAKE THE CARAMEL SAUCE:

While the rolls are baking, place 1 stick of butter, 1 cup of sugar, 1/2 cup buttermilk, 1/2 tsp baking soda, and 1 tbsp Karo syrup in a large saucepan.

Boil slowly for approximately 10 minutes.

Keep a careful watch and stir it down if it boils up high at first. Let cook until deep caramel colored but don’t let it burn! This happens very quickly.

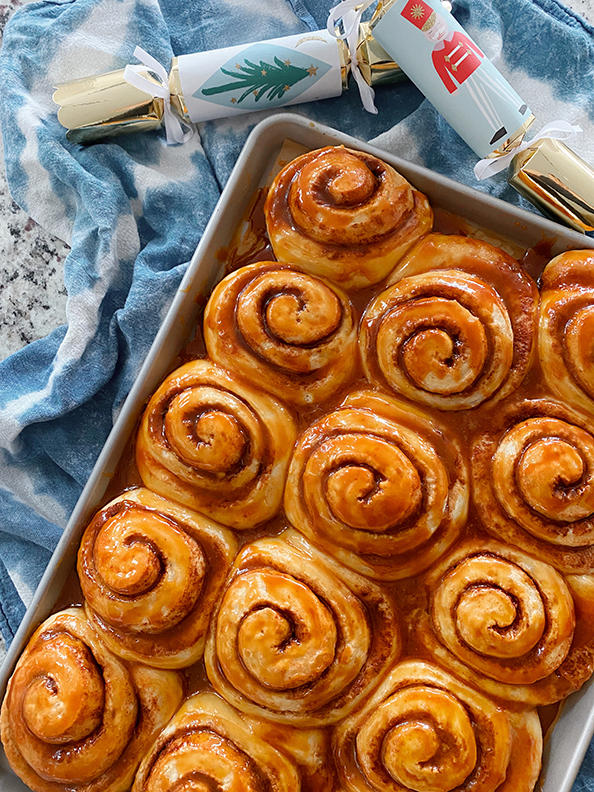
Pour over the rolls as soon as they’re out of the oven.

Enjoy!


GINGERSNAP CARAMEL PUMPKIN CHEESECAKE


I found these gingersnaps… mainly purchased for the tin… and OMG they are so good! I thought that in order to not eat the entire tin in one day, I better use them for a pie to be shared. Thanksgiving is the perfect excuse to turn these cookies into the crust for a gingersnap caramel pumpkin cheesecake! I had extra batter since I used a smaller springform pan, and made 6 minis- so cute and easy. I actually liked the balance between crust and filling on the minis better than the cake… both great, don’t get me wrong. If you have extra minis, they would be perfect to drop off on a neighbor’s porch (which I did) since many cannot get home to see their families. Effing Covid.

Gingersnap Caramel Pumpkin Cheesecake Recipe

Scroll down for the mini version (you don’t necessarily need to make a crust for this- just use the unbroken cookie as the base).


Crust and cheesecake via The Pioneer Woman

Caramel sauce via The Brown Eyed Baker


Crust Ingredients (for minis you just need the cookies):

12 oz. (about 54) gingersnaps plus 8-10 extras for the topping – THESE are the best!

6 tbsp unsalted butter, melted

2 tbsp brown sugar

1/2 cup chopped pecans

1 dash of salt


Caramel Sauce Ingredients:

1 cup granulate sugar

6 tbsp unsalted butter, room temp

1 tsp sea salt

2/3 heavy cream


Filling Ingredients:

packages (8 0z. packages) cream cheese

1 1/2 c. sugar

can 15-ounce pumpkin puree (NOT pumpkin pie filling)

1 tsp ground cinnamon

1 tsp. allspice

1/2 tsp. nutmeg

4 whole eggs

2 tbsp. heavy cream


Equipment:

food processor (or ziplock bag and a rolling pin could substitute)

9″ or 10″ springform pan

muffin liners or ramekins if you’re making minis

parchment paper

rimmed baking sheet


1. Make the crust:

Lightly butter a 9″ or 10″ springform pan. In a food processor (or large Ziploc bag), crush gingersnaps. Add chopped pecans, melted butter, brown sugar, and salt, and pulse (or mix) until thoroughly combined. Press into bottom and sides of the springform pan. Chill crust for 20-30 minutes.


2. Make the caramel sauce:

In a 3-quart saucepan, heat the sugar over medium-high heat, whisking as the sugar begins to melt. Some of the sugar will harden into clumps, but that’s okay – it will melt eventually – just keep whisking. Continue to cook the sugar until it reaches a dark amber color. At that point, whisk in the salt, and then add the butter all at once and whisk until it is completely incorporated into the sugar. Remove the pan from the heat and pour in the heavy cream (it will foam up when first added). Continue to whisk until it forms a smooth sauce. Allow to cool for 10-15 minutes before using.


3. Make the filling:

In a mixing bowl, beat cream cheese and sugar until light and fluffy. Add pumpkin and spices and mix again. Add eggs one at a time, mixing for 20 seconds between each addition. Add cream and mix until just combined.


4. Assemble the cake:

Line a rimmed baking sheet with parchment paper. I did not not do this and the caramel leaked through and burned my oven… yikes. Pour a little less than half of the caramel sauce onto the crust (I prefer more on top of the cake), moving the springform pan around so that it coats the sides and bottom. Save the rest of the caramel in an airtight container for the top of the cake before serving. Put the crust back in the fridge to set. Pour the filling into the caramel-coated crust and fill up to the top of the crust. If you have extra filling, see below suggestion for minis. Place the cheesecake on top of the parchment paper lined rimmed baking sheet. Bake 350 degrees, 1 hour and 15-30 minutes until jiggly but not soupy. Cool on the counter for 30 minutes. Cover and chill for 4 hours or overnight. Remove rim of the pan then use a spatula to carefully remove the bottom of the pan and transfer it to a serving platter. Pour the rest of the caramel sauce on top. Top with crumbled gingersnaps. Slice and eat!


For minis:

Line a rimmed baking sheet with parchment paper. Place muffin liners or ramekins (lightly butter these) on the baking sheet. Instead of making a crust, just place a whole gingersnap cookie on the bottom of the liner. Cover it with a little caramel. When this bakes, the cookie and caramel will fuse together into a soft delicious crust. Fill each about half way with the cheesecake filling. Bake 350 degrees for 25 minutes until jiggly but not soupy. Cool on the counter for 30 minutes. Cover and refrigerate 4 hours or overnight. They look cute in their liners or ramekins plus… it’s easier… no need to transfer! Top each mini with remaining caramel sauce and crumbled gingersnaps before serving.


xo

Leah

RBG COLLAR

All rise! This easy DIY Ruth Bader Ginsburg collar is the perfect halloween costume honoring the notorious RBG. Use whatever material you have around the house- felt, paper, an old sweatshirt, whatever. I cut this out from a reusable grocery tote bag and taped jewels on.

On this other version (modeled by my brother lol), I just drew lines and circles with a white paint pen. You can also jazz it up with jewels or pearls.

WHAT YOU NEED:

fabric / felt / grocery bag / old shirt

paint pen / paint / sharpie

scissors

string

hole punch

extra credit: jewels or pearls (I used strong double stick tape)


  1. Print out templates. To cut out and trace on another material, click HERE. To print out in black and white and use as your actual collar (like if you’re printing it to use on paper), click HERE.
  2. Cut out collar and trace
  3. Punch holes in either corner and string
  4. Decorate!


ROSH HASHANAH TREAT BOARD

Happy New Year to those who celebrate! I created a cheese-board-like creation with my favorite Rosh Hashanah treats: homemade challah, honey cake, and apples & honey. Also this wooden platter is the PERFECT size, food safe, and $39. Scroll down for the recipes!

HONEY CAKE

Adapted from Brown Eyed Baker

Delicious made 1 day in advance! Keep in a sealed container at room temp.

INGREDIENTS

  • 3½ cups all-purpose flour
  • tablespoon baking powder
  • teaspoon baking soda
  • ½ teaspoon kosher salt
  • teaspoons ground cinnamon
  • ½ teaspoon ground cloves
  • ½ teaspoon ground allspice
  • cup vegetable oil
  • cup honey
  • 1½ cups granulated sugar
  • ½ cup light brown sugar
  • eggs (at room temperature)
  • teaspoon vanilla extract
  • cup plus 2 TBSP brewed coffee (warm)
  • ½ cup plus 2 TBSP orange juice

DIRECTIONS:

  1. Preheat oven to 350°F. Generously grease 2 loaf pans with non-stick cooking spray then line with parchment paper, leaving an inch overhang on each side.
  2. In a large bowl (no need for an electric mixer), whisk together the flour, baking powder, baking soda, salt, cinnamon, cloves and allspice. Make a well in the center and add the oil, honey, white sugar, brown sugar, eggs, vanilla, coffee, and orange juice.
  3. Stir together with a wooden spoon or spatula until all ingredients are well-blended, scraping the sides and bottom of the bowl, making sure that no ingredients are stuck to the bottom.
  4. Spoon batter evenly into prepared pans.
  5. Bake 35-40 minutes (if you’re using an 8×11″ brownie pan bake for about 40 minutes). The cake should be SLIGHTLY jiggly. I like to set my timer to 30 minutes and check 3 minutes at a time. If it jiggles like pudding, it needs a couple more minutes. I hate dry bread, so undercooking it a tad keeps it moist.
  6. Immediately grab the parchment paper and pop out of the pans so it doesn’t keep cooking in the pan. See how the photo has that yummy looking puddle in the middle? That’s the good stuff. The bottom of this cake bakes up FAST, so you really don’t want it to burn.

RECIPE NOTES:

This recipe can be made in two standard loaf pans, two 9-inch square or round cake pans, one 9- or 10-inch tube or bundt cake pan, or one 9×13-inch sheet cake, but baking times will differ.
Now onto the challah…


CHALLAH

This is my favorite challah recipe! IT. IS. SO. GOOD. Our family friend, Carol, shared this recipe with my mom and me, and we will forever be grateful. Chewy and slightly sweet. Spread butter on a slice and drizzle with a little honey. I usually like to braid a 4 part braid and form into a ring so that the challah bakes evenly all around (SEE POST HERE), but I wanted it smaller for the board- see this braiding technique for a round challah HERE. We traditionally bake a round challah for holidays.

INGREDIENTS:

2 tsp honey
1 pkg yeast
1/2 c vegetable oil
1/4 c sugar
2 tsp salt
2 eggs (+ 1 egg for egg wash – see notes for alternatives)
4 c bread flour

DIRECTIONS:

  1. Dissolve 1 tsp honey in 1/2 c. warm water in large mixing bowl which has been rinsed with hot water.
  2. Sprinkle yeast on top, mix, let stand 10 min.
  3. Stir in oil, 1/2 c. warm water, sugar, 1 tsp honey, salt, eggs, and 2 c. flour. Beat well.
  4. Stir in remaining 2 c. flour. Dough will be sticky.
  5. Knead 2-3 minutes with a bread hook attachment or turn onto a floured board and knead.
  6. Round up in greased bowl, cover, and let rise in a warm place for 2 hrs. It should have doubled in size. Gently put finger in top; if dough stays indented, it’s finished. If it bounces back, continue to rise.
  7. Punch down, cover, let rise again 45 min.
  8. Place on parchment paper on a baking sheet. Divide into sections and braid (ring instructions HERE, round instructions HERE), tucking in the ends.
  9. Cover, rise 20-30 minutes.
  10. Brush with beaten egg yolk and 1 tsp water (or sub- see below). Optional: sprinkle with poppy seeds.
  11. Bake 400 degrees 15-20 min. The last 5 minutes or so, you can cover the top with foil so it doesn’t get too brown. Put a toothpick in the center of a braid and check for doneness. My mom and I like to under bake it just a tad so it doesn’t dry out- we like it a tiny bit gooey but it’s all to your preference.
  12. Eat! Delicious with butter and /or honey. Perfect the next morning for french toast.

RECIPE NOTES:

I always run out of eggs for the egg wash! You can sub with melted butter before you put it in the oven then a little when you take it out. I also spread a little honey on top to really take it to the next level.

xo

Leah

MY GO-TO YELLOW CAKE + MARSHMALLOW BUTTERCREAM FROSTING

I updated my go-to yellow cake recipe! This cake is m-o-i-s-t, slightly dense but light, buttery, and absolutely delicious. I promise it’s easy and WAY better than boxed. The marshmallow frosting is nice and gooey and not as sweet as you’d think. The flavors go really well together! Scroll down for the recipe, but READ THESE NOTES FIRST:
  1. If you want your cake to taste fresh and delicious, use fresh and delicious ingredients. I know that sounds like common sense- but seriously- use GOOD and real (read: expensive) vanilla extract, use the best butter, eggs, milk, etc. It truly makes a difference.
  2. UNDER BAKE this cake. My rule of thumb is set the timer 5-10 minutes under what the recipe says and keep testing every 2-3 minutes. The cake should be firm with a little JIGGLE when you gently shake the pan. It will KEEP COOKING in the pan!! Put a knife in the middle and it should come out with crumbs on it- NOT clean. Clean means you probably over baked it. But still eat it. Obviously.
  3. IF YOU OVER BAKE IT and the bottom is brown, wait for the cake to cool then take a serrated knife and skim off the brown. Brush the milk soak on it, and it should help the moisture level.
  4. For the reason above, please please please line your pan with parchment paper buttered on both sides! Even I have over baked my cake (who meeeee?) and needed to resort to the cake shaving!
  5. For lazy baking, I use an 11×13″ baking pan you’d normally use for brownies. It’s one layer and easier to store than a layer cake. Still line with parchment and butter in case you need to pop it out.

CAKE RECIPE:

INGREDIENTS:
1 cup unsalted butter, room temp
2 cups granulated sugar
4 eggs, room temp
2 3/4 cups bread flour (I just always bake with bread flour, but you can use all purpose!)
2 1/4 tsp baking powder
1/2 tsp salt
1 cup buttermilk (to make your own, mix 1 cup of milk + 1 tbsp white vinegar and let it sit for 5 min)
2 tbsp good vanilla extract
Milk soak: 1/4 cup milk + 1 tsp vanilla
parchment paper
  1. Preheat oven to 350 degrees.
  2. Line 2 9″ round pans or 1 9×13 pan with parchment paper (butter pan, place parchment paper down, butter parchment paper).
  3. Sift dry ingredients and set aside.
  4. Beat butter for 3 minutes. Add sugar and beat another 3 minutes. Add eggs one at a time and beat thoroughly.
  5. Add flour mixture on lowest speed one cup at a time, alternating with milk. End with the flour mixture.
  6. Add vanilla and mix well.
  7. Pour into prepared cake pans.
  8. Bake about 20 minutes in the 9″ rounds or 30 minutes in the 9×13 pan until a knife inserted in the center comes out with crumbs. DO NOT over bake- the secret to the yummiest cakes (see notes above). The cake should jiggle a tiny bit in the middle like firm jello (not gooey pudding) and be the slightest golden brown.
  9. Cool in pans on wire rack for 5-10 minutes only, then flip out on a wire rack covered with parchment paper and cool completely.
  10. Mix milk soak together and brush over the surface of the cake before frosting.

MARSHMALLOW BUTTERCREAM FROSTING

INGREDIENTS

1 cup salted butter, room temp (or add 1/4 tsp salt to unsalted butter)

14 ounces Marshmallow Fluff

2 cups powdered sugar

1 teaspoon vanilla

* If frosting a sheet cake, I like to halve the recipe since you’re not covering as much area. This frosting is rich!


  1. Mix butter on medium speed until smooth. Add in the Marshmallow Fluff and mix for an additional minute, or until smooth, scraping the sides of the bowl as necessary.
  2. Turn the mixer to low and add in the powdered sugar and vanilla, mixing until combined, then turn the mixer up to medium and mix for another minute. Add food coloring if you want.
  3. Scoop a small amount and drop onto the cake. Take an offset spatula or knife and cover the surface of the cake- it’s ok if crumbs get mixed in- this is called the crumb coat! Let that set.
  4. Scoop and drop the rest of the frosting on the cake and spread. Top with sprinkles!