PRINCESS & PIRATE PARTY FAVORS + DIY PRINCESS CROWNS

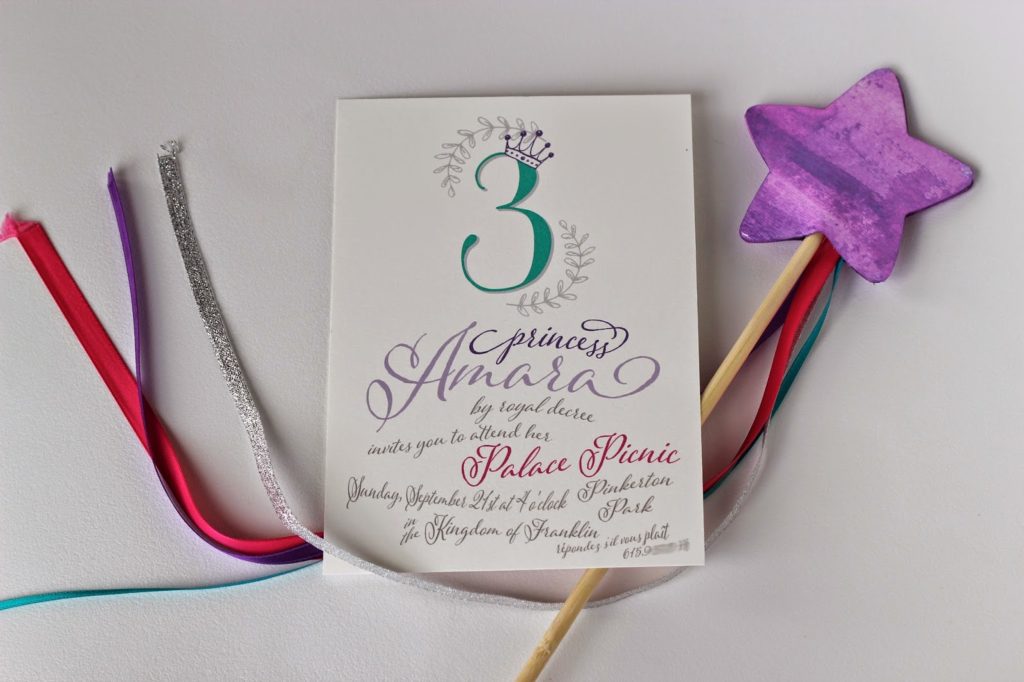
Soooooo, when I meant that I would share a more detailed post of the party favors from Amara’s 3rd birthday party on Monday…… yeah, I meant NEXT Tuesday! Yikes! So sorry for the delay. We are really trying to get back to our first love around here….. blogging. However, our Etsy shop has definitely taken up a lot of our time. We are so grateful, and we are loving it, but we also love sharing things with our readers on here so much!!
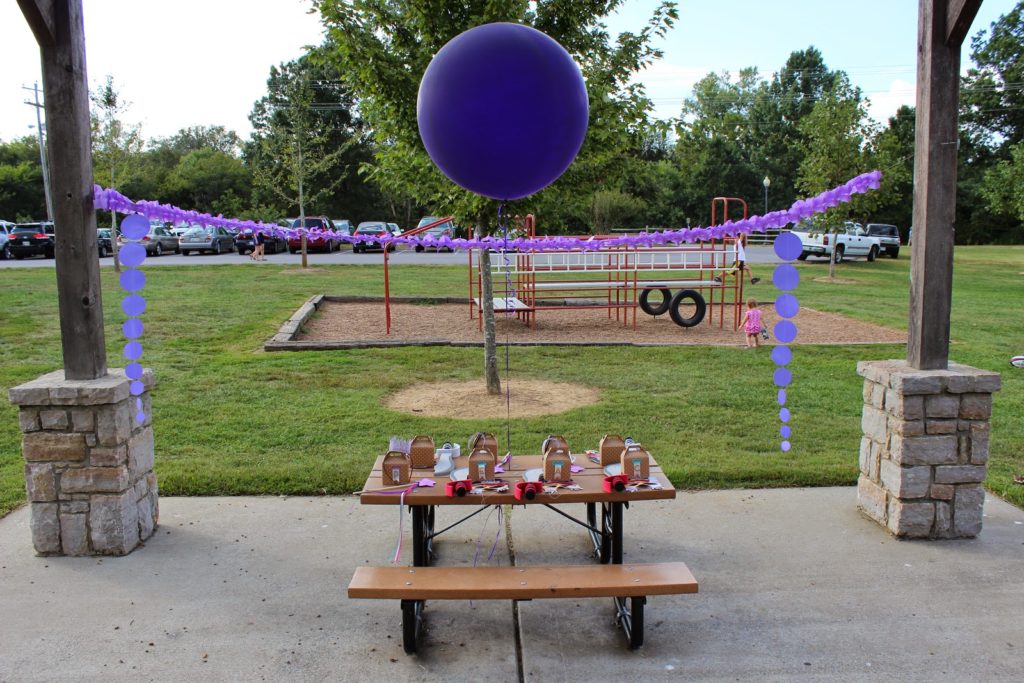
Ok, so here are the detailed photos of the party favors….
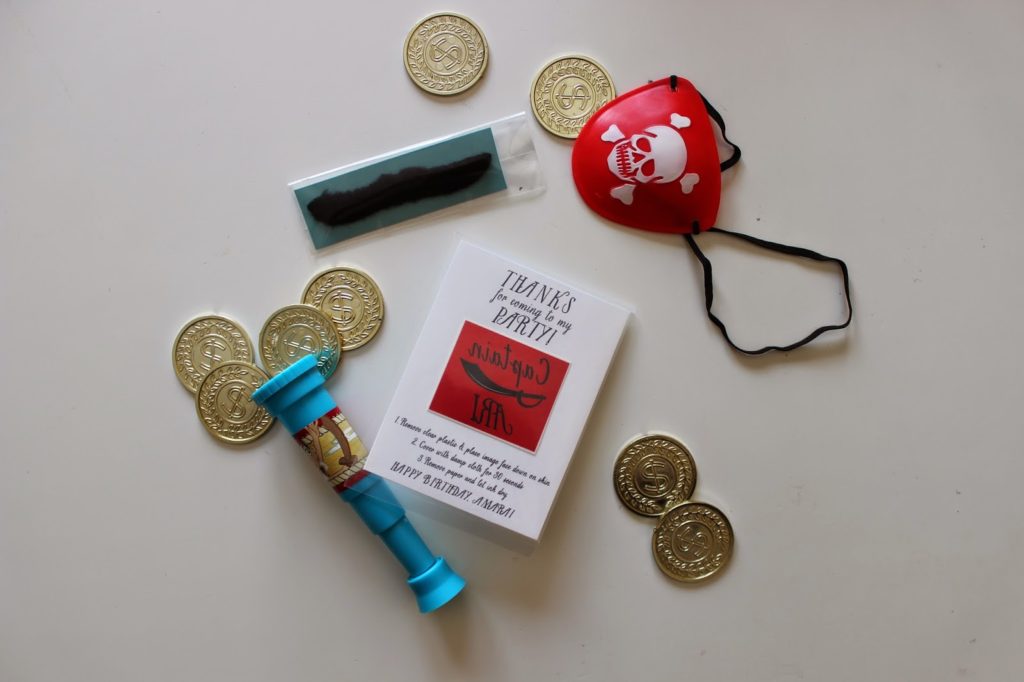
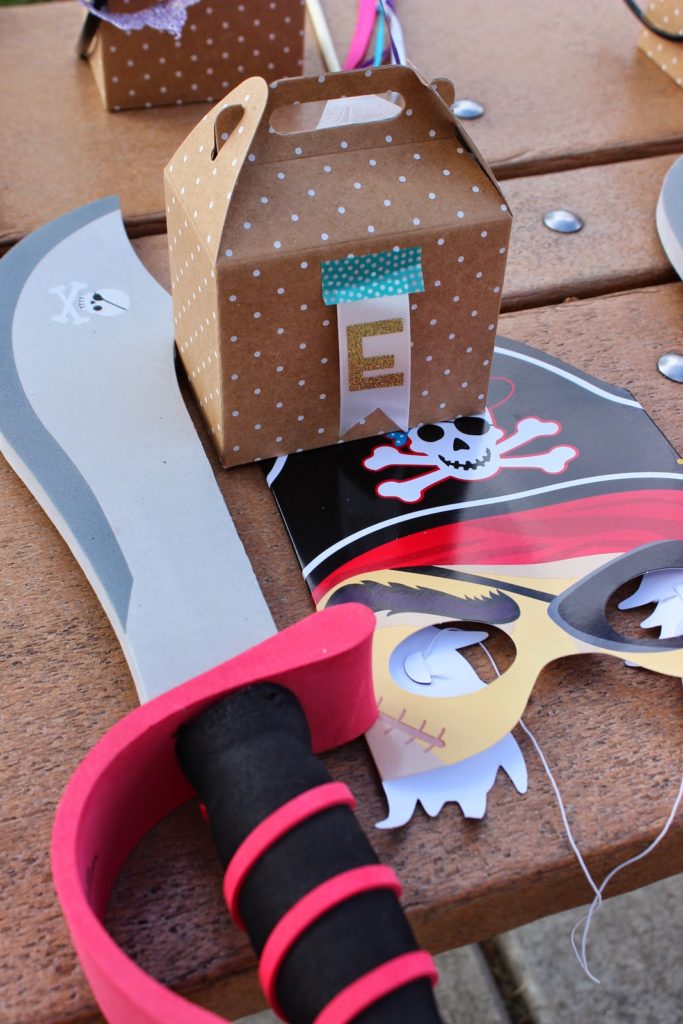
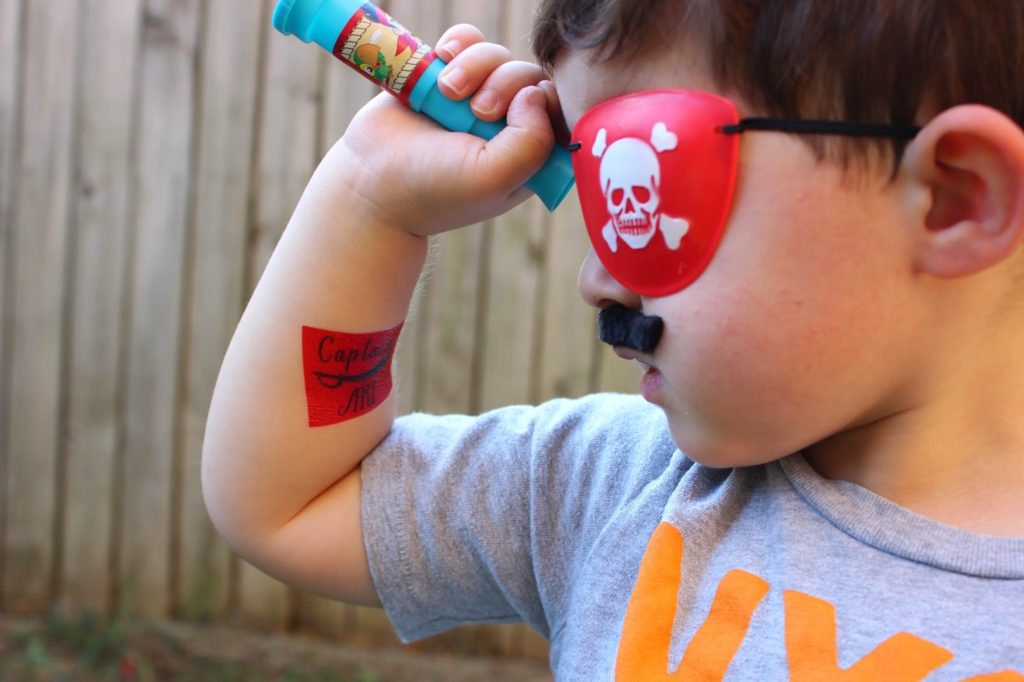
Everything for the pirate favor boxes was purchased at Party City. 

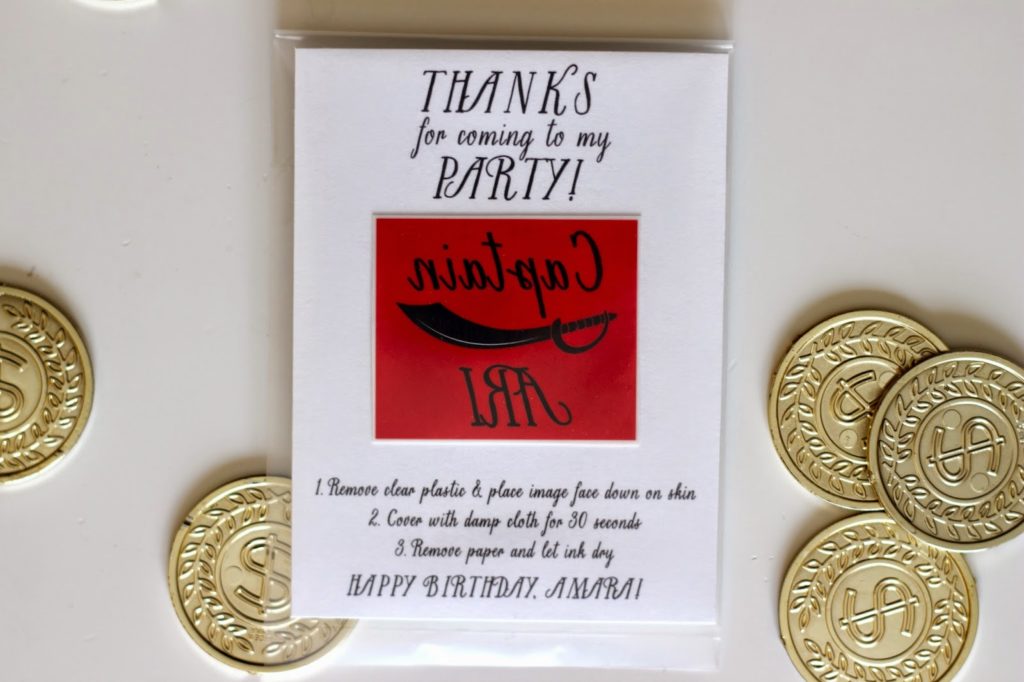
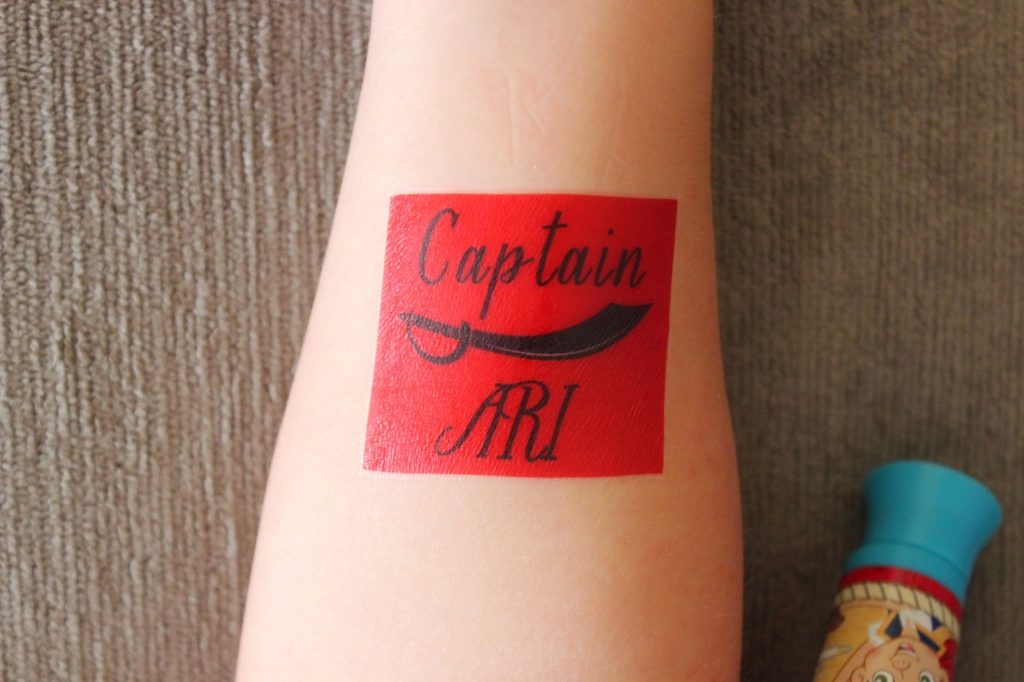
 Except for the tattoos of course! Check out our Etsy shop for customized tattoos for your next event!!

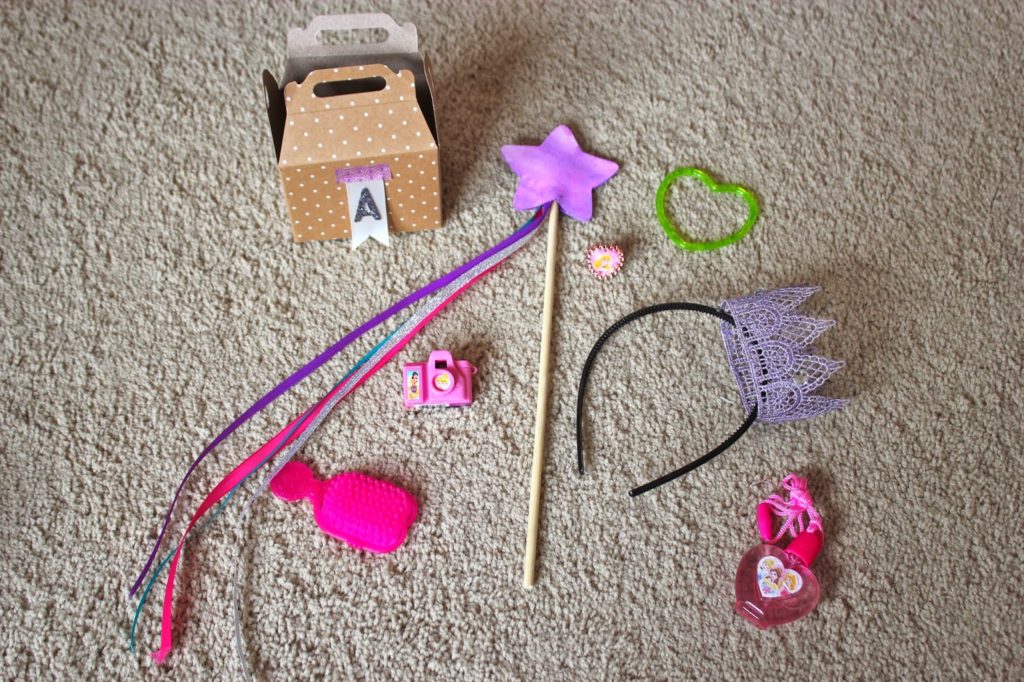
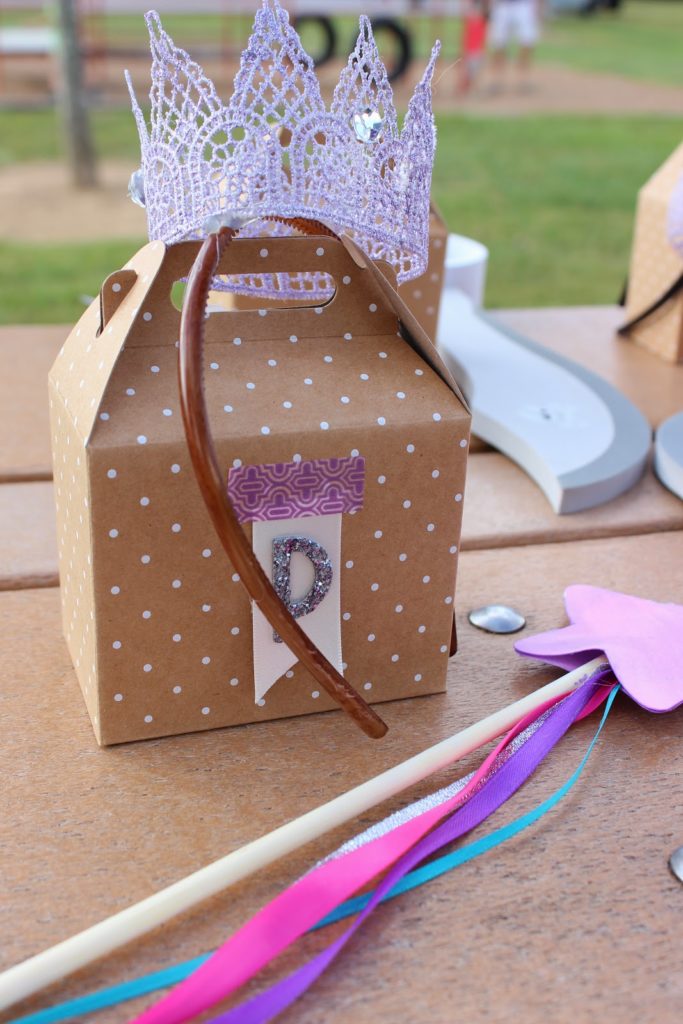
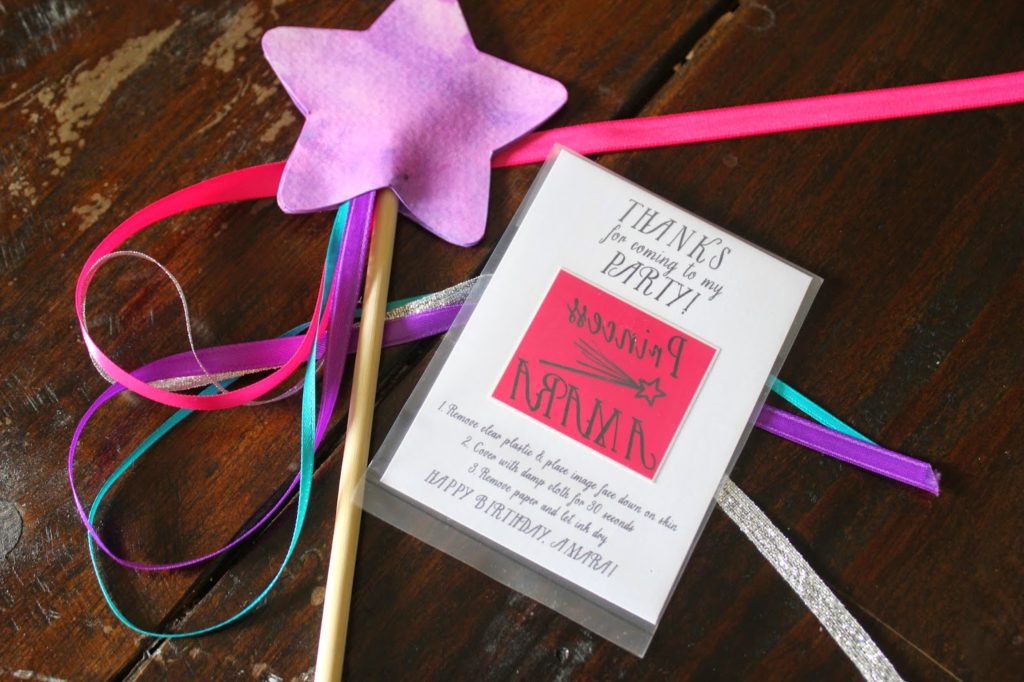
 I found all of these goodies at Party City as well. The little camera was quite the hit!! I made the wands using dowels, ribbon, and watercolor paper! So easy!! I just traced a star out with a cookie cutter and painted them purple and hot glued them to the dowel.

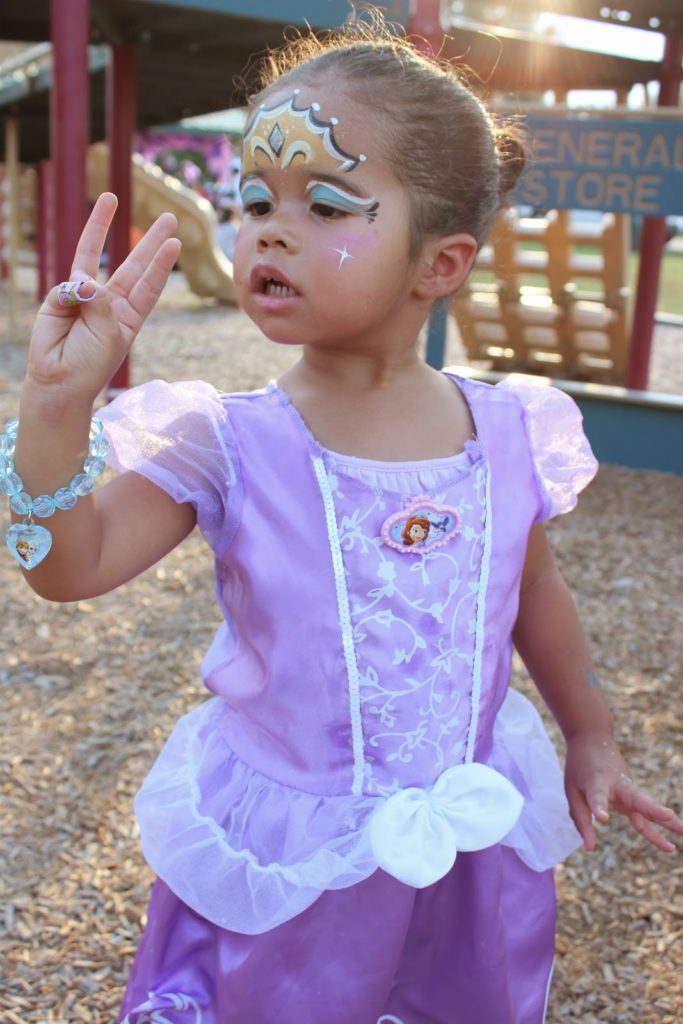
Below is a little tutorial on how I created the princess crowns…

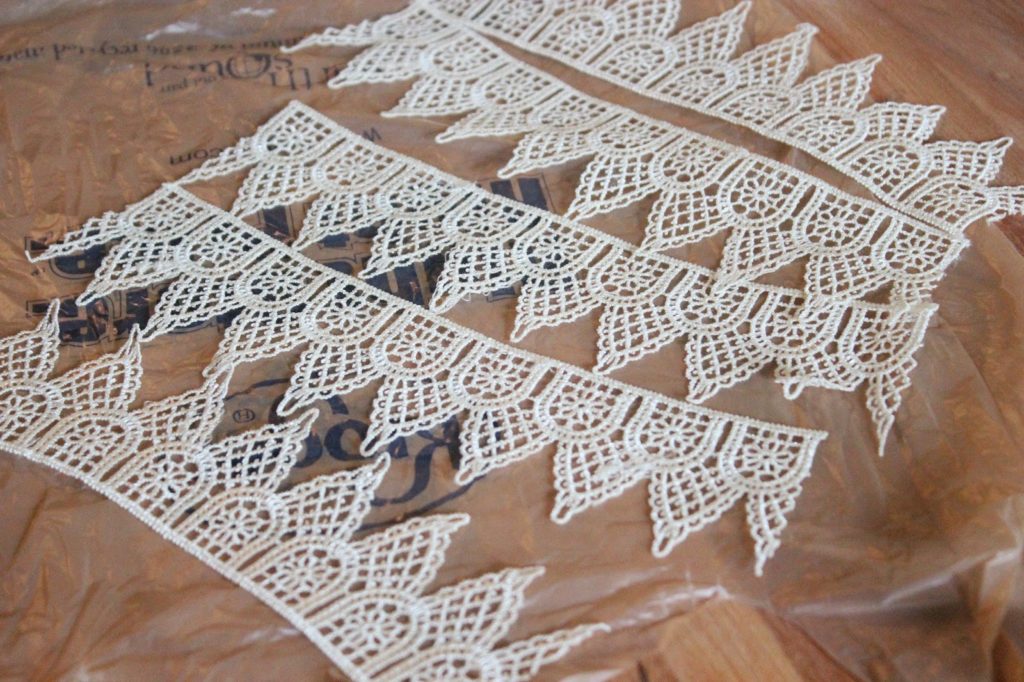
 Cut your lace strips into the size that you want. I just wrapped it into the size circle I wanted, then measured each strip.
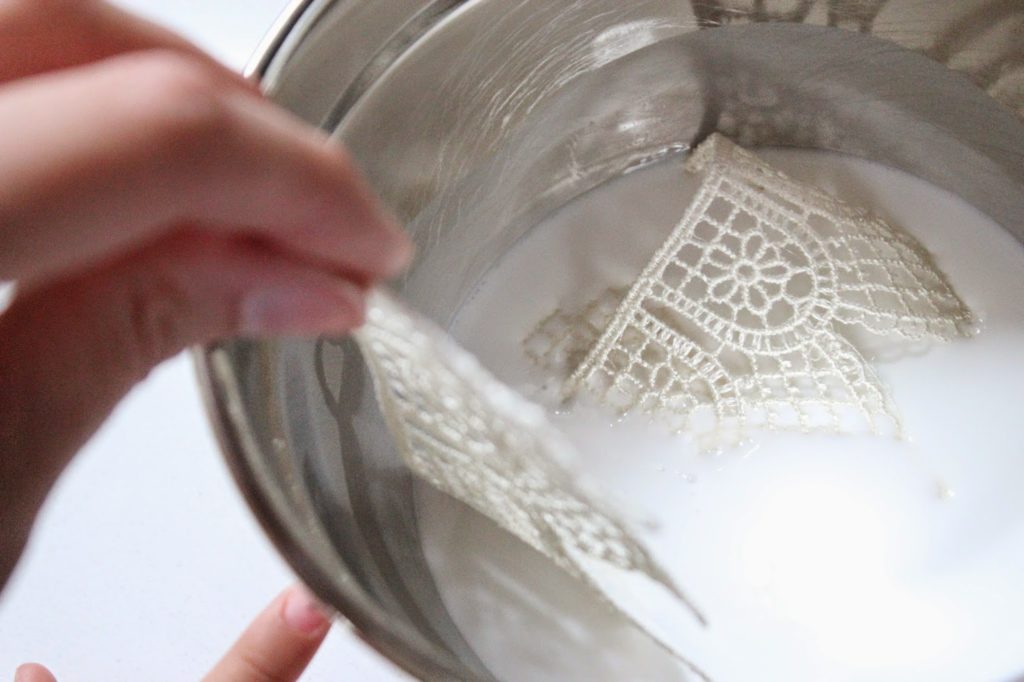
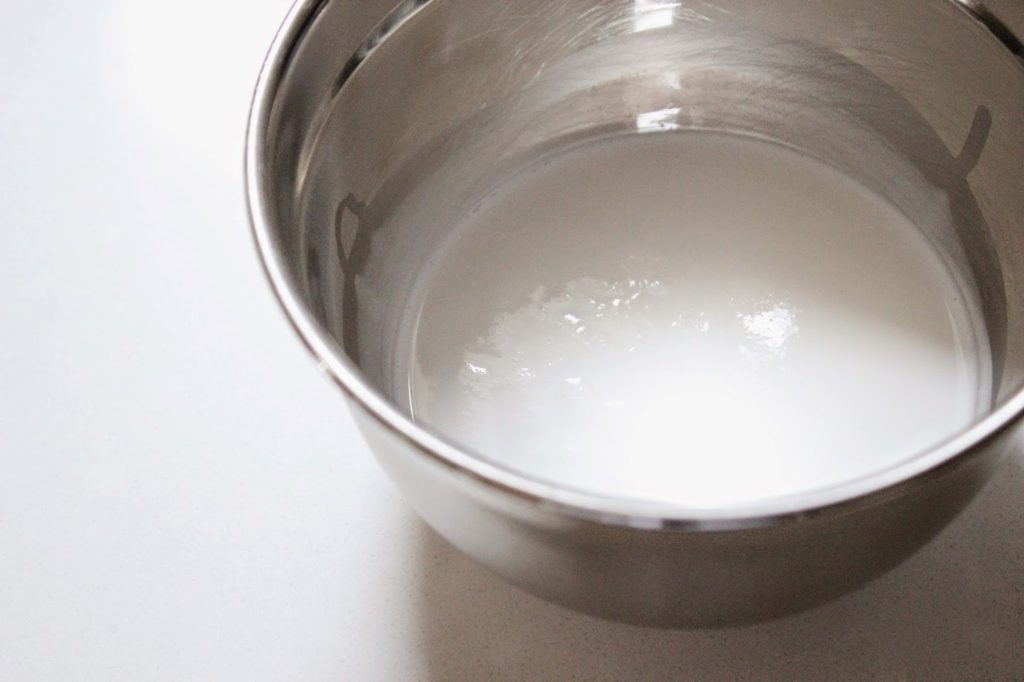
 Completely submerge each lace strip into the stiffener.
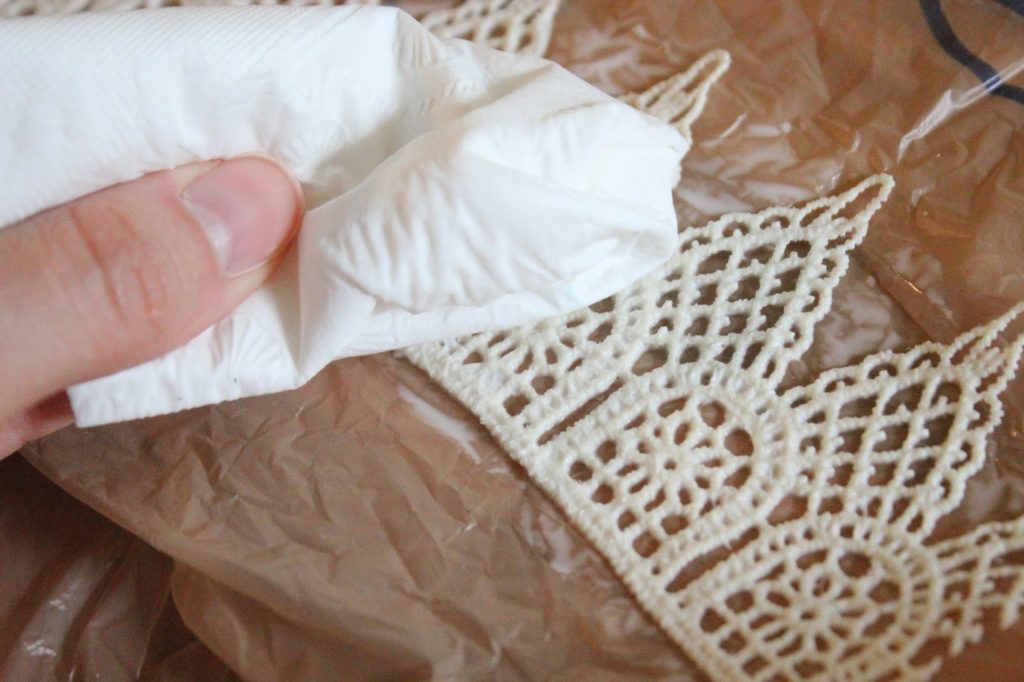
 Blot off the excess on both sides and lay on a plastic bag so that they can dry partially.
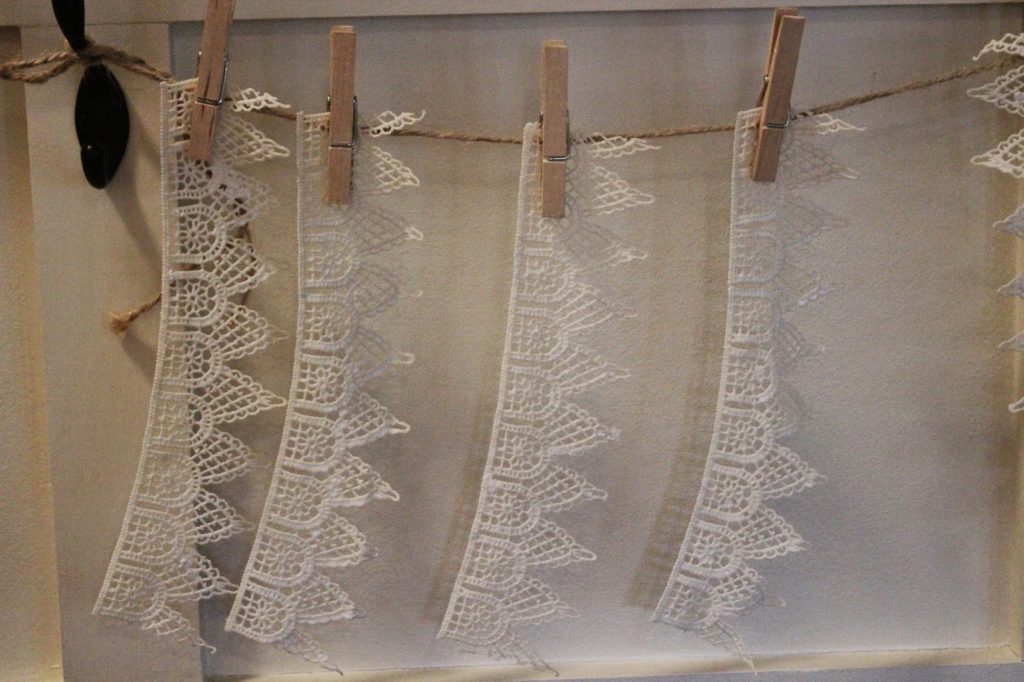
 Once they start stiffening up, hang them on a “drying line” so they can completely dry on both sides.
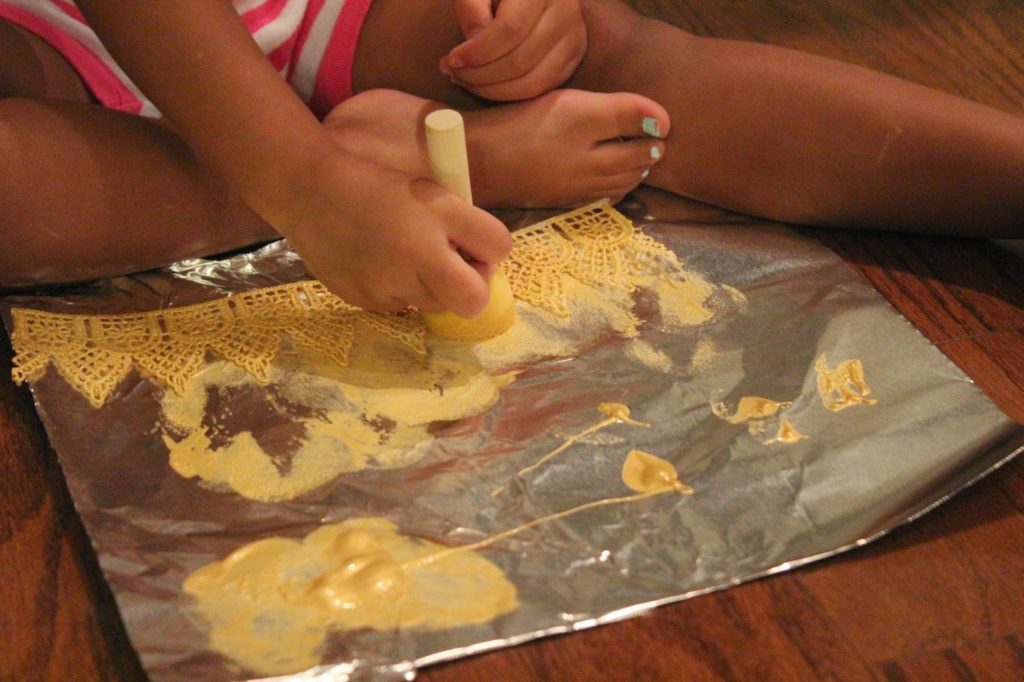
 Let your little help! Take a sponge brush and dab each side until the lace strip is completely covered in your paint color of choice.
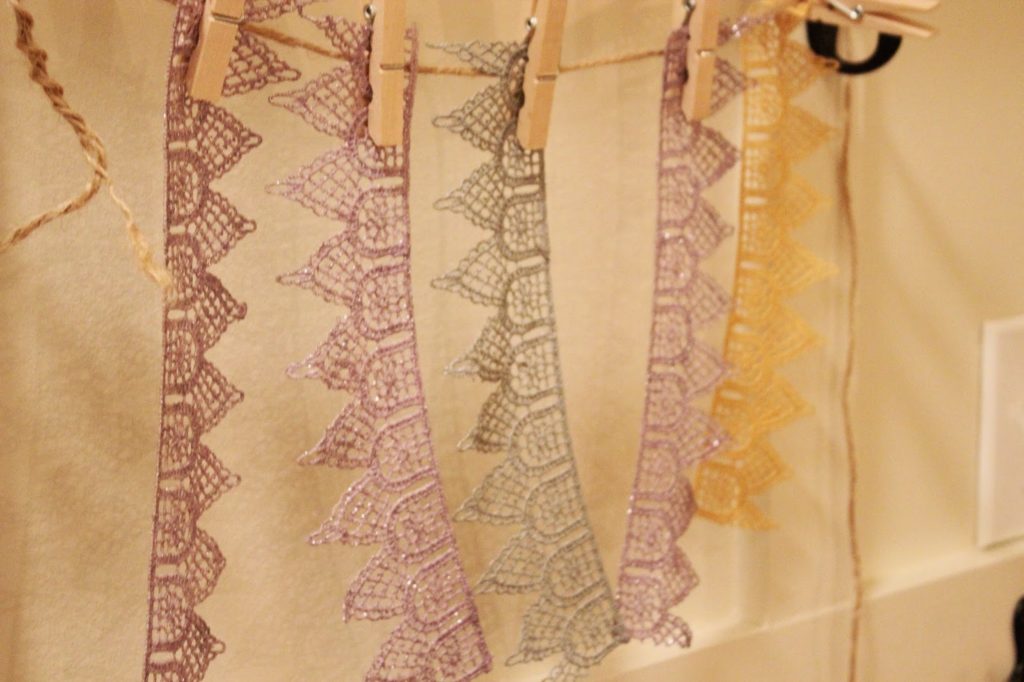
 We opted for metallic gold, silver and purple.
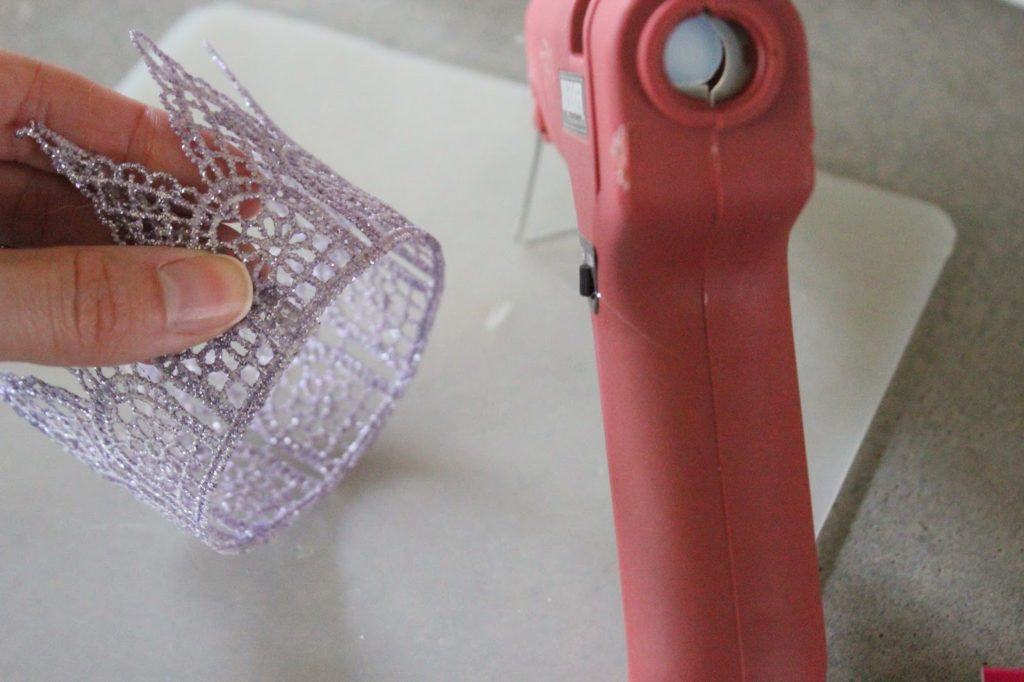
 Wrap around and glue!

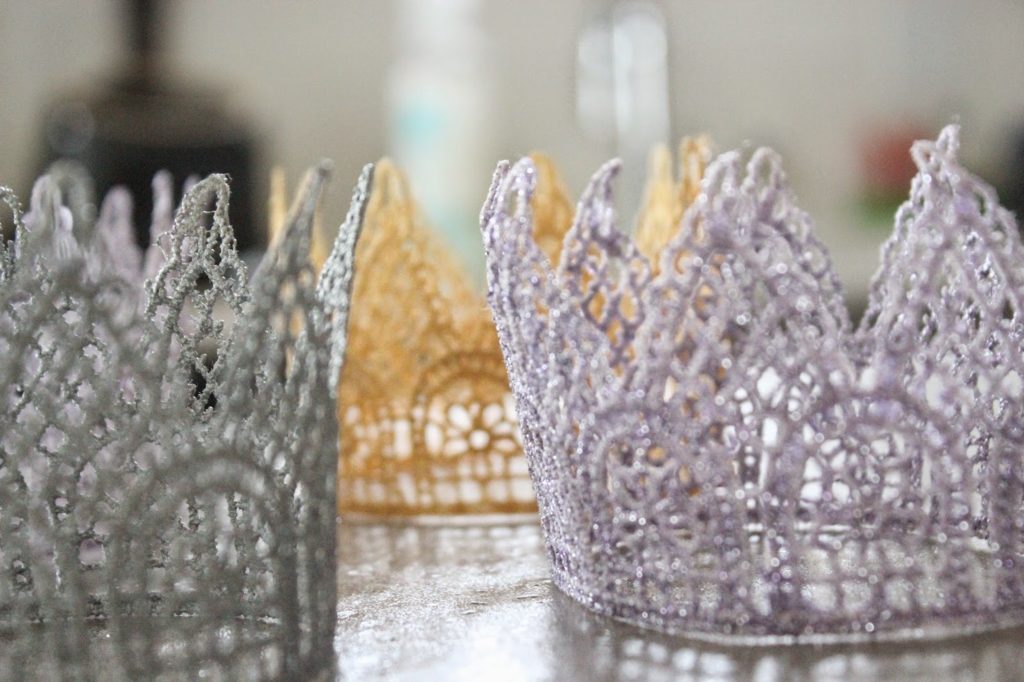
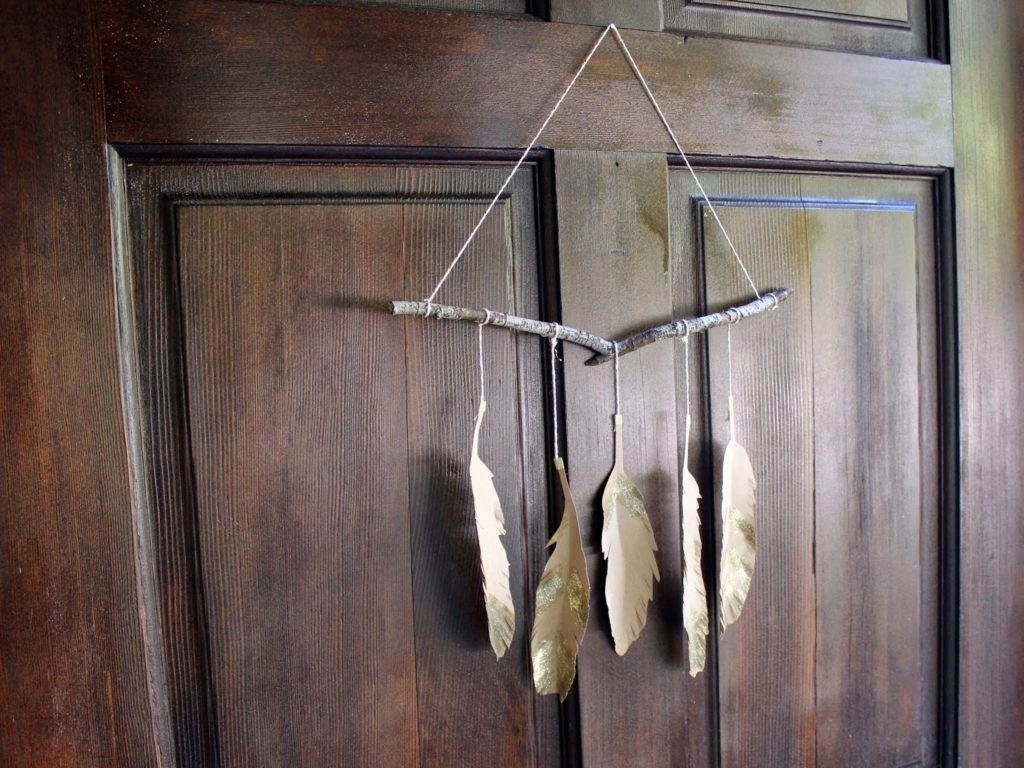
Voila! The last step ( which I failed to photograph…. I was in party mode) is to glue them to a headband , or even a hair clip. We also ended up glueing a couple of “gemstones” on each of them. 
Enjoy!

FEATURED: ROWEN’S SHARK PARTY

We’ve been bugging our crazy-talented friend, Shara, for pictures of Rowen’s Shark Party since we walked through the door of the party… and had our mind’s blown. Modern, clean, fun, creative touches EVERYWHERE. Crafty in the coolest way, clever menu, fun games for kiddos…so good.
Shara used two slightly different colors of crepe paper and twisted them to create “water”. She hung all the sharks from string so they would appear to float on top of the waves. Genius.
 One of our favorite things of the party was this shark wreath! Shara spray painted a foam wreath core gray then hot glued plastic sharks (here) all around to simulate a shark attack feeding frenzy!
The fins on the mantel were pin-on fins for the kids to wear. Shara made them using stiffened felt and a template found here.
 I mean… really
Cake topper here

 Menu:
Shark Bait sandwiches (tuna salad)
Shark Fin sandwiches (cheese triangles)
Slow Swimmer Salsa and Sea Algae Guacamole with Fins (blue tortilla chips)
Shark Teeth (Bugles)
Whale and Goldfish crackers
Vegetarian Shark Food (crudites)
Watermelon Shark fruit salad (carved by Shara’s husband after she showed him pictures on Pinterest and convinced him it would be easy! Ha!)
Sea Dogs (hot dogs)
Great White Sugar Cookies
Fish Kabobs (gummy fish and shark candies on a stick)
Life Preservers (mini sugar donuts with red gel icing)
Jaws cupcakes (vanilla cake with vanilla whipped frosting and gummy sharks
Shark Attack cupcakes (blue velvet cake with coconut cream cheese icing and fondant fins)
Chum Punch
Shark Infested Lemonade
 Shara’s favorite things about the sharks hung from the ceiling were the shadows they created when the light was turned on. The slight movement of the sharks and the big shadows made it look like there were actually sharks swimming around the room.
Party Activities: 
Shark Dress Up Bucket- shark, sailor, and captain costumes, beach ball, surfboard, sunglasses, flower leis, blow up shark, beach paraphemalia
Air swimmer remote-controlled helium shark (Amazon)
Pink the Fin on the Shark (Amazon)
Make Your Own Shark Game craft station
Let’s Go Fishing Game
Finding Nemo Movie
 
Ari LOVED this activity… we still have his shark on the fridge!
 Favor buckets: “shark tank” bubbles, “under the sea” coloring book, shark stickers and tattoos, bag of shark and fish gummy candies, shark squirter toy, fish stamps, sunglasses, and glow bracelet
Invitation, favor tags, and thank you notes here
Gummy fish kabob!
Big Birthday Boy Rowen!
Thank you for sharing your party with us, Shara! We loved every minute of it (oh and so did our kids!!). 

A PRINCESS PARTY IN THE PARK

Our little Amara turned a whopping 3 years old at the end of September. I am really late in getting this post up, so I apologize! Anyway, we have a lot going on right now, and the end of summer/ beginning of Fall is always such a busy season for our family ( lots of birthdays and travel). So, I decided to keep Amara’s party simple this year! The biggest thing for me was NOT hosting it at my house. Last year, we did her party at a local vineyard ( 2nd birthday here ), and it was so nice not having a huge mess to clean up at my house afterwards. 
With that being said, the park seemed like a good choice. Kid’s could play, the weather is so gorgeous this time of year, and it is easy clean-up. You always take a risk having your party at a public place. There were NO empty pavilions for decorating, so we worked with what we were given. It all turned out nicely.

 The party favors were a mix of handmade and store bought items. There will be a more detailed breakdown of the favors on Monday! So, be sure to check back!

 Princess (fruit) wands were a hit…
 Pirate’s Booty (Amara’s favorite) snack bags!
 Our cupcakes began to melt in the sun, which didn’t make for a pretty photo-op, but I got some horse figurines from the Target dollar section to resemble “Minimus” from Sofia the First.
 I made sure all of the food was grab and go…. stuff that you could stand around and eat. 
 It is always good to save. I had tons of straws leftover from Amara’s party last year, so I just put them to use this year. 
 We hired an amazing face painter, and she was definitely the hit of the party. I could have stood there and watched her paint every single face. Such a talent!


Amara takes it VERY seriously…. 


Mastering her new number…

DIY FALL DOOR DECOR

We’re stiiiiill in our rental- two more months to go before our house is finished!!- but that doesn’t mean we shouldn’t make it feel homey and festive for fall! Or at least that’s what Jenni keeps telling me. This was a super easy and quick craft project that I did during nap time. You can do it too… promise! I made a free download for the template you can get right here.
What you need:
1 piece of Kraft paper or other color card stock
Metallic Sharpie (or you could use paint!)
Scissors
String
Stick
Washi tape
Glue and glitter if you want to make it glitzy
1. Print template… Click HERE to download
2. BEFORE you cut out the feathers, color in designs with a gold sharpie or paint designs. It’ll make less messy that way!
3. Cut out the feathers shapes then score by using your fingernail tracing along the middle- I sort of did this in a curved shape to give the feather more dimension. Gently fold the feather up. 
4. Cut thin diagonal lines all the way down the sides of the feather. Run your fingers up and down the fringe to give the feather some texture.
5. You could stop here… or you could get a little messy and add glitter! I used Martha Stewart’s Florentine Gold Glitter. 
See that fun fringy texture?
6. Find a stick…
 Tip: toddlers are low to the ground and can find the best sticks. And oh yeah… boys love sticks.
 See that pretty texture? Score, Ari!
7. Attach string to each feather with a little piece of washi tape then simply tie the string to the stick. 
Happy fall y’all! 
(I only say “y’all” in print… it just doesn’t sound right in my midwestern accent!)
-L

FEATURED: GEORGE + HENRY’S SHARED TODDLER ROOM

Can we say “perfection”? Tamie, mommy to George and Henry, created a black and gold oasis for her boys that we can’t stop staring at…. or wishing that we could have a sleepover in. Is that weird?
 We truly feel like simplicity wins in this particular space. A basic color palette, minimal (but meaningful) artwork, soft white walls, and no clutter is definitely the way to go in our book. We are going to quit blabbing so that you can tour this space already. Scroll down for sources.
TAMIE: I’m from the Black Hills in South Dakota. This room is a nod to where I grew up. Gold mining was huge, and my great uncle actually built, owned, and ran his own gold mine for years. The Stand By Mine was an iconic piece of architecture until it had to be torn down. Everyone in my family was either directly or indirectly involved in supporting the industry.
TAMIE: I’m not someone who can go to a thrift shop and refinish a dresser. I don’t have that skill set. I knew I wanted something more substantial than what a big box store could offer (two little boys CLIMB!) and that meant something mid century and sturdy. The dresser is stout and was half the cost, including white glove delivery, than major retailers. It’s perfect. And those pulls? Forget it, I’m in love.
Photographs are printed from Prinstagram and affixed with gold washi tape.
SOURCES:
(links in bold)

G & H Wall Letters: Land of Nod
Bedside Table: Pottery Barn
Clock: Kit Cat Clock (the first time I saw Henry he was swaddled and his eyes were darting around the room checking everything out, I immediately thought of the clock!!)
Dresser lamp: Target
Gold lamp: Target
Mirror: Target
Rug: IKEA
Silhouettes: Disney world souvenir
Dresser: Etsy
“I love my family” Print: Etsy
”Be you bravely” Print: Etsy
Quilts: Etsy
Box spring cover: West Elm
Photographs are printed from Prinstagram and affixed with gold washi tape
Paint: Benjamin Moore Tundra (walls), Day’s End (in chalkboard paint on the ceiling), Modern Masters Gold Rush (ceiling border)
Stunning job, Tamie! All of your hard work certainly paid off. We know George and Henry will have many adventures in this room!
xo