leah

ROOM TOUR: THE BOYS’ PLAYROOM

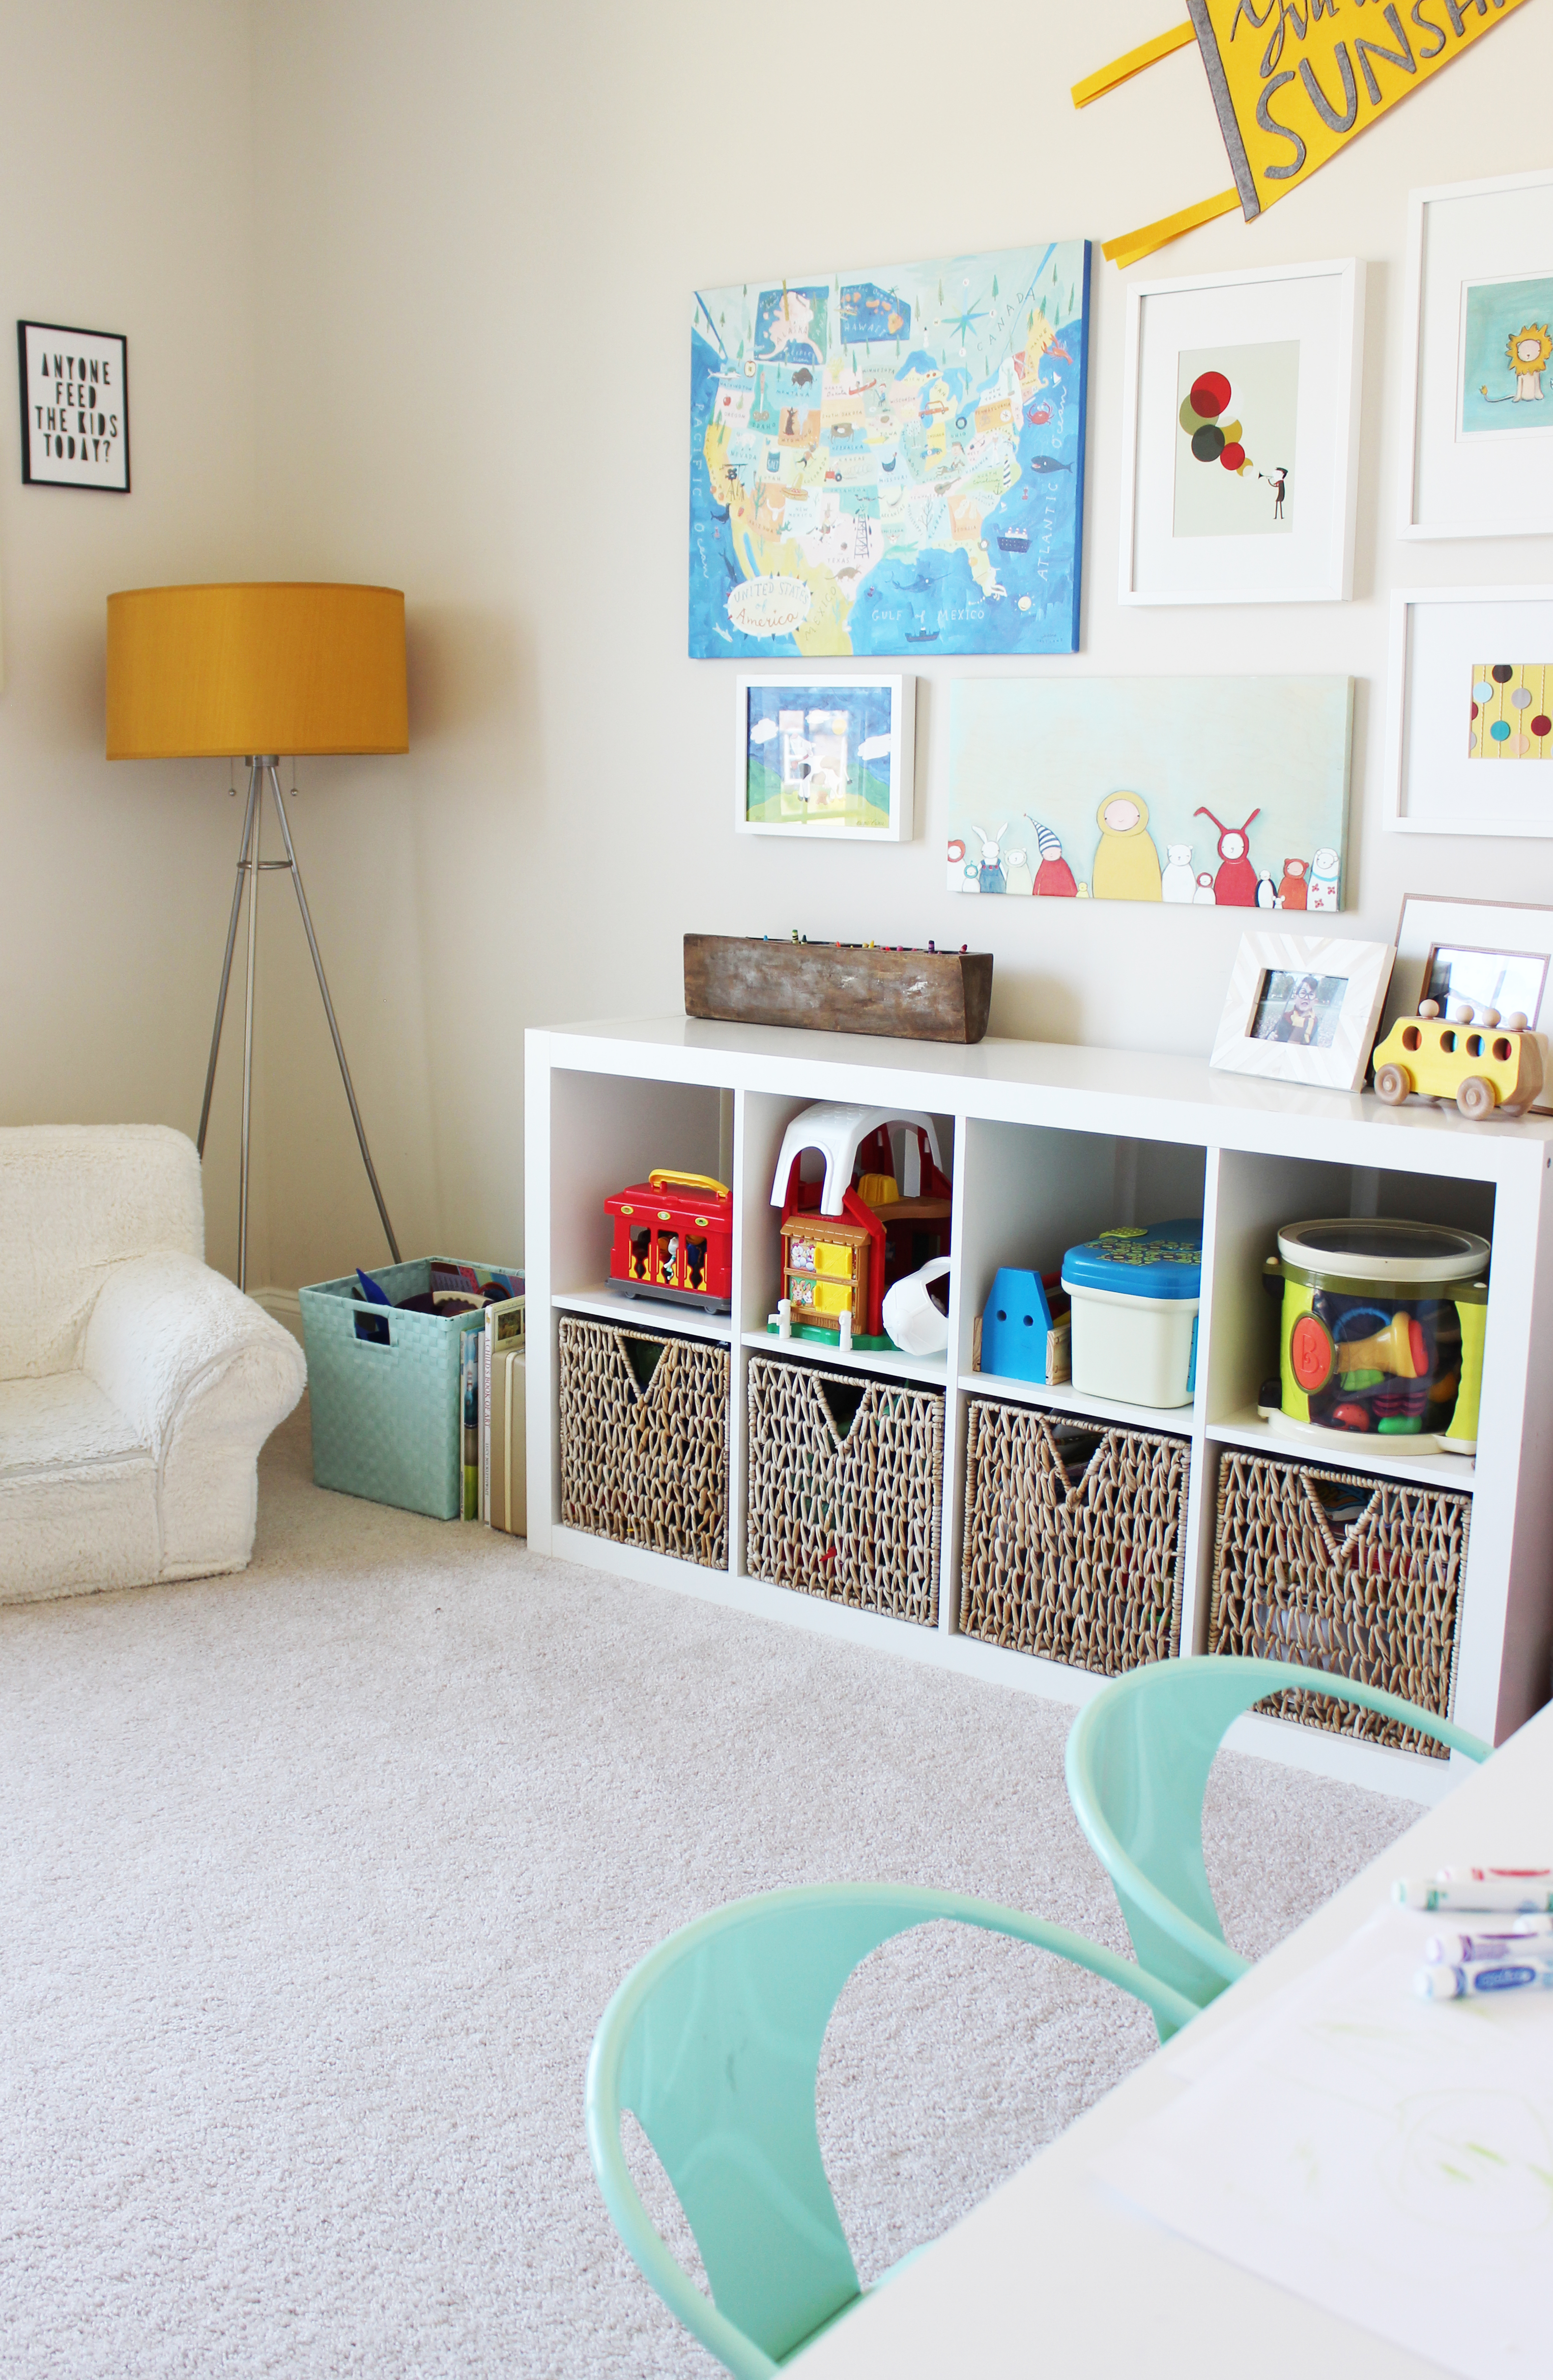
It only took me 2 1/2 years to organize my playroom… but it’s finally looking pretty good! All that I needed was a system. Thankfully my besties The Home Edit let me bother them over and over about what to do. They suggested I color code shelves for easy cleanup, and label bins so that everything has a home. I purchased some inexpensive solutions, all linked below! Truly hoping this makes clean up easier for my kids and me!

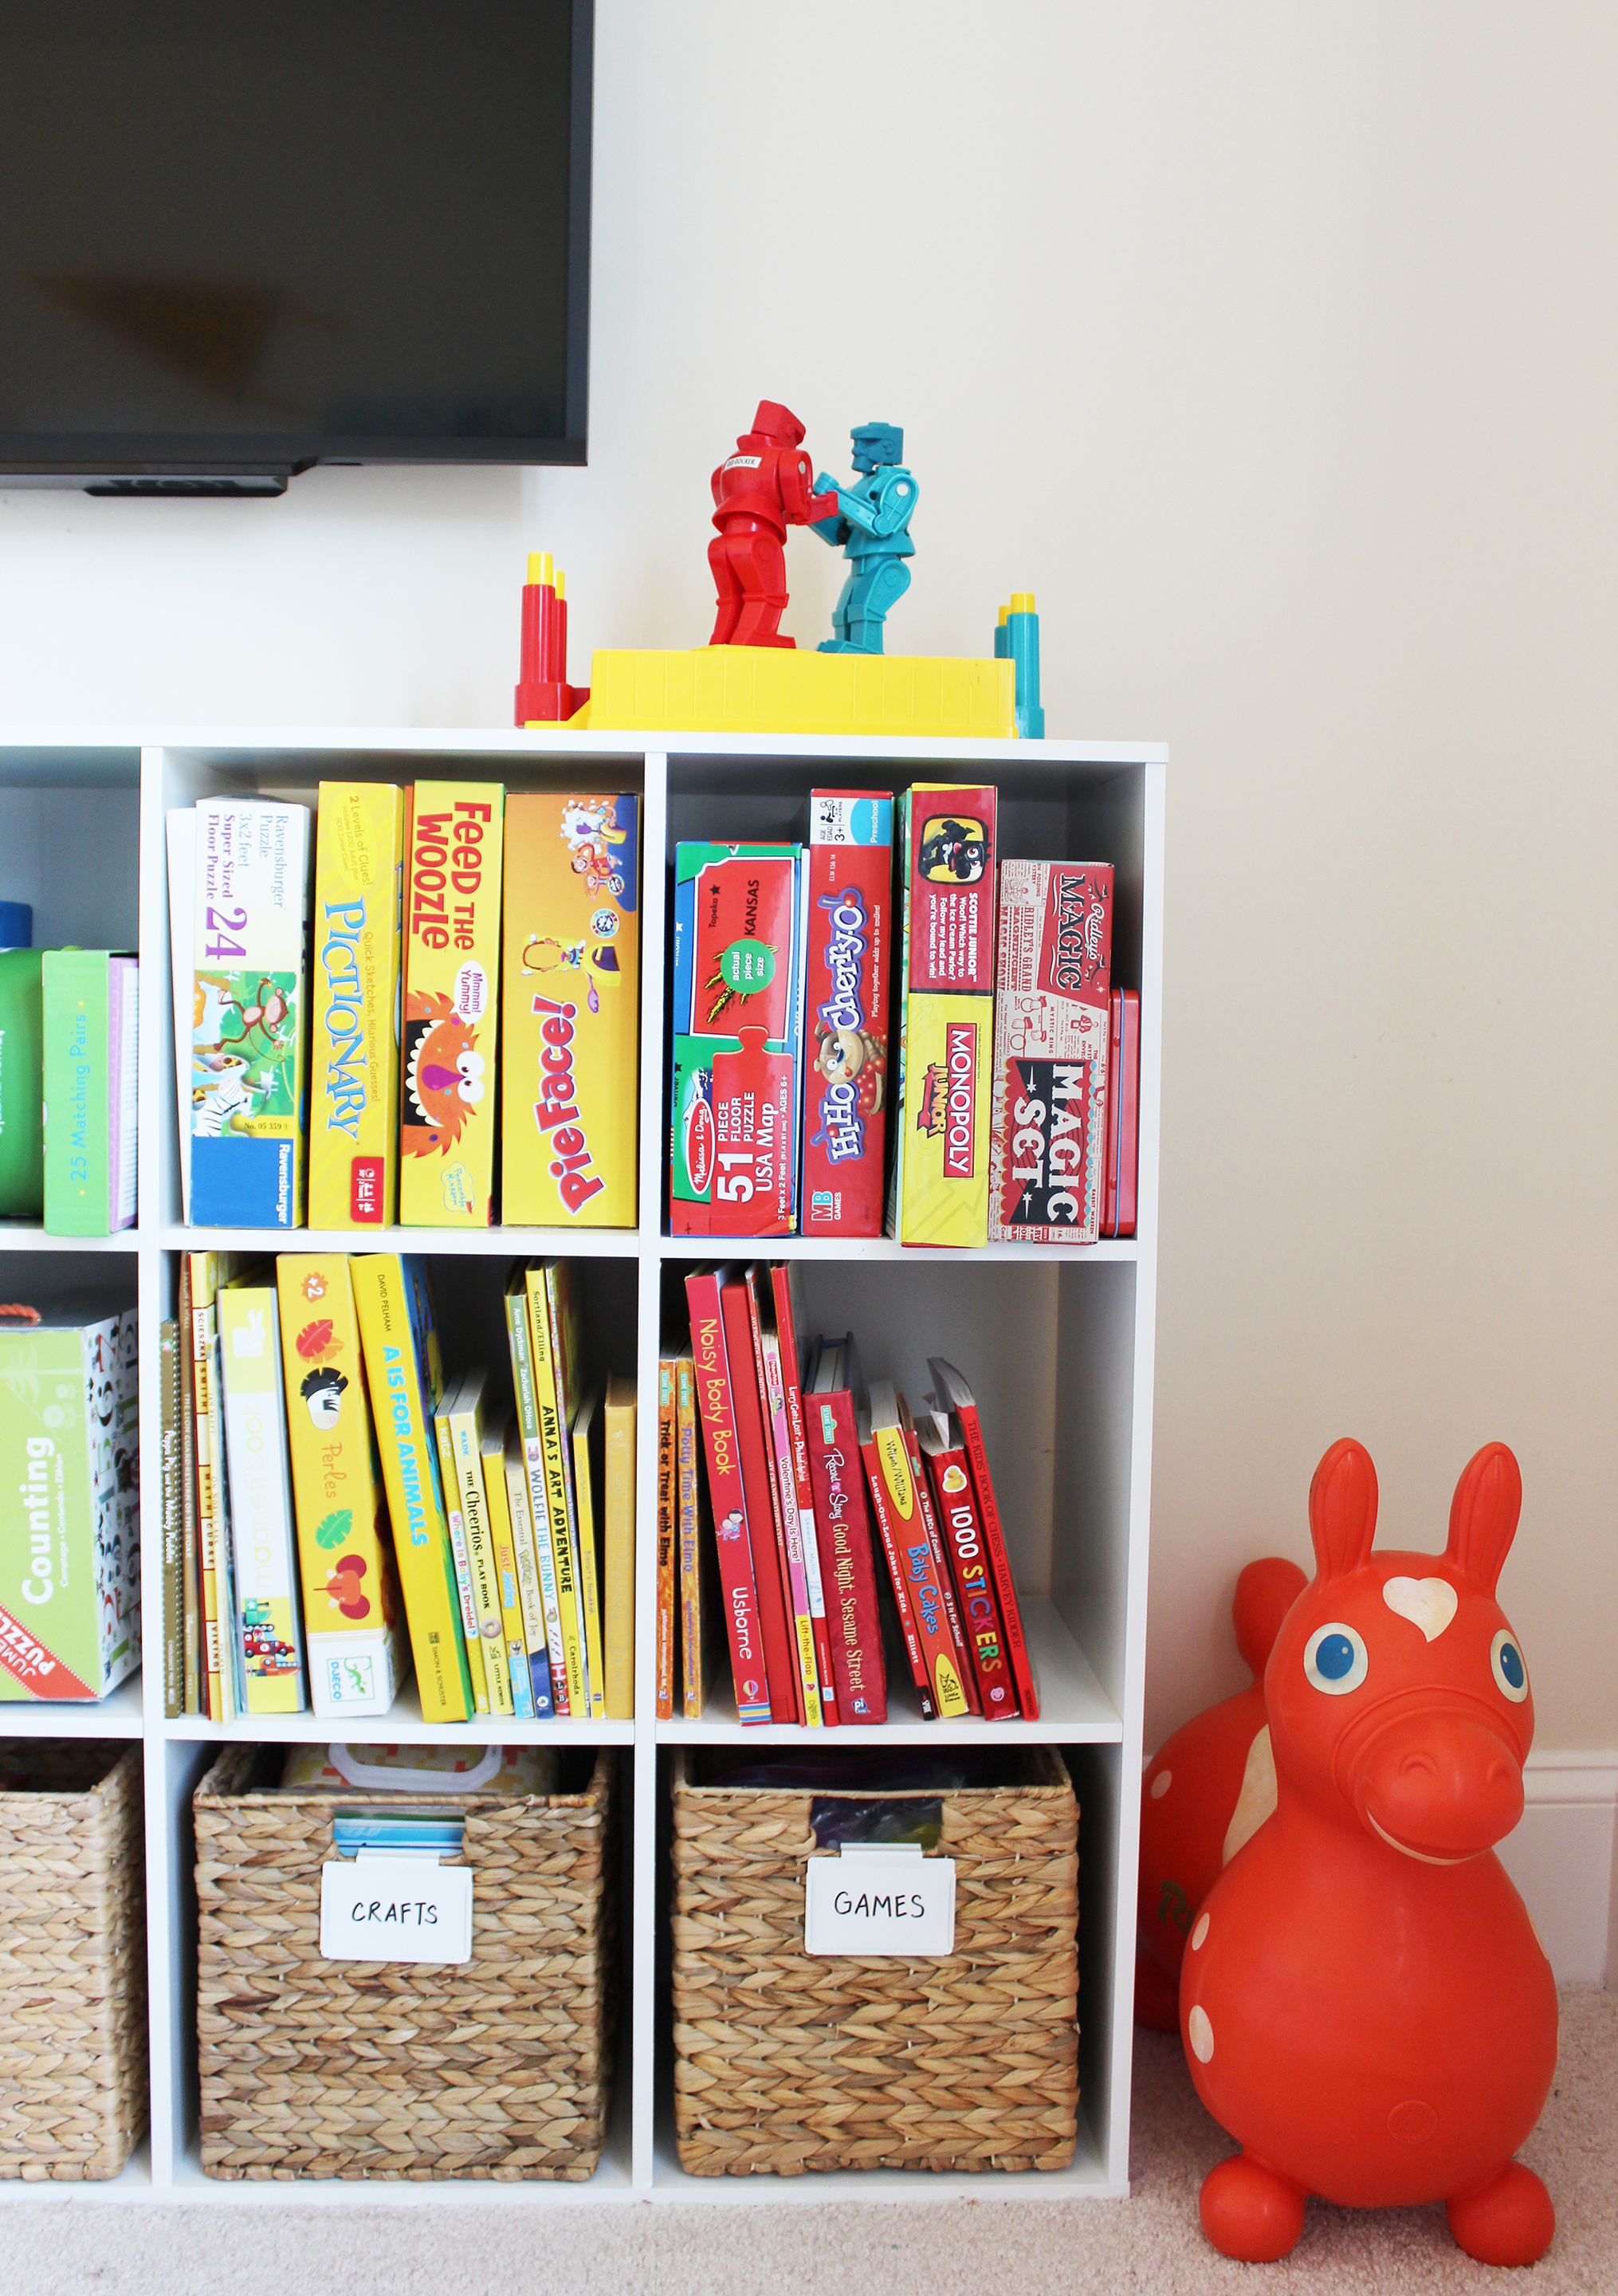
Board games and puzzles on the top row, books on the middle row, and baskets filled with smaller items on the bottom row. ROYGBIV everything so everyone knows where it goes!

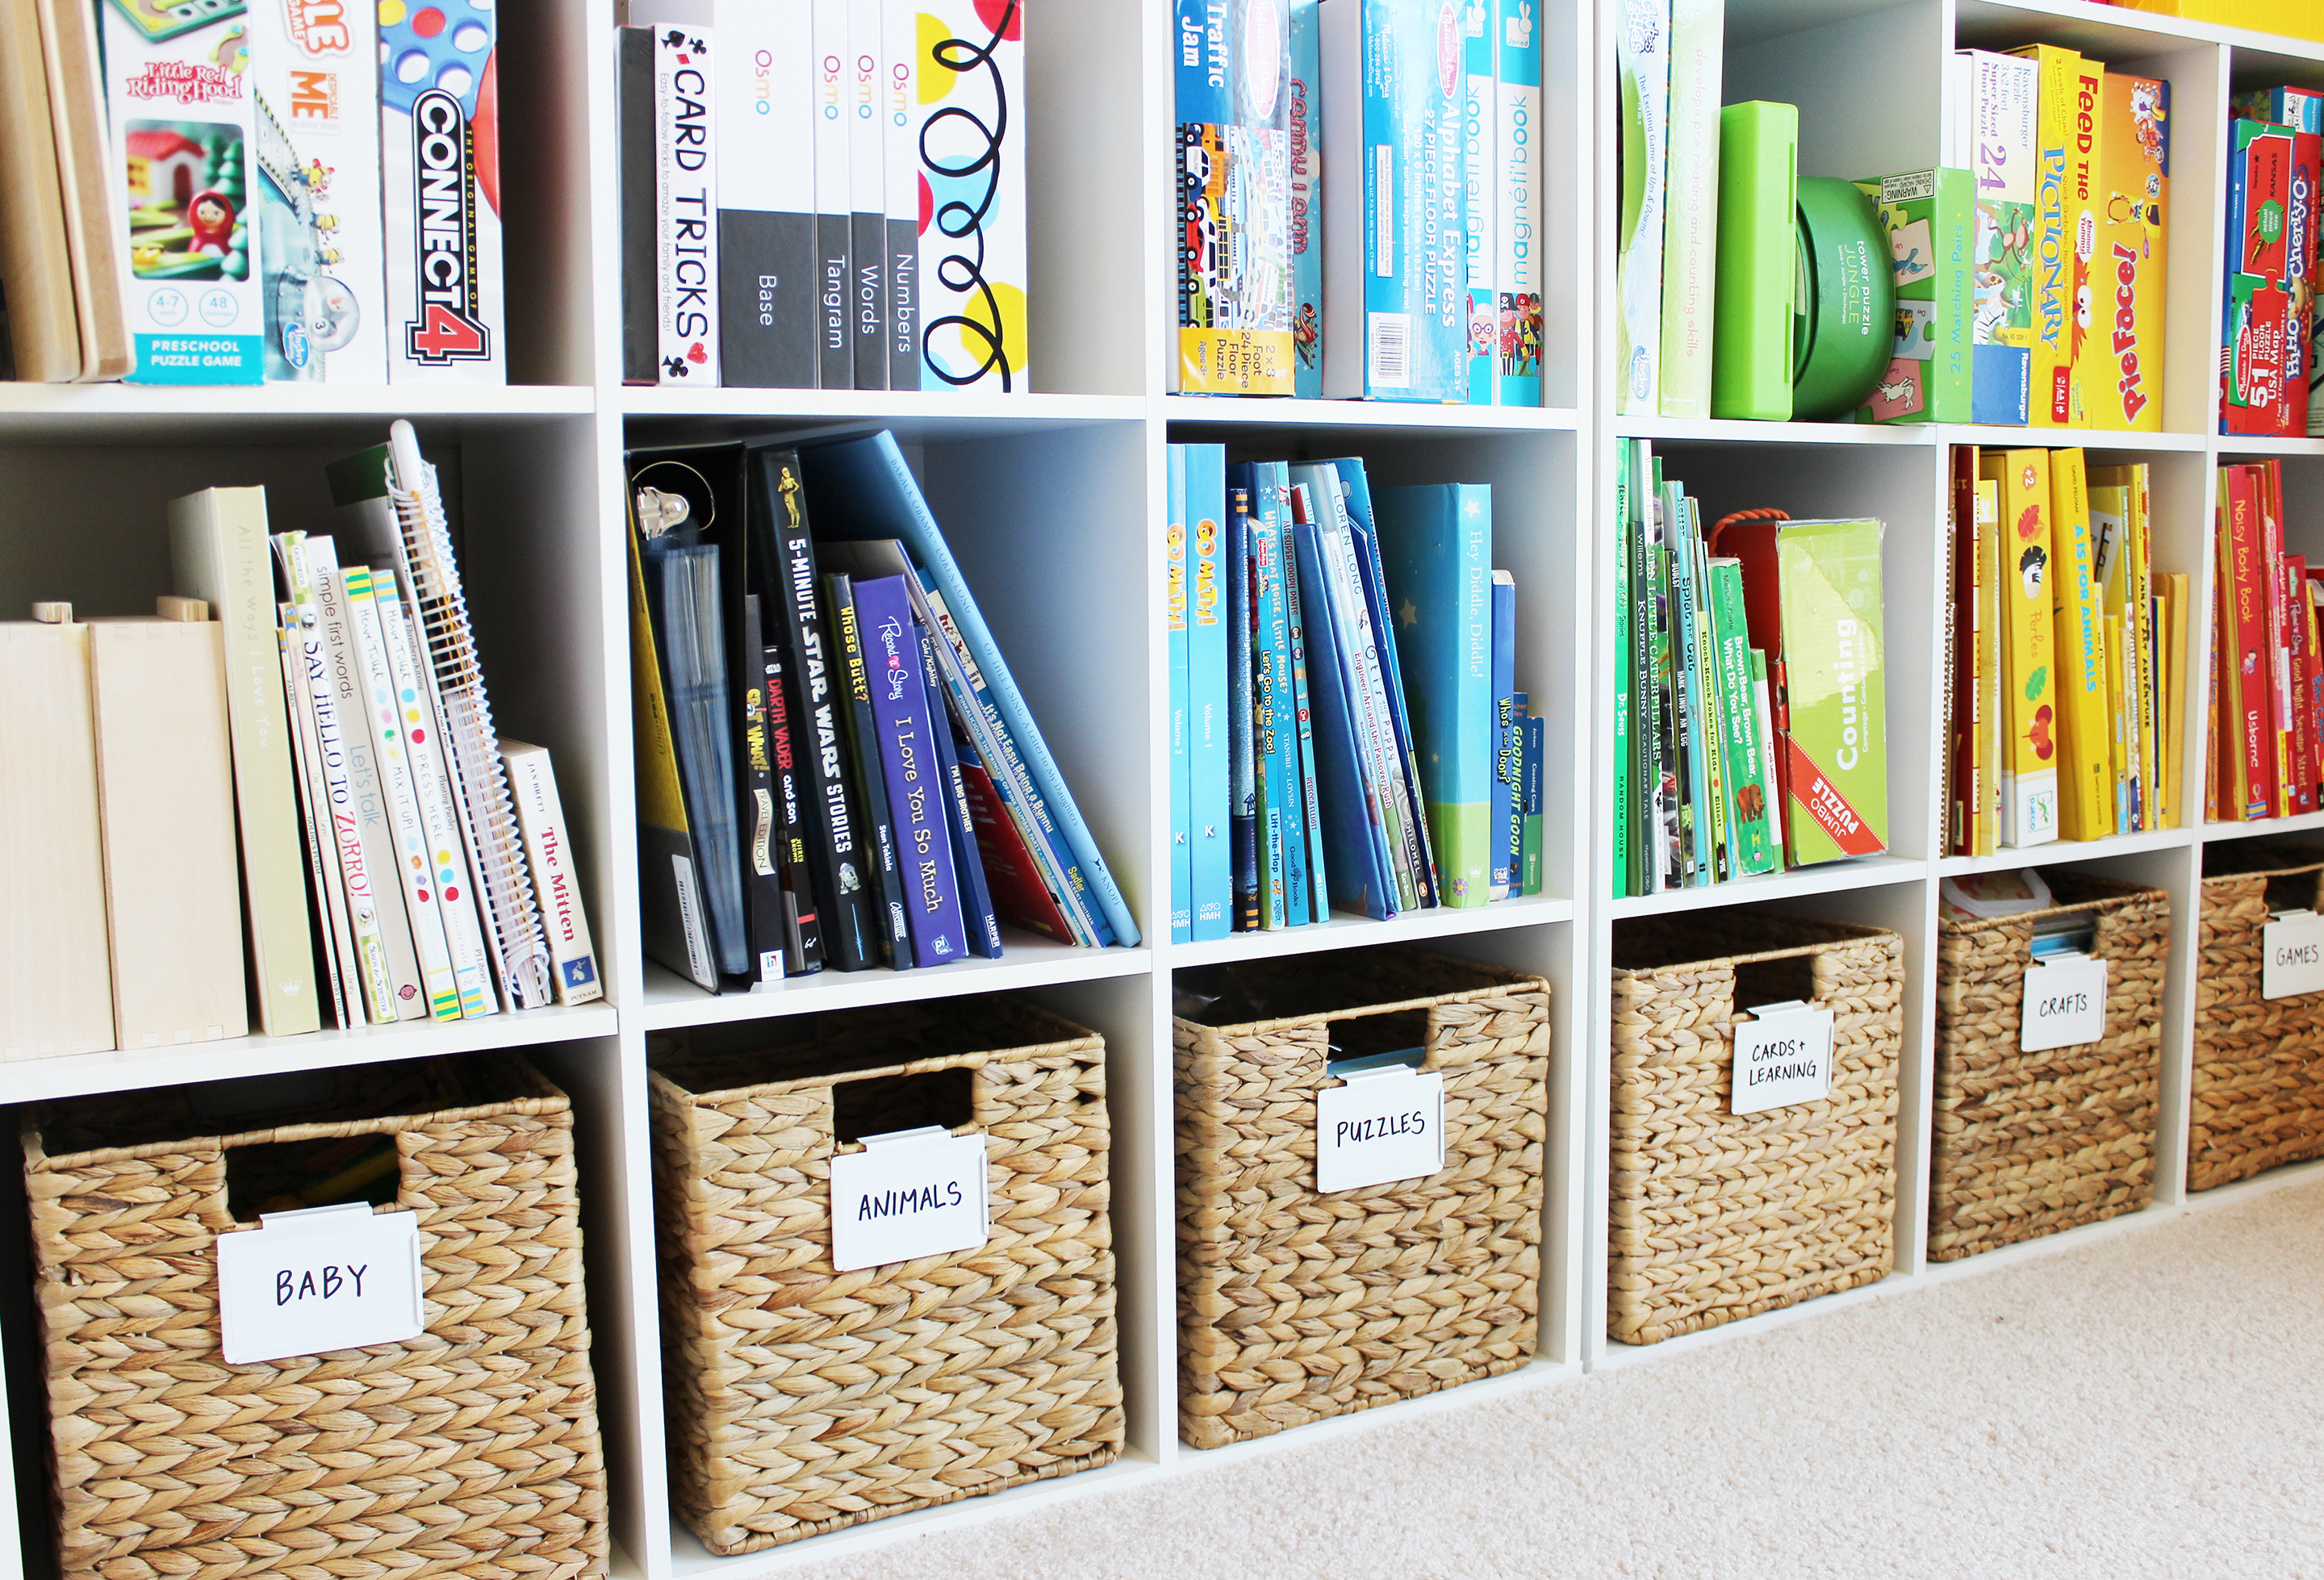
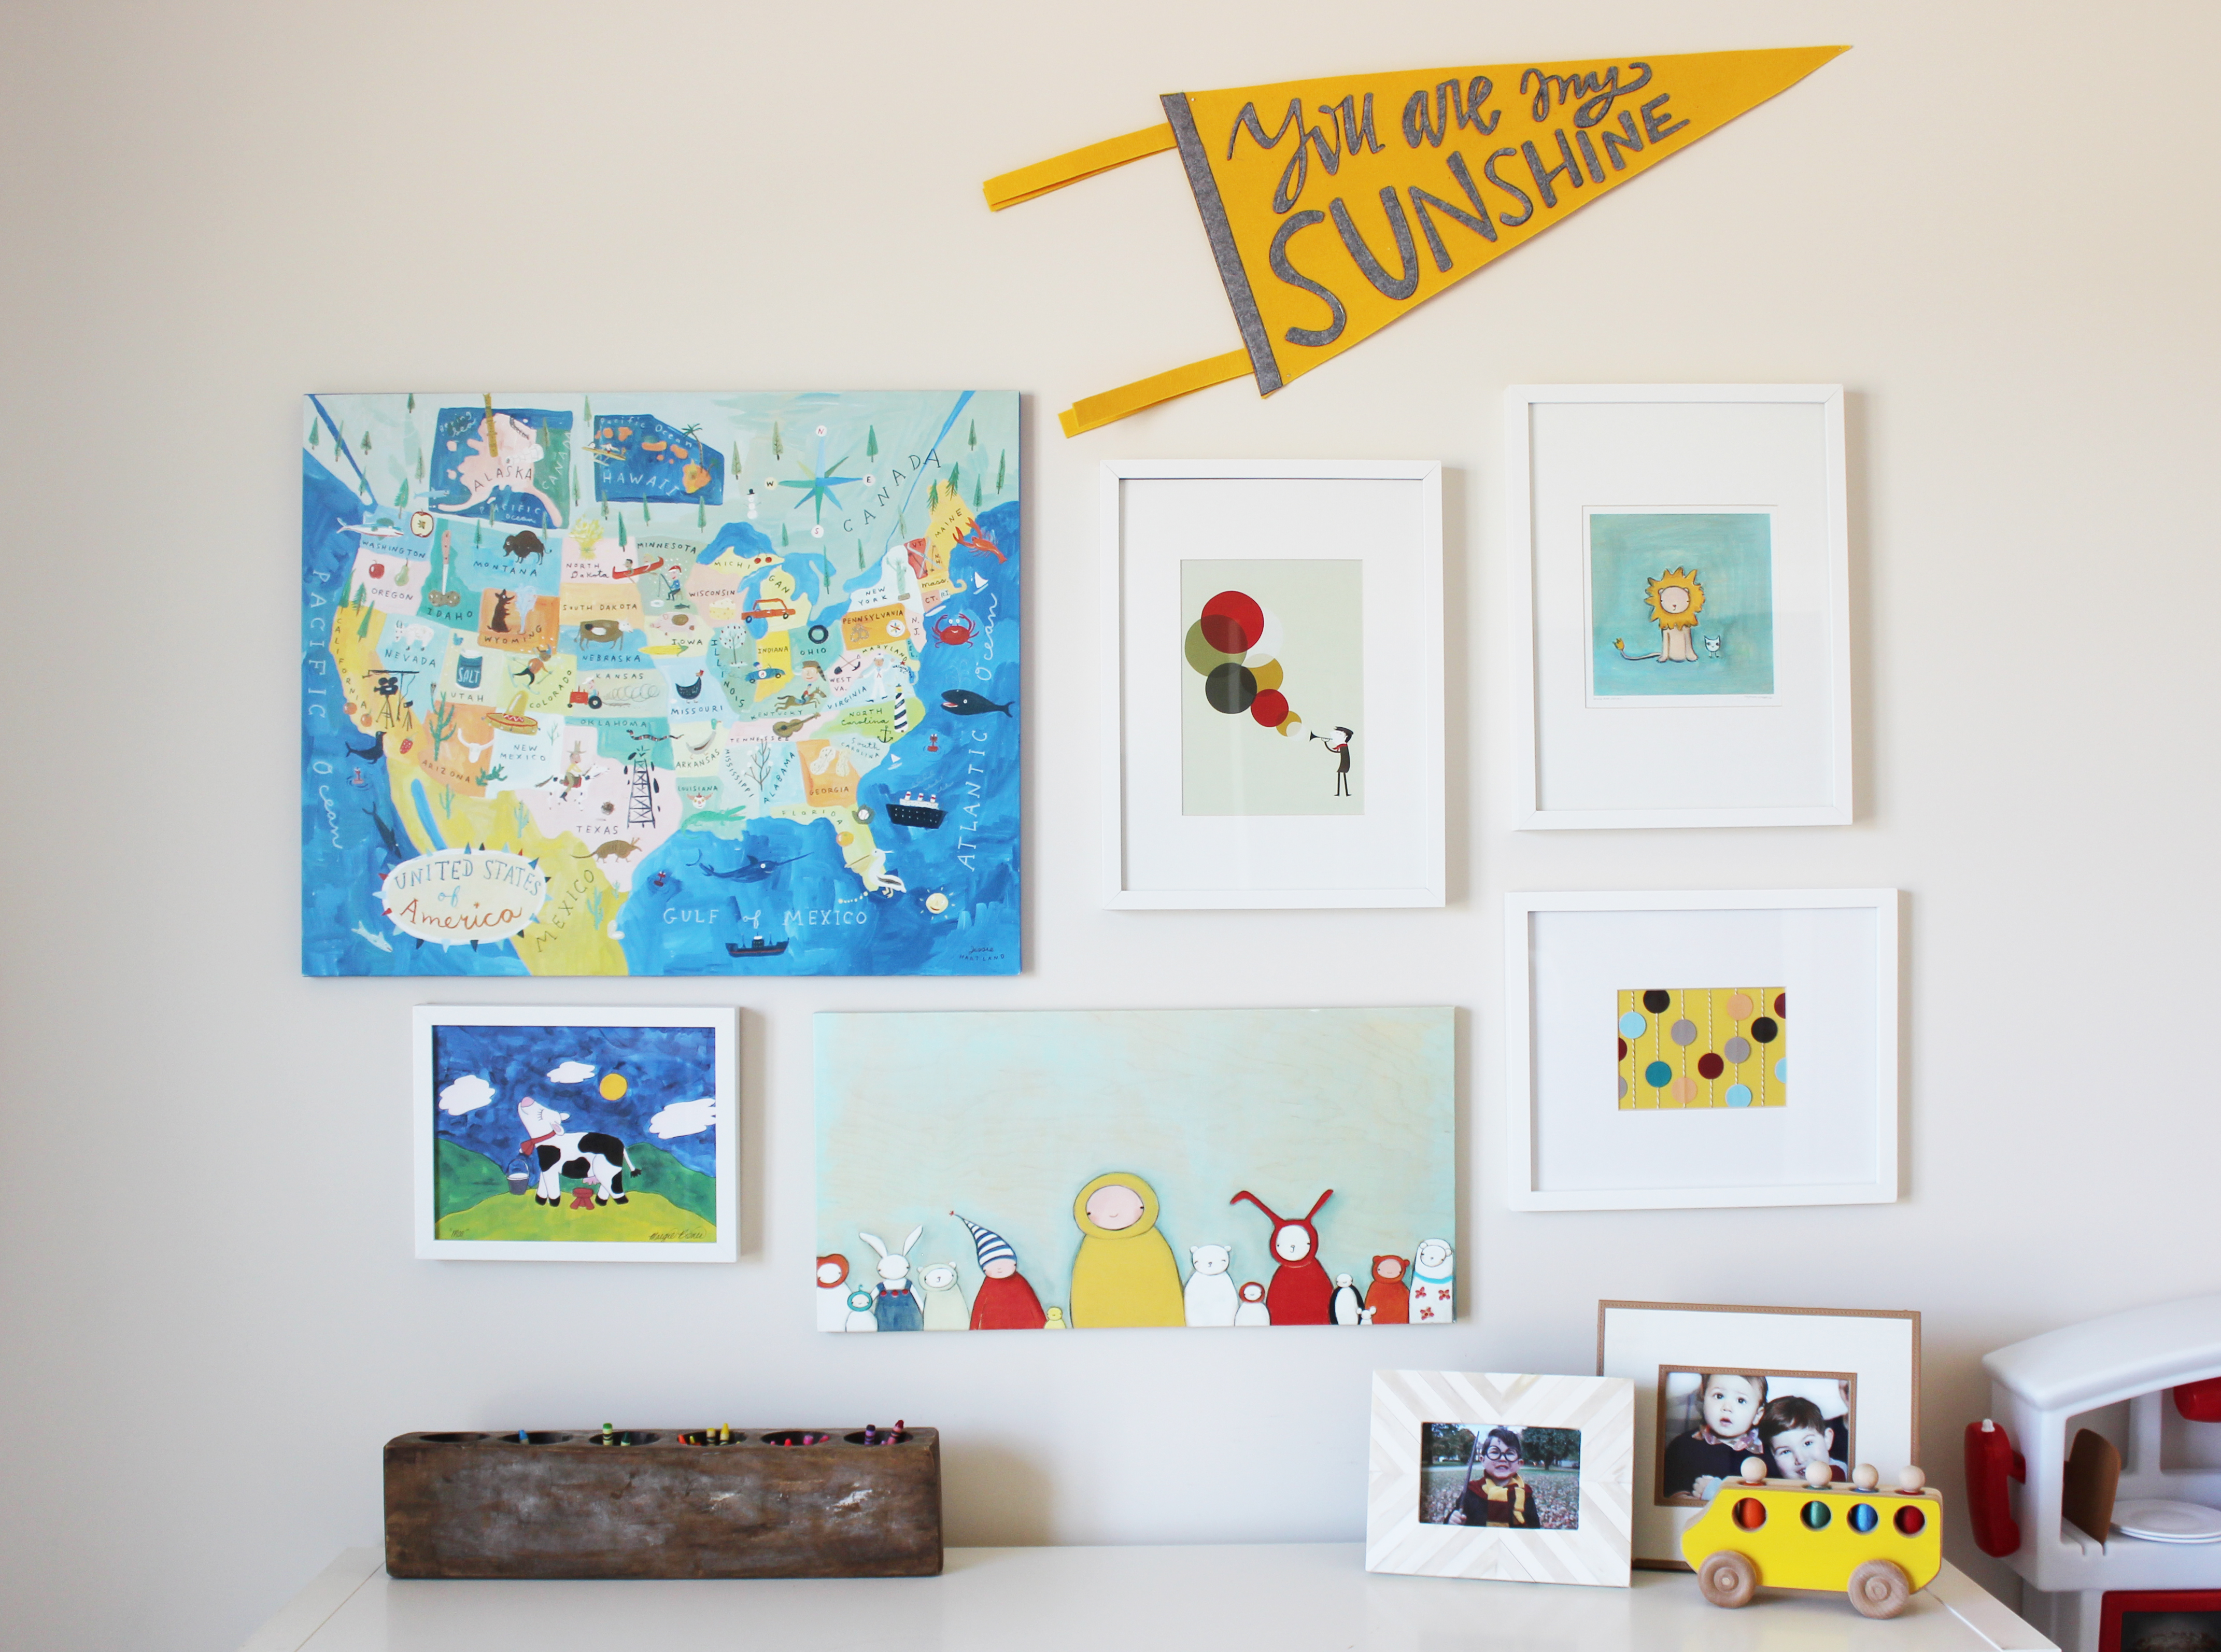
For decor, I tried to stick to 3 colors: mint, golden yellow, and red. Keeps things easy!

CLICK FOR SOURCES:

Shelves under the TV

& Baskets (10″)

Bin clips

Removable tape for bin labels (but I wrote with a sharpie)

Round white and mint bin – Target Pillowfort, only in stores

Shelves under the window (2)

& Bins

Shelves under the artwork

Baskets (ikea, no longer available)

White fluffy chair

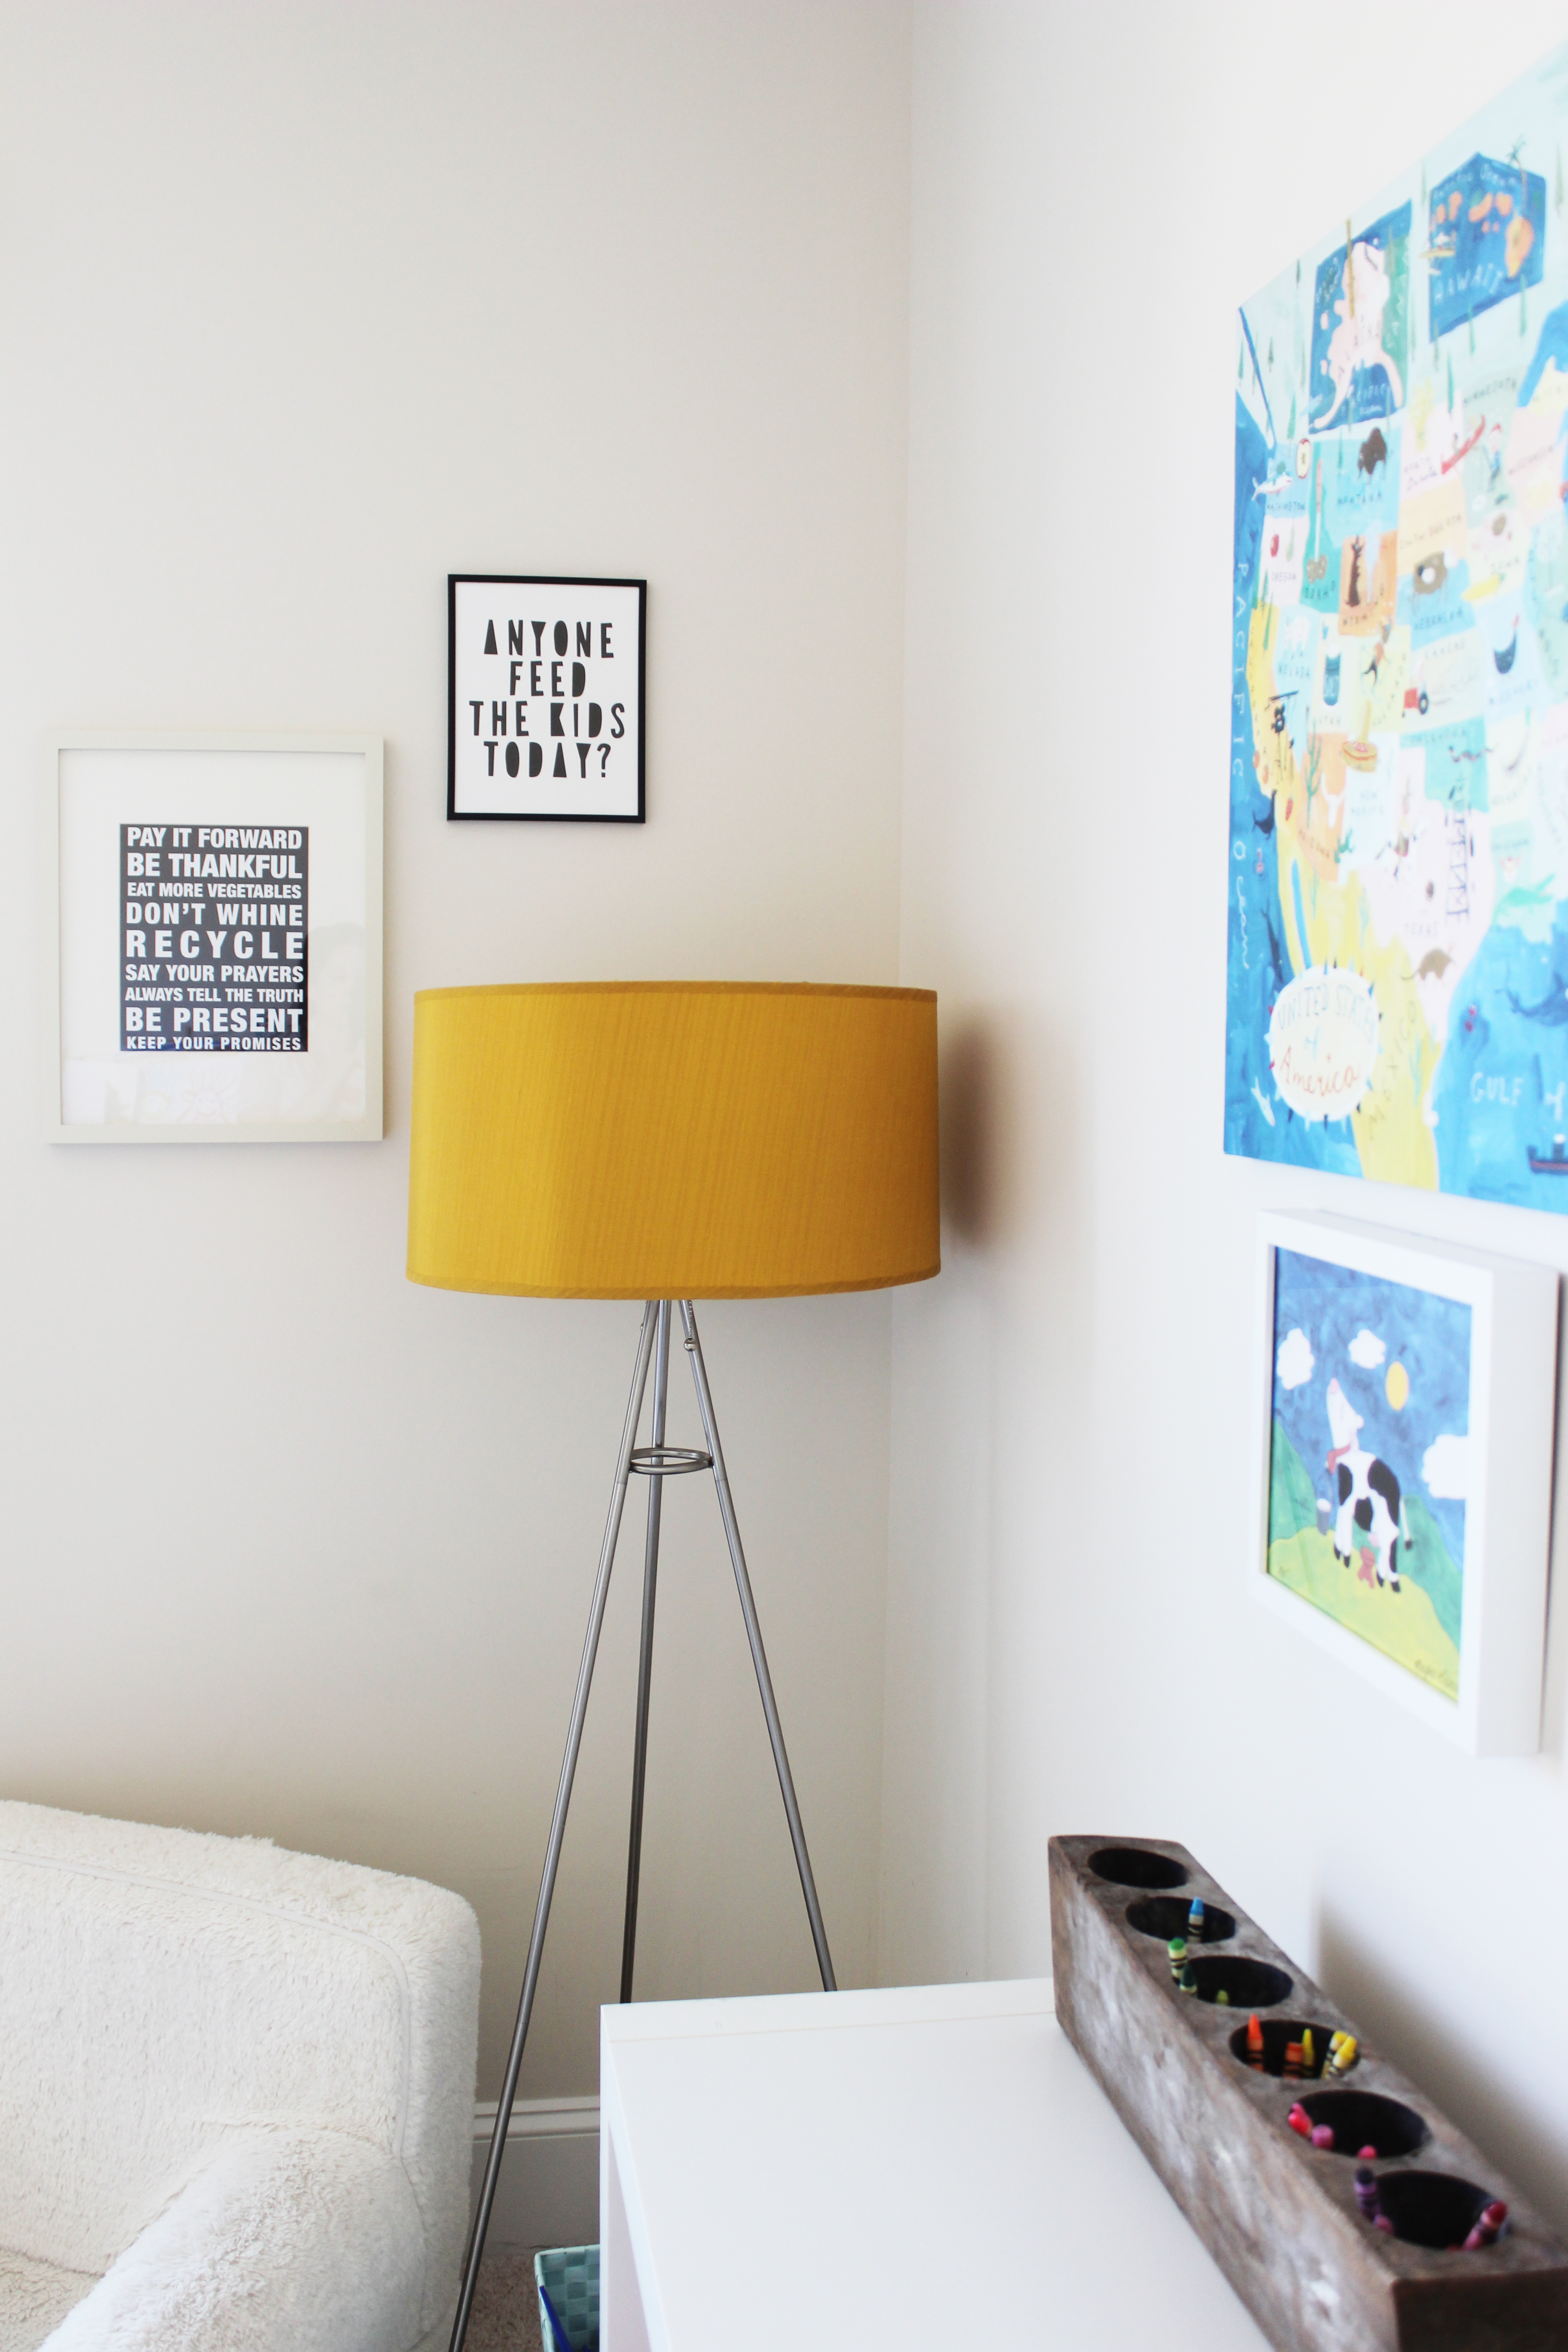
Yellow lamp (Target, no longer available)

Mint woven bin

Anyone feed the kids art print

Art table

Aqua chairs

ART WALL:

Pennant

Map

Man playing trumpet

Lion & people

Cow

School bus

Let me know if you have any questions!!

xo

Leah

HOLIDAY CARDS WITH MINTED.COM

Have you ever used Minted? Ok, click HERE and you’re welcome. Oh and pppssst! 20% off your holiday cards through today at noon PST with discount code: CM2015.
Minted did my holiday cards this year, and I am beyond grateful!! I could just rave about the whole process forever, but I’ll try to keep it brief. First of all, the quality is SO good. My cards have silver foil, people! The options are endless depending on your photo and the number of photos you want. It’s all tailored to you with ease. I had too many good photos to chose from (captured by the brilliant Kate Davis! Family photo shoot HERE) so I chose a backing with space for 6 more photos. My favorite part? The envelopes are pre-addressed for you! For free. Whaaaat?? And the wraparound labels with my return address just make the whole card come together like a little package. Could not be happier! You can purchase my holiday card design HERE.
Happy Everything!
xo
-L

ROOM TOUR: LIVING ROOM

I had to capture the one moment in time my house was clean by photographing it! This is my living room which opens up to the kitchen (not clean enough to photograph). It’s not particularly “styled” with design pieces and plants (I wish) since my 1.5 year old would destroy it, but it’s just enough so it feels like home. 
We love this room for two main reasons: the rug and the beams! The oriental rug was passed down to us from Jeffrey’s Nanaw (she truly was a fabulously glamorous lady), and I love every little detail on there. It makes the room warm and cozy, and we love thinking of Nanaw each time we look at it! 
This room, being a double story felt a little too open and cold, so we added beams a couple months ago. It’s changed the whole feel of the house to us- we are obsessed! The Tenneessee Barn Project found these 100-year-old hand hewn beams in an old barn. We love all the beautiful inconsistencies in these beams and the iron supports that hold them up. Industrial chic at it’s finest! I still have plans for a laundry room makeover and a new kitchen table from them eventually!
Thanks for taking a peak! Click links below for sources.
-L
SOURCES:
Fan – Lumens
TV console – Restoration Hardware
Leather club chair – Restoration Hardware
Coffee table – Crate & Barrel
Glass jugs – Haven
Couch – Havertys
All throw pillows – Ikea
Blanket – Jonathan Adler
Glass lamp – Ikea
USA map print – Alison Hardcastle
Nashville print – Rock Paper Scissors
Buffalo print – Animal Print Shop
Entry way light fixture – Joss & Main
Door wreath – Target
Kitchen bar stools – Restoration Hardware
Metal orbs (similar) – Target

THE BEST CHOCOLATE CAKE!

Not to toot my own horn… but I’m going to. This cake is the BEST. It’s super m-o-i-s-t (don’t say it out loud) and super chocolaty in a not-to-sweet way. It’s pretty easy too!
My two cute helpers
Ari said “Happy Birthday, Daddy! Daddy, how old are you turning? Oh wow, 32? Does that mean you’re going to go bald soon?”

THE BEST CHOCOLATE CAKE EVER EVER EVER

Cake Recipe
Adapted from Ina Garten
Ingredients:
Butter, for greasing the pans
1 3/4 cups all-purpose flour, plus more for pans (I use bread flour)
2 cups sugar
3/4 cups (good!!) cocoa powder
2 teaspoons baking soda
1 teaspoon baking powder
1 teaspoon kosher salt
1 cup buttermilk, shaken
1/2 cup vegetable oil
2 extra-large eggs, room temperature
1 teaspoon (good) pure vanilla extract
1 cup freshly brewed hot coffee
Directions:
Preheat the oven to 350 degrees.
Butter two 8-inch x 2-inch round cake pans (or 11×13″ sheet pan)
Line with the bottom of the pan with parchment paper, then butter and flour (or use cocoa powder) the pans.
If you’re using a sheet pan, have the parchment paper hang off on either side so you’ll have little handles to pop it out when you’re ready to cool it.
  1. Sift the flour, sugar, cocoa, baking soda, baking powder, and salt into a large bowl and mix until combined. I actually don’t like using an electric mixer with this recipe- it’s too liquidy
  2. In a medium bowl, combine the buttermilk, oil, eggs, and vanilla.
  3. Slowly add the wet ingredients to the dry.
  4. Slowly add the coffee and stir just to combine, scraping the bottom of the bowl with a rubber spatula.
  5. Pour the batter into the prepared pans and bake 20-25 minutes. Always bake for a few minutes less if you’ve never made this recipe before, so you don’t over-bake the cakes. You can always add more time, you can’t take away. When you start to smell it, it’s probably almost done. Give the pan a jiggle when you start smelling it. Keep adding 3 minutes on your time and checking it again. It should jiggle like solid pudding, not like jello. It will keep baking in your pan after you take it out of the oven. If you want to really check it, put a knife in the middle and it should come off with a few crumbs.
  6. Cool in the pans for 5 minutes (unless you’ve over-baked it*). Run a knife around the edges so the cake will come out more easily. Turn the cake out onto a cooling rack lined with parchment paper and cool completely. It’s a gooey cake, so the parchment paper on the cooling rack is KEY. If you’re baking it in a sheet pan, you’ll already have the parchment paper to just pop off and place on the cooling rack.
*If you’ve accidentally over-baked your cake, pop it out of the cake pan immediately to cool on a cooling rack or it will keep baking. Scrape off any crispy parts. Combine 1/4 cup of milk with 1/4 tsp vanilla. Brush it all over the surface of the cake.

CHOCOLATE FROSTING RECIPE

Adapted from Magnolia Bakery
* If frosting a sheet cake, I like to halve the recipe since you’re not covering as much area. This frosting is rich!
Ingredients:
1 1/2 cups (3 sticks) unsalted butter, softened to room temp
2 tablespoons whole milk, room temp
12 ounces chocolate, melted and cooled (I use Ghiradelli 60% bittersweet chocolate)
1 pinch fleur de sel / sea salt / kosher salt
1 teaspoon (good!!) vanilla extract
2 1/4 cups sifted confectioners’ sugar
Directions:
  1. To melt the chocolate, place in a double boiler over simmering water on low heat for about 5-10 minutes. Add a pinch of sea salt. Stir occasionally until completely smooth and no pieces of chocolate remain.
  2. Remove from the heat and let cool for 5-15 minutes.
  3. In a large bowl, on the medium speed of an electric mixer, beat the butter until creamy, 3 minutes
  4. Add the milk carefully and beat until smooth
  5. Add the melted chocolate and beat for 2 minutes.
  6. Add the vanilla and beat for 3 minutes.
  7. Gradually add the sugar and beat on medium until fluffy.
Your frosting might be a little melty so keep your mixer and beater attachment out. Refrigerate the frosting for 30 min or until the frosting is more solid, then re-whip it with the mixer.

MARSHMALLOW FROSTING

This will make the cake taste like a s’mores!

* If frosting a sheet cake, I like to halve the recipe since you’re not covering as much area. This frosting is rich!

Whip together:

1 cup salted butter, room temp (or add 1/4 tsp salt to unsalted butter)

14 ounces Marshmallow Fluff

2 cups powdered sugar

1 teaspoon vanilla


PEANUT BUTTER FROSTING

Ina Garten
* If frosting a sheet cake, I like to halve the recipe since you’re not covering as much area. This frosting is rich!
Ingredients:
2 c powdered sugar
2 c creamy peanut butter
10 tbsp butter, room temp
1 tsp vanilla
1/2 tsp salt
2/3 c heavy cream
Directions:
Beat all ingredients except the cream in a mixer on low until creamy. Add the cream and beat on high until fluffy and smooth.


You are going to LOVE this!! Enjoy!
-L