Hannukah

DREIDEL GAME RULES – FREE PRINTABLE

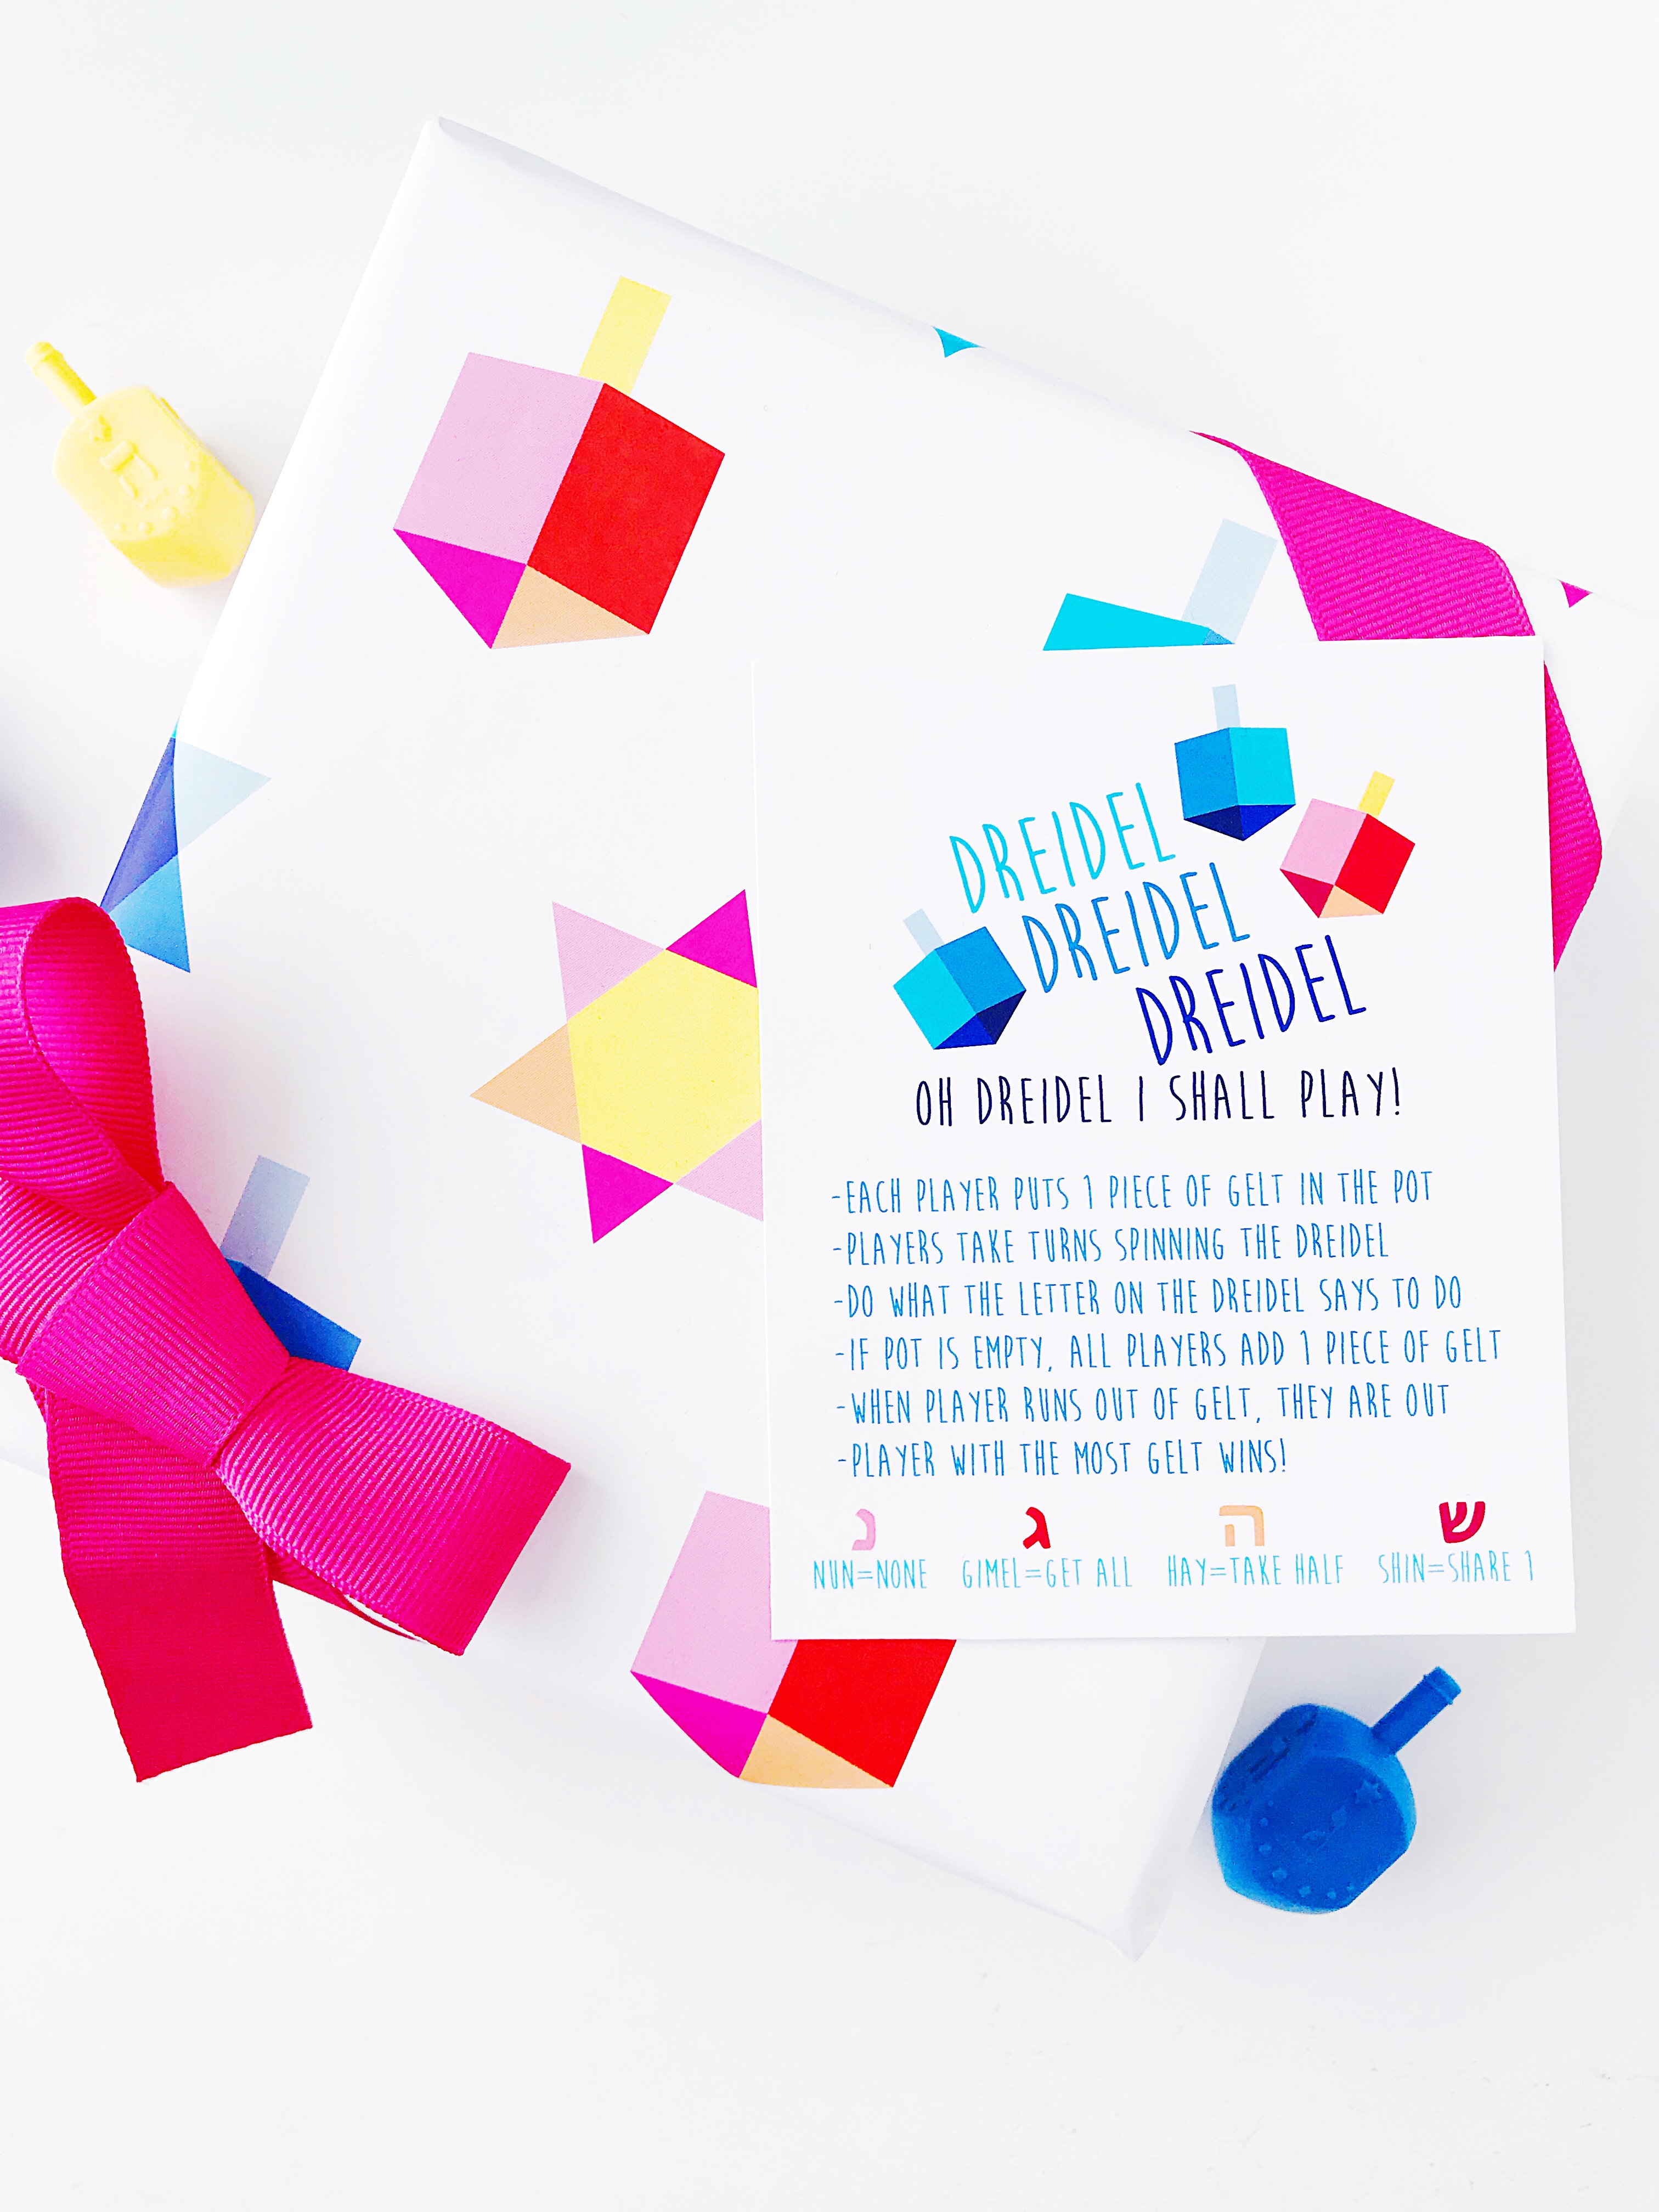
Happy Hannukah / Chanukah / Hanukah! Here’s a fun dreidel game starter kit to give to your kiddos or your students. I’ve found the best thing to do is to send the colorful cards, dreidel, and gelt/pom poms home with kids and then print out a few of the large black and white pages for playing in the class. That way they can have the rules in front of them as they play with friends, but also have a sealed pack they can bring home to their parents. Tell the kids when they play at home, they can use anything for gelt: paperclips, pennies, marshmallows, whatever they have around the house!

DREIDELS

GELT or POM POMS

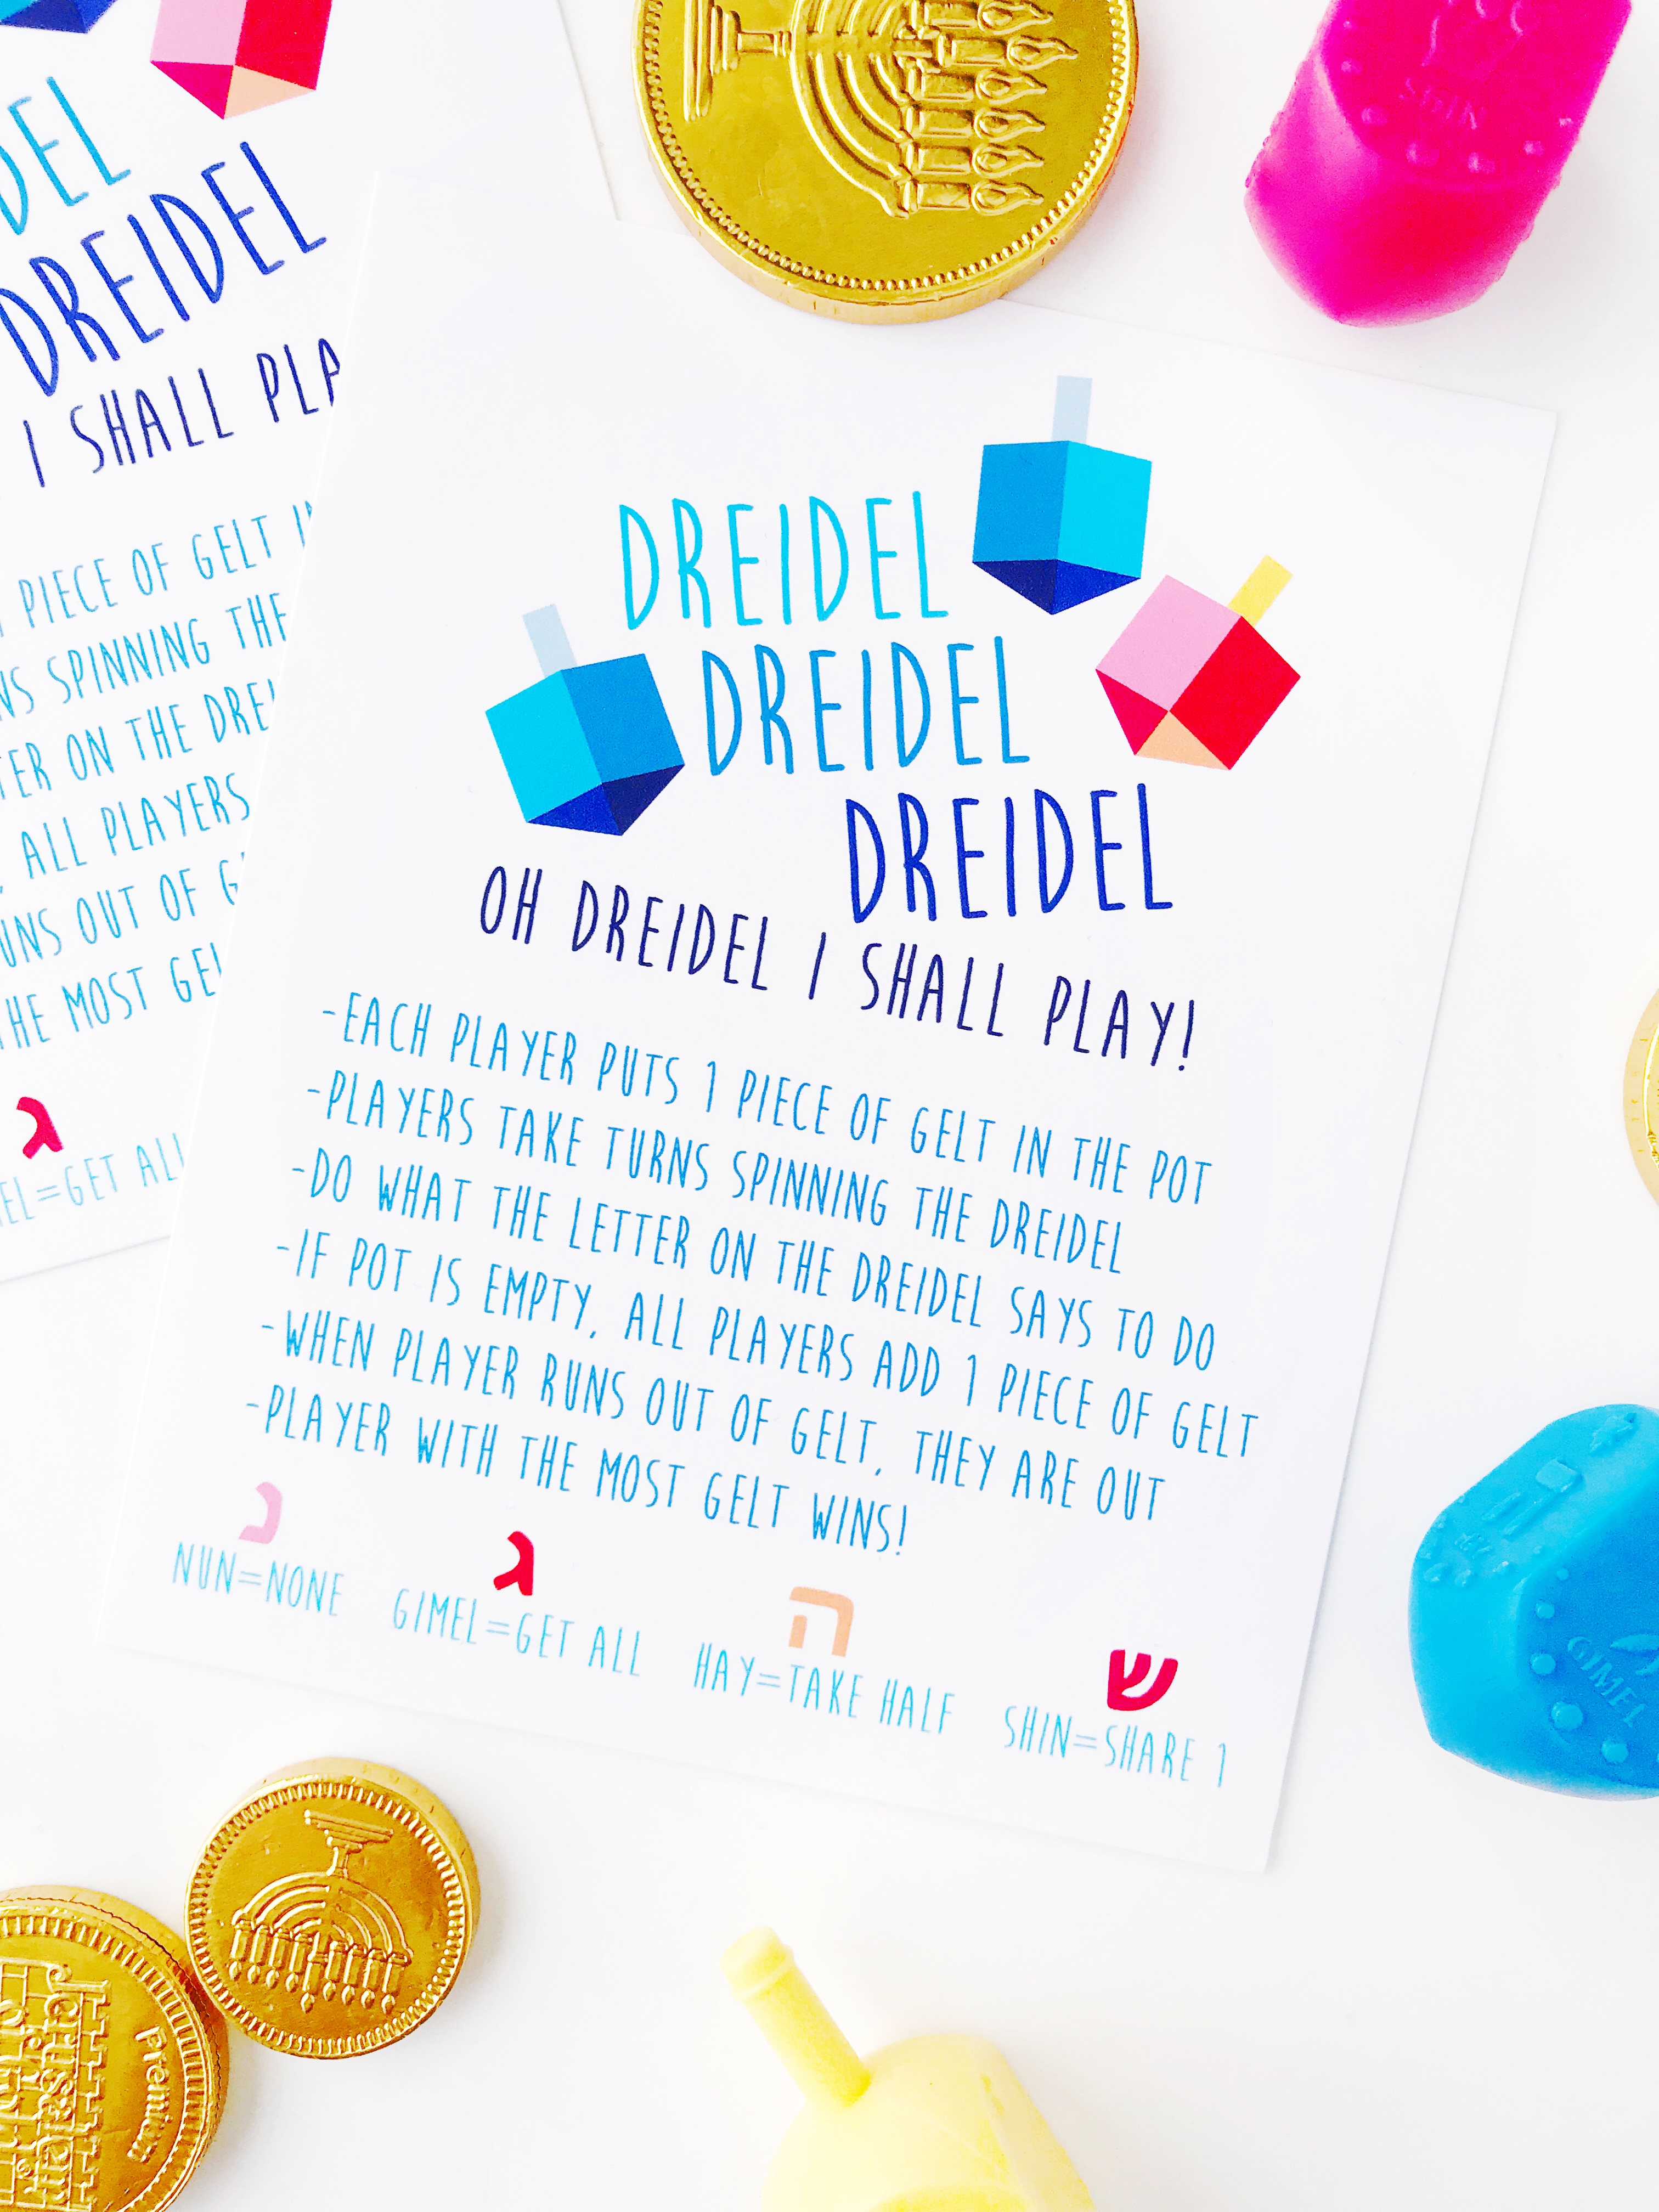
SMALL COLORFUL INSTRUCTION CARDS

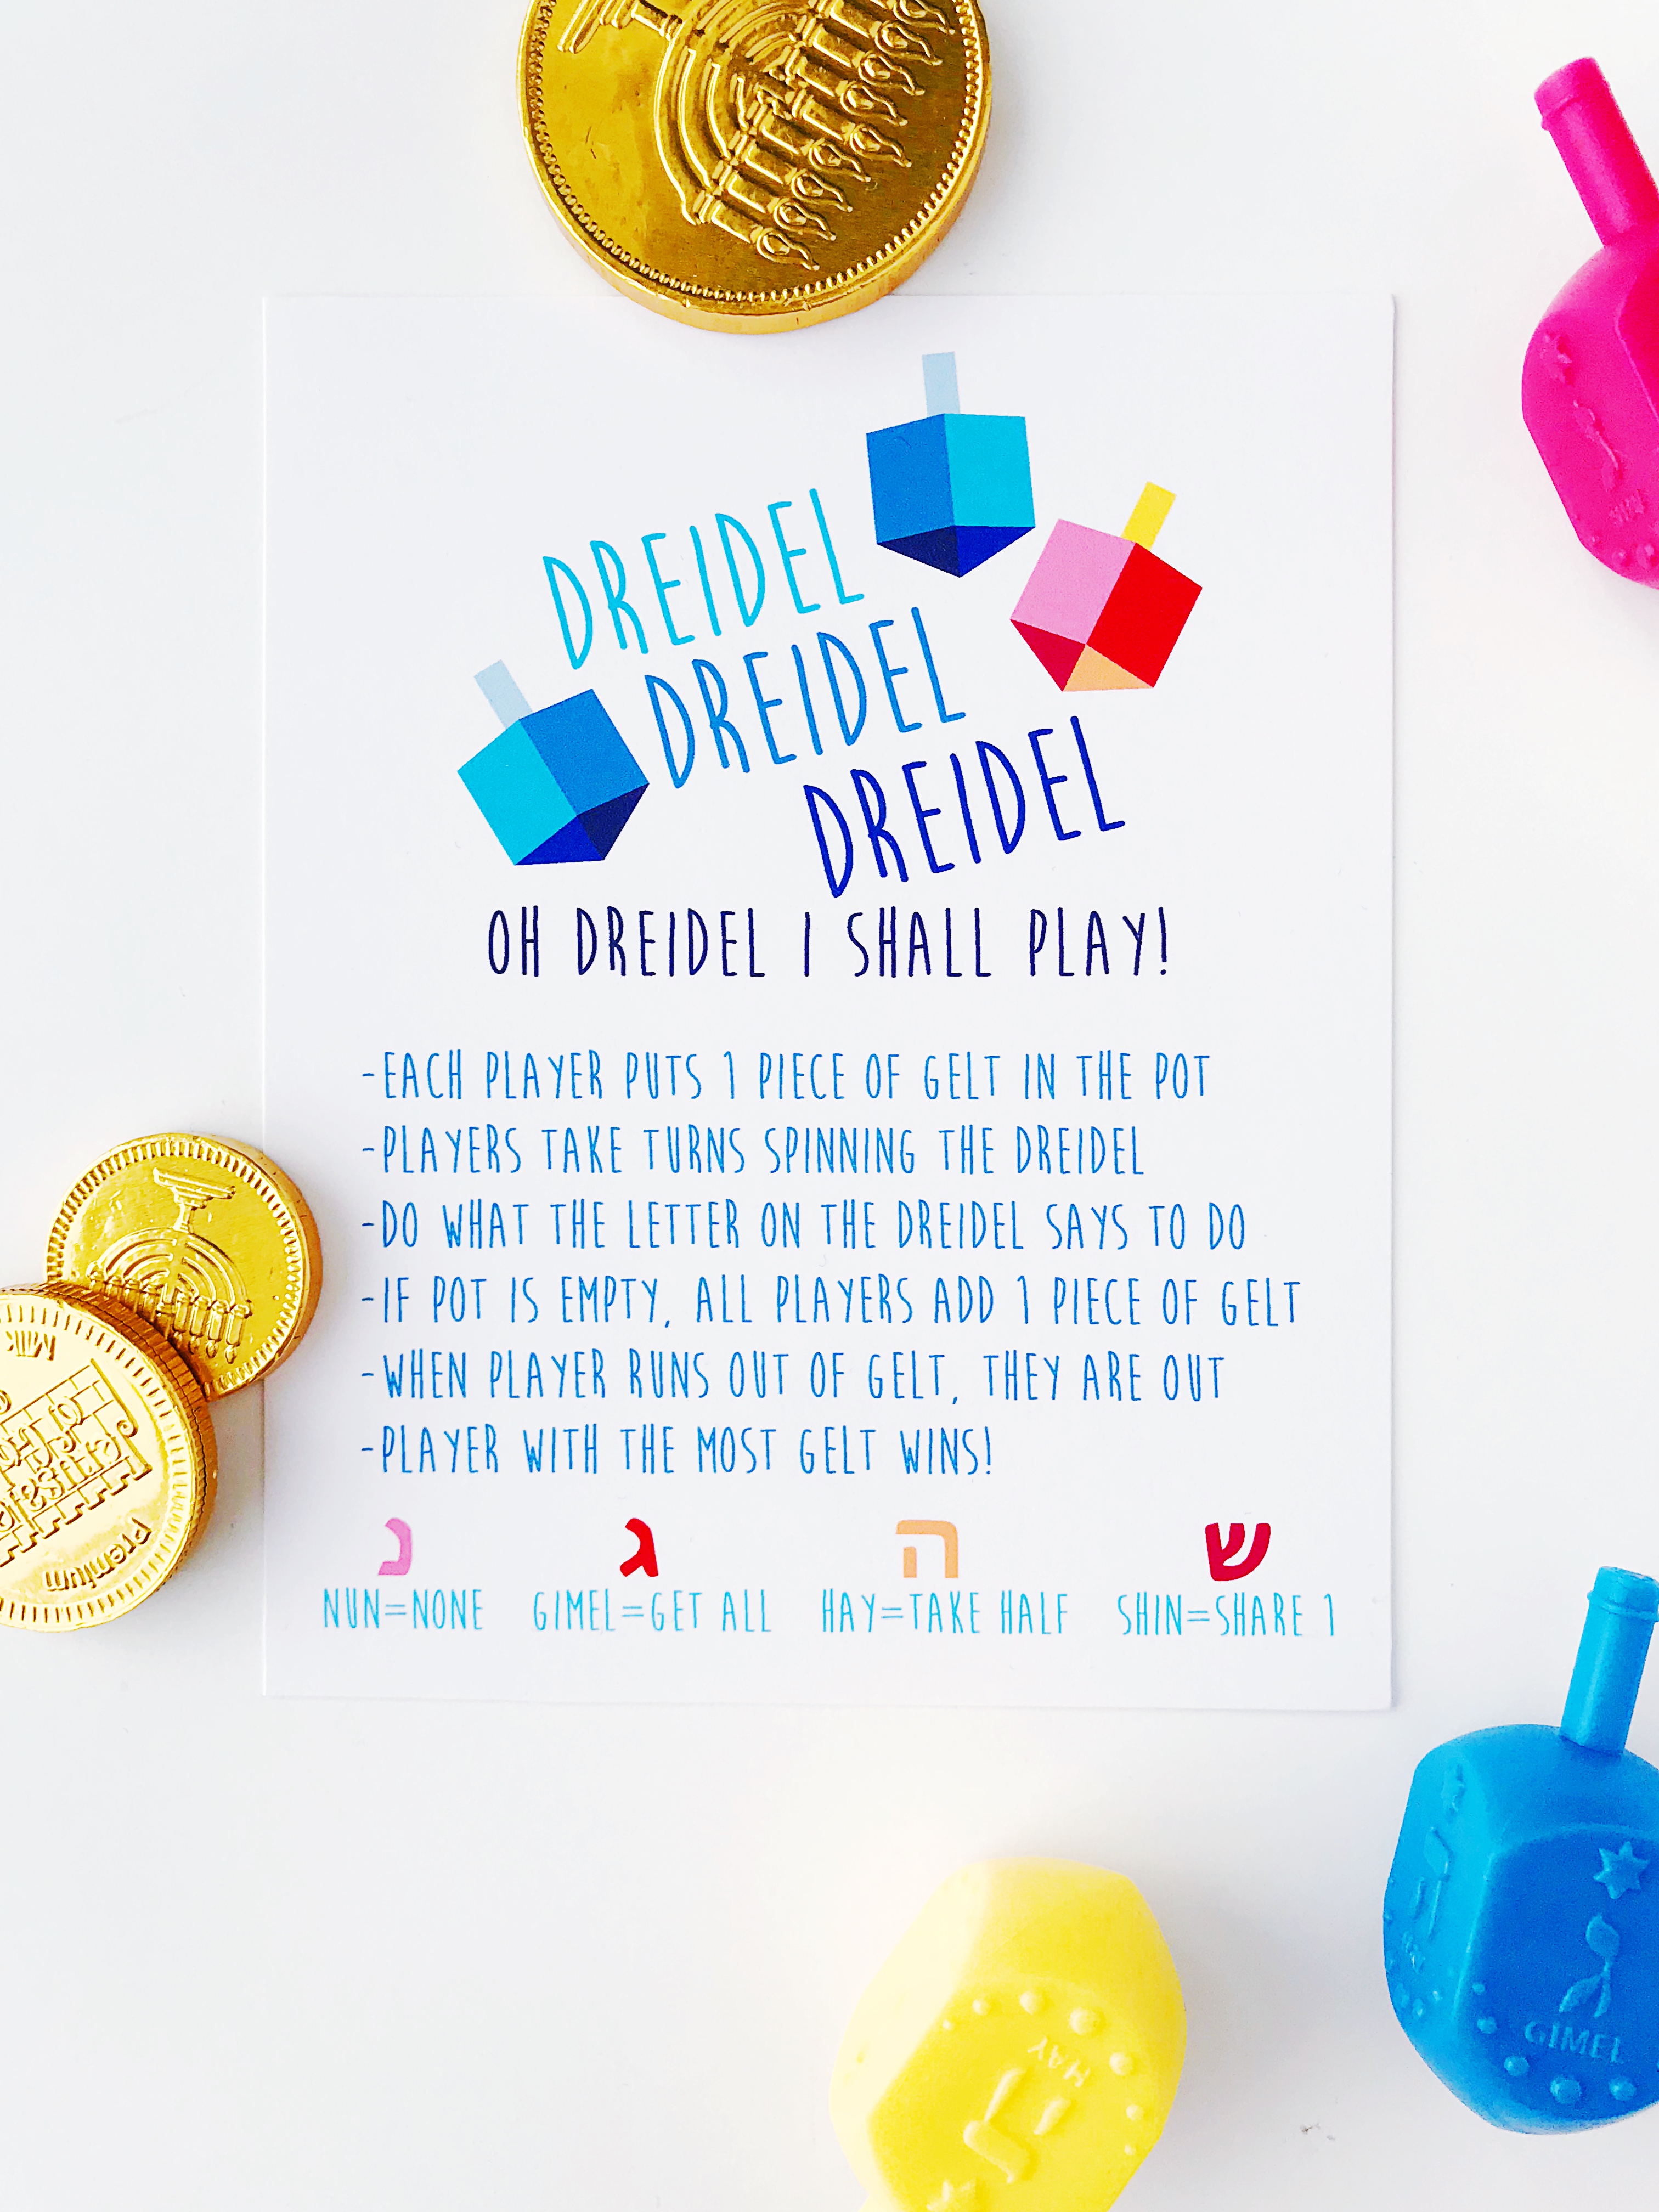
LARGE BLACK AND WHITE INSTRUCTIONS

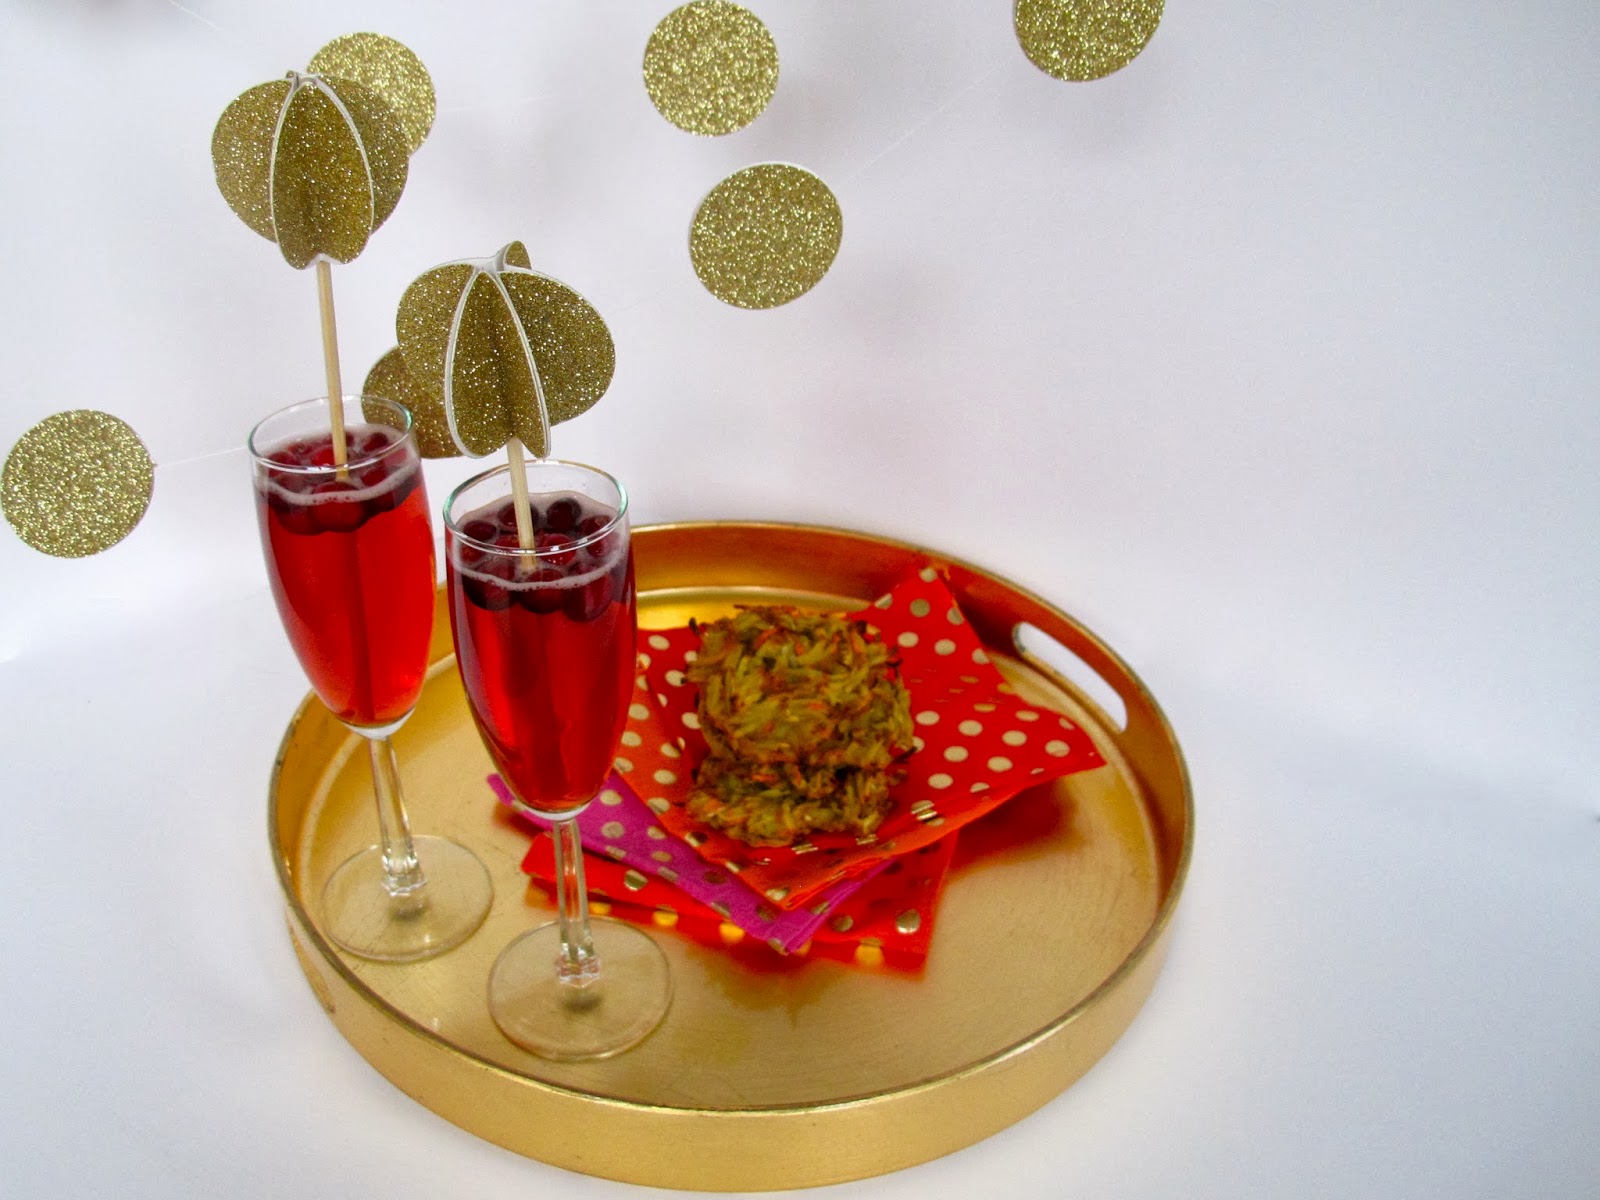
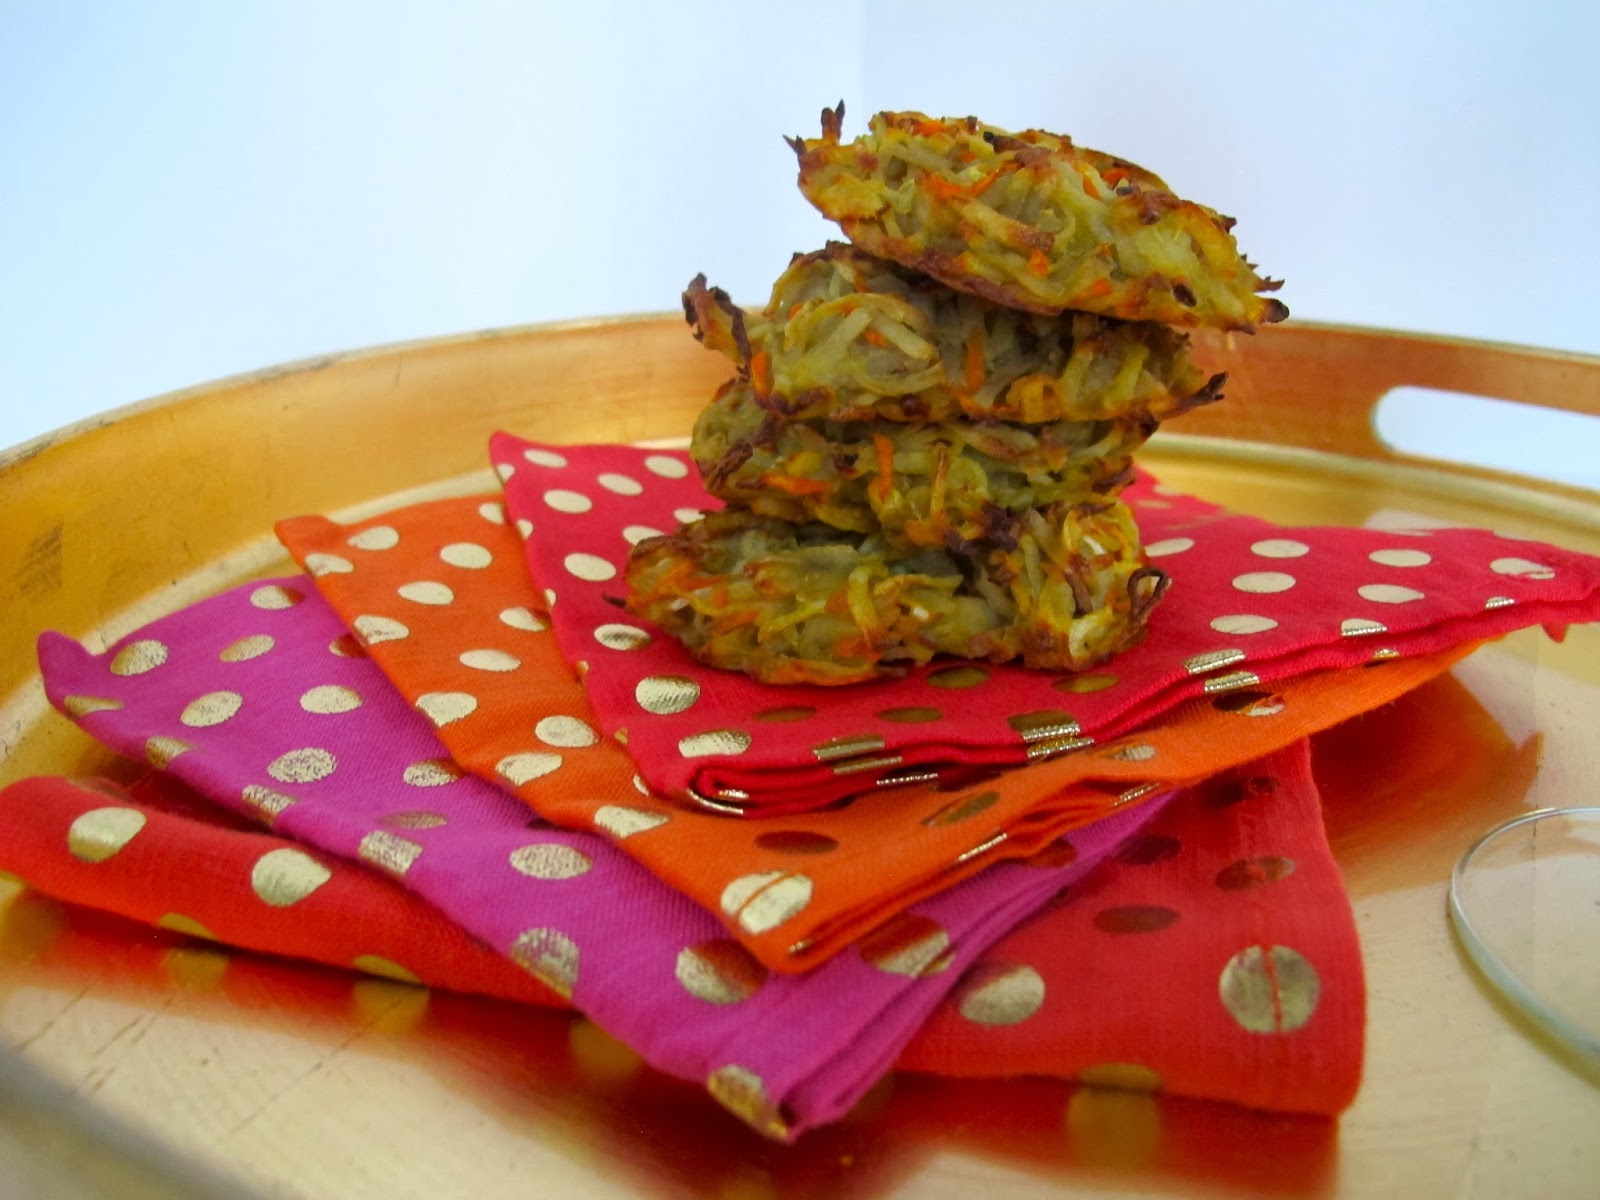
* you can also add this LATKE RECIPE printout too!


This is my favorite PAPER CUTTER we use for every printable


These books are some favorites to read to the class if they’re kindergarten – 2nd grade age:

Meet the Latkes

The Only One Club

Gracie’s Night


Happy spinning!

GIFT GUIDE – UNCOMMON GOODS

Here are a few of our favorite things!
Uncommon Goods literally has something for everyone. Helloooo taco mobile. Anyone having a baby? Can we please get you a whole taco themed gift? Personally obsessed with the light box, and my kids are obsessed with the ice cream truck! Our friends, Haulin’ Oats have their amazing oatmeal on here- and we can testify that the cinnamon girl flavor is to die for!
The best part about Uncommon Goods is that they promote small businesses, emerging designers, and hand makers. Each item has a story behind it and a bio of the artist. As makers ourselves, we SO appreciate that! They also keep sustainability in mind- helping the earth and helping us gift beautiful, handmade items? Yes please.
Scroll down for links.
Love that the ice cream truck is made out of very easily put together cardboard, so it can be disassembled easily when your kids are finished playing. Great for small spaces.
As a blogger/instagrammer, the light boxes are perfect props for styling photos! And we’ve been using this as our shop sign when we do markets.

Here are our favs below, but also check out these easy to shop gift guide links:
BABY
KIDS
FOR HER
FOR HIM
bloody mary mix
men’s wooden watch
moscow mule carry on kit

HOLIDAY CARDS WITH MINTED.COM

Have you ever used Minted? Ok, click HERE and you’re welcome. Oh and pppssst! 20% off your holiday cards through today at noon PST with discount code: CM2015.
Minted did my holiday cards this year, and I am beyond grateful!! I could just rave about the whole process forever, but I’ll try to keep it brief. First of all, the quality is SO good. My cards have silver foil, people! The options are endless depending on your photo and the number of photos you want. It’s all tailored to you with ease. I had too many good photos to chose from (captured by the brilliant Kate Davis! Family photo shoot HERE) so I chose a backing with space for 6 more photos. My favorite part? The envelopes are pre-addressed for you! For free. Whaaaat?? And the wraparound labels with my return address just make the whole card come together like a little package. Could not be happier! You can purchase my holiday card design HERE.
Happy Everything!
xo
-L

RECIPE: CHALLAH

This challah is the BEST. The recipe is actually by our close family friend, Carol. She made this challah for everyone at my wedding. Like every single table got one. Seriously. Not only do I love eating it, but I love the memories we have surrounding it. Friday nights with family and friends, eating this soft, chewy bread, spread with butter or dipped in honey. Every time my mom would make challah, the whole house was filled with the smell of baking bread! That’s probably my favorite smell in the whole world. That and my newborn babies. Equally delicious.
Full recipe below.
RECIPE:
Mom’s Famous Challah
INGREDIENTS
2 tsp honey
1 pkg yeast
1/2 c vegetable oil
1/4 c sugar
2 tsp salt
2 eggs
4 – 4 1/2 c bread flour
1 egg yolk
  1. Dissolve 1 tsp honey in 1/2 c. warm water in large mixing bowl which has been rinsed with hot water.
  2. Sprinkle yeast on top, mix, let stand 10 min.
    Stir in oil, 1/2 c. warm water, sugar, 1 tsp honey, salt, eggs, and 2 c. flour. Beat well.
  3. Stir in remaining 2 c. flour. Dough will be sticky. If it’s too sticky when you test it with your finger, add another 1/2 cup of flour.
  4. Knead 2-3 minutes with a bread hook attachment or turn onto a floured board and knead.
  5. Round up in greased bowl (I just use the same dough bowl and put vegetable oil all around it), cover, and let rise in a warm place for 2 hrs. It should have doubled in size. Gently put finger in top; if dough stays indented, it’s finished. If it bounces back, continue to rise.
  6. Punch down, cover, let rise again 45 min.
  7. Prep the counter with cooking spray.
  8. Divide the dough on the counter into three or four sections and loosely braid* (instructions below), tucking in the ends. Put the braided challah on a parchment paper-lined baking sheet.
  9. Cover loosely with saran wrap or a non-textured kitchen towel and let rise 20-30 minutes.
  10. Brush with beaten egg yolk and 1 tsp water.
  11. Bake 400 degrees 20 min or until it’s a good color on top. Cover the top with foil, put it back into the oven for 5-8 minutes until a toothpick in the center of a braid comes out clean.
  12. Immediately remove the challah from the tray and place on a wire rack so the bottom doesn’t continue to bake.
  13. Eat! Delicious with butter and/or honey. Perfect the next morning for french toast.
* Traditional challahs are braided in one row. On holidays or special occasions, it’s made into a circle.
* This video tutorial is super helpful! I usually do a 4 strand with a circle challah, but I LOVE the 5 strand technique for a straight loaf: CLICK HERE.
* Round challah braiding tutorial (above) CLICK HERE
* Four strand challah:
Divide dough into 4 equal sections
Leave the ends loose if you’re making this into a circle- you’ll weave these ends in at the end when you connect your circle
Take the strand at the left and weave it over-under-over the other three strands
Take the next strand at the left and do the same- weave it over-under-over the other three strands
Repeat until you can’t anymore, form it into a circle and connect the ends on each side- just sort of weave them together…as long as they stay together it’s fine! Just keep tucking the ends in.
xo, Leah

HOLIDAY PHOTOSHOOT – OUTFITS FOR THE WHOLE FAMILY

I think we all sort of cringe a little when we think about dressing up our resistant kids (and husband!) in fancier clothes and convince them to smile like they love taking photos. Just me? But honestly, it’s totally worth it in the end. I don’t always appreciate this stage in my life. The messy, whiney, poopy, busy days that just fly by without noticing any of the details. I’m too tired or stressed or frustrated to really take it all in. Seeing these photos (captured by the BRILLIANT and talented Kate Davis) will always be a fierce reminder of the beauty of our little family in this moment. 
With each photo we saw, we ooooh-ed and aaaahhh-ed and laughed, and omg-ed! Kate knocked it out. of. the. park. She made us feel right at ease, especially the boys! Max nicknamed her Katesadilla. I’m obsessed with her fashion blogger photos and love that casual feel more than the stiff posed look. I also loved taking pics around town instead of in nature like we normally do. Gotta love a good white background! This was shot all behind and to the side of Draper James and at Las Paletas. Ending the photoshoot with popsicles was basically the only way we got the kids through it!
Aside from finding the best photographer in Nashville (duh: Kate Davis) the next step is figuring out what to wear! Coordinating NOT matching is my personal preference. My best tip is to go into one store and use their color palette for the season. I guarantee they have similar colors in different patterns and textures that will be perfect for the whole fam. Start with yourself first. Find what YOU look best and feel comfortable in, then you can plan around everyone else. Selfish? Maybe. But kids and dudes look good in pretty much anything right? 
I’ve linked everyone’s outfits at the bottom of the post in case you want to go with our red, tan, and blue color palette!

 OUTFIT LINKS
Leah: poncho / dress (H&M in-store only) / boots or similar
Jeffrey: shirt (H&M in-store only) / jeans / shoes
Ari: shirt and sweater (H&M in-store only)  / jeans / shoes
Max: shirt and sweater (H&M in-store only) / jeans and suspenders / shoes
Goooood luck, Mamas!
-L

HOLIDAY CARDS + A MINTED DISCOUNT

Have you ever used Minted.com before? It’s so bizarre for us to hear that some people haven’t, because it’s an incredible company! Everything is just so. freaking. easy. We just recently went crazy on their art site which we’ll update you with later! Out of control good! 
Minted has an insane amount of designs for holiday cards. They use independent artists to design, so you can feel good about your purchase. The quality is also amazing, which appeals to these two paper snobs! They have foil pressed cards and we are suckers for anything shiny (hello rose gold foil… muah)! If you have moved, had a baby (and want to announce it 6 months later – insert raised hand here), married the love of your life, or just simply want to say Happy Holidays, there is a card for just that! You can filter it by the number of photos, whether you want it flat or folded, whether you want it to say Christmas/Holiday/New Years, if you want the writing on the top or the bottom… we could go on and on. And the coolest feature? You can upload your holiday photo and see what every single card looks like with your photo! Then you can chose a patterned back or more photos, you can order your return address label that matches your card. And the BEST part? YOU GET FREE RECIPIENT ADDRESS PRINTING. What??!!
Like we said, it’s SO easy! 
We don’t have our photos yet, but are planning which cards and which outfits go with our picks. Here are our favs…which one should we go with? Ah! So many good choices!
LEAH’S TOP PICKS:
Dashing Dots card HERE
Holiday Headliner card HERE
Not So Calm card HERE

Photo Booth Filter card HERE
JENNI’S TOP PICKS:

The More, The Merrier card HERE


Gold Illume card HERE


Santa’s Newest Helper card HERE

Silent-less Night card HERE

The other good news? 
Minted is giving you 15% off on holiday cards through 10/30/15 using code: LOVELION15
That’s something to be jolly about!
xo

DIY HOLIDAY CARDS DISPLAY

This is so easy… I don’t even know why I’m posting it. BUT I think it turned out pretty cute. So. I’m also procrastinating cleaning my house. Typically when I’m at my most creative.
I just received my first two holiday cards! One from my bestie since college, and one from my sweet little nieces and nephews! Last year I was so lazy (read: just had my second baby) that I put all of my cards in a pretty bowl on the coffee table. This year I’m stepping it up a tiny notch. 
All you need for this easy DIY is:
– 1 wire wreath form
– 1-2 packs of plain clothes pins
– 1 roll of fun washi tape
– 1 clear command hook (sticks on the wall and removes without damaging the paint!) See below:
I found this pretty Meri Meri washi tape at our fav shop Rock Paper Scissors.
 Measure by sticking a clothes pin on the tape
 Cut tape
Bend around the sides of the clothes pin. Use the back of your finger nail to really stick it on there well. And… that’s it. Told you it was easy! You could totally spray paint the wreath form gold or silver first, but it’s going to get covered up with cards anyway, right? She says to convince herself.
I still have to finish decorating my mantel. Cannot find the rest of my decor!! It’s probably in storage somewhere. Ugh. Ooh and I’m waiting on a sparkly banner from The Bannerie! I’m a tad obsessed.
Happy decorating!
-L

HOLIDAY GIFT GUIDE FOR THE BOYS

Heeeeere we go, people! T-minus 24 days (or 15 days if you celebrate Hannukah like me) ’til Christmas! Here are my picks for the little dudes in your life. 
Click the item names below for the links:
1. ALPHA POPS: These are genius. Combining a kid’s favorite food group and learning? Check. Match uppercase and lowercase letters, match colors, use for imaginative play. Yum- I mean- fun!
2. BROTHERS BANNER: Sweet little sign for bros bein’ bros. Cute for a playroom or a new big brother. Love this Etsy shop- lots of rad designs!
3. KIWI CRATE: Yet another genius idea! Monthly subscriptions (3, 6, or 12 months) of creative and educational projects for kids of all ages. AKA no work for you mamas to come up with something to battle the “I’m bored’s”.
4. SPY GLASSES: Because every little boy wants to be a spy!
6. SHARK AQUABOT: Swims in water! The only kind of pet I’m okay with right now.
7. HARRY POTTER BOOK SET: A special keepsake plus it comes in a cool trunk! You know me and my true love for Harry Potter. My husband and I passed that love onto our son. He’s not quite ready to read the books, but he’s seen the first movie about 50 times. This month.
8. KINETIC SAND: An OCD mother’s dream come true! Sand that isn’t messy! You can squeeze it, mold it, shape it, let your kiddo really experiment with it. Comes in lots of fun colors too.
9. TWIST AND DRILL: If your kid loves to pretend to play power tools as much as mine, they’ll love this! The drill actually works and twists the screws in to build cars and trucks. Good for hand eye coordination and pretend play.
10. HI/BYE HAT AND GLOVES: For friendly kids to say hi and bye to everyone they pass on the street. Warm and wooly but don’t put these in the dryer… been there, done that. Now Max wears them.
11. THE BOOK WITH NO PICTURES: Fun and silly and written by one of my fav comedians, B.J. Novak. I think any kiddo would get tons of giggles out of this one. 
12. STAR WARS COOKBOOK: Make ice saber popsicles. Enough said.
13. WOODEN CHESS SET: Chunky chess pieces perfect for chunky little hands with directions engraved at the bottom. A great first set for early learners.
Any gifts we missed? We’d love to know. Happy shopping!
-L

LATKES AND VODKAS

It’s the 6th night of Hannukah, and we’re having latkes and vodkas over at our house! 
A latke (rhymes with vodka) is a potato pancake cooked in oil- a traditional food we eat on Hannukah. My dad created a baked version that is just as good and is super easy to make, not to mention way healthier… though go ahead and fry those babies if you chose! To go along with your crispy latkes, we’re having sparkling cranberry orange cocktails, concocted by my sis. A festive fizzy drink perfect for the holiday season! Scroll down for recipes. 
Not the most attractive food, but they’re absolutely delicious!
Fizz, pop, clink!
I made the drink stirrers with a skewer, 5 folded circles of paper, and double stick tape. Easy peasy! Tape together any extra circles on fishing line, and you have a simple and sparkly garland.
BAKED LATKES
makes about 12
3 potatoes 
1 carrot
1/4 onion
1 tbsp salt
1 tbsp flour
1 egg
*serve with sour cream or chunky applesauce 
Preheat oven to 450 degrees.
Peel and shred potatoes (I used a food processor) and mix in 1 tbsp salt. Let sit while you prepare the rest of the ingredients.
Line 2 baking trays with parchment paper.
Shred carrot and onion.
Drain access water from potatoes and squeeze with paper towels.
Mix together potatoes, carrots, onions, flour and egg. 
Scoop 3″ rounds loosely on parchment paper.
Bake 12-15 minutes per side until brown and crispy.
Best baked right away before potatoes turn brown. They’ll still taste good but won’t look so hot!
Delicious savory with sour cream or sweet with applesauce.
SPARKLING CRANBERRY ORANGE COCKTAIL
1 oz vodka
1 oz dry sparkling wine
Splash of cranberry juice
Orange simple syrup to taste – boil half sugar and half water with a couple strips of orange peels
Fresh cranberries
Shake together vodka, juice, and syrup. Strain into a champagne flute, top with sparkling wine, and serve with a cranberry garnish.
ENJOY!
-L

CUSTOM HOLIDAY WRAP FOR THE LITTLES

Remember the chain link garlands you made in grade school? Well, we’re reinventing them! They make perfect gift wrap toppers for the holidays. At Love & Lion we celebrate both Hannukah and Christmas, so we’ll show you how to wrap using all the same supplies. This is the perfect craft for your littles! My three-year-old Ari stamped the Hannukah wrap paper all by himself. Great for small motor skills and shape recognition. 
Grab your toddler and get to stamping!

Here’s how to make your chain link garland topper:

Voila!

Here are some shots of our Hannukah party. We used the extra stamped wrapping paper as a table runner and kinda went crazy with the chain links!

We tied the napkins with candles – Hannukah is the Festival of Lights after all! 

Any great holiday crafts you like to do with your kids?
-L