target

MOTHER’S DAY WISHLIST | BLACK, WHITE & NEON

Hey you guys!! I am squeezing in a last minute Mother’s day post before the weekend. I just thought I would share a couple of things that I am SERIOUSLY wanting, whether it be for MD or not! I am obviously getting the best gift in the world this year right around this sweet holiday, which is the birth of my SON!!! We are still anxiously awaiting his arrival, but when my hubby asked me what kind of prezzie I would like for Mother’s Day, I immediately asked for a bathing suit. It is super important for me to have a bathing suit that I feel more than comfortable in as I will be diving into the pool with the toddler weeks after giving birth. Ummm….. nightmare? Yes, I think so!
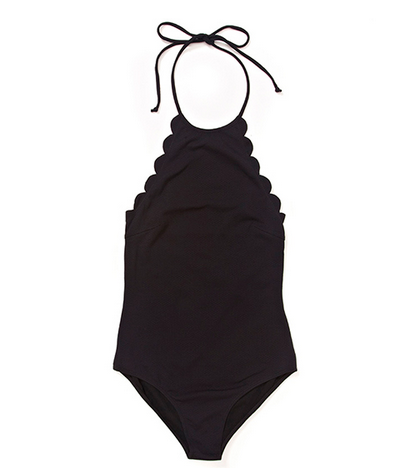
I can’t get my mind off of this one, so that usually means that it will be in my drawer soon! The scalloped edge has me swooning!! I will probably end up with black, although this tan one is soooo lovely!
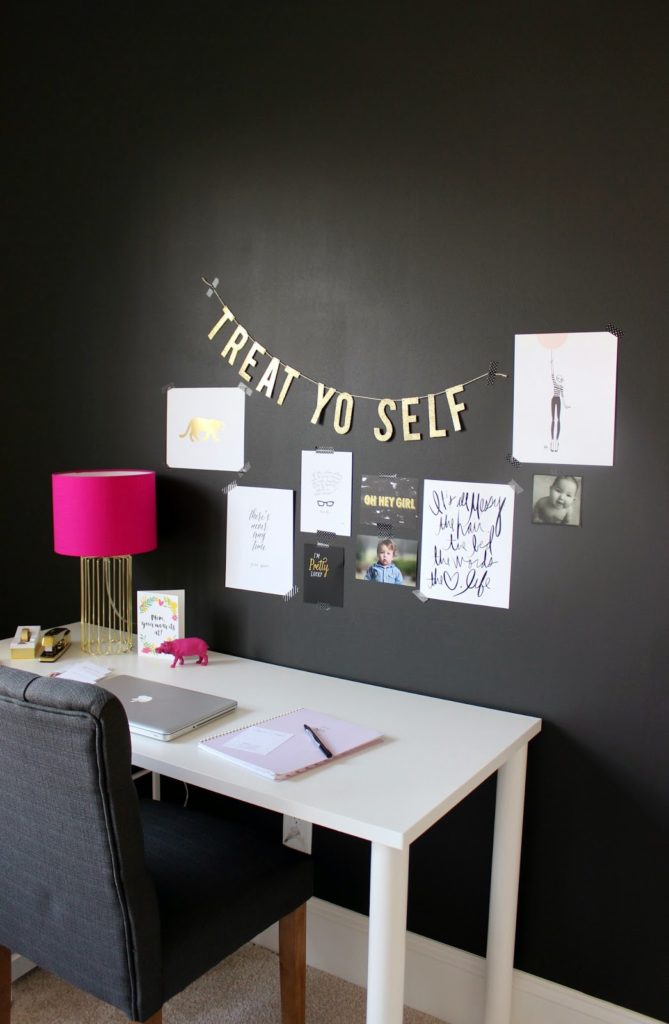
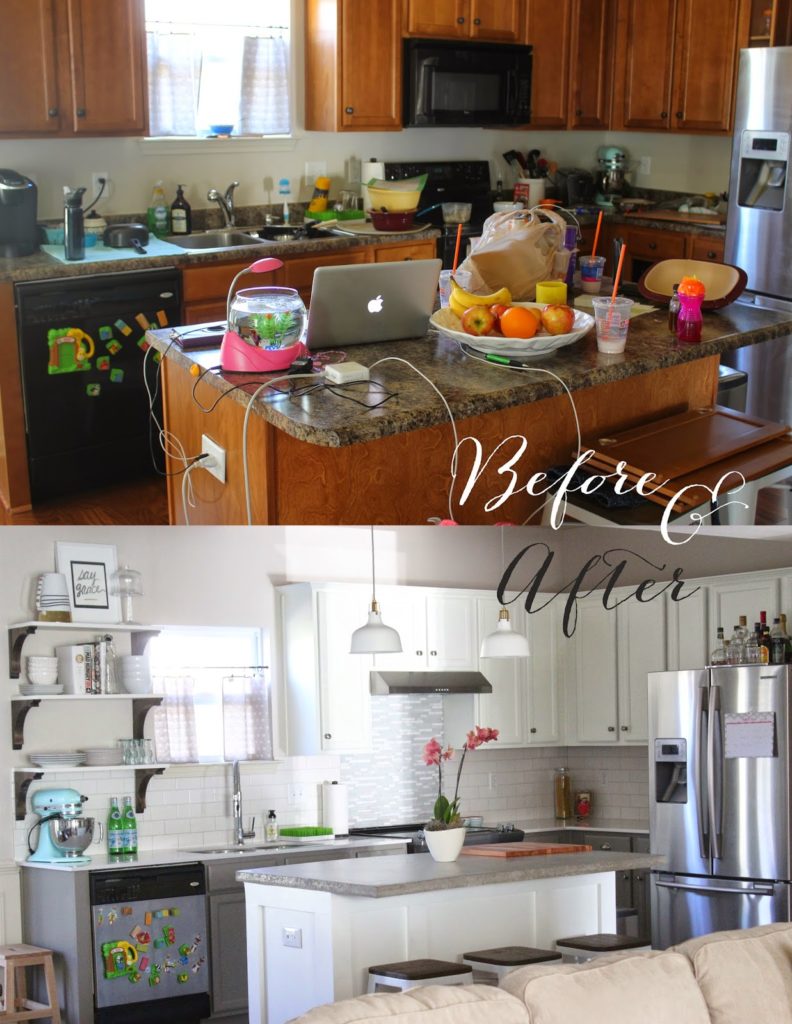
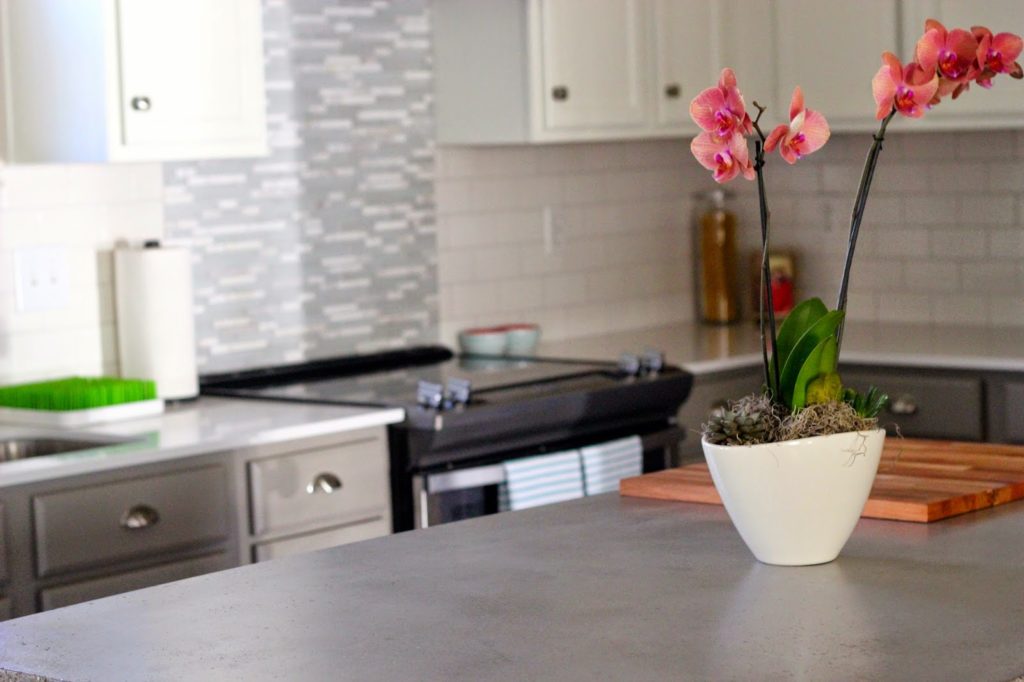
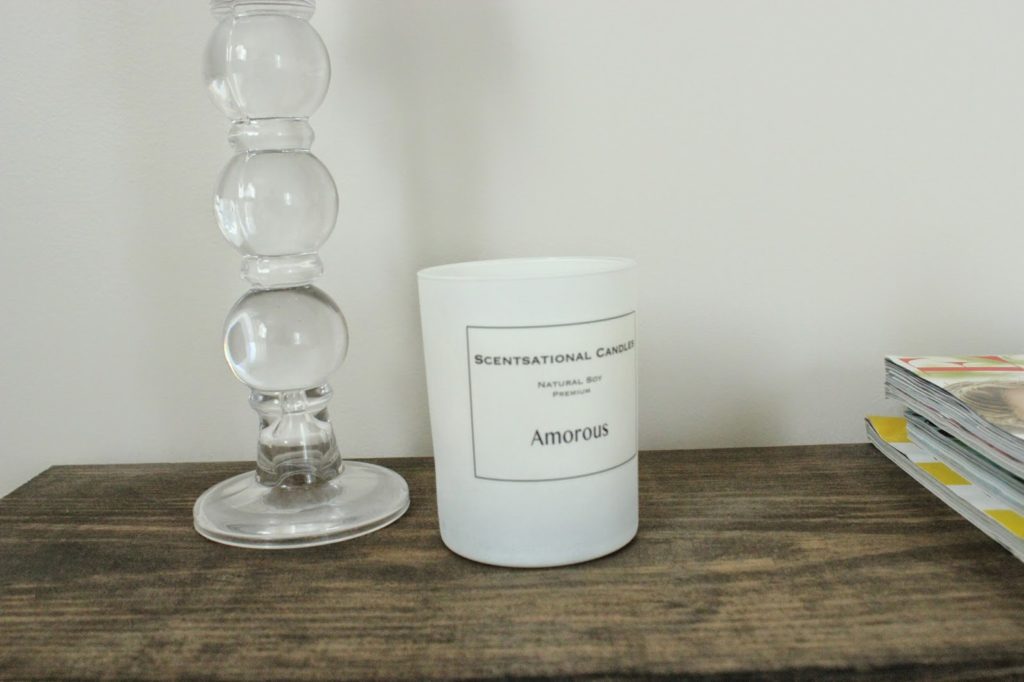
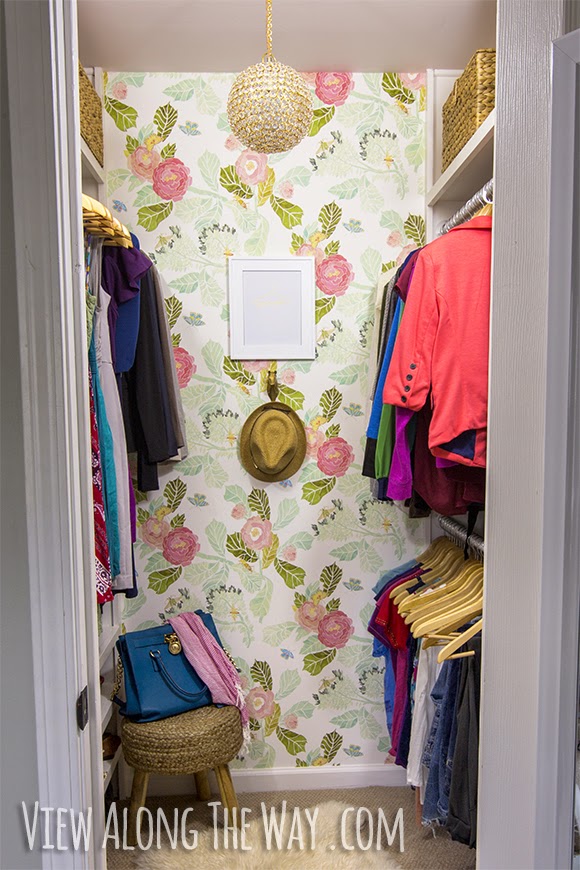
Have you guys seen this closet DIY? I have had it pinned for quite some time on my personal Pinterest page, and have added to the hubby’s “to-do list”. They did SUCH a fantastic job AND it is super budget friendly. A Mother’s Day gift is made much sweeter when it is handmade, right? ha!
I always have a couple of expensive/time consuming ideas on hand when it comes to gifts for myself. For the more low-key/ budget-friendly requests…. these are mine..
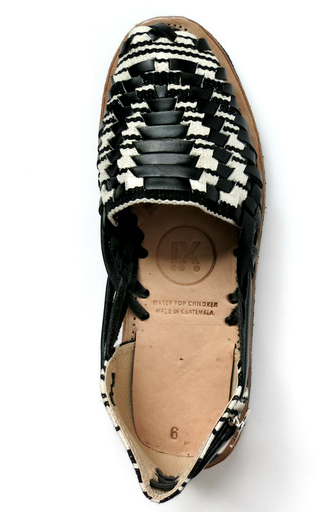
These sandals look super mom friendly (buuuut still stylish), and for every pair purchased, they donate clean drinking water to children. Win Win! I also love this pair and this pair. What is even sweeter is that they make them for little kids too!! You know I love a good mommy/daughter dress alike day. ๐Ÿ˜‰
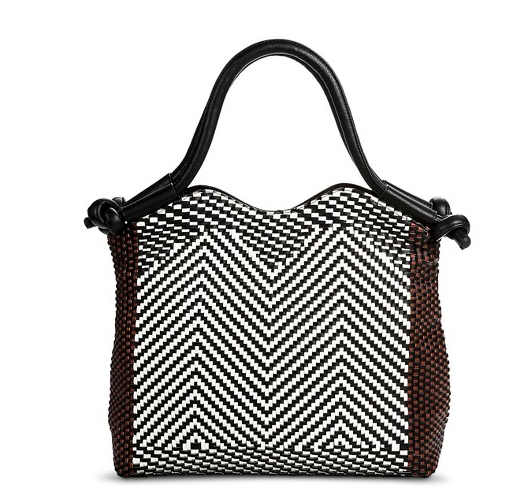
 I NEED this bag from Target!! It is always good to have a breakaway from the diaper bag that you carry 90% of the time, right? It is so chic, and the quality is impressive! It would make a great date night bag! I am also loving this all white weekender ( for the small getaways I never take) yes, please!!
 I think key chains are super cheeseball ( despite my collection I assembled as a teenager), but truthfully, I need an easy way to actually FIND my keys in my bag. I always challenge myself to put my keys in the same pocket, but that never happens. This neon tassel key fob is perfect!!
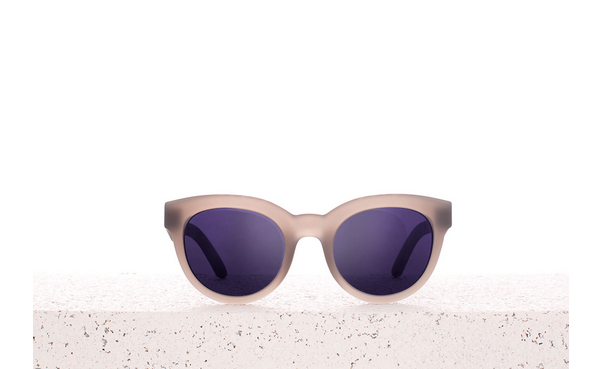
I have been wanting a great pair of aviators for a while now, but these are kind of winning in my book right now!
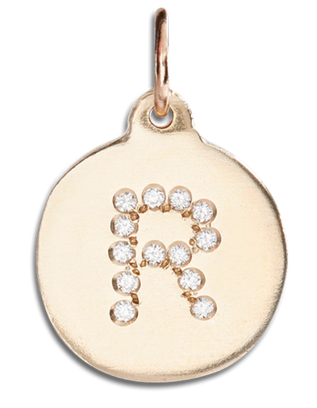
Leah and I both love our Helen Ficalora necklaces! It is kind of a little tradition to add initial charms to my necklace! I am in need of another chain because it feels like a lot to wear all of the charms on the one that I have. I reeeeaaaallllly want this “R” in all diamonds ๐Ÿ™‚ Since this is a pricier option, and it may be farther down the road… I would LOVE this one in the meantime to mix with my Helen necklace for summer! Love layering dainty gold pieces.
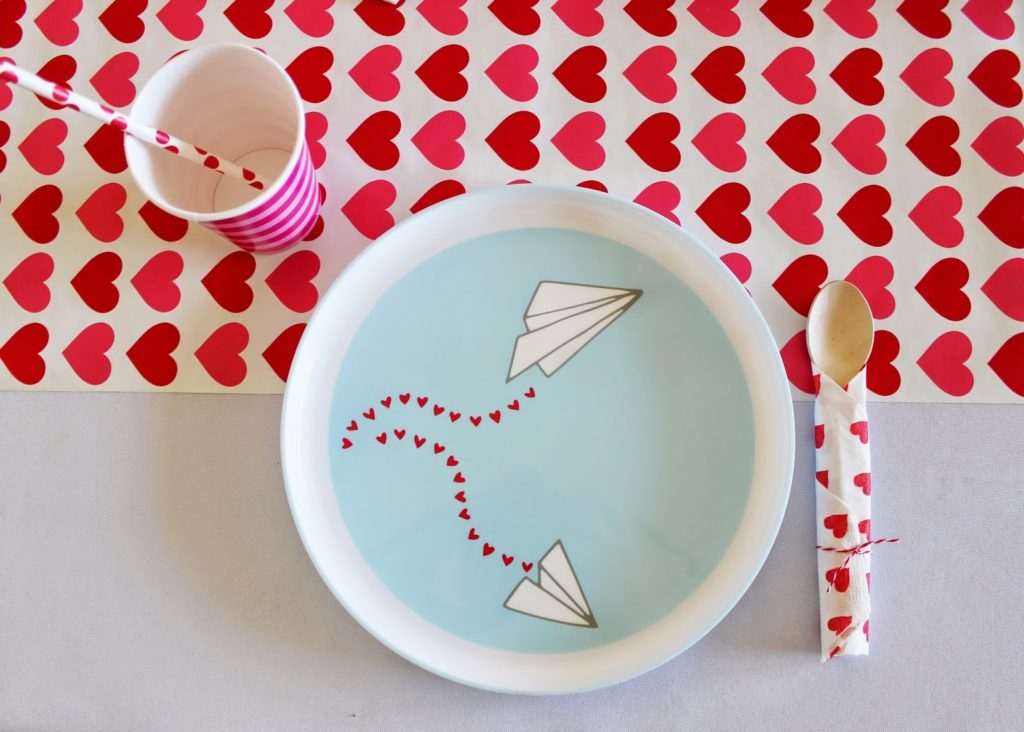
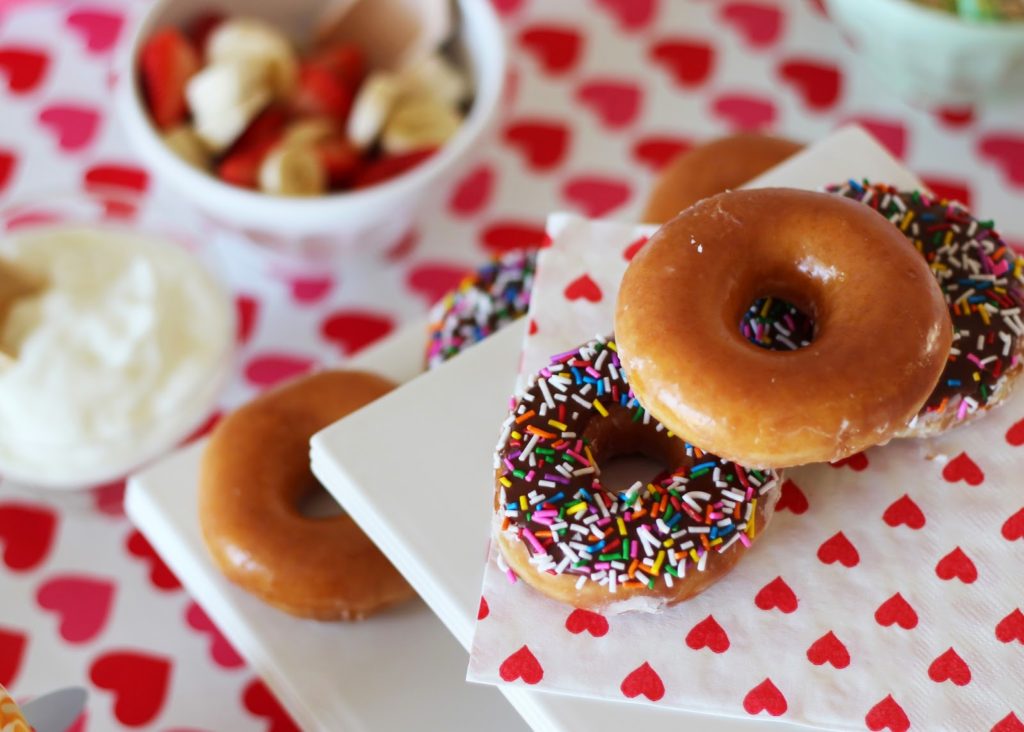
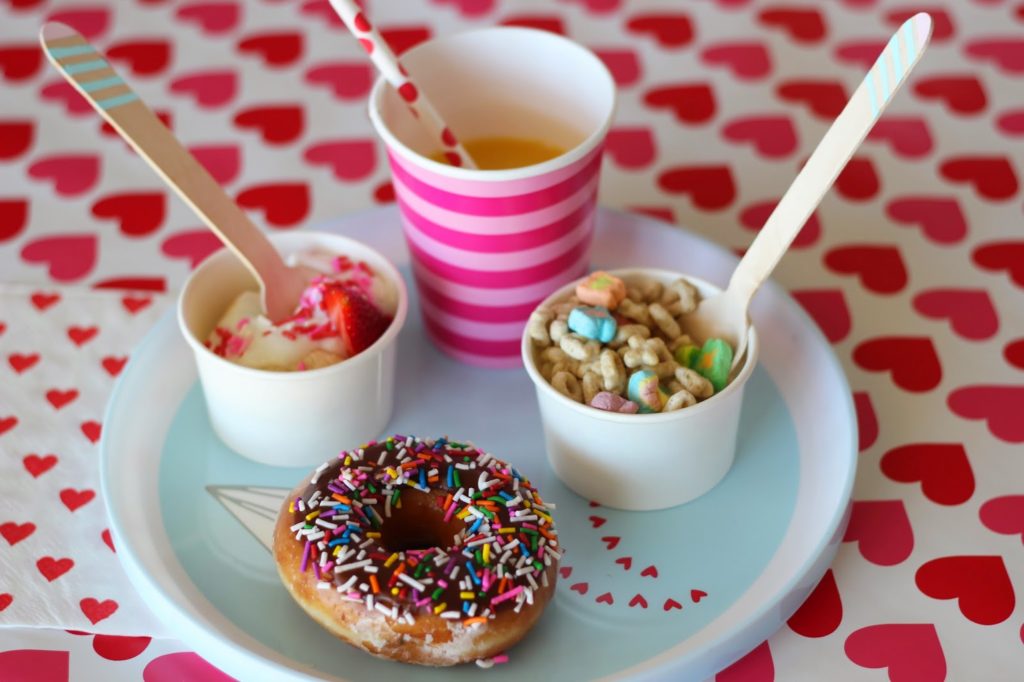
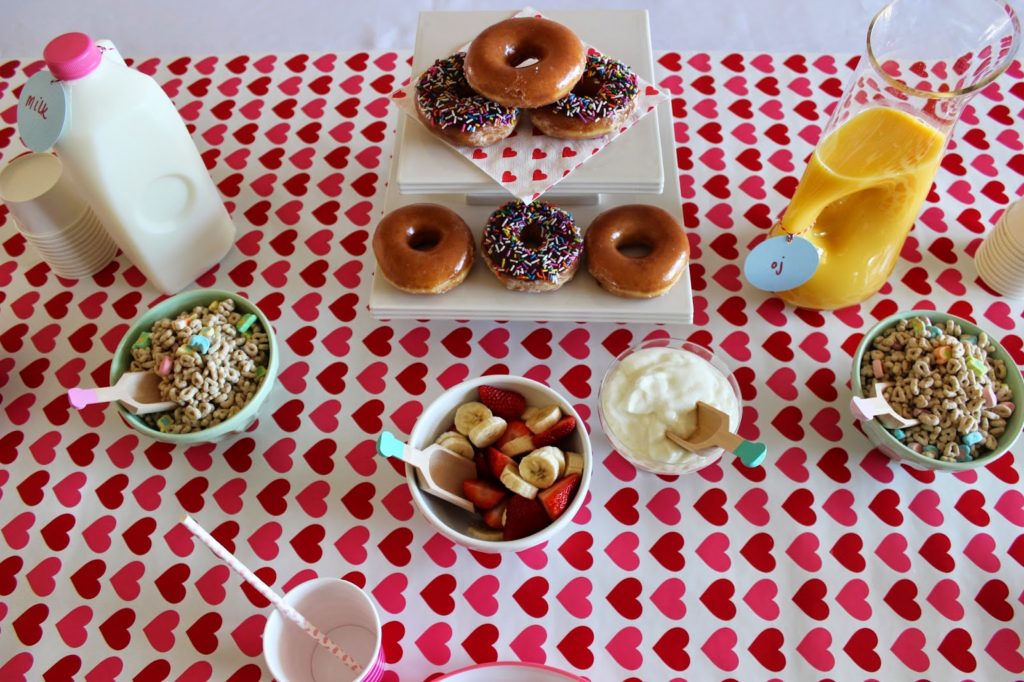
Gifts are FAB… don’t get me wrong, but just being loved on and served that day is the real winner. Leah and I love a super thoughtful card and a super delish brunch at the very least!! That is simple, right? We hope you all have a Happy Mother’s Day weekend! We love getting to know you all through blogging and Instagram. We truly love being mommies ourselves, and at the end of the day, we just want you to feel celebrated because you are freaking awesome!!!
XO!
  

MY OFFICE (SO FAR) + FREE PRINTABLE

You guys, I’m soooo excited that you’re not looking at crazy hoarder piles of crap all over my blah tan room right now! I’ve been slowly working on my office since we moved into the house, and I finally have a little work space that doesn’t stress me out! I’ll update you once I finish the rest of the office and my craft closet (weeeeeee!!!) but wanted to show you a peak! Scroll down for sources.
Also wanted to share this little free print I designed for my desk below.
I am constantly quoting Jessie Spano and thought I needed to include this in my office. Just to remind myself that I’m being ridiculous. “There’s never any time! I’m just so so… scared!”. I’m usually more of a Kelly Kapowski but lately I’ve been all about that crazy caffeine pill poppin’ mama.
Download printย HERE
This is my little inspiration wall. I have SO many more prints I’m coveting, so I’ll just continually add to it when I can. Absolutely love this black paint, Behr Broadway. It’s only on this accent wall while the rest of my office is white. The black is a chalkboard black- not too harsh, not too soft, juuuust right.
I kept this card (download HERE) for myself because it makes me smile and cringe all at once. Little pink hippo is a hoarder leftover from Ari’s party HERE.
SOURCES:
(click for links)
Black paint: Behr Broadway
Thanks for checking out my space! More to come (when I feel the motivation to organize… could be a while).
-L

KITCHEN REDO : BEFORE & AFTER

Yes, the very first bit of imagery you see in this post was how my kitchen looked at one time in my life. Embarrassing, but REAL. LIFE. I must say, the mess alone makes the “after” shot look pretty impressive. Haha!
Ok guys!! I feel like I teased you with a kitchen redo post many months ago. Theeeeeen, I got pregnant, L&L shop has bloomed so beautifully (and busily), and life in general brought us to a lot of roadblocks during this process. However, it is FINALLY done!!!
We started this process as a bit of a challenge! Could we actually do OUR OWN kitchen? on a budget? And paint our own cabinets? Would we totally screw them up? One day, we went and picked out cabinet paint colors just to keep for when we decided to actually got the guts decided to paint the first coat. Little did we know, it would be sooner than later. I think we went that week to buy our first gallon of primer. To be honest, there were MANY times that we wanted to quit during this process, but the good news is that…. you just can’t. Paying someone to finish what we started was just NOT an option.
Our best investment while doing this kitchen was buying a paint sprayer. After lots of research by my hubby, we decided on this one. It didn’t break the bank and it worked beautifully. It really makes your cabinets look like they are professionally done. My biggest tip to anyone taking on a project like this is to be patient, and go through all of the steps…. properly!! Anytime we got antsy and wanted to knock out two coats of paint in one night vs. one…. we hit the brakes and gave ourselves a pep talk. We just really didn’t want anything to set us back! I plan on posting a tutorial on how WE painted our cabinets soon. I promise!!
Ok, enough talk…. here is what our kitchen looks like now!
 ^^DIY cafe curtains HERE. ^^
^^ Barstools from Target, aaaaand they are on sale now! Also, we ended up just paneling out our island. We wanted it to look a little more custom, but didn’t want to rebuild an entire island. We were happy with the way it came out! ^^
^^ Pendant lighting from Ikea ^^

^^ Also, to stress ourselves the freak out cut costs, we opted for a concrete countertop for the kitchen island. We followed this tutorial. Let’s just pretend ours went just as smoothly as this tutorial makes it seem. Oooooook…. moving on….
 ^^ We found our subway tile online… Ebay to be exact! Home Depot had a $2/per tile price tag. No thanks! We ended up getting ours for roughly .50 per tile. We were able to do our entire kitchen for $100. ^^
 ^^ The marble and glass tile was a last minute call. We had purchased it at Habitat for Hummanity Restore months before we started this process. We thought we would use it in a bathroom or something. It costed us $1/sq ft., and it was the perfect focal piece we needed for behind the oven.
^^ You may have seen our open shelf styling post HERE. This still stands to be my favorite part of our kitchen redo. We simply bought corbels from Home Depot, stained them, and painted some slabs of plywood that my husband cut to size. Super simple DIY! ^^
Please comment and email us with any questions that you may need answered regarding a kitchen redo. We are no pros, but through trial and error, have learned a thing or two! We would be happy to share that knowledge!!
**All cabinet hardware was from Home Depot**
BE SURE AND ENTER OUR GIVEAWAY IF YOU HAVEN’T ALREADY!!! It ends today!!

DIAPER CAKE TUTORIAL

At every baby shower we throw, there’s always a diaper cake centerpiece (scroll down for more of our cakes)! Not only is it visually super fun, but it’s also the perfect gift for a new mama. We try to embellish the tiers and topper to match the theme of the party, and this one pictured above was from Jenni’s hip hop/concert themed baby shower we threw last weekend… working on that post… promise! Jenni’s always talked about getting baby Nike Dunks for her baby boy way before she even had Amara, so I knew the topper had to be these little kicks.
I’ve made all the mistakes for you and come up with my fail-safe way to make a 4-tiered spectacular diaper cake!
I’ve found TARGET BRAND diapers to be the best!! First of all, they’re great diapers. When I had Ari I insisted on Pampers swaddlers (they are super soft after all) but when Max was born, I just went to Target brand and they’re just as good and way cheaper. Aesthetically for a diaper cake, they’re the best, because they are plain white and nice and flat. Pampers are a little puffier and look messy on a cake. Still works though- scroll down to see previous diaper cakes.
I bought one small pack each of newborn, size one, and size two. It’s nice to give the mom a variety and it also looks really nice on the cake to have the tiers be different heights.
 My secret to the perfect shaped diaper cake is…. an oatmeal can inside! Yep, that’s how I get that nice round shape, it fills in the middle nicely, and it keeps all the tiers sturdy.
WHAT YOU NEED:
1 Oatmeal Can
LARGE Rubberbands
String (anything will do!)
About 75 diapers 
(see anatomy picture above for size variety)
Embellishment for tiers and topper
Cake Platter (mine is about 13″)
INSTRUCTIONS:
*Tip- make sure each diaper for each tier is facing in the same direction
4th TIER
Start with the largest size diaper for the bottom tier.
Place a large rubberband around the can and start sticking diapers in, layering about 2-3 inches. You want to overlap them evenly all around. Soon your rubberband will get super tight and break in your face and your diapers will fly everywhere and you’ll say a non-baby-shower-appropriate-word and you’ll need to reinforce this layer with a piece of string. (See, told you I’ve made all the mistakes for you!) Just tie loosely around this layer in a bow so that you can adjust the length as you add more diapers.
As you layer the diapers all the way around, tuck the last diaper underneath the first so that it looks continuous and clean. Tie TWO pieces of string around this layer, one on the top and one on the bottom of the tier. This keeps the shape.
This bottom tier (4th tier) will have TWO rounds of layers. So just start layering again on top of the first round of diapers, this time with a string to hold this layer unless you have a huge rubberband! Can’t tell you how many times I thought a rubberband was big enough and -snap-! Tie two pieces of string around the layer, one near the top and one near the bottom. You’ll cover these up with embellishment at the end.
3rd TIER
This is one layer of diapers all around, about 17 diapers in size 1. Tie two pieces of string around the layer, one near the top and one near the bottom.
2nd TIER
If you’re using the same size diapers and oatmeal can that I did, you’ll notice that there’s only about 2-3 inches of space left on the oatmeal can for the next tier. That’s not going to be sturdy enough to keep the clean, round shape of the tier. You’ll need to take 3 diapers and simply fold them each in half, stack them, and wrap 2 rubberbands around them. Place on the top of the oatmeal can, and now you’ll keep that 2nd tier more sturdy and not falling in on itself.
Wrap only 8 or so diapers around and spread the layers a little wider than before. This keeps the tier thinner than the previous tier. Tie two pieces of string around the layer, one near the top and one near the bottom.
1st TIER
Roll 4 newborn size diapers up and individually wrap with a rubber band. Bring these 4 together and wrap all 4 up with a rubberband. This is the center of the top tier which will keep the shape since you’ve run out of room on the oatmeal can. Put another large rubberband around these 4 and start tucking in your diaper layers. Wrap about 8 diapers around, tucking the last one behind the first for that continuous look. Tie two pieces of string around the layer, one near the top and one near the bottom.
 You can see each tier has the string tied around the top and bottom which keeps that nice straight shape.
Voila! You’re ready to decorate!
Lauren of Rock Paper Scissors printed these patterned strips of paper to match the invitations she designed. You could use thick ribbon or any type of paper (taped together into strips) to cover the strings and rubberbands.
 Don’t forget your cake topper!
Here are some of our earlier cakes to give you decoration ideas: 
Modern mint an neutral baby shower HERE.
 This was from Jenni’s baby shower for Amara almost 4 years ago! (HERE) This was one of my first diaper cakes, so I used colorful diapers, but I think it still turned out okay not being all white.
Lori’s stork-themed baby shower (HERE) These were Pampers diapers- see a little too puffy and not uniform enough for OCD me. For embellishment, I taped strips of kraft paper together, wrapped around each tier, and glued feathers on top.
Lauren’s Winter White Baby Shower (HERE). I loved this one! I used white silk ribbon so that everything was white…. can’t tell you how many people thought this was a real cake. They were super disappointed.
Please let me know if you have any questions on construction! It can be a little confusing! If you’re in Nashville, we can totally make this for you! Convo us on our Etsy shop or email us ๐Ÿ™‚
XO
-L

FEATURED: DEVAN’S WINTER WOODLAND NURSERY

She did it again! Our dear friend Shara (remember her Shark Party HERE?!) is blowing our minds with her son’s dreamy gray and aqua nursery. It is styled. to. perfection. We’ve been stalking gently convincing her to let us show her whole house! One day, Shara, one day…. mwahahahaha!

SHARA:
When I was pregnant with my second, I was so sure I was having a girl that I went ahead and bought crib bedding and started planning out a perfect baby girl nursery. I was just SURE. Halfway through my pregnancy at the big ultrasound, the tech waved her magic wand, paused, and then asked me if I still had the receipt for that bedding… I was having another boy! I was shocked and kind of in denial, so I decided I didn’t need to do up another room for baby boy – he would just share a room with his big brother once he was old enough to move out of the bassinet in my room. 
Fast forward to a month before my due date. The urge to nest suddenly kicked in haaaaaaard and I just HAD to have a nursery. Jenni had thrown me the most perfect “snowy sprinkle” baby shower (see it HERE), and I worked from that idea to create a gender-neutral winter woodland nursery. The room was already painted grey (Valspar’s โ€œCement”), so I left it as is and used that as my starting point. Anyone who has been to my house knows how much I love the color aqua, so I (unsurprisingly) decided on a grey/aqua/white color theme, accented by warmer tones here and there to keep it from being too matchy-matchy or cold. It took more than a year to finish up the room – I had my hands kind of full with two little ones! – but I think that the extra time allowed the room to evolve into something even better than I had originally visualized. Now itโ€™s one of my favorite rooms in the house!
PS. I never did return that girly beddingโ€ฆ itโ€™s packed away carefully in hopes that maybe one day my pretty pink nursery will become a reality ๐Ÿ˜‰


SOURCES:
Tree decals – WallDecorative
Arrows – Mineral and Matter
Feather mobile – DIY
Dreamcatchers – DIY
Bedding – skirt from Land of Nod, sheet & chevron knit throw from Target
Aqua book cart – Land of Nod
Rocking moose – Ikea
Polar bear blanket – Land of Nod
Polar bear โ€œskin” – eBay
Lamps – Target
Squirrel nightlight – Modcloth
Tree wood bead puzzle – Skip Hop
Bird mobile – Boon
Changing pad cover – Land of Nod
Curtains – Amazon (blackout lining added DIY)
Dresser, end table, book ledges – Ikea
“Things” organizer – Land of Nod
Grizzly bear wood block calendar – West Elm
Fox, raccoon and owl art – Sass and Peril
Antlers – White Faux Taxidermy
Clock – Target
Rocking bird – West Elm
Ceramic fox figurine and white fox speaker – Target
Moon globe – Urban Outfitters
Marquee arrow light – Target
Forest Love screen print – Sass and Peril
Young & Brave print – Billy and Scarlet
Paper deer – Template from French Melody
Name letters – DIY
Woven baskets – Walmart, spray painted teal
Owl vase – Target

BABY BOY NURSERY + VALENTINE GIVEAWAY (GIVEAWAY CLOSED)

My husband and I literally just dreamt up what we would like to see in our baby boy’s nursery a few days ago. We are in the process of getting our house ready to put on the market possibly, and since we are going through and taking things down, painting everything neutral and not really taking too many risks decor wise, I felt like I had NO freedom to do what I really wanted to do. 
It has actually occurred to me that what I love fits right in with our neutral colors and my husband’s ban on wallpaper. I love the idea of a woodland/under the stars kind of feel in the room. I also put my own personal ban on the use of gold….. silver tones have been calling my name.
My husband brought home a print that he picked up when he was traveling ( the Wonder print), so I kind of just started there. I love that he picked something out on his own and brought it home ;).
mobile / zinc monogram – Michael’s craft store / wonder print / moon print / giraffe / lamp / crib
arrows – found on etsy, but no longer available, so on the search for something similar / rug / accent table / dresser / ottoman / industrial bins
GIVEAWAY….
ALSO…… WE WANT TO SPREAD THE LOVE!! Leah and I are giving away goods from our Valentine’s Day party from this post. A party in a box if you will! Then, you can host your own little breakfast/ Valentine decorating soiree for your little and their friends!
Comment below and tell us your favorite Valentine’s Day memory or tradition. That. is. it! The box contains the following items:
– 2 mini mailing tubes (purchased at Michaels if you want to add more)
– custom mailing labels
– 4 children’s plates
– 8 red and white heart napkins
– 6 pink striped cups
– 4 hand painted mini scoops
– 8 mini ice cream cups (used for cereal)
– 6 paper straws with mini pink hearts
– “You’ve got Mail” banner
– 8 mini paper airplanes on twine
– fiber fill for clouds
– 3 handmade heart “globes”
Amanda!! You are our winner! Thanks for entering everyone! 
xo
                       

VALENTINES DAY BREAKFAST AND CRAFTING FOR LITTLES: YOU’VE GOT MAIL!

Here is a simple Valentine’s Day breakfast and card making morning for your littles! We picked up most of these goodies from Target and Michaels Craft stores- just goes to show you what you can create with store bought items and just a touch of DIY.
Scroll down to the bottom for a DIY on this simple heart ornament.
We used fiber fill for the clouds and used THIS tutorial for the paper airplanes.
Straws, cups, plates, and napkins from Target.
Wooden scoops by US! Convo us on ETSY to purchase!
Michaels Craft store had the banner blank- we just added letters! We rummaged through our craft drawers and found lots of card-making supplies for the kiddos.
Fill mini shipping tubes from Michaels with crafting supplies! 
Download “Special Delivery” labels HERE.
Have your littles decorate mailbags – tutorial HERE.
HEART ORNAMENT TUTORIAL:
First make a heart template: fold a piece of paper in half, cut out half of a heart shape. When you unfold it, it should be a symmetrical heart. Fold colorful paper strips in half, fold your template in half and trace on the folded paper strips. (All of the hearts need to be the same size for this to work). 
 Use double stick tape to put the hearts together back to back. We used 6 or 7 hearts per ornament.
Stop half way through to tape the string in the middle.
Voila!
We hope you and your littles have a SWEET and fun Valentine’s Day breakie!

FEATURED: GEORGE + HENRY’S SHARED TODDLER ROOM

Can we say “perfection”? Tamie, mommy to George and Henry, created a black and gold oasis for her boys that we can’t stop staring at…. or wishing that we could have a sleepover in. Is that weird?
 We truly feel like simplicity wins in this particular space. A basic color palette, minimal (but meaningful) artwork, soft white walls, and no clutter is definitely the way to go in our book. We are going to quit blabbing so that you can tour this space already. Scroll down for sources.
TAMIE: I’m from the Black Hills in South Dakota. This room is a nod to where I grew up. Gold mining was huge, and my great uncle actually built, owned, and ran his own gold mine for years. The Stand By Mine was an iconic piece of architecture until it had to be torn down. Everyone in my family was either directly or indirectly involved in supporting the industry.
TAMIE: I’m not someone who can go to a thrift shop and refinish a dresser. I don’t have that skill set. I knew I wanted something more substantial than what a big box store could offer (two little boys CLIMB!) and that meant something mid century and sturdy. The dresser is stout and was half the cost, including white glove delivery, than major retailers. It’s perfect. And those pulls? Forget it, I’m in love.
Photographs are printed from Prinstagram and affixed with gold washi tape.
SOURCES:
(links in bold)

G & H Wall Letters: Land of Nod
Bedside Table: Pottery Barn
Clock: Kit Cat Clock (the first time I saw Henry he was swaddled and his eyes were darting around the room checking everything out, I immediately thought of the clock!!)
Dresser lamp: Target
Gold lamp: Target
Mirror: Target
Rug: IKEA
Silhouettes: Disney world souvenir
Dresser: Etsy
“I love my family” Print: Etsy
”Be you bravely” Print: Etsy
Quilts: Etsy
Box spring cover: West Elm
Photographs are printed from Prinstagram and affixed with gold washi tape
Paint: Benjamin Moore Tundra (walls), Day’s End (in chalkboard paint on the ceiling), Modern Masters Gold Rush (ceiling border)
Stunning job, Tamie! All of your hard work certainly paid off. We know George and Henry will have many adventures in this room!
xo

PREPARING A GUEST ROOM

Is there really anything better than walking into a hotel room ( or whatever kind of accommodations you have made) when on vacation or a business trip of some sort? Clean sheets, fresh towels, beautiful flowers….. I die for them all! A hotel room, with a beach cottage feel, is exactly what my husband and I wanted our guest room to feel like for friends and family that come to stay with us. Whether it be for a night or a couple of days, I still prep the same.
Our dear friends, who are also newlyweds, came to stay with us for a night after a party we all attended  near our home this past weekend. The sole reason we have a house with more rooms than we need is to be able to open our home up to people. It is a passion of ours to be able to bless people that way. When they ask, we say “yes!” I took some time to shoot the room to show how I set up for these occasions. 
Everything in this room ( excluding the duvet cover and sheet set) has either been handmade, or purchased at an extreme discount!! You can completely make a beautiful space on a dime. 

We tend to call this room our “California room”. California is a special place to us because it is where my husband is from, and also where we were married. I found “vintage” San Francisco prints at Goodwill and framed them with clearanced Target frames that I spray painted white. The wooden San Diego print was a gift from my husband. Also, the chair was a thrift find that I spray painted and covered in fabric during our first year of marriage….. 7 years ago.
I love keeping a pen and pad by the bed. Most of my thoughts come to me at night, so I assume the same for my guests I suppose. Ha! Lamp, table and golden crab were clearance finds from Target.
Sconces were handmade by my dad. Love them!
We made our headboard using a drop cloth from Lowe’s.
The navy and ivory Pottery Barn pillows were given to us along with a couch that was given to us when we first moved into this house by some super sweet friends. We have held on to them and I added the duvet, sheet set and ikat pillows (clearance find) from Target.
I handmade a little monogram tag and attached it to a fresh bottle of water for our guests when they arrived. Saves them from making a trip downstairs, especially in the middle of the night if they get thirsty. My husband handmade this console table with hairpin legs from hairpinlegs.com and a piece of wood from Lowe’s.

A little gold dish for jewelry, coins or any other pocket items…

 End table was a $30 clearance find at a furniture store several years ago.
 Magazines are always a good thing to have stacked up!
 Shell from Target (clearance)

Curtains are old ( and quite short for my taste) clearance finds from West Elm, but they still work for now, and I have always loved the subtle pattern on them.
Hope this inspires you to create a little oasis for yourself or your guests somewhere in your home.
Sweet Dreams!
-J

FATHER’S DAY PARTY

Hey father lovers!! We are getting ready for a little mini Father’s Day grilling session at our house this weekend! We are having a few friends over, so of course I have to do a LITTLE decorating! I put together a little style board of all the things you need for a fabulous (but manly), low-key outdoor celebration. The best part is that most of these items are DIY or printable, which makes it all the easier on us mamas. Sometimes, even Leah and I like to take a break from “creating” and partake in a little printable fun….. thanks to our fellow creative bloggers.
flags / mixers / speaker / card / poster / plates – Target dollar section / liners (also a gingham pattern in Target dollar section) / wrap / labels / banner
We sure are grateful for our baby daddies! Whoever it is that you celebrate on this day….. celebrate him well.

SPRING FASHION WEEK: DATE NIGHT

It’s “fashion week” here at Love & Lion. We are dedicating all of our posts to Spring looks that we are loving right now.
I love patterned pants…. like LOVE them! I bought this pair of 7 for All Mankind skinnies last season, and they feel like leggings. They are also my hubby’s favorite! Who doesn’t want to wear something that their husband compliments a little more? This is my perfect date night outfit right now. I love it! I am all about nudes right now, so I chose to pair this with a nude lip  (Maybeline’s baby lips is my favorite right now) and a copper eye (from the Naked Pallet 2)

top / jeans (very similar here) / sandals (from Target, but couldn’t find online. Another cute option here / 
thick gold bangle / blue stone bangle / clutch /, watch, earrings, citrine stone ring and other stacking bracelet are old/ boutique purchases.
Photo cred: Gabriel Patillo
XO!
-J

STYLED: ENTRY WAY

My husband is not touring these next couple of months, which means he is HOME and I am putting him to WORK! Lots of things get left undone when he is away, so we have a lot of catching up to do. We are currently in the process of ridding our walls of the flat builder’s paint that has been here since we moved in, and painting them in Behr’s lovely “Chocolate Froth”. It is a lot of work, but so worth it! I absolutely LOVE this color! We painted our guest room with this color, and I knew immediately that I wanted it in every other room in our home! 
We are currently working on our entry way, which is (by default) part of our living room. I put together a little inspiration board of things I have pinned over time or recently purchased for this little space. I am  mostly excited about wrapping a parsons console table in fabric or grass cloth. Leaning towards grasscloth. Have you ever tried a project like this? I am curious to know any tips you may have!
-J