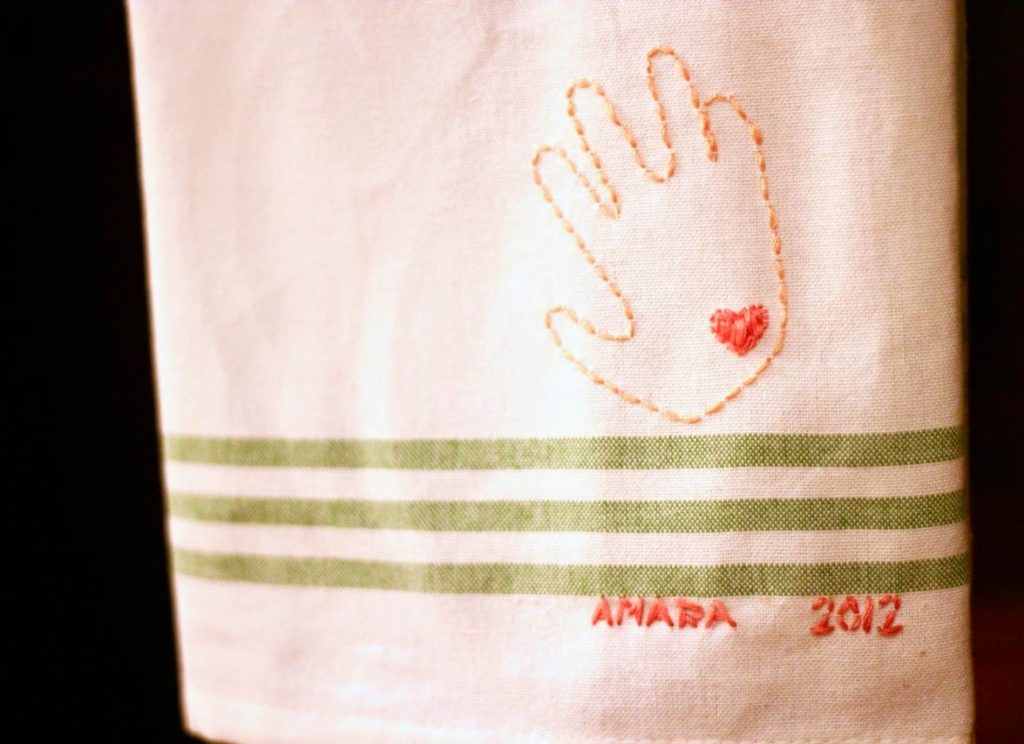
tutorial

DIAPER CAKE TUTORIAL

At every baby shower we throw, there’s always a diaper cake centerpiece (scroll down for more of our cakes)! Not only is it visually super fun, but it’s also the perfect gift for a new mama. We try to embellish the tiers and topper to match the theme of the party, and this one pictured above was from Jenni’s hip hop/concert themed baby shower we threw last weekend… working on that post… promise! Jenni’s always talked about getting baby Nike Dunks for her baby boy way before she even had Amara, so I knew the topper had to be these little kicks.
I’ve made all the mistakes for you and come up with my fail-safe way to make a 4-tiered spectacular diaper cake!
I’ve found TARGET BRAND diapers to be the best!! First of all, they’re great diapers. When I had Ari I insisted on Pampers swaddlers (they are super soft after all) but when Max was born, I just went to Target brand and they’re just as good and way cheaper. Aesthetically for a diaper cake, they’re the best, because they are plain white and nice and flat. Pampers are a little puffier and look messy on a cake. Still works though- scroll down to see previous diaper cakes.
I bought one small pack each of newborn, size one, and size two. It’s nice to give the mom a variety and it also looks really nice on the cake to have the tiers be different heights.
 My secret to the perfect shaped diaper cake is…. an oatmeal can inside! Yep, that’s how I get that nice round shape, it fills in the middle nicely, and it keeps all the tiers sturdy.
WHAT YOU NEED:
1 Oatmeal Can
LARGE Rubberbands
String (anything will do!)
About 75 diapers 
(see anatomy picture above for size variety)
Embellishment for tiers and topper
Cake Platter (mine is about 13″)
INSTRUCTIONS:
*Tip- make sure each diaper for each tier is facing in the same direction
4th TIER
Start with the largest size diaper for the bottom tier.
Place a large rubberband around the can and start sticking diapers in, layering about 2-3 inches. You want to overlap them evenly all around. Soon your rubberband will get super tight and break in your face and your diapers will fly everywhere and you’ll say a non-baby-shower-appropriate-word and you’ll need to reinforce this layer with a piece of string. (See, told you I’ve made all the mistakes for you!) Just tie loosely around this layer in a bow so that you can adjust the length as you add more diapers.
As you layer the diapers all the way around, tuck the last diaper underneath the first so that it looks continuous and clean. Tie TWO pieces of string around this layer, one on the top and one on the bottom of the tier. This keeps the shape.
This bottom tier (4th tier) will have TWO rounds of layers. So just start layering again on top of the first round of diapers, this time with a string to hold this layer unless you have a huge rubberband! Can’t tell you how many times I thought a rubberband was big enough and -snap-! Tie two pieces of string around the layer, one near the top and one near the bottom. You’ll cover these up with embellishment at the end.
3rd TIER
This is one layer of diapers all around, about 17 diapers in size 1. Tie two pieces of string around the layer, one near the top and one near the bottom.
2nd TIER
If you’re using the same size diapers and oatmeal can that I did, you’ll notice that there’s only about 2-3 inches of space left on the oatmeal can for the next tier. That’s not going to be sturdy enough to keep the clean, round shape of the tier. You’ll need to take 3 diapers and simply fold them each in half, stack them, and wrap 2 rubberbands around them. Place on the top of the oatmeal can, and now you’ll keep that 2nd tier more sturdy and not falling in on itself.
Wrap only 8 or so diapers around and spread the layers a little wider than before. This keeps the tier thinner than the previous tier. Tie two pieces of string around the layer, one near the top and one near the bottom.
1st TIER
Roll 4 newborn size diapers up and individually wrap with a rubber band. Bring these 4 together and wrap all 4 up with a rubberband. This is the center of the top tier which will keep the shape since you’ve run out of room on the oatmeal can. Put another large rubberband around these 4 and start tucking in your diaper layers. Wrap about 8 diapers around, tucking the last one behind the first for that continuous look. Tie two pieces of string around the layer, one near the top and one near the bottom.
 You can see each tier has the string tied around the top and bottom which keeps that nice straight shape.
Voila! You’re ready to decorate!
Lauren of Rock Paper Scissors printed these patterned strips of paper to match the invitations she designed. You could use thick ribbon or any type of paper (taped together into strips) to cover the strings and rubberbands.
 Don’t forget your cake topper!
Here are some of our earlier cakes to give you decoration ideas: 
Modern mint an neutral baby shower HERE.
 This was from Jenni’s baby shower for Amara almost 4 years ago! (HERE) This was one of my first diaper cakes, so I used colorful diapers, but I think it still turned out okay not being all white.
Lori’s stork-themed baby shower (HERE) These were Pampers diapers- see a little too puffy and not uniform enough for OCD me. For embellishment, I taped strips of kraft paper together, wrapped around each tier, and glued feathers on top.
Lauren’s Winter White Baby Shower (HERE). I loved this one! I used white silk ribbon so that everything was white…. can’t tell you how many people thought this was a real cake. They were super disappointed.
Please let me know if you have any questions on construction! It can be a little confusing! If you’re in Nashville, we can totally make this for you! Convo us on our Etsy shop or email us 🙂
XO
-L

NAP TIME PILATES WORKOUT!

If you know me at all, you know I’d rather do anything than work out. It’s tied with cleaning the house. Actually Jenni and I are both averse to expending more energy than it takes to chase our kids around. We’ve been saying, who has the time to work out? 
Fortunately for us, my good friend, Kelly Simmons, is a Pilates instructor and health coach (and I don’t even hate her… I adore her actually). Kelly has come up with a 10-30 minute workout, easily accomplished at your kids’ nap time- like in your bedroom, bra optional! That’s the most I can deal with right now, ya know? The beauty of this workout is that you can do it anywhere at any time! No getting sweaty, no gym equipment, nothing. This whole workout was done in the corner of my bedroom- see, you can do this anywhere! I even do some of these exercises in the play room with my kids! 
If you’re in the Nashville area, be sure to scroll down to the bottom of the post for all of her contact info and social media! She’s THE BEST. Check out Kelly’s gorgeous site HERE.
KELLY:
These exercises are perfect for an at-home workout, and can be completed quickly—in less than 10 minutes, or could be expanded for a full 30-minute workout. 
WALK OUT PLANK
Full body move that’s great as the first and/or last exercise in your workout.

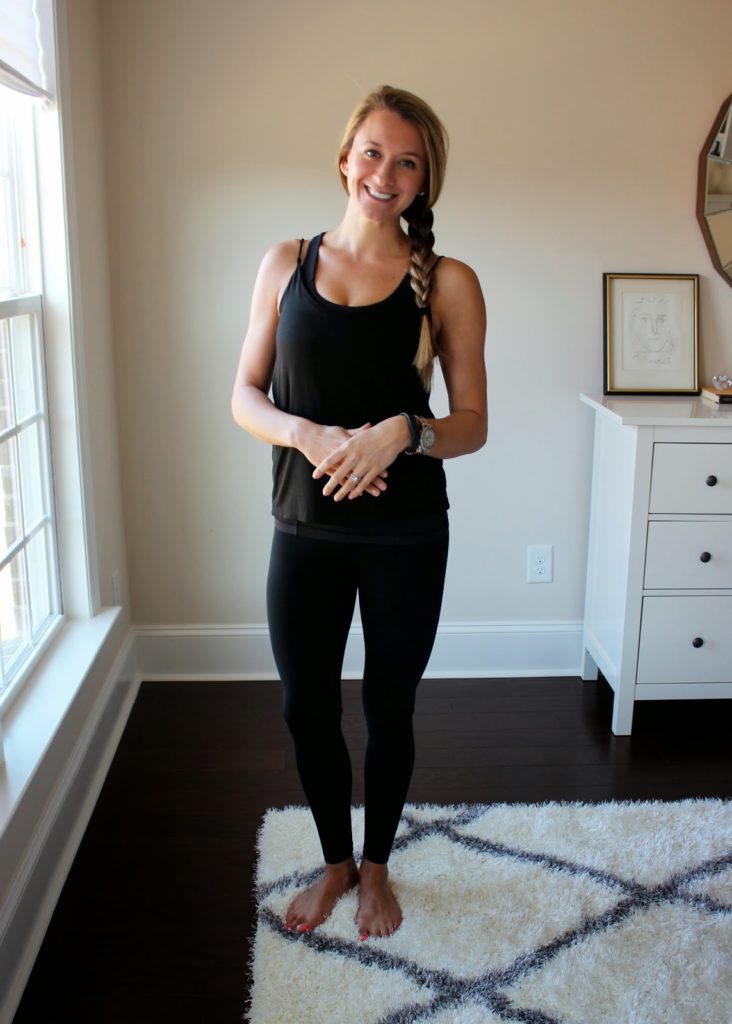
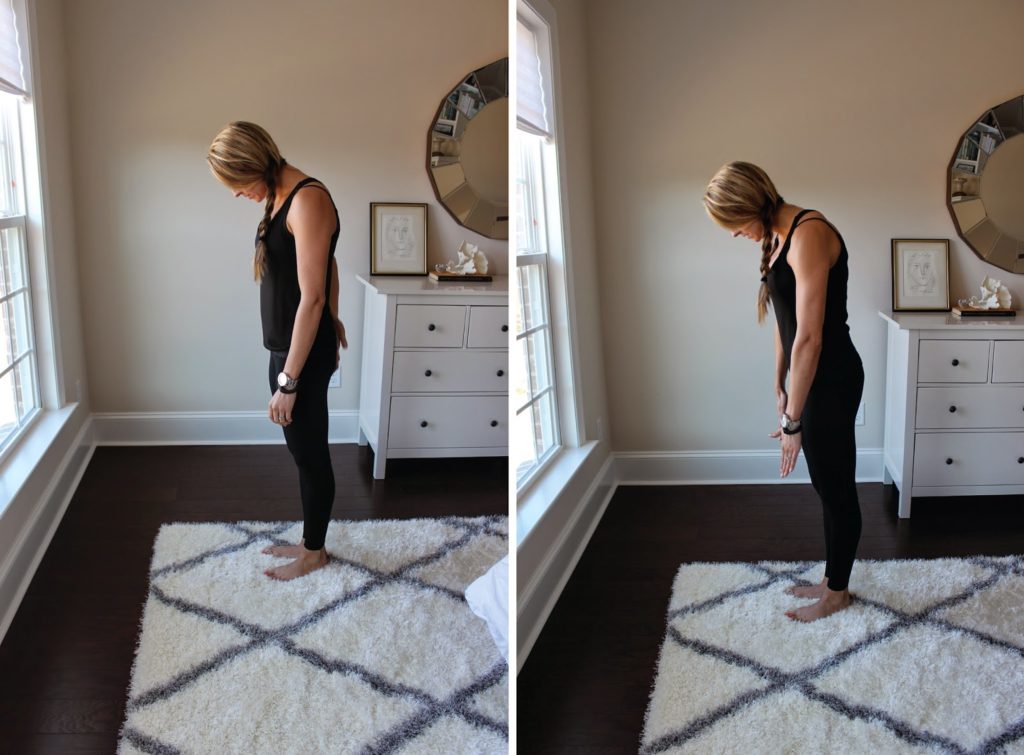
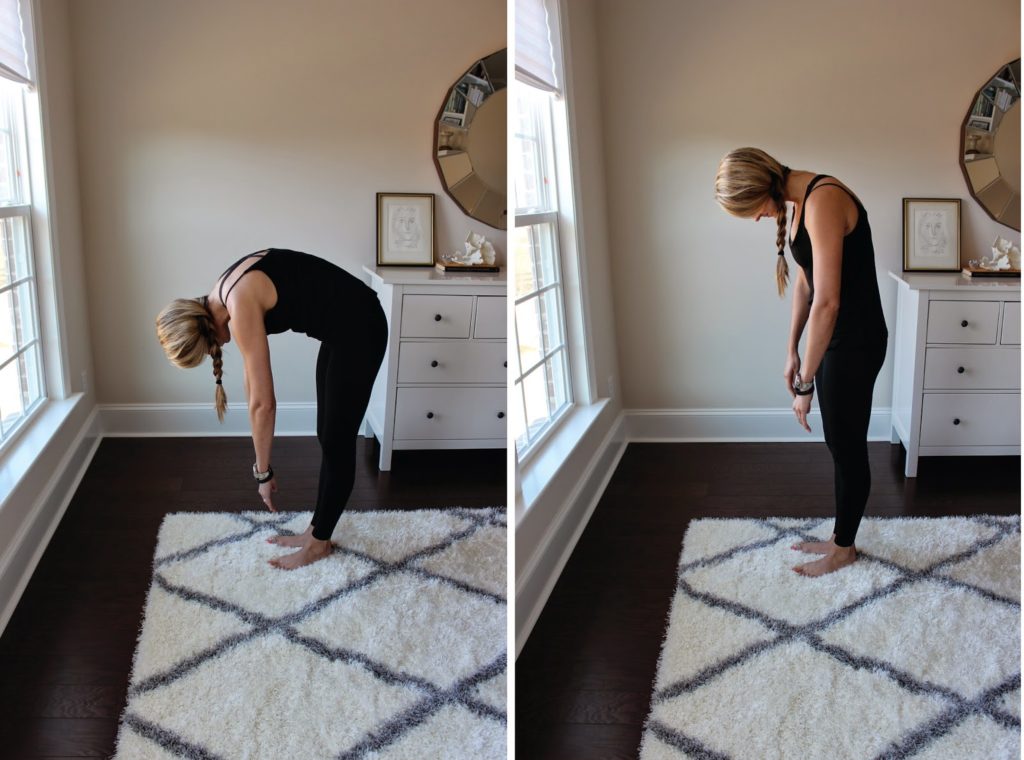
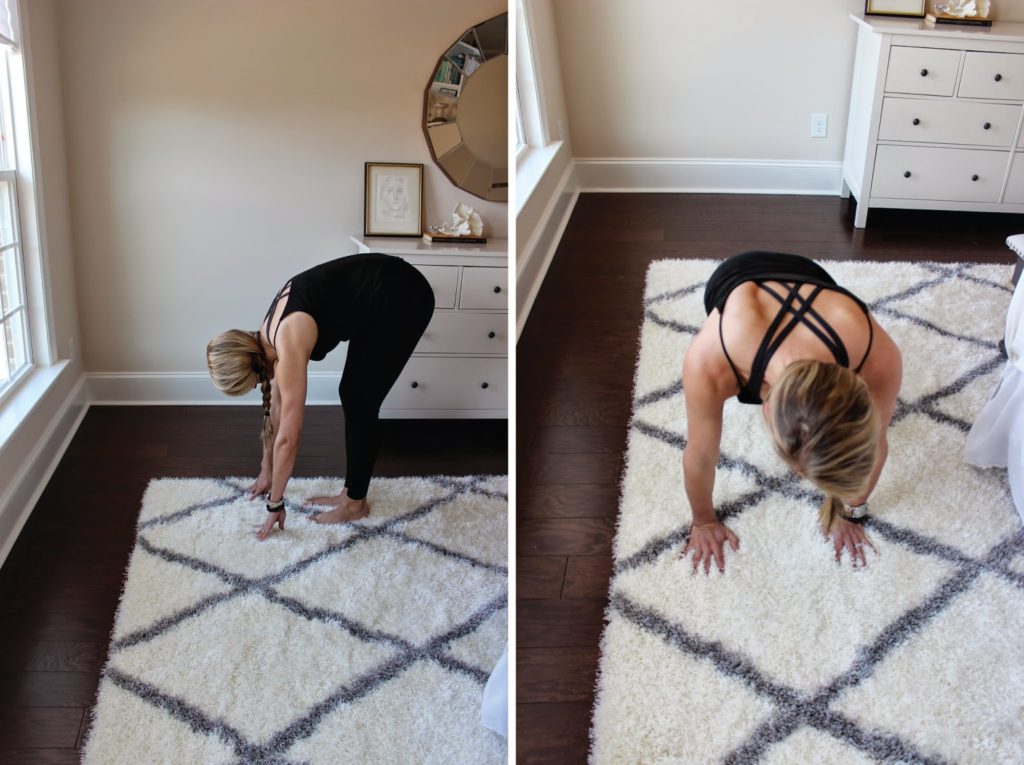
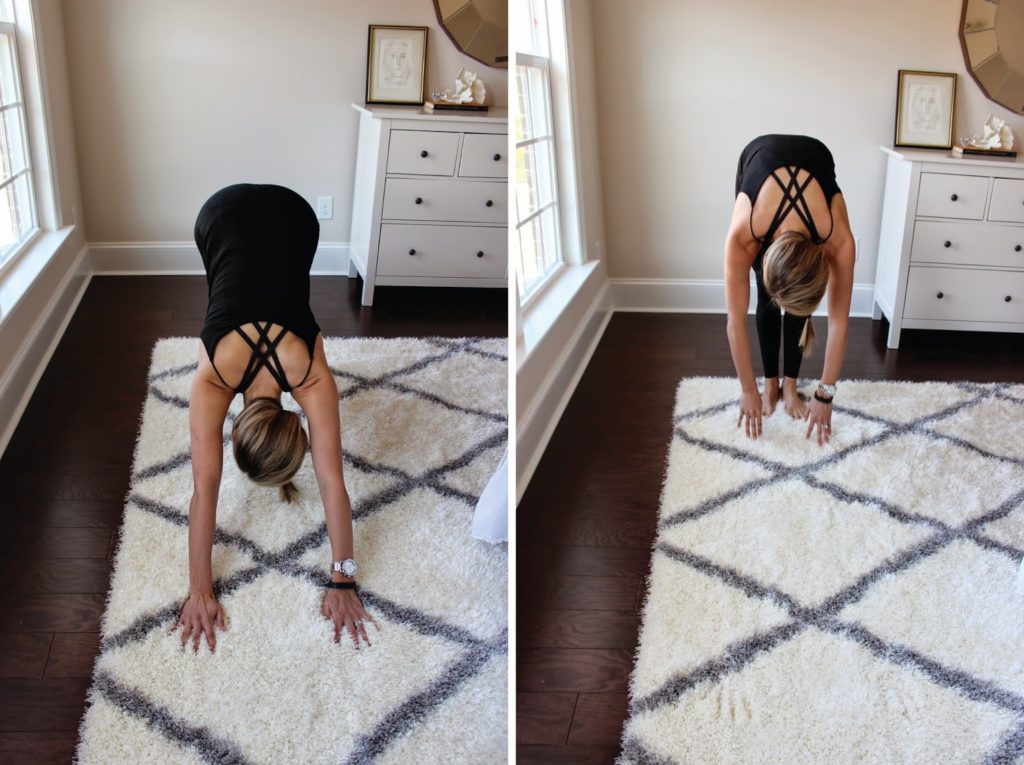
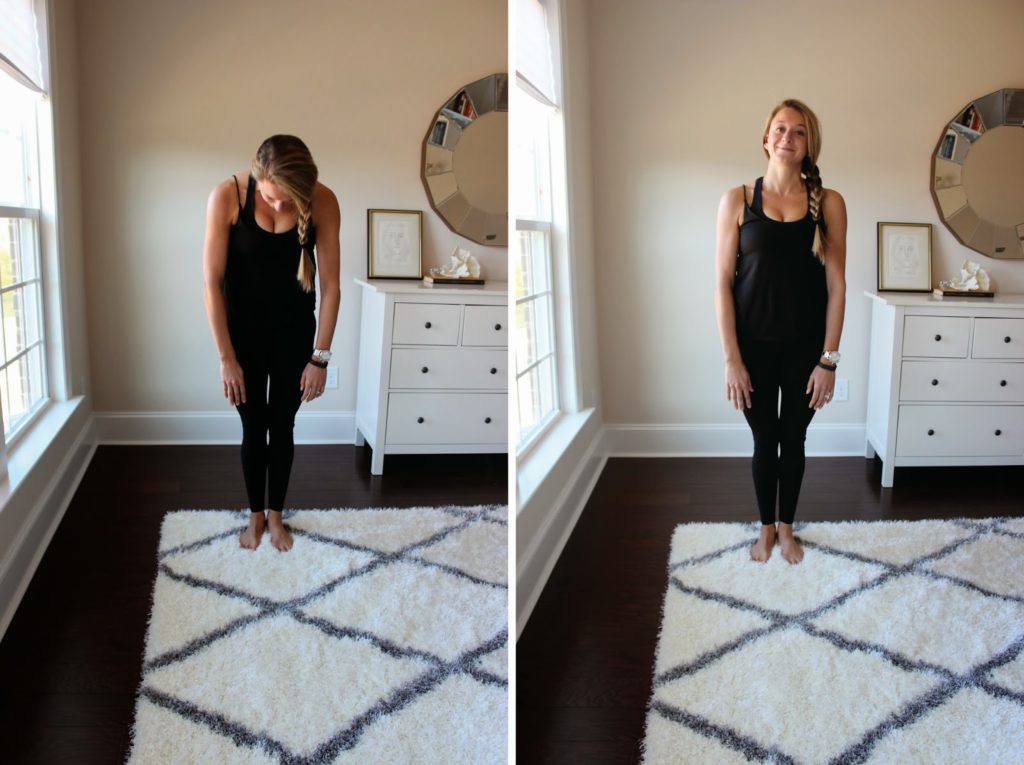
Start in a standing position, arms hanging by your side. Nod chin to chest, round the upper body over the waist, pulling the ribs up to the ceiling. Come back to a tall back by re-stacking the spine. The neck and head are the last to come up. Repeat. 

On the last repetition, roll all the way down, place your hands on the floor (bend your knees if needed) and walk out to a plank position. Hold the plank position for a few deep breaths, then go into a downward dog stretch and then back to the plank. 
More difficult: add push-ups. 
Reps/sets: 2-3 roll downs, 3-5 walk out planks/downward dog stretches.

TOE TAPS
This move targets the abdominals, but your arms and legs will also get involved.

Lie on your back, arms by your side, fingers reaching towards your toes. Bring your right knee to a “table-top” position (knee in line with the hip, shin parallel to the mat). Keep the 90 degree bend behind your knee and lower your toe toward the mat. Lower as far as you can while keeping your ribs pressed into the mat. Switch legs. Then, bring knees together and lower both legs together.

More difficult: Add the arms– with straight arms, reach behind you as lower your toes.

Reps/sets: 5-10 reps on each side, 5-10 reps with both legs.

CAT COW STRETCH
This is a great stretch that prepares your powerhouse for the next move.

Come into an all-fours position (hands under shoulders and knees under hips).

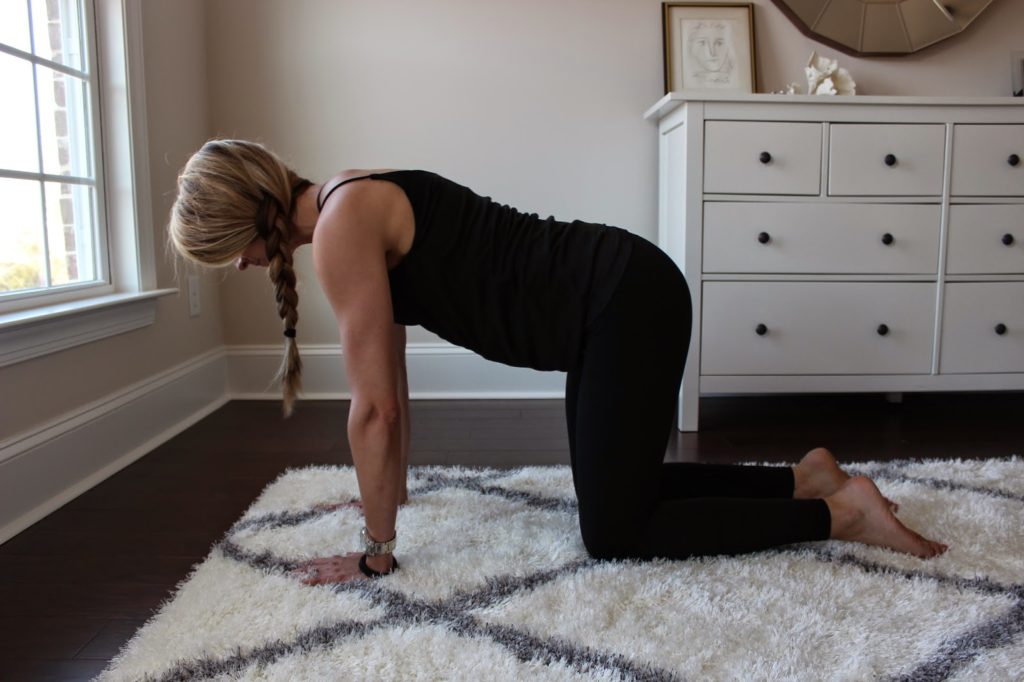
Lift ribcage high to the ceiling, tucking the tailbone under.

Then, reverse– drop ribs down, press tailbone into the air.

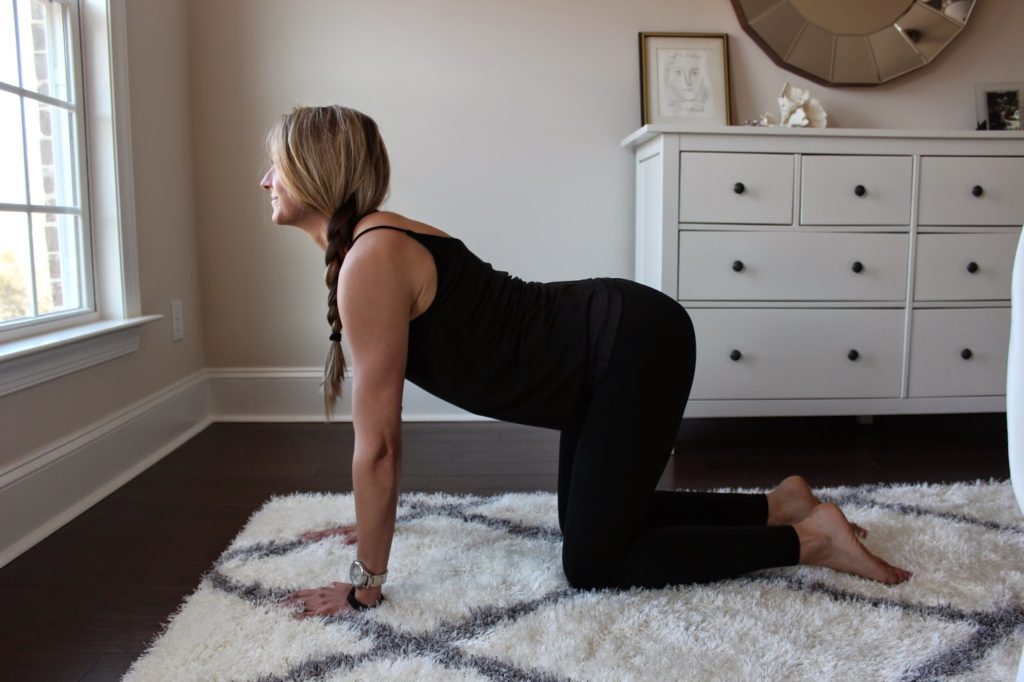
Reps/sets: 5-10 sets (1 set = 1 cat and 1 cow)

BIRD DOG
This is a balance challenge and also works back, abs, glutes, hammies.

 Stay on all fours, weight balanced evenly across shoulders and hips, with the waistline cinched up. Stay in steady, balanced “table” position, and reach one leg out behind you, hip height. Take a couple deeps breaths. Switch legs. Repeat.

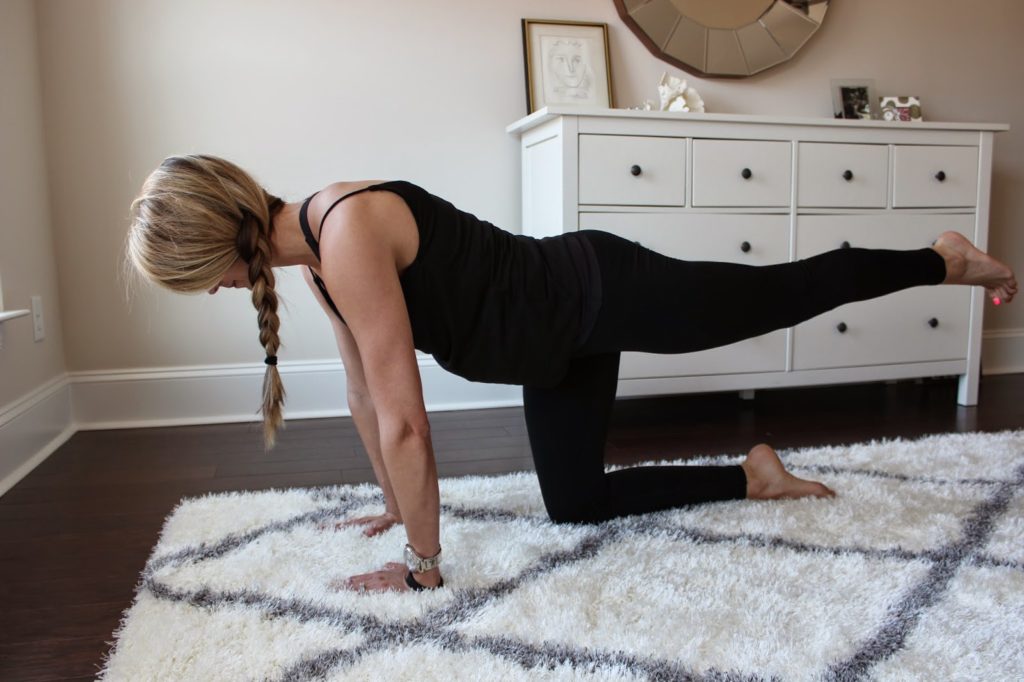
Do arms (one arm out at a time, repeat).

Then, lift one arm and the opposite leg.

See-saw the arm and leg, keeping the powerhouse strong.

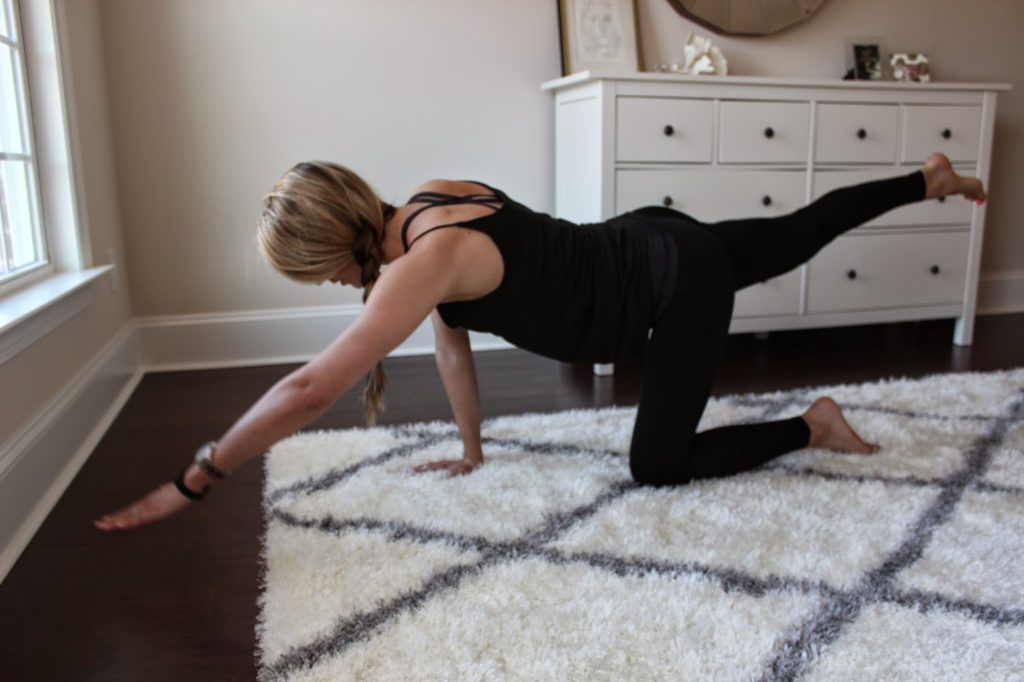
More difficult: bring opposite elbow to opposite knee.
Reps/sets: 2-3 reps of lifting each leg and arm, 5-10 see-saws.

SAW
Strengthen your abdominals and back with this rotation exercise that will also make you feel taller.

Sit on your sits bones, arms in a “T”, legs mat-with apart, knees lightly bent and feet flexed.

 Sit tall, twist from the ribs, reach over the thigh to “saw” off the pinky toe with the pinky finger.
Come up to vertical in the twist, then unwind through center. Repeat on opposite side.

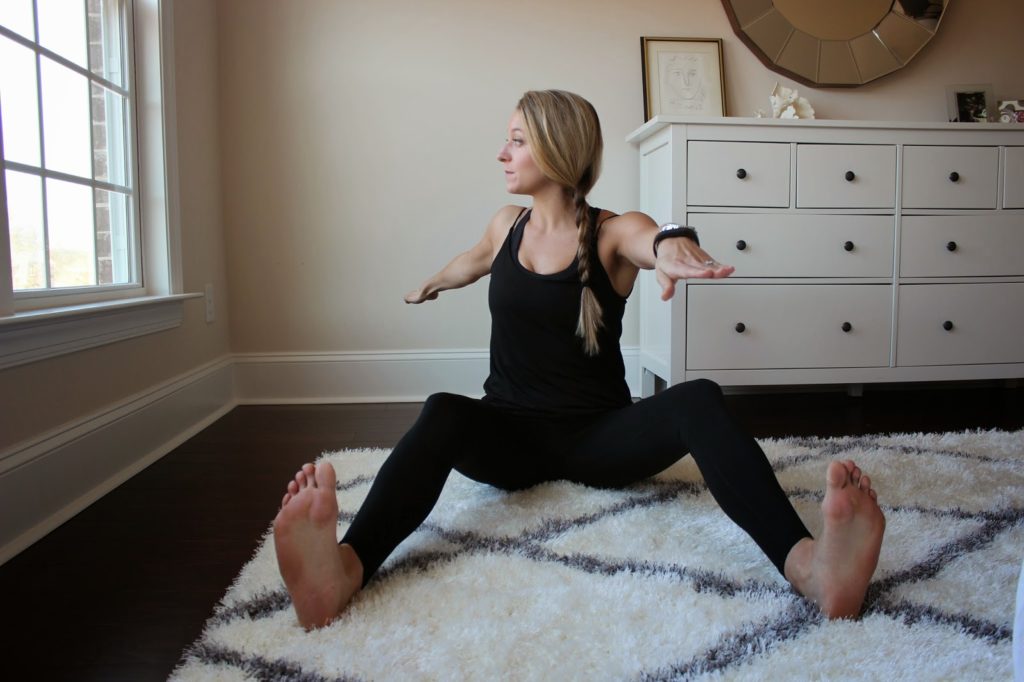
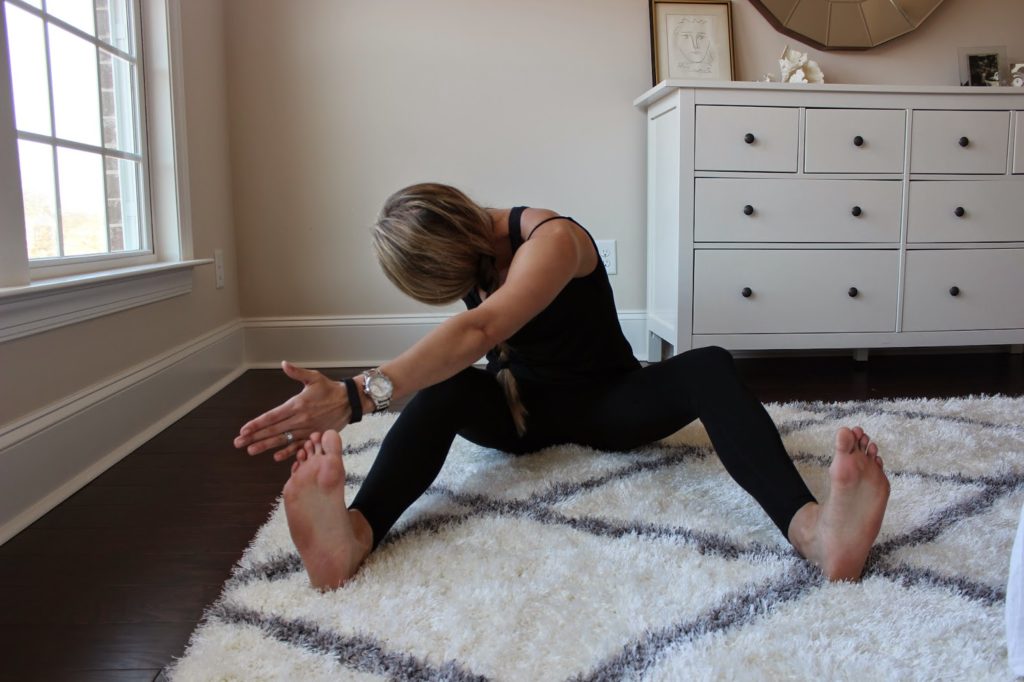
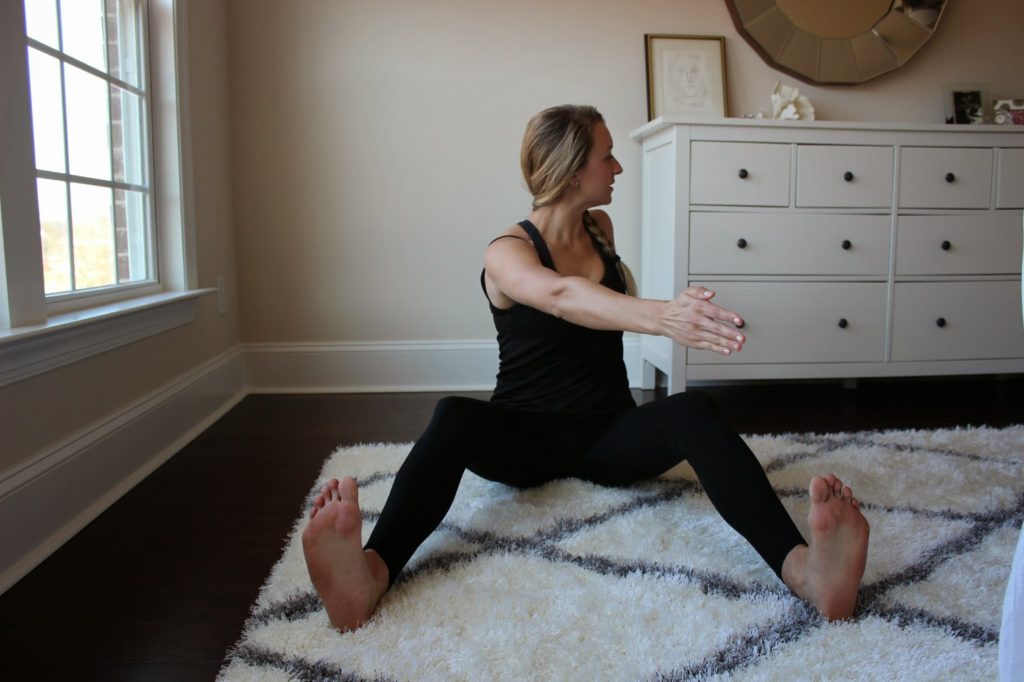
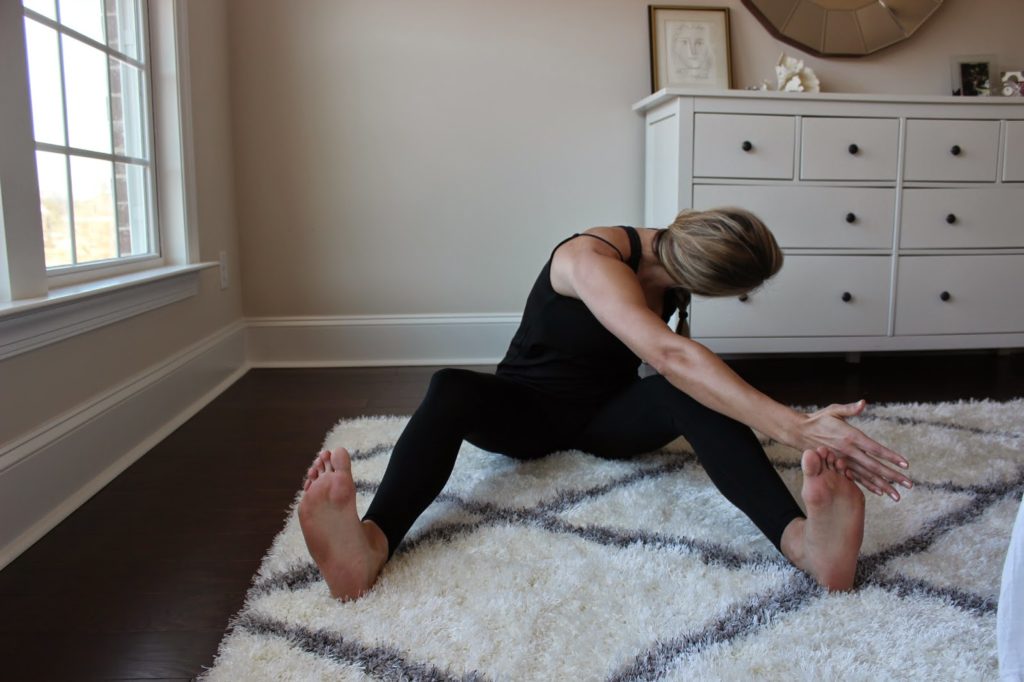
Reps/sets: 3-5 sets).

SWAN
You may not feel as graceful as a swan as you do it, but this exercise is excellent for improving posture.

Lie on your stomach, legs together, all ten-toe nails on the mat. Make a pillow with your hands—palms down, one hand over the other. Put your forehead on your hands.

Lift your abdominals off the mat. Hover your head and shoulders a few inches off the mat and hold for a breath. 

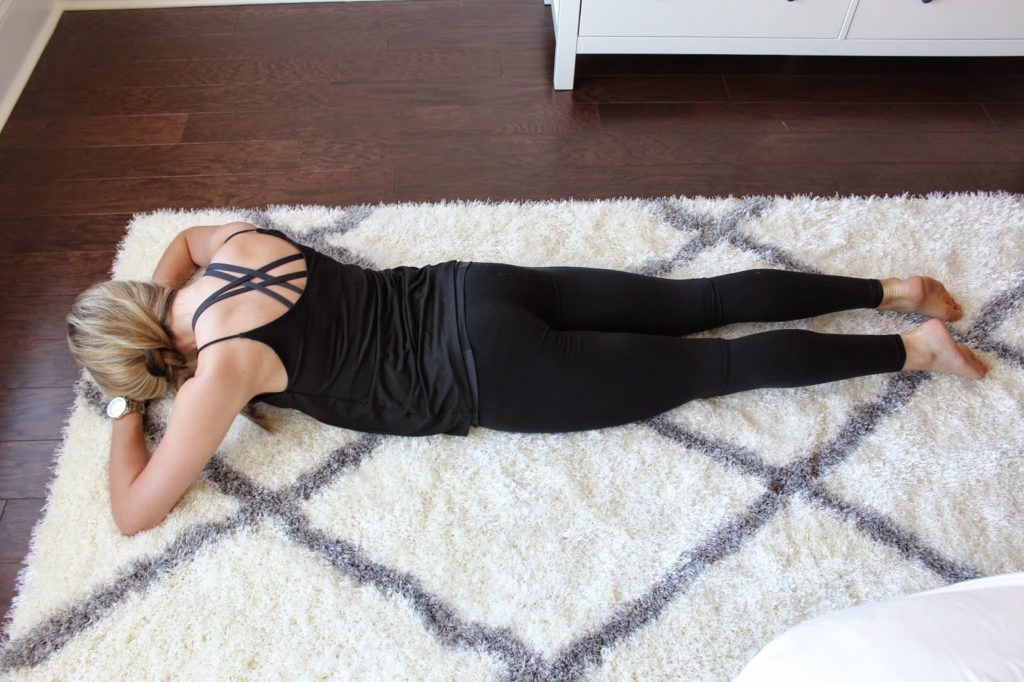
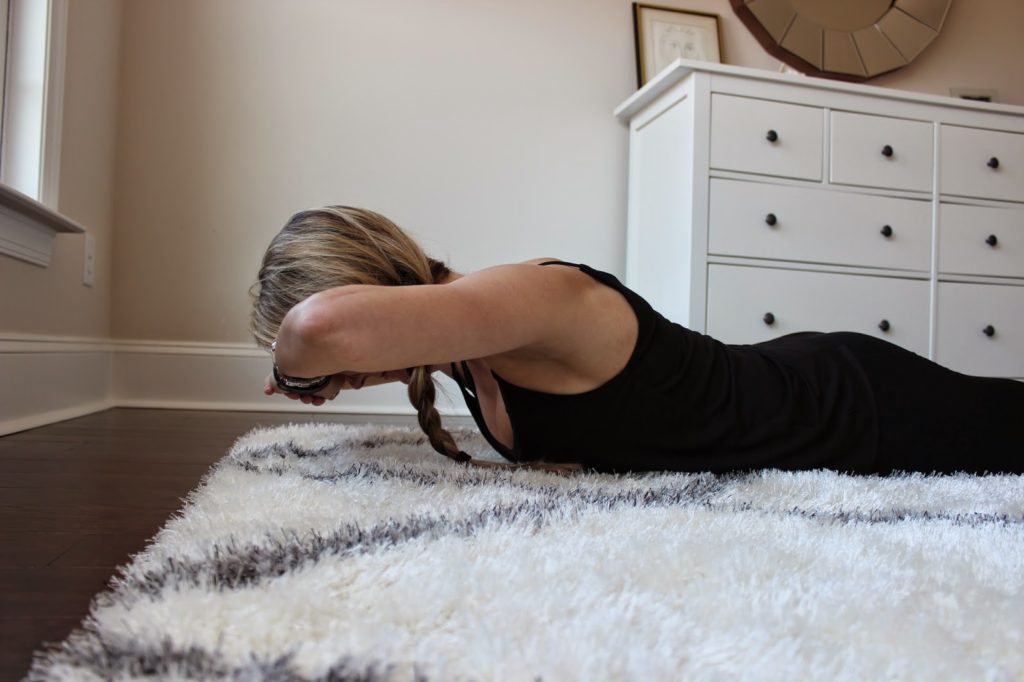
Reps/sets: 3-5 reps.

SHOULDER BRIDGE
Get your glutes, hammies, core and arms with this combo move.

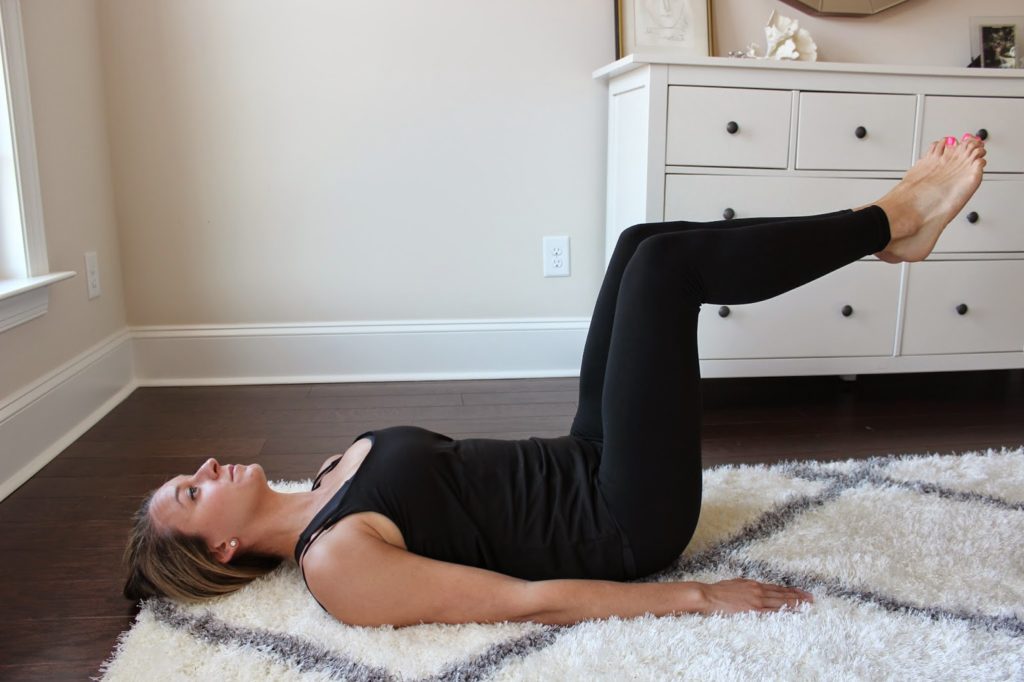
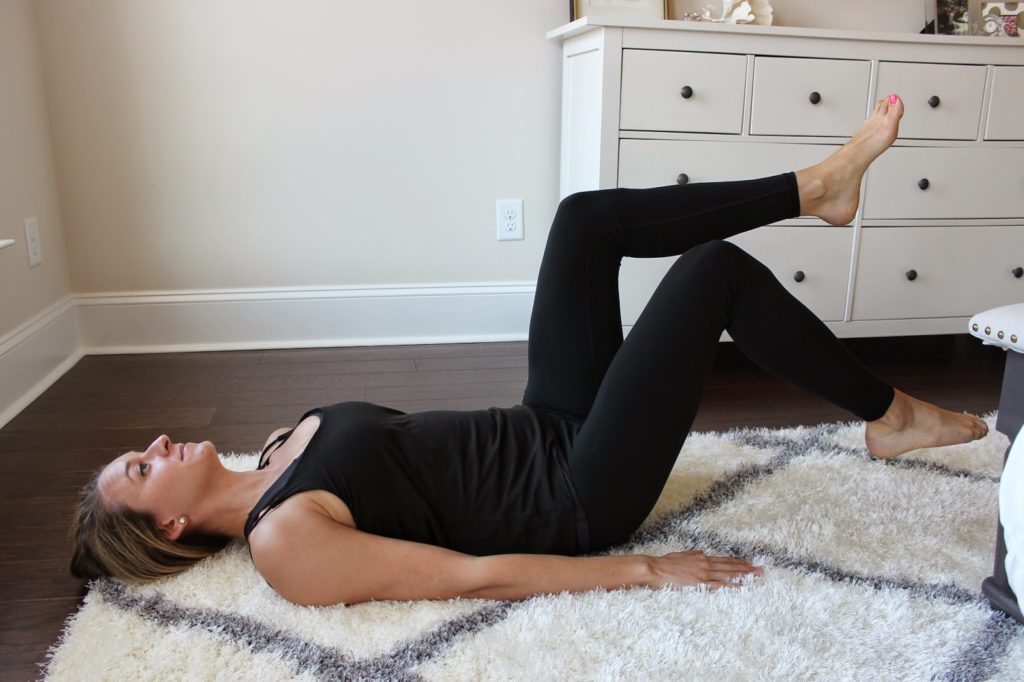
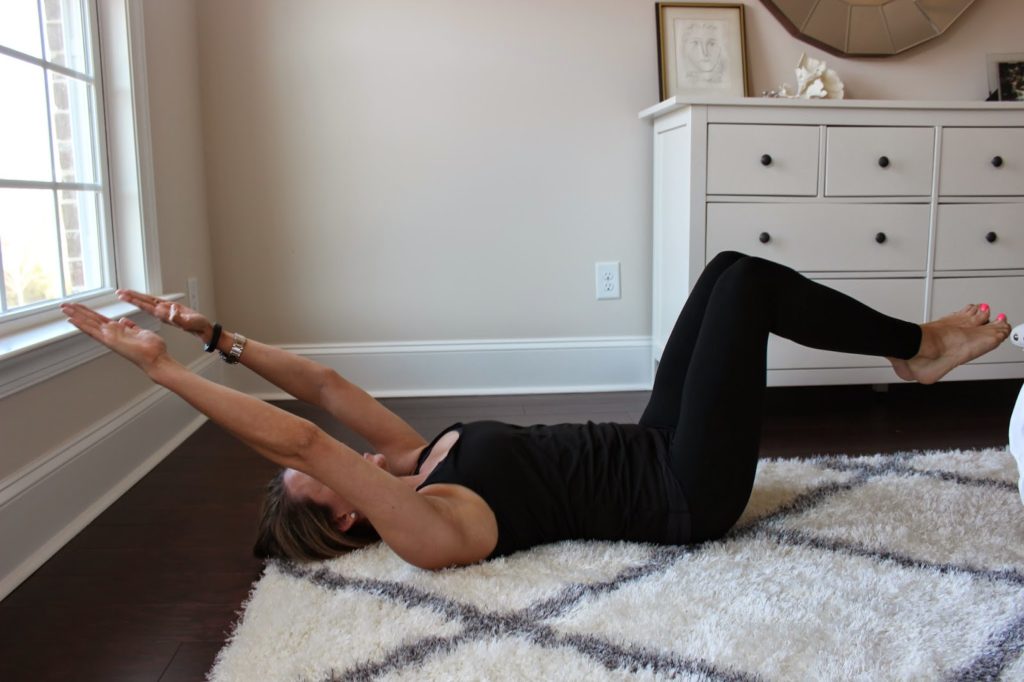
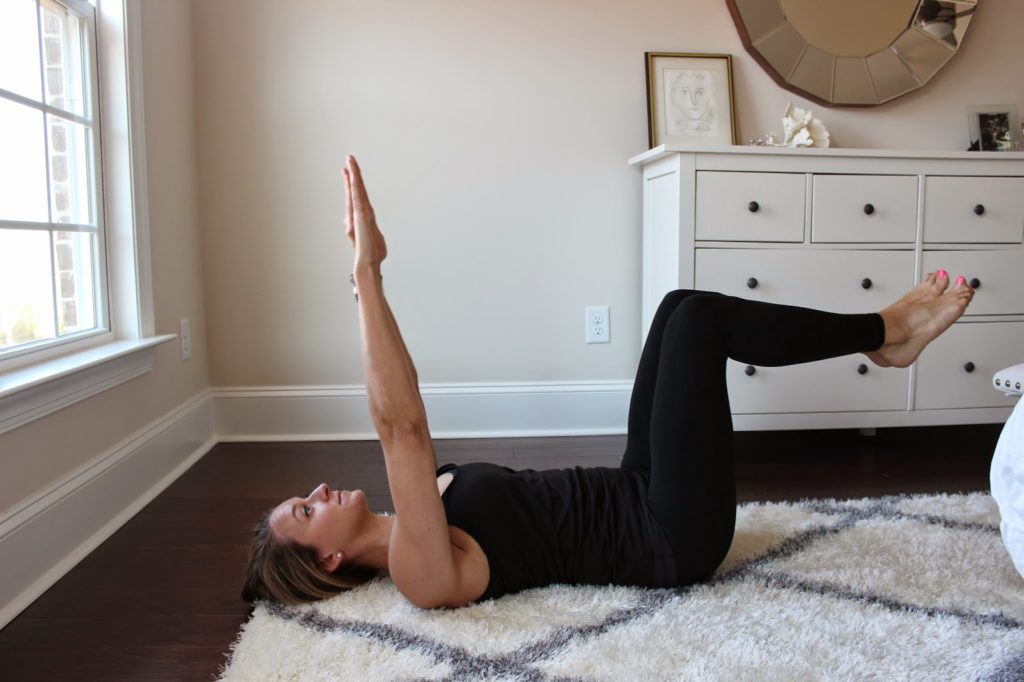
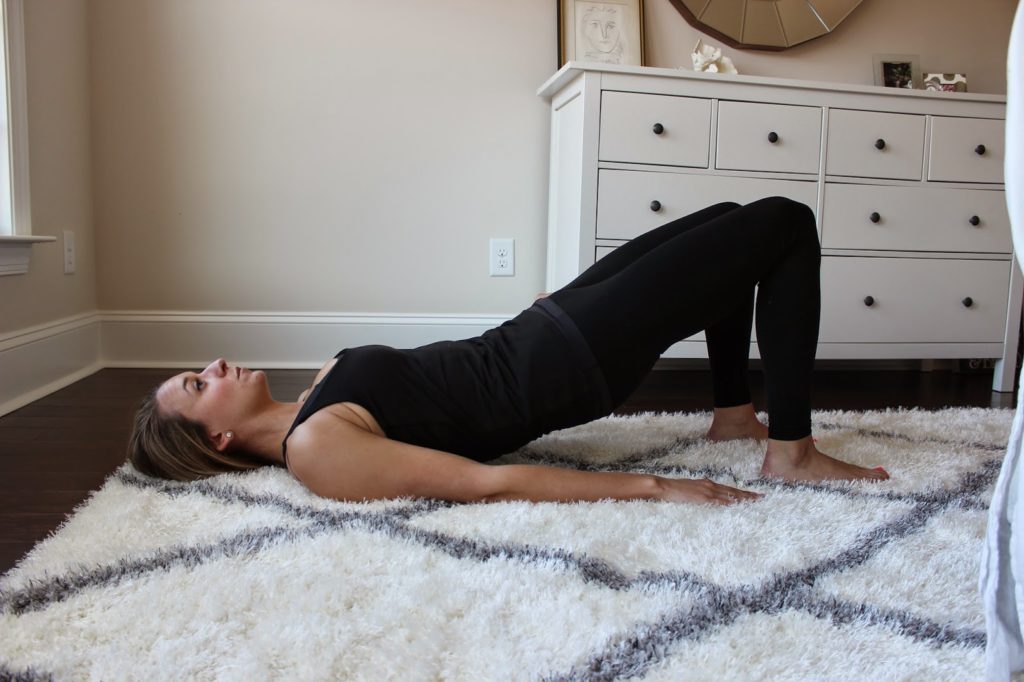
Lie on your back, knees bent hip distance apart, feet flat on mat.

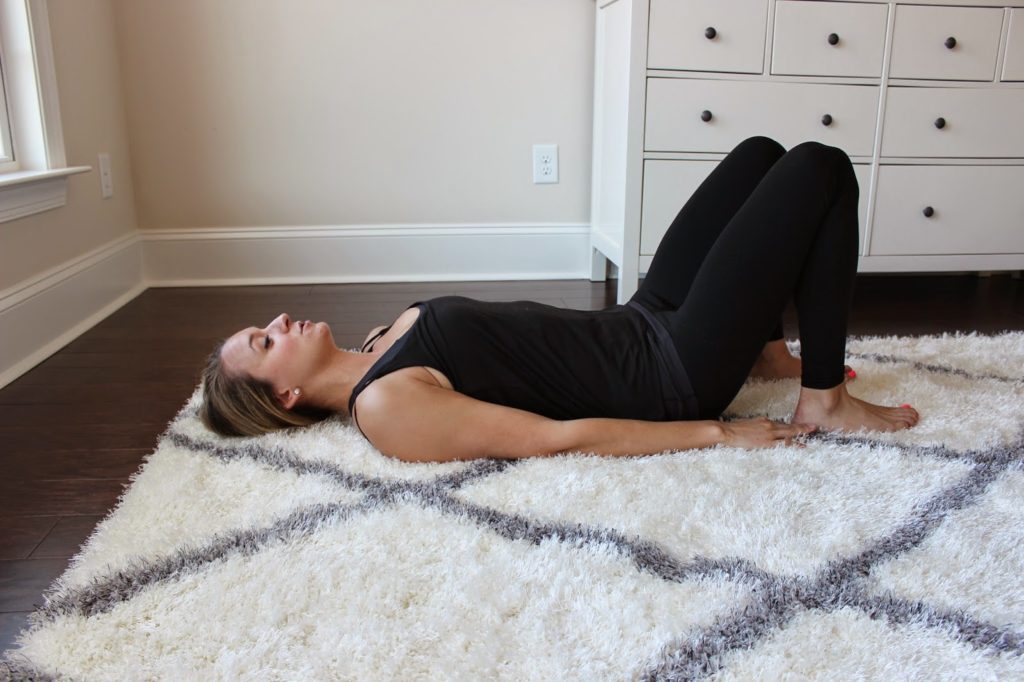
Curl tailbone up, follow by lifting the pelvis, middle back and upper back into a “bridge”— long line from shoulders to knees.

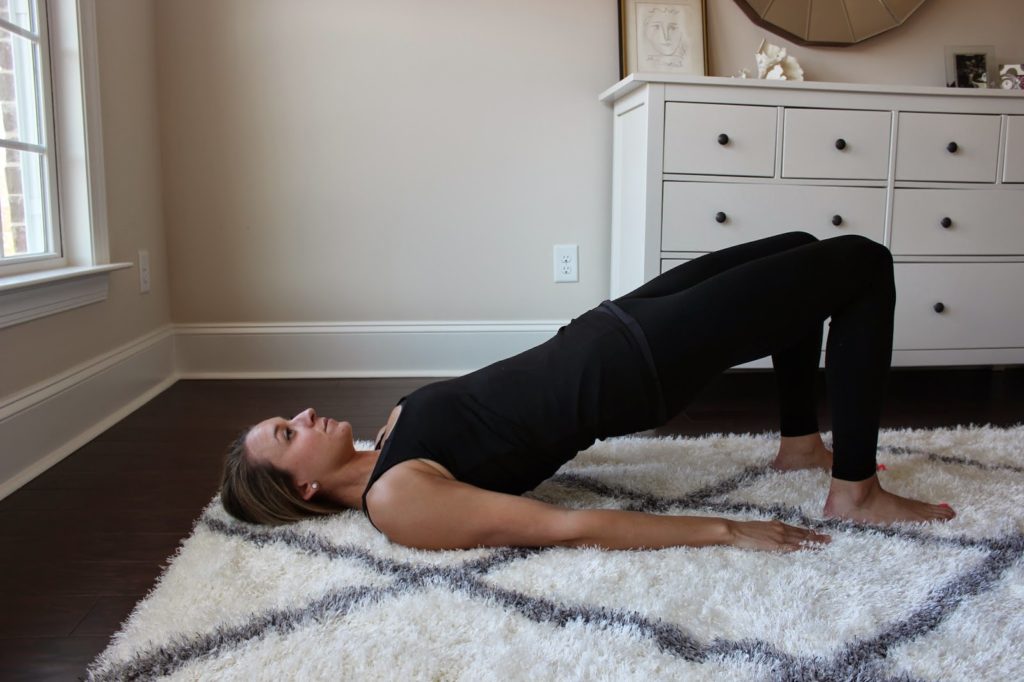
 Lower down by rolling through the upper back, middle back, low back until the tailbone touches the mat. Repeat.

On last rep, stay in the shoulder bridge, bring your right knee into your chest then straighten the right leg up to the ceiling.

Flex the heel, lower the leg to the height of the left knee, point the toe, and lift. Repeat 5 times. Bend the knee, lower the foot to the ground. Switch sides.

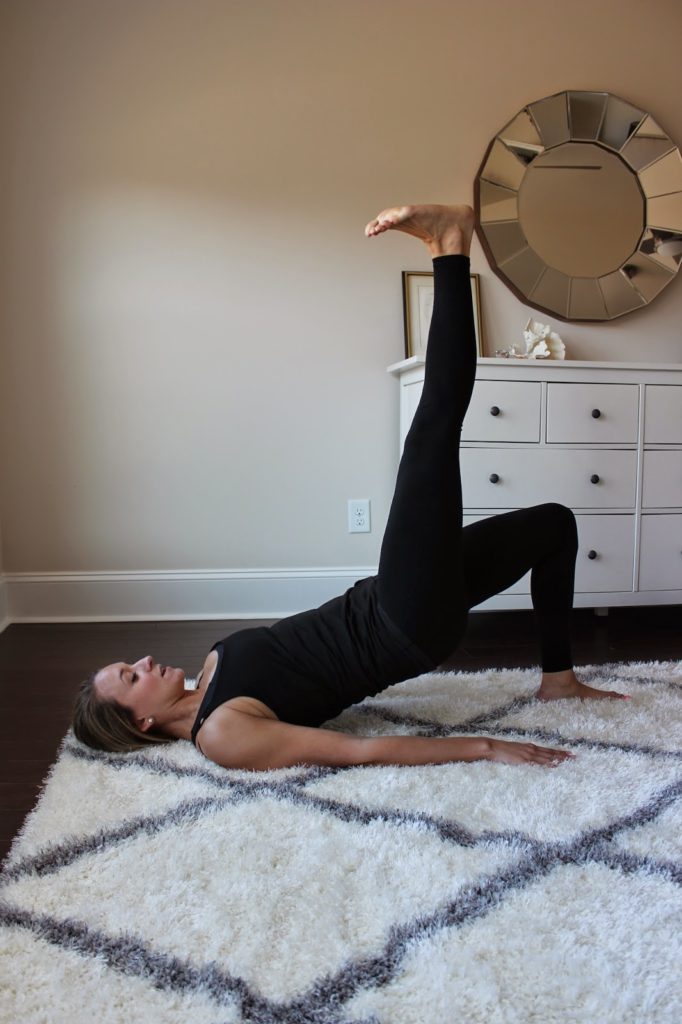
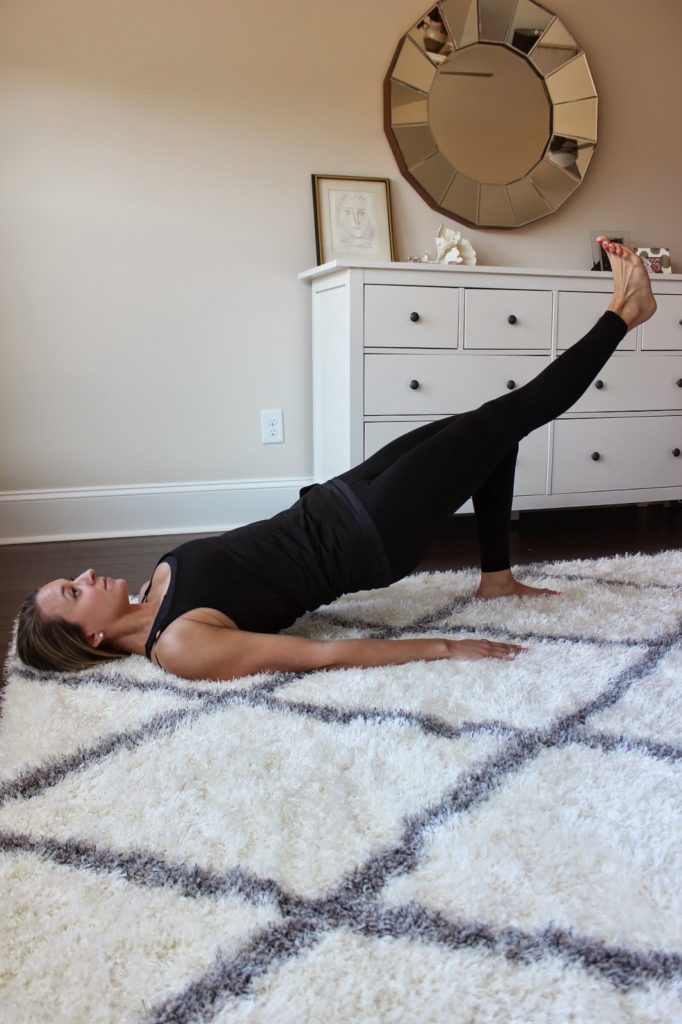
Reps/sets: 3-5 shoulder bridges, 5 reps of leg lifts on each side.

RELEVE BALANCE
Stand with heels together, toes apart, zipping legs together. Arms out into a wide “T.” Imagine a corset around your ribcage to keep your abdominals working.

Lift onto the toes, look to the right, look to the left, look to center. Lower the heels. Repeat.

More difficult: close your eyes as you turn your head to each side.
Reps/Sets: 2-3 sets.
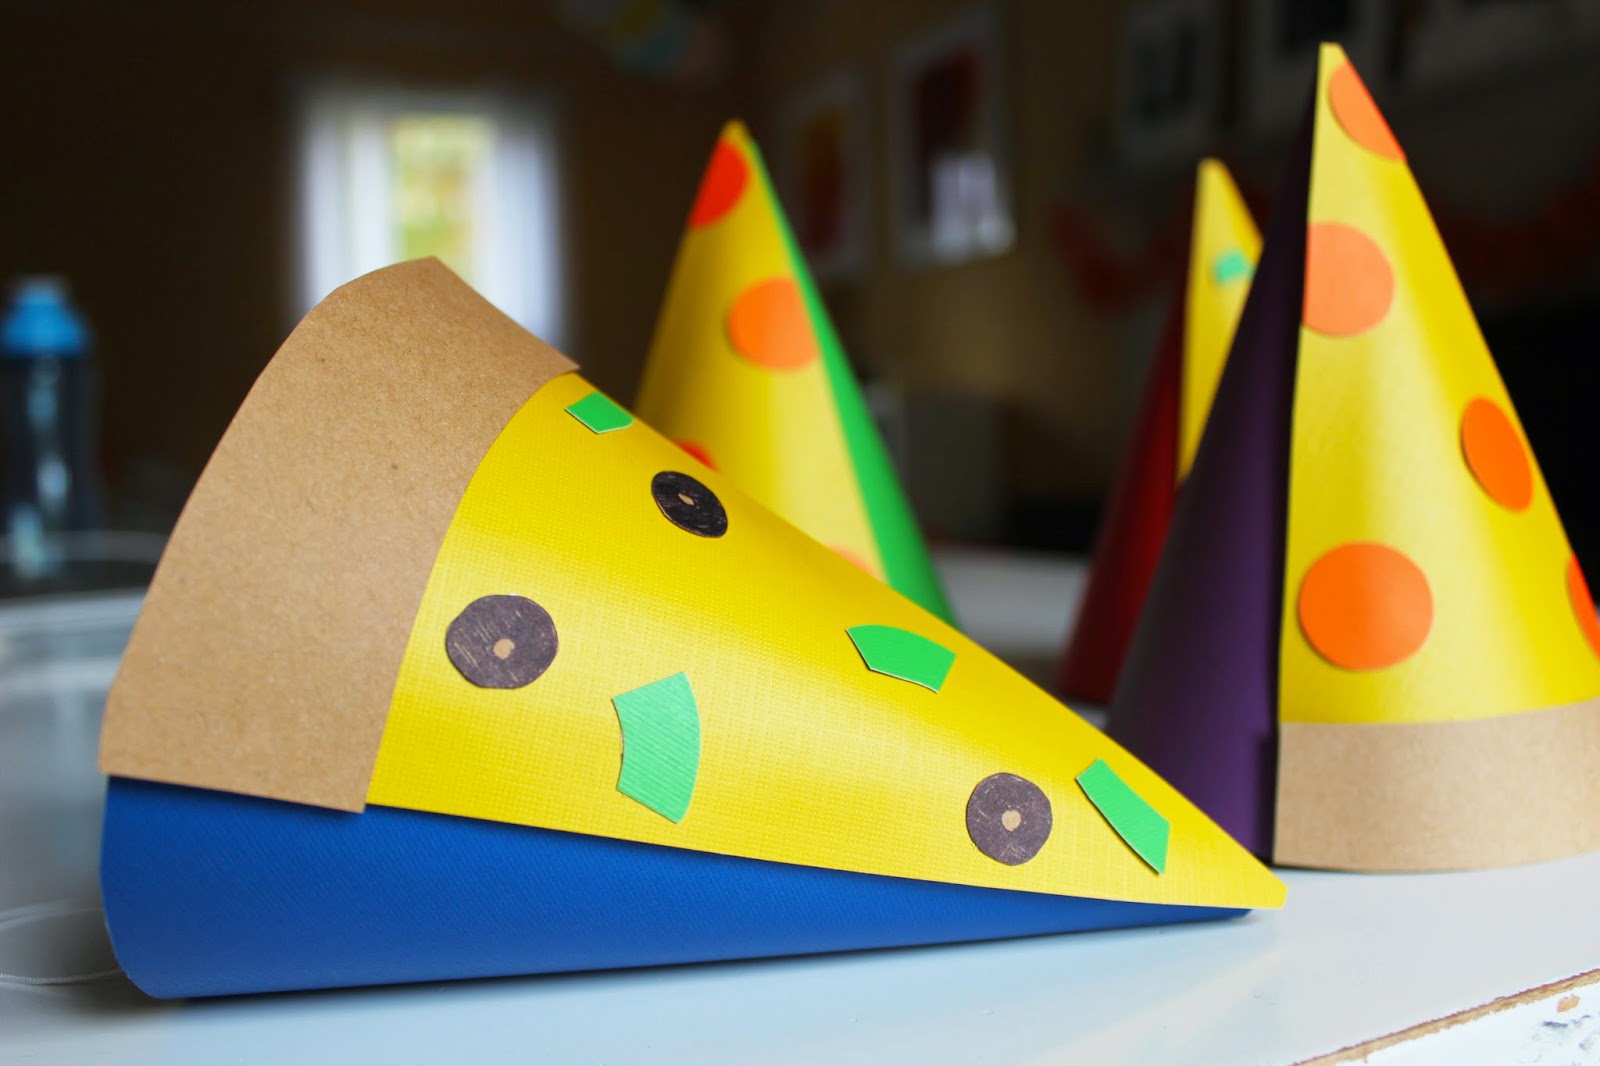
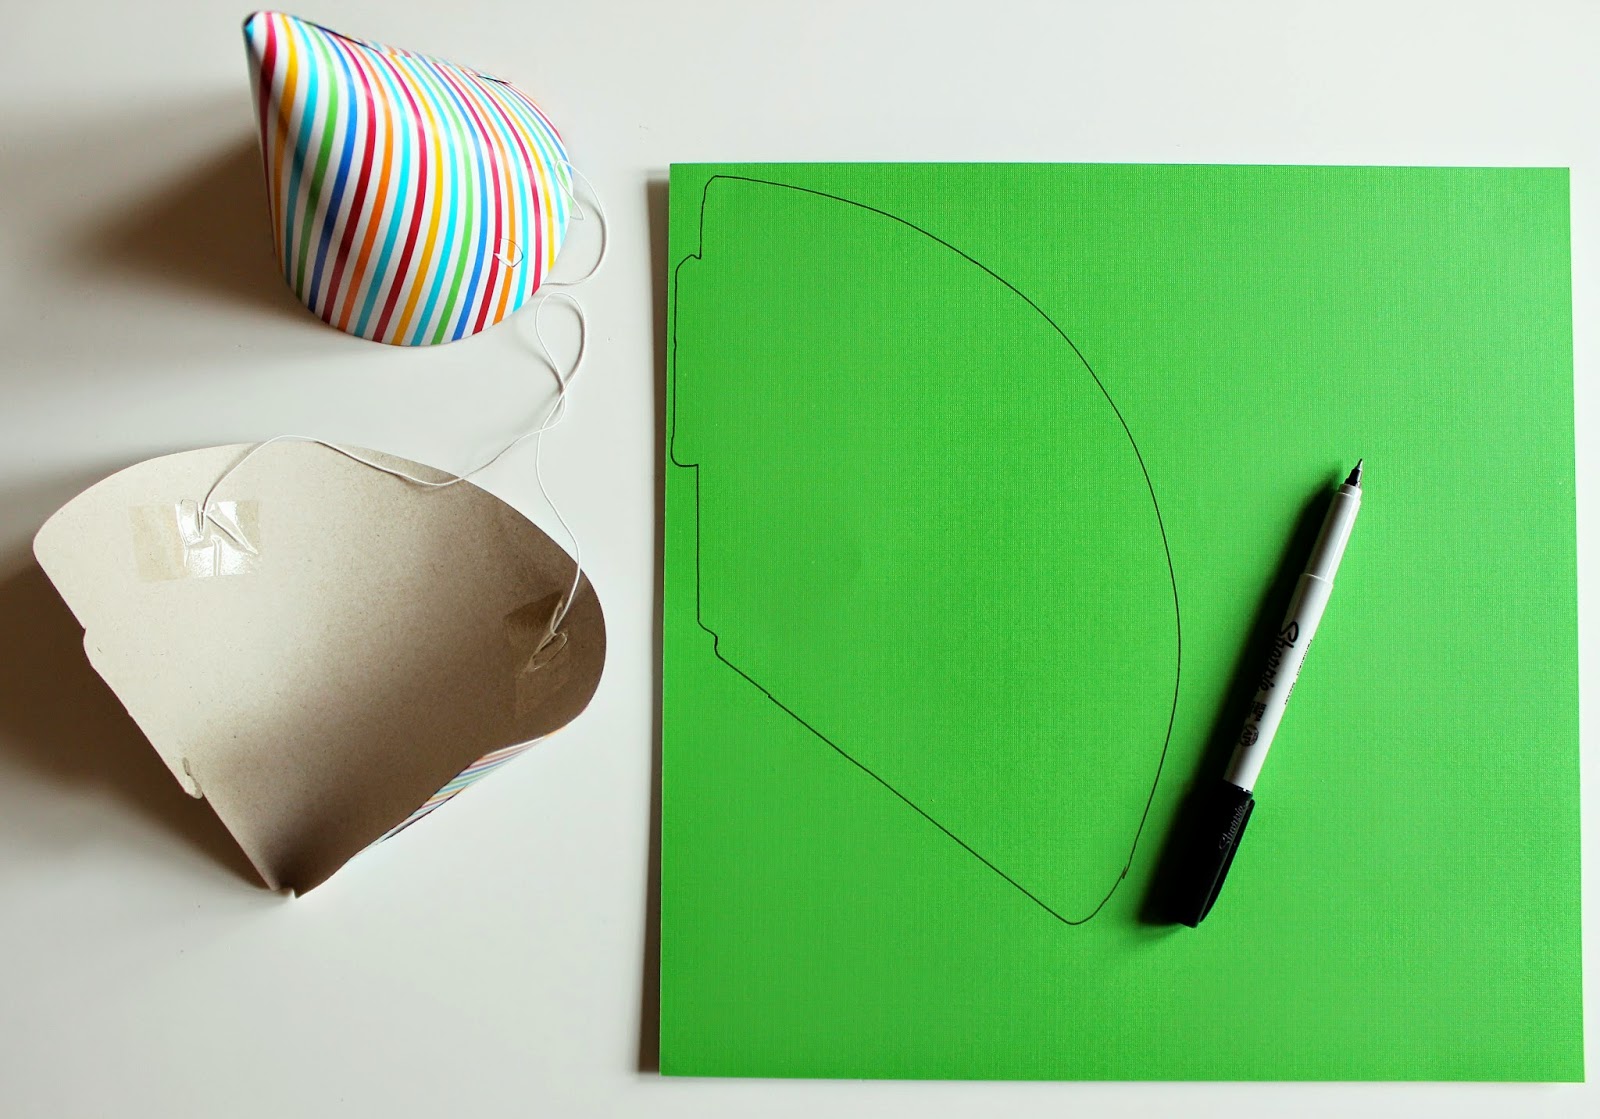
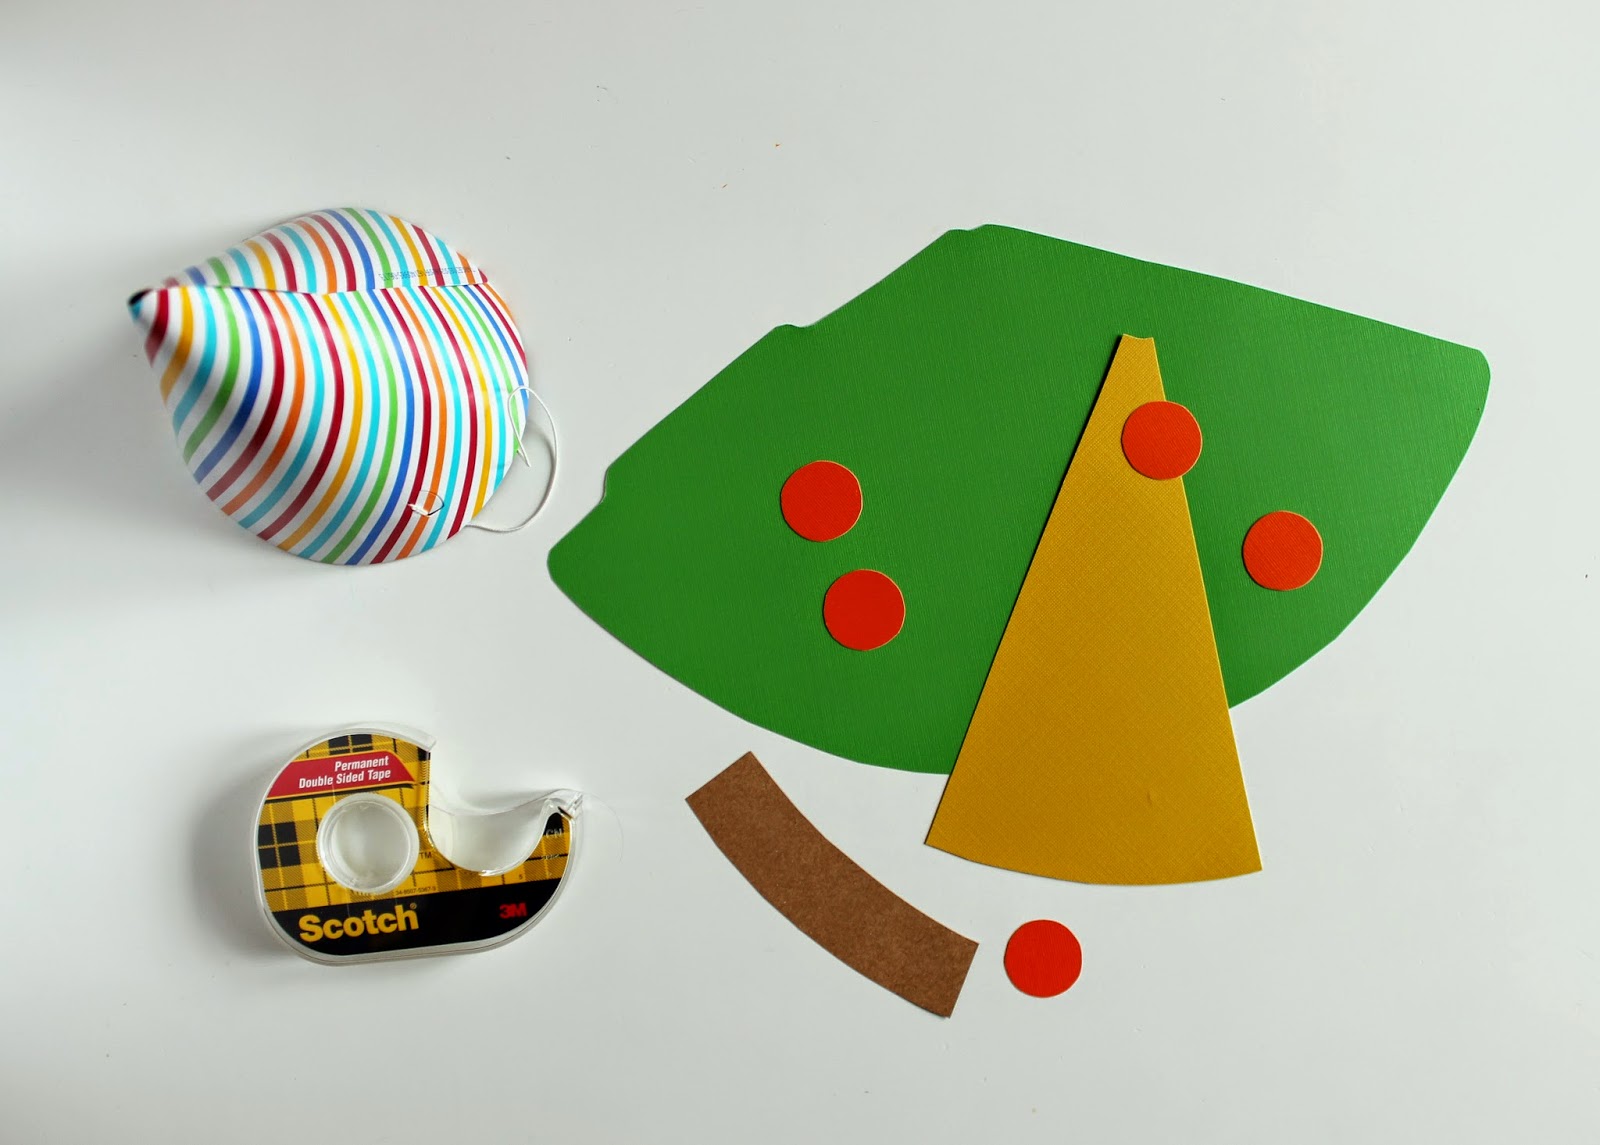
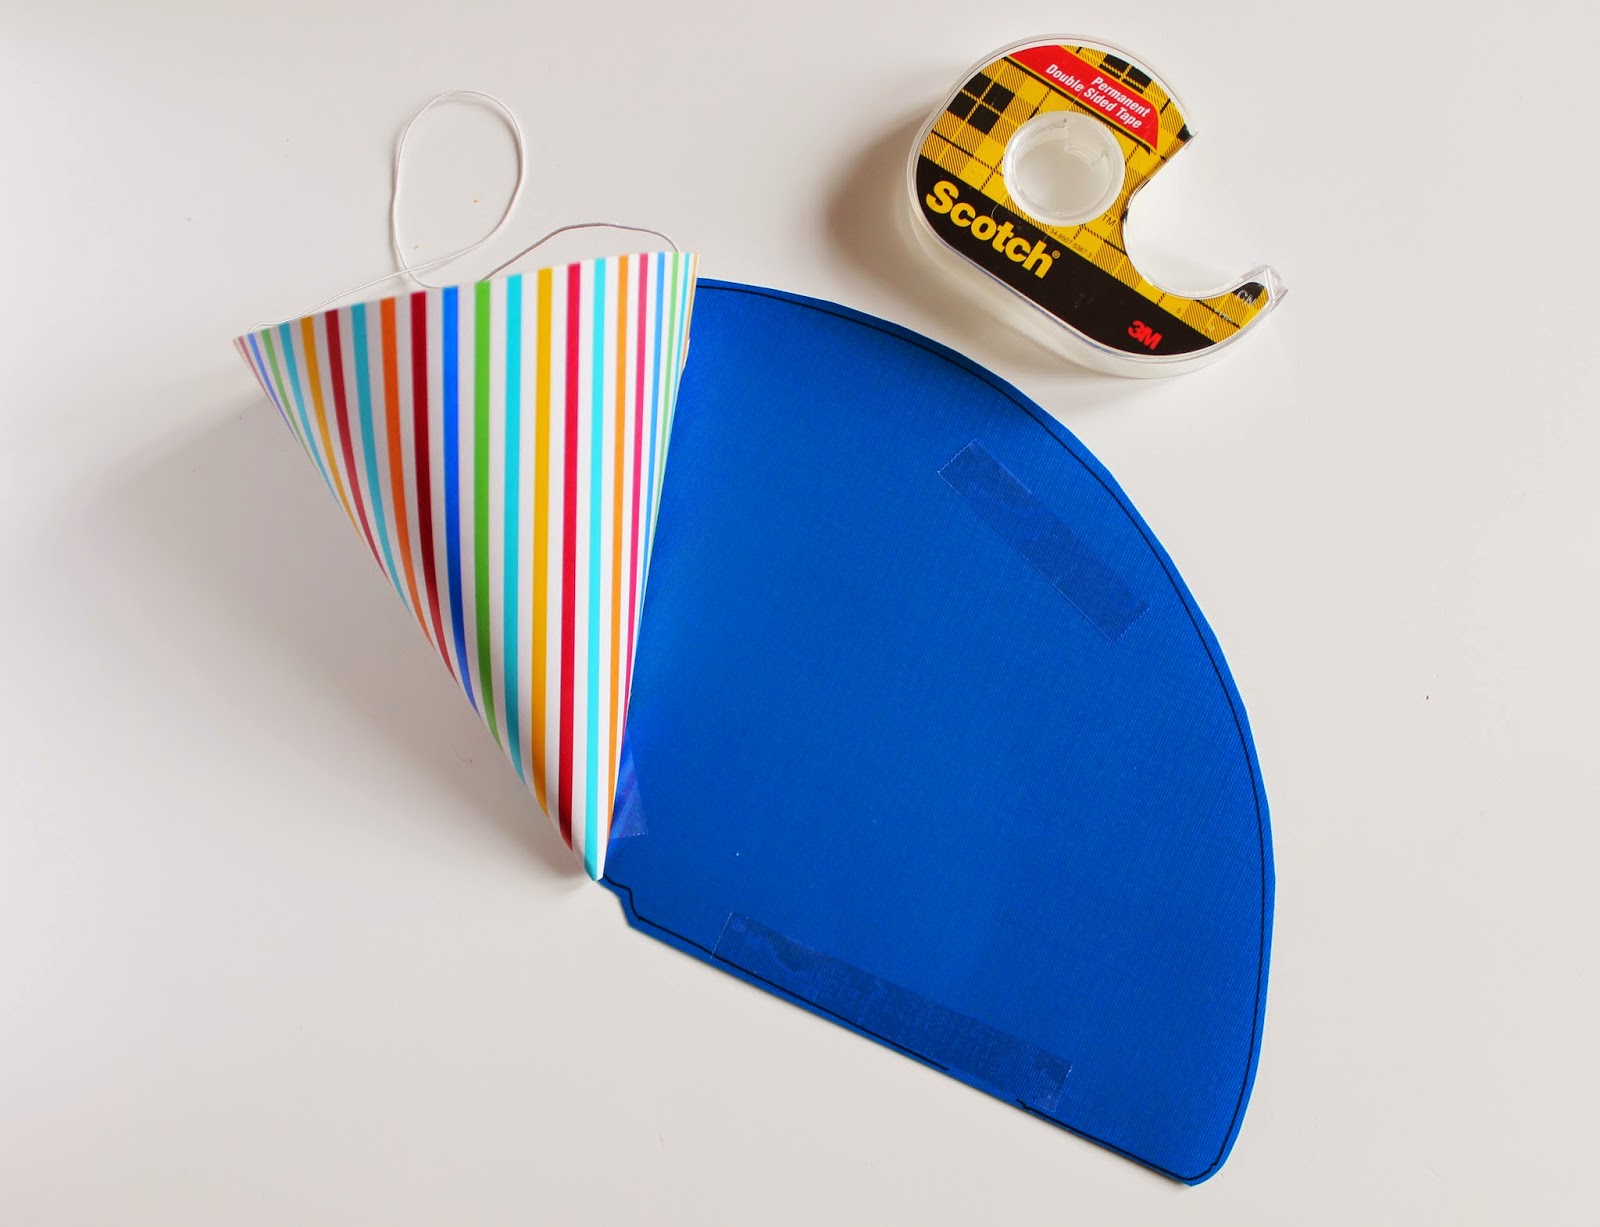
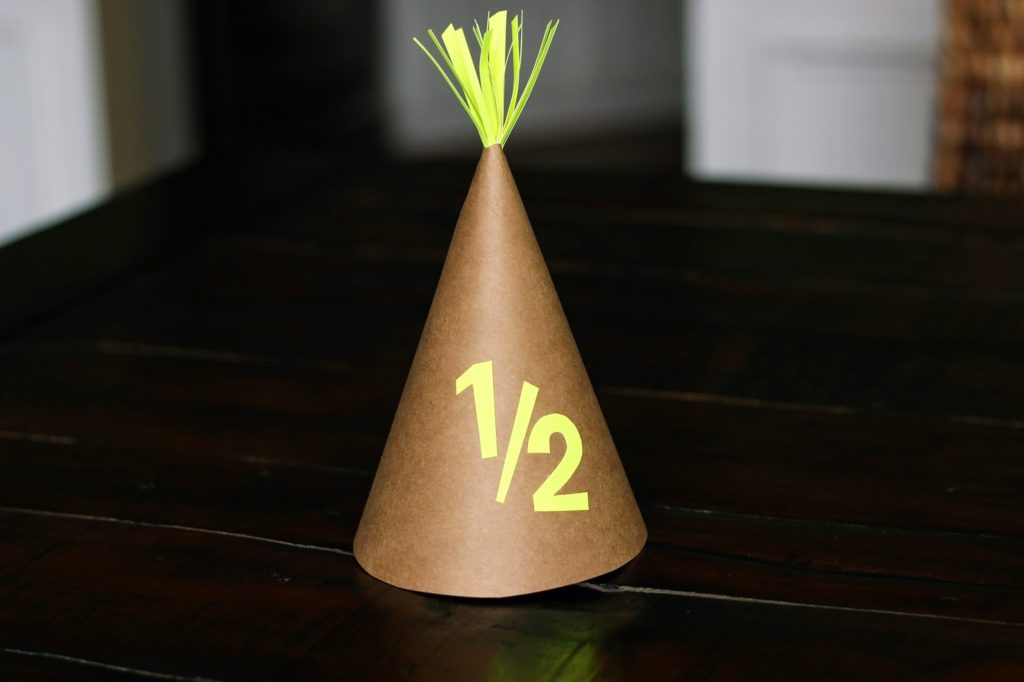
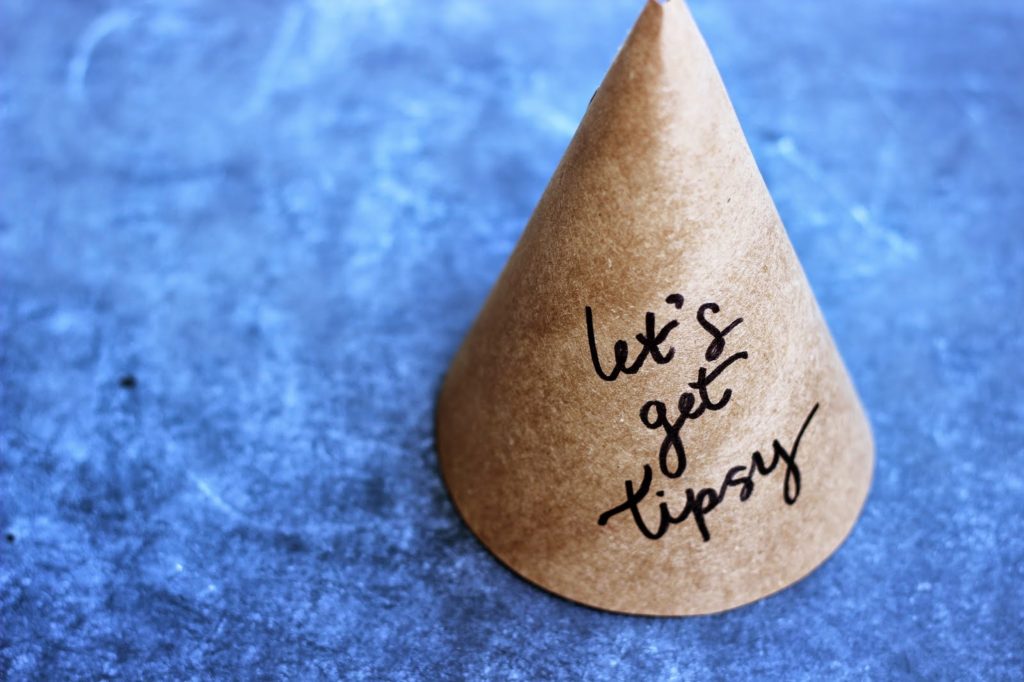
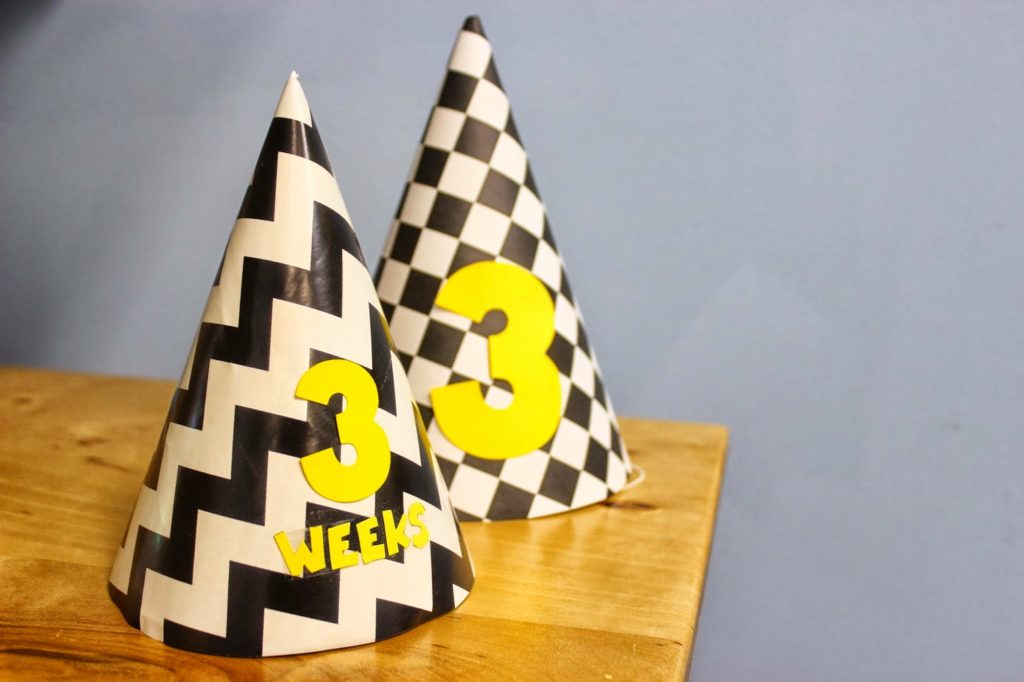
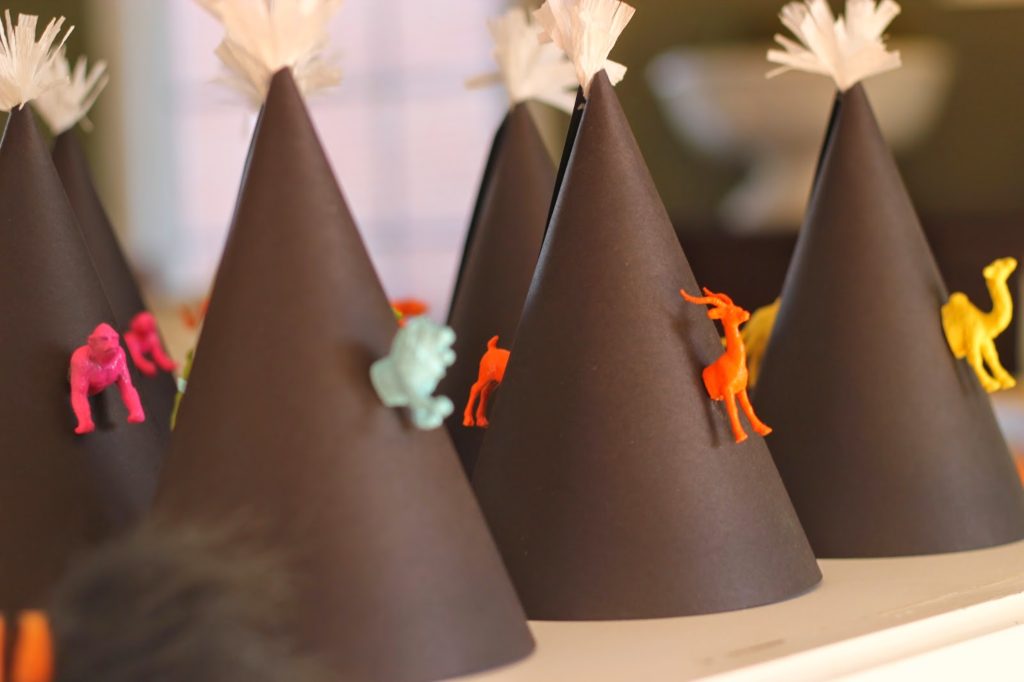
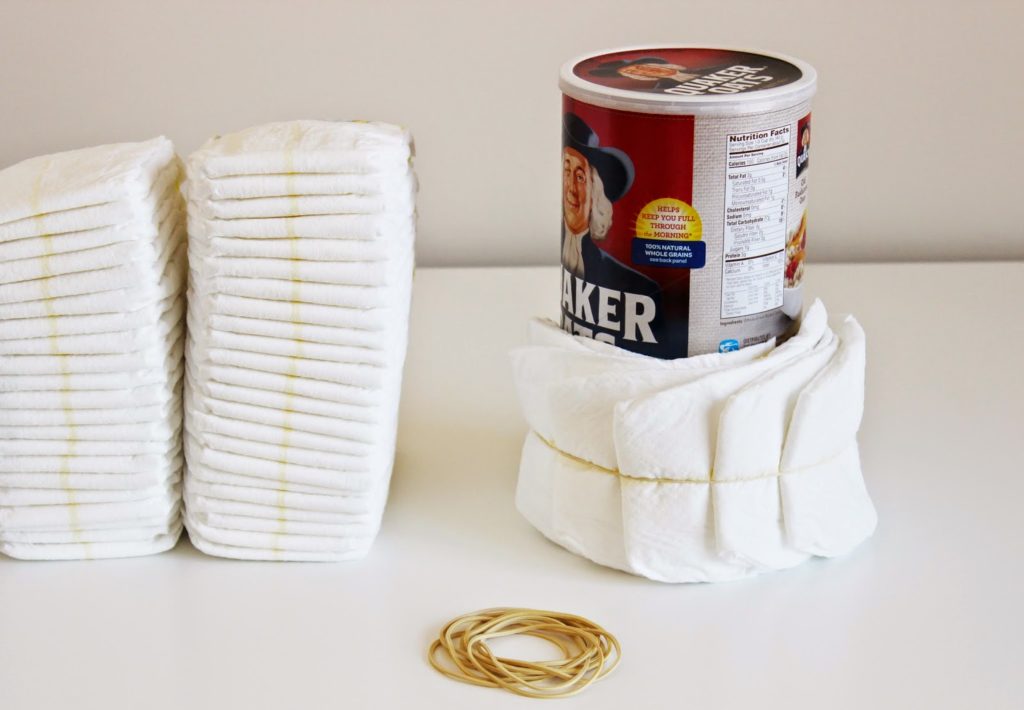
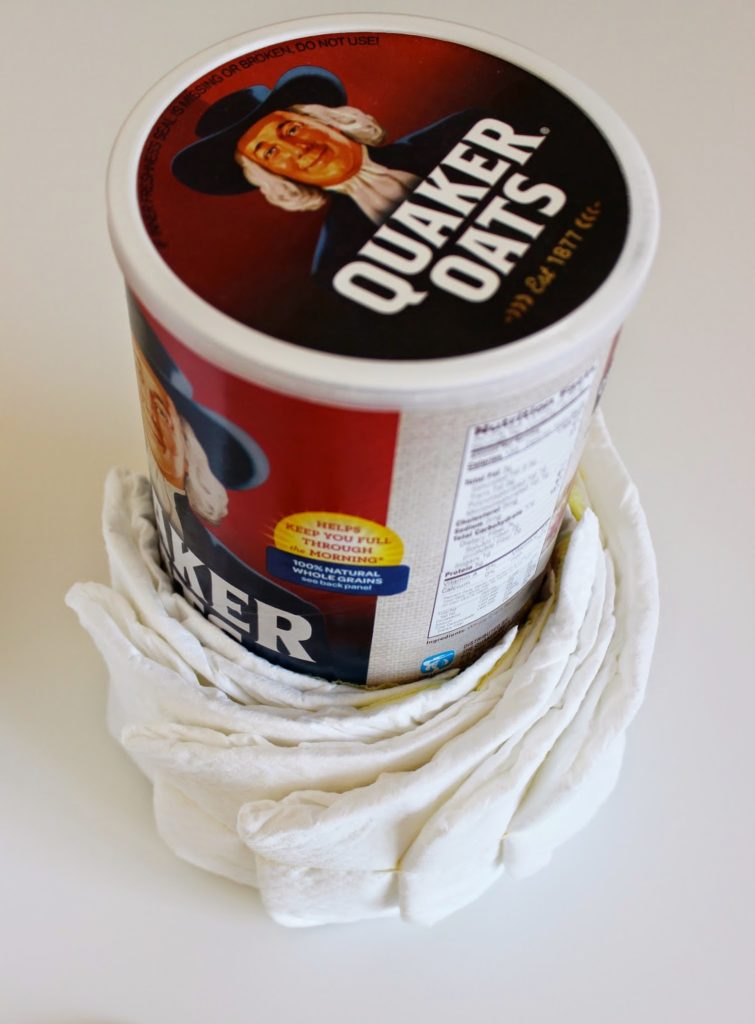
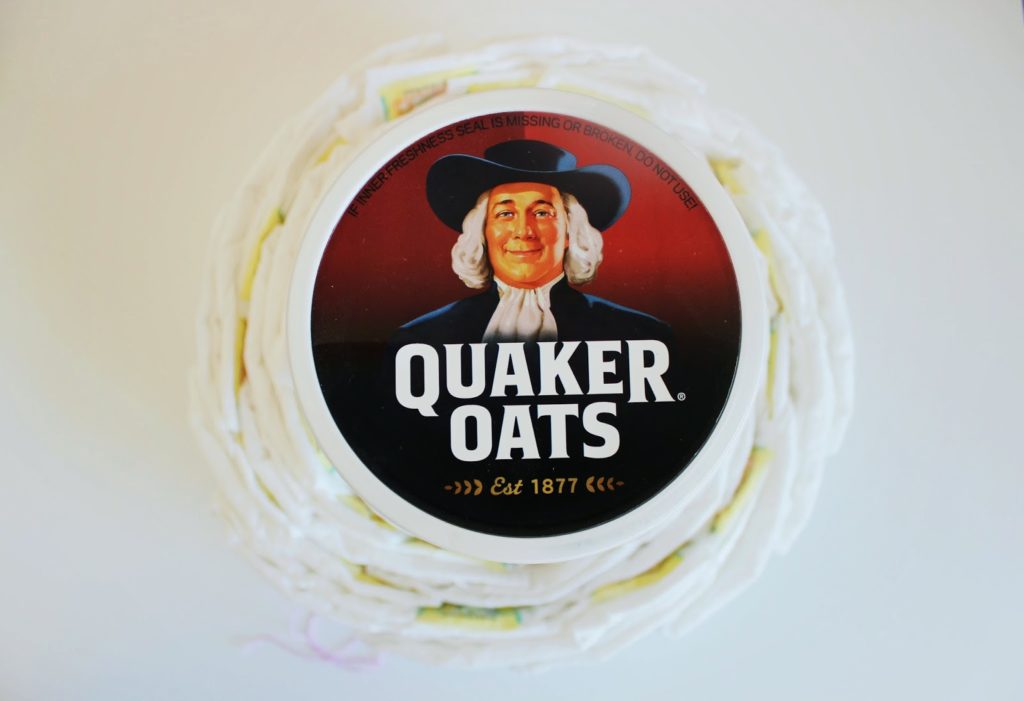
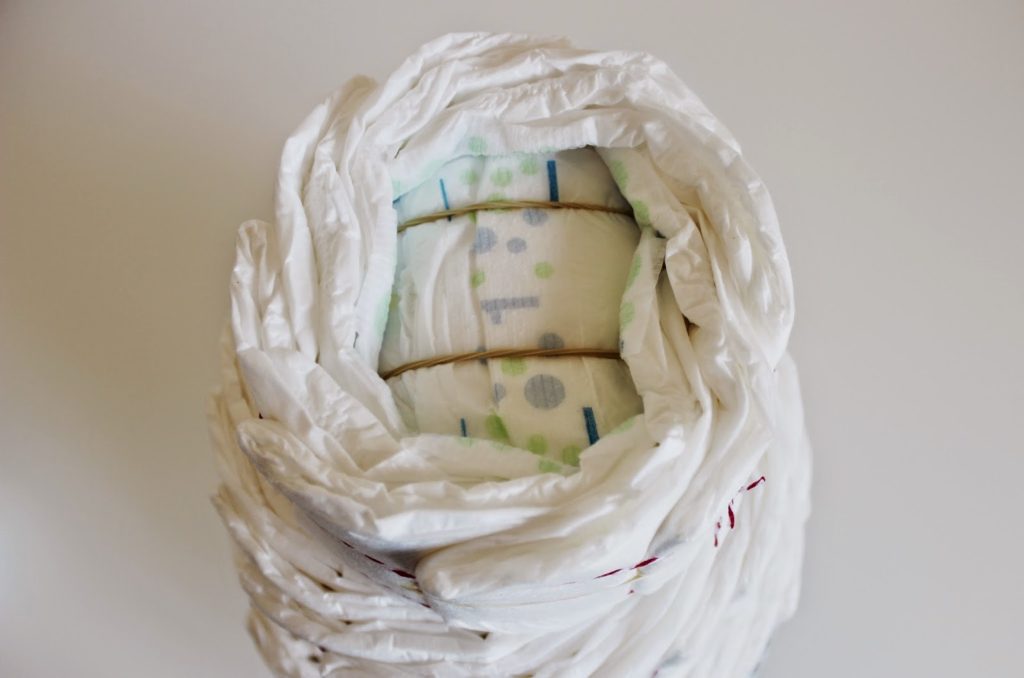
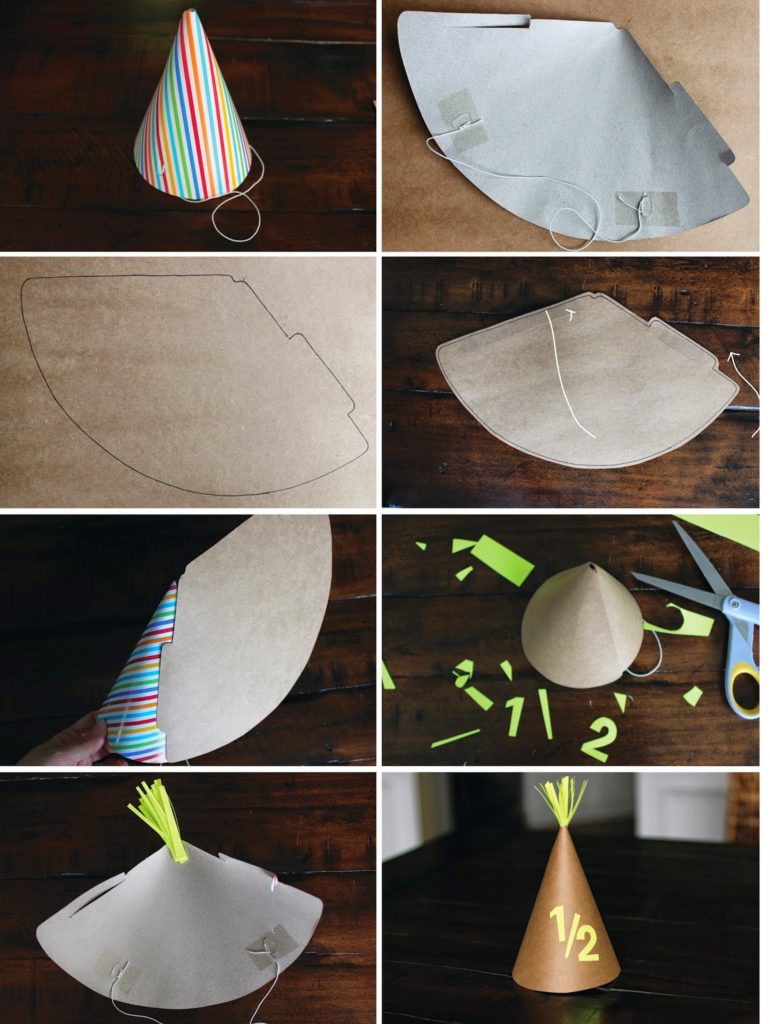
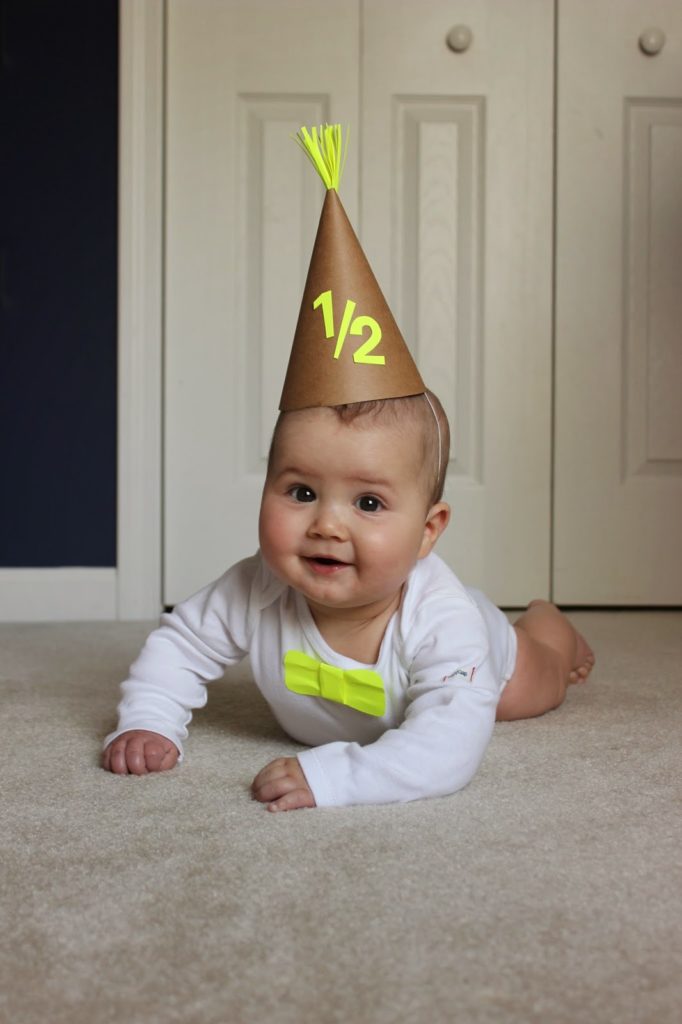
Kelly Simmons, PMA®-CPT is a Nashville-based, NYC-trained Pilates instructor who helps clients improve overall strength, flexibility and mobility. Through group fitness and private training, she focuses on safe, effective movement for full-body workouts that emphasize the core. As a certified Health Coach with the American Council on Exercise, she helps people get well and stay well with tools and strategies for everyday healthy living. 
To contact Kelly, visit kellysimmonshealth.com or email kellysimmonshealth@gmail.com
For fitness tips and healthful ideas, go to Facebook.com/KellySimmonsHealth, find her on instagram @kellysimmonshealth, and follow her on Twitter at @ksimmonshealth.

HOW TO PERFECTLY WRAP A GIFT

We hope you guys are enjoying the holiday season. Leah and I are a bit under the weather, which is NO. FUN. 
Okay, so wrapping gifts is one of our favorite tasks of the season. Most people loathe it, but we feel like if you buy beautiful wrap, gift toppers, ribbon and use these tips then you might actually ENJOY it. What!?!?! When Leah and I met ( working for our friend, Lauren, at her paper boutique) we were taught the skills to pay the bills by Lauren herself. We offered a professional gift wrapping service that saved a LOT of people from going insane over trying to wrap their gift themselves. Okay, they may not pay our bills, but they do make people envious of your beautifully wrapped gift at your holiday gift exchange. Whenever all of us girls get together, and there is gift giving involved, we almost care more about how it is wrapped vs. what is inside the box. True story! It is just in our blood now. 
Here are our tips that we are passing on from one great wrapper to another…. YOU!
Get a great box that is sturdy and has a good shape.
-Wrap your gift in beautiful tissue and seal with pretty tape 🙂 Details people.
– Once your items are placed in the box, then fill all of the extra empty space with tissue paper. This helps your box not cave in when you are wrapping it. This is VERY important. The box structure is everything!!
-Roll out your wrap and lay your box in face down. Pull the edge of your wrapping roll to the center of your box and tape (using regular invisible tape). This is where your perfect seam will be.
– Then, pull the other side of the wrapping roll (the actual roll itself) over about a 1/2″ passed the seam you created, and cut.
– Now, turn your box (with the wrap attached) horizontally to where the untaped edge of the wrap is closest to you. Fold over to create a perfectly seamed line. Then, attach DOUBLE-SIDED tape to the inside of the wrap. In other words, put the tape right on the fold that you just created. We use about three strips to go along the width of the box.
– Now time to do the ends! Simply cut excess paper off so that your edges reach about half way down the side of the box. Any seam you are taping directly to the box can be adhered with regular tape. Any of the corners that you fold in and adhere to the paper itself should be taped with double-sided tape. 
– Fold in all of your corners just like you would on a regular wrapping job. Remember to keep pulling tightly and doing intense folds to keep the wrap from “bubbling” around the box.
– Turn your gift right side up! We love to add “bands” around our gifts. They help make your pretty wrapping paper go further and adds interest. I chose an old wrap from last year to use as a band over the gold polka dots. Simply cut the band to size (width wise) and wrap it around the BACK of the box to where the ends of the band take up about a 1/4-1/2″ of each side of the back of the gift. We are alllllllll about the front! 
– I opted for a sparkly ribbon with no bow ( as this gift is for my 16 year old girl cousin). Again, to save ribbon, I just wrapped the ribbon slightly around the edges to the back of the gift and taped it. Double stick tape is preferred here so that you don’t see it on the back of the ribbon, but regular tape seemed to hold this ribbon better. 
– Choose your perfect gift tag. Don’t skimp on the gift tags!! They are fun and add that special touch to your already beautiful gift. Is it bad to say that we are NOT fans of sticker name tags on gifts???
oops!
Host a wrapping party, turn on a good holiday movie, or just grab a glass of champagne and get to wrapping!!! The investment in good boxes, pretty tissue, gift wrap and all of the pretty things that come after truly make the wrapping experience so much more fun! Also, receiving a beautifully wrapped gift can make the recipient feel all the more special. 
XO!!
-J
All wrap and gift wrapping goods were purchased at Lauren’s boutique, Rock Paper Scissors
Seriously, she has the best stuff!!!

ARI’S 4TH BIRTHDAY – PIZZA PARTY!

Ari turned 4 yesterday! I cannot believe I have a four-year-old. What?! After Max’s 1st birthday party last month (HERE) I was pretty spent, so it was music to my ears when Ari declared he didn’t want a party! Background… he’s not too into other kids his age and much prefers adults. We’re working on it at preschool and with play dates, but honestly it was his birthday, so he should get to do what he wants, right? Ari’s request was going to his fav pizza place, Mellow Mushroom, with just the family. So that’s what we did!
I kept decoration to the bare minimum (to my standards) and just made these little pizza party hats, a pizza cake, and pizza tattoos
Pizza Party tattoos in our Etsy shop HERE
For the pizza cake, I just used sour straws and chocolate cheerios for the “pizza toppings”. I tinted frosting red for the middle layer and yellow for the top. You guys… I totally attempted a brown crust out of frosting and failed miserably. Scraped it off and stuck with a clean yellow top! 

I thought these pizza hats turned out pretty well and were super simple! For the tutorial and more DIY party hat ideas, click HERE.

Here’s my birthday boy checking out his cake sans pants.
That’s a wrap! Now to move into our new home NEXT WEEK…. oy.
-L
Ari’s Modern Animal Themed 2nd Birthday Party HERE, HERE, and HERE.

JENNI’S PINK POM POM BABY SHOWER

I’ve been waiting (impatiently) to share one of my favorite events… Jenni’s baby shower! Almost three years ago I co-hosted this charming fete for my bestie along with two incredible and important women in Jenni’s life, Lori and Amanda. Although it was a couple’s shower, we decided on a pink pom pom / chevron theme to match Amara’s nursery (scroll down to see) and just told the boys to get over it! Plus I guarantee 99% of the guys never noticed the girly theme when there was plenty of drinks, great food, and lots of late-night dancing going on! And Jenni and Gabe’s friends can DANCE, people. Actually the dance floor was my favorite area strung with tons and tons of pom poms!
The dessert table laden with all pink desserts and a garland of little tissue paper squares.
Gabe and Jenni! Youngin’s…
I found this pink box in the office section at Walmart!! and filled it with teeny treat bags full of Gabe’s favorite candies, Reeses Pieces. Gotta give the dad one thing, right?
Lori made the BEST oreo truffles…omg 
We wrapped the vases and tables with ribbon – simple!
Late night s’mores around the fire pit were the perfect way to end the night!
My favorite thing to make for baby showers- a diaper cake! To fit with the pom pom theme, I just made tiny ones and stuck them in with floral wire.
To give the cake an ombre look, use matching tissue paper and ribbon: two fuschia tiers, one light pink tier, and two white tiers. Normally I use Pamper Swaddlers diapers since they’re all white… but honestly I had these on hand and didn’t mind the touch of green.
More of our diaper cakes HERE and HERE.
We asked Jenni and Gabe’s parents to send us pictures of them when they were little for the centerpieces, so we could imagine what Amara will look like! (Spoiler: exactly like Gabe).
We even anchored some poms in the pool to carry the theme throughout the yard. Amanda’s home is stunning, right??
I made this chevron photo booth backdrop with just squares of pink and white tissue paper. Just layer the squares- no cutting! I used double stick tape on two large pieces of foam core and Lori’s insanely handy hubby hung them with fishing line. 
Photo booth props: empty barnwood frames from Hobby Lobby, and a baby bump pillow were favorites. We also left a blank scrap book out for guests to write their best advice and wishes!

Here’s the gorgeous Jenni in Amara’s nursery- the inspiration for the whole shower! She and Lori hand painted this wall! To see Amara’s white and modern big girl room, click HERE, though after all that hard work painting, I can’t believe Jenni switched the look!
The invite! Inspired by the pink chevron wall above. By Rock Paper Scissors.
What a joyful night! We celebrated the crap out of these two. Deserving people who created the most special little lady, Amara. Let’s do it again, Jenni! (She’s reading this going, noooo way!)
-L

PARTY HAT TUTORIAL – FREE DOWNLOAD

Here’s a quick and easy party hat tutorial for you. If you want a solidly constructed hat with the string and everything (so you can force your baby to wear it like I do) but have it match your decorations, this is my fav way to go. Scroll down for the tutorial and download.
Ari’s third birthday party HERE
Ari’s second birthday party HERE

 PARTY HAT TUTORIAL:

1. Start with any store-bought hat
2. Unfold the hat, design-side down
3. Trace around the hat
4. Cut out traced shape, a little outside the lines to leave room for error
5. Put double stick tape on the two straight edges of the traced shape
6. Start with the “tab” side and tape on the hat, wrapping around the paper as you go
(If you want to do a little fringe or pom pom add this in before you close up the hat)
7. Decorate! 
Download party hat numbers HERE
 And here are my babies in their birthday hats! Oh how I love to torture them.

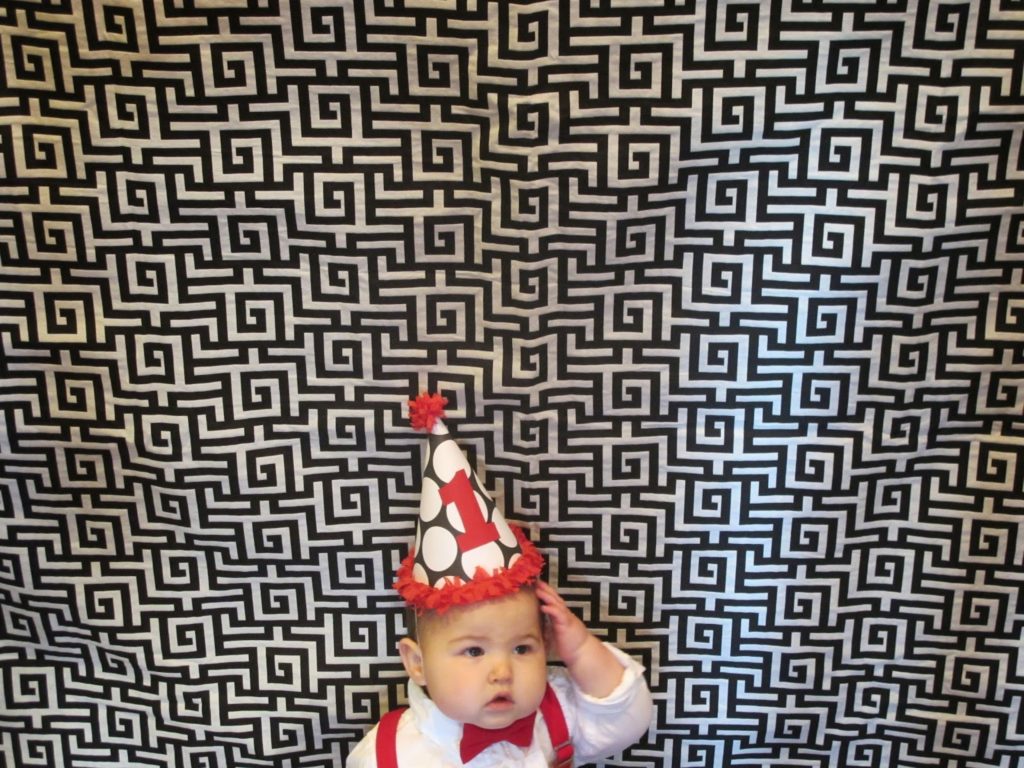
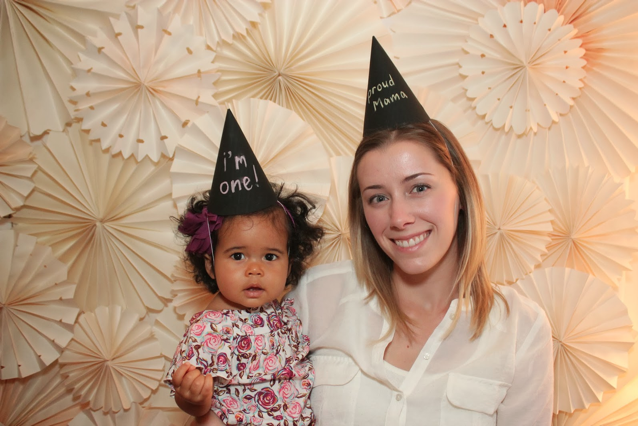
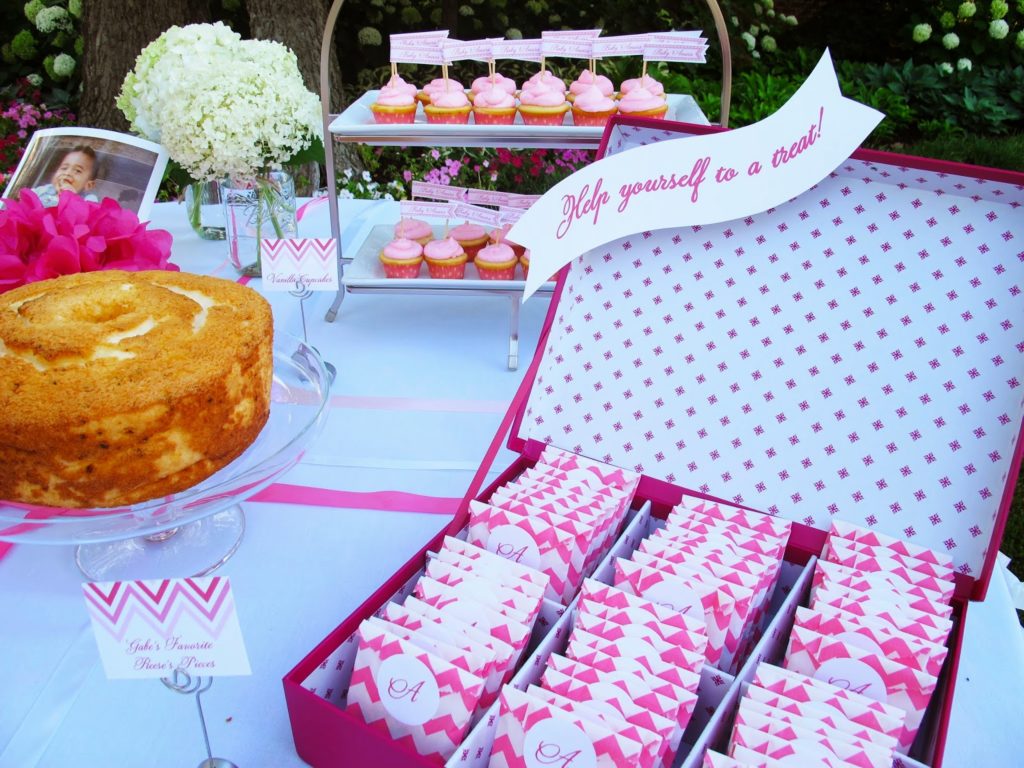
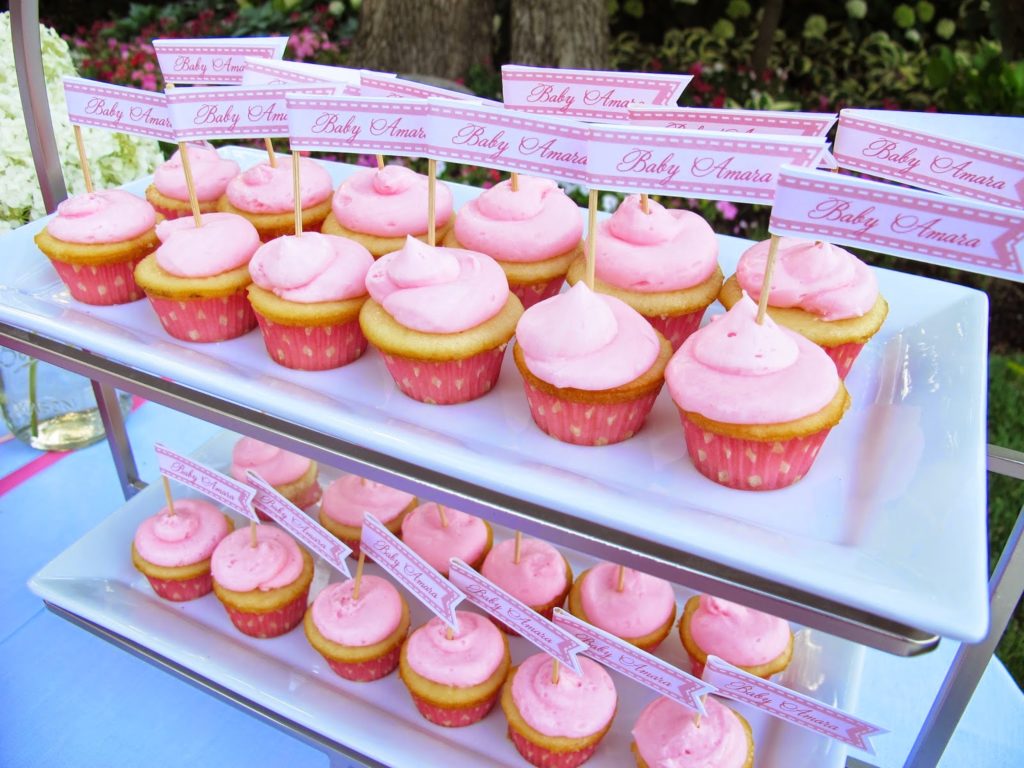
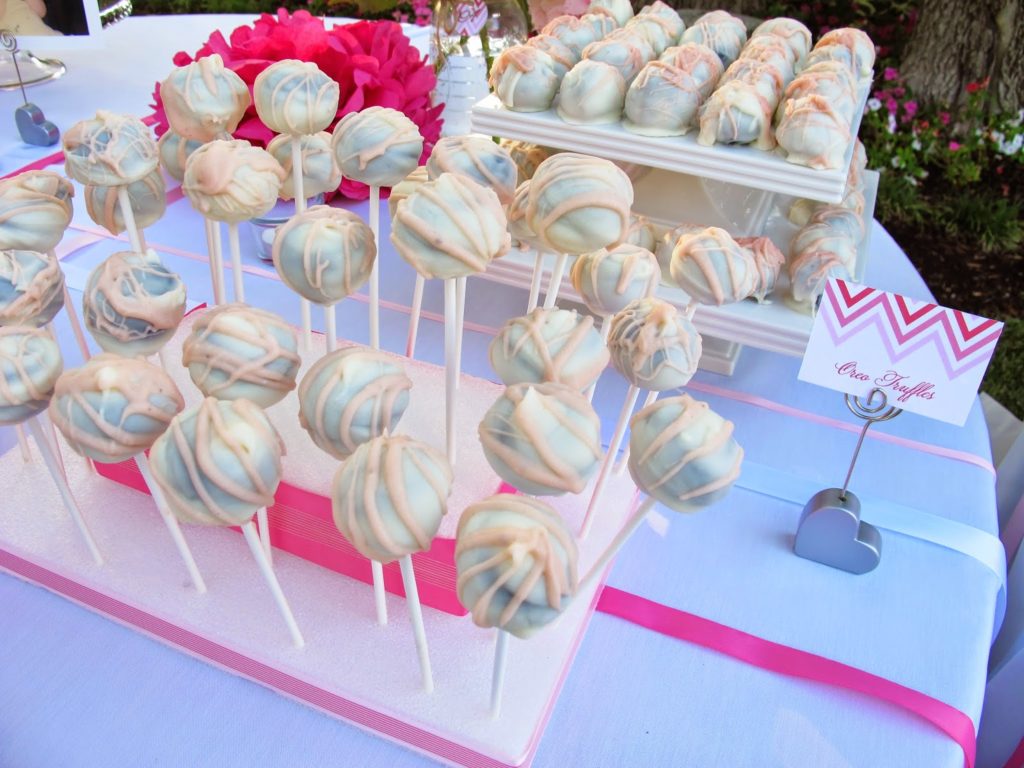
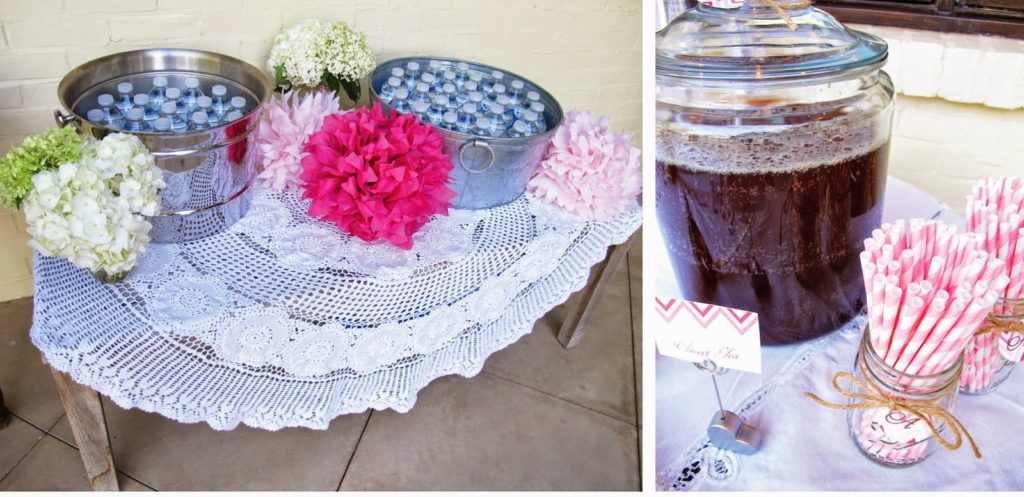
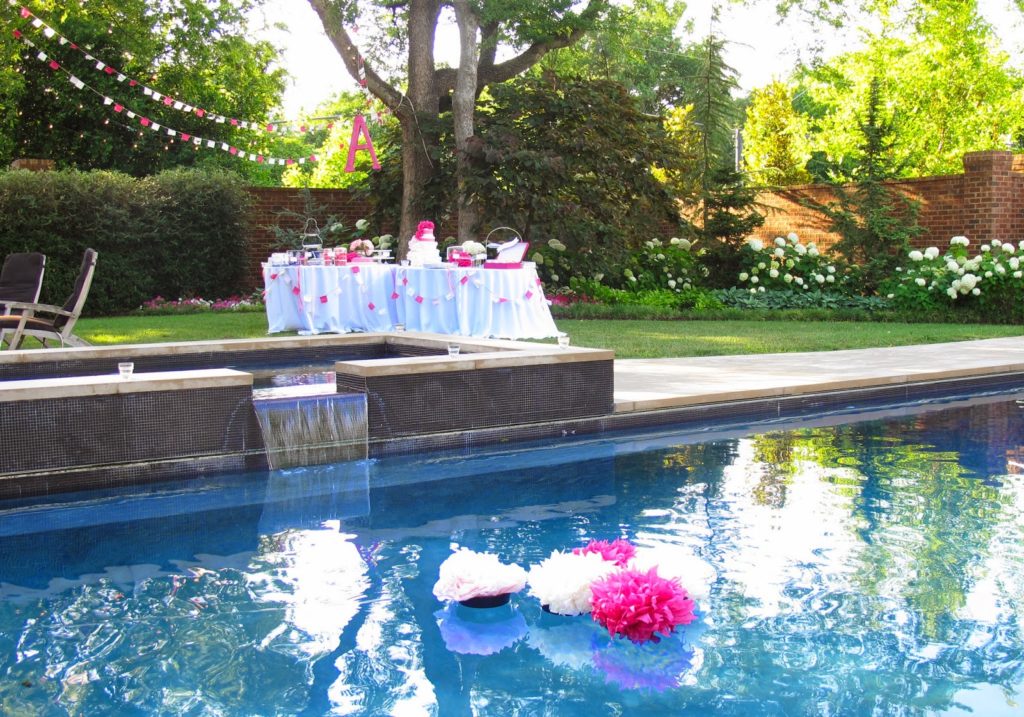
Jenni covered her hats with chalkboard paper and wrote with chalk. Amara’s first birthday party HERE

We’d love to see your party hats! Email us!
 -L