baby shower

MODERN MINT & NEUTRAL BABY SHOWER

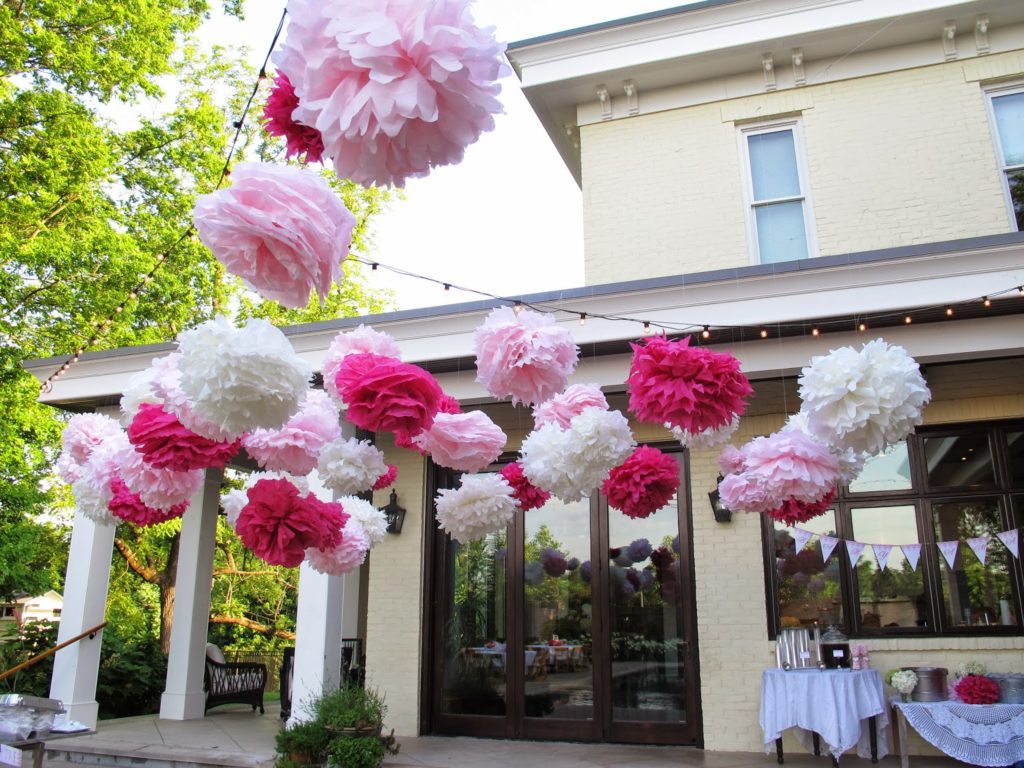
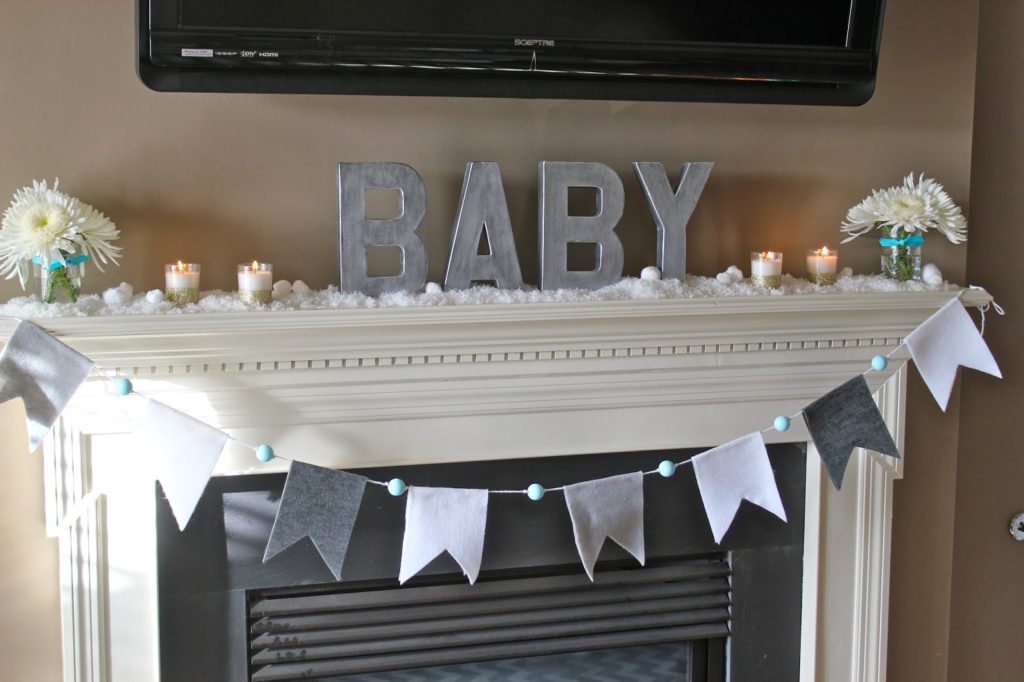
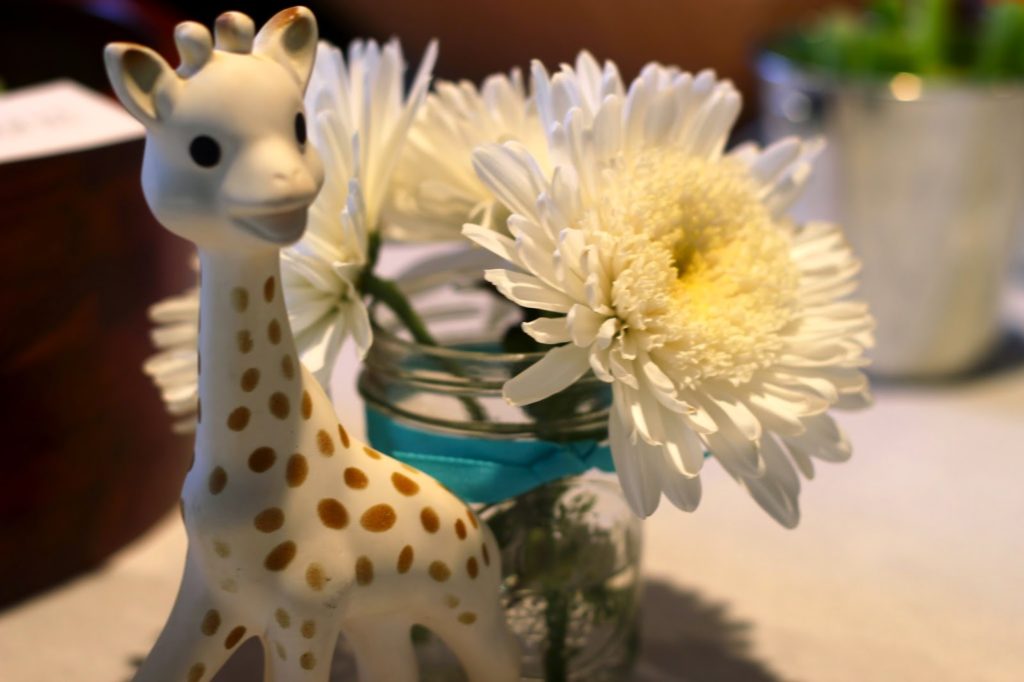
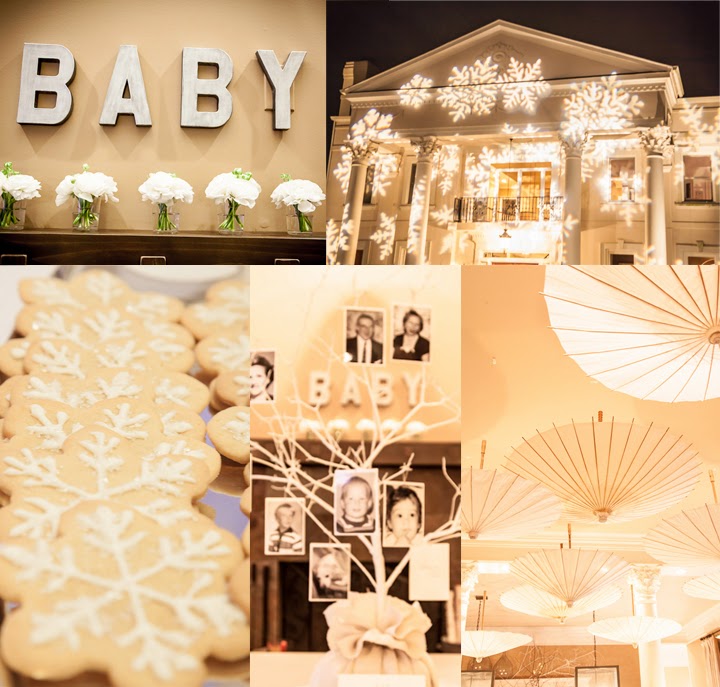
We LOVE planning parties, especially baby showers! It’s so special and important to shower that mama-to-be with lots of love and thoughtful details. I was honored to co-host with 2 fabulous ladies, Dara and Emily, friends of the guest of honor, Leeron. It will be the second boy for Leeron, but we didn’t want to go all blue blue blue. We went with white, neutrals, and pops of mint and sage green. 
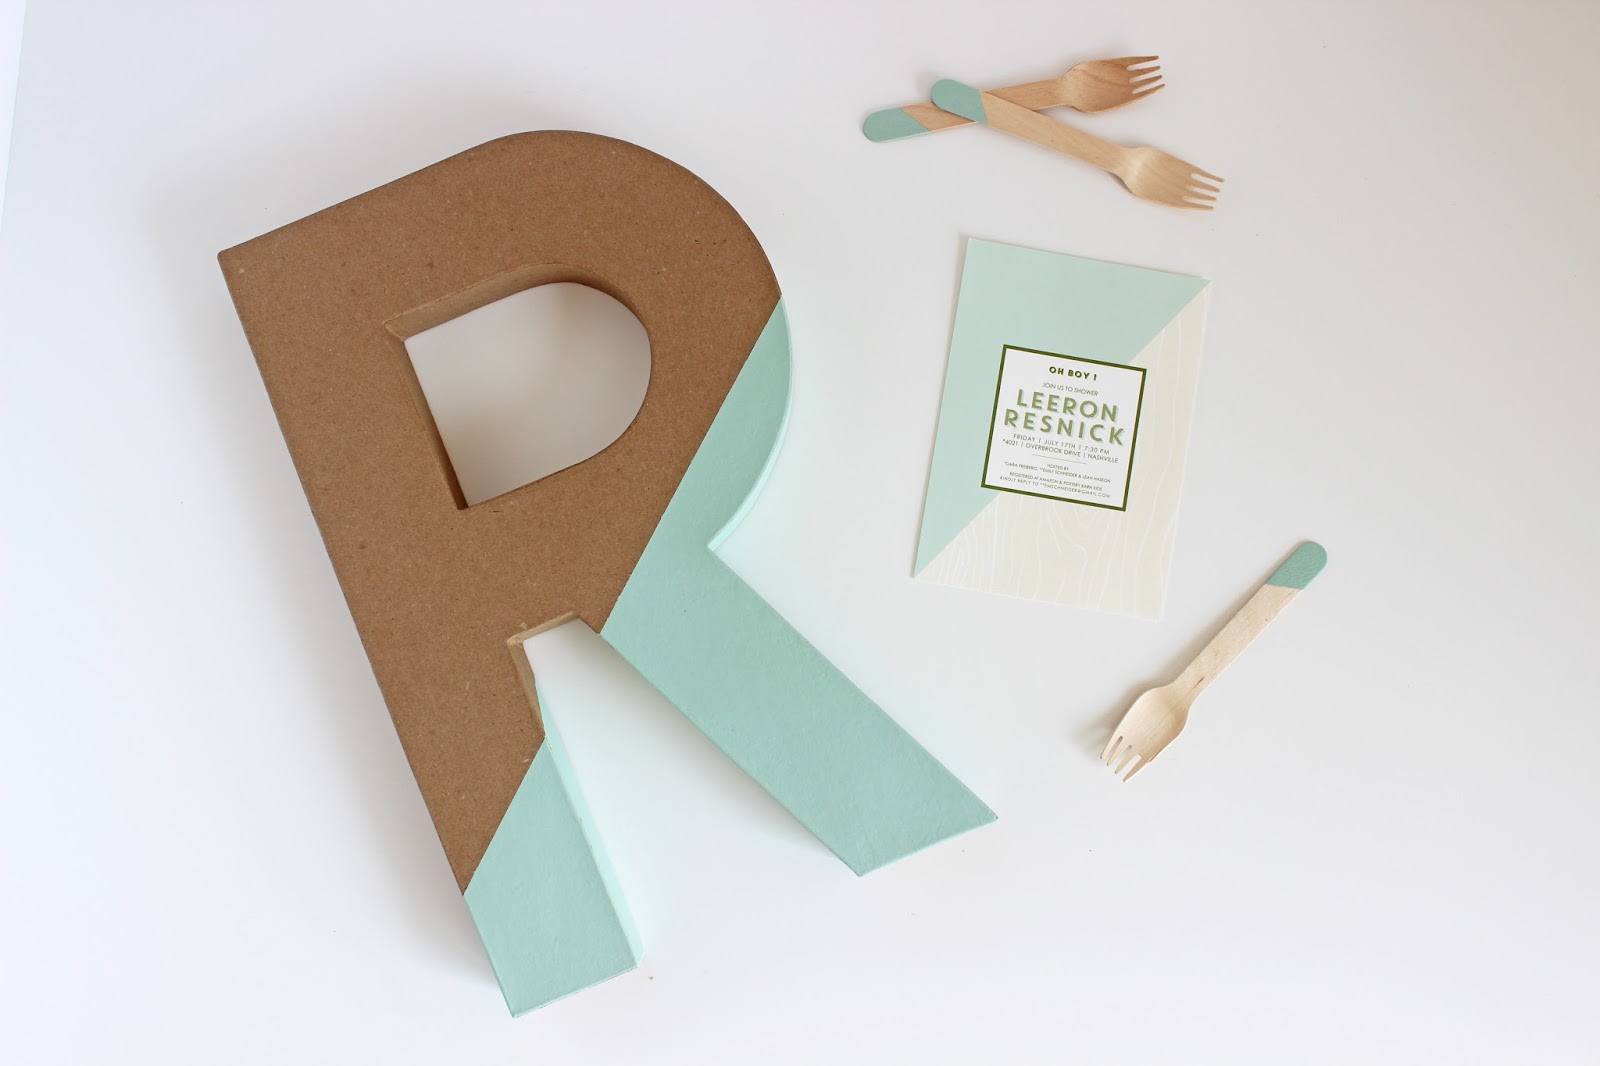
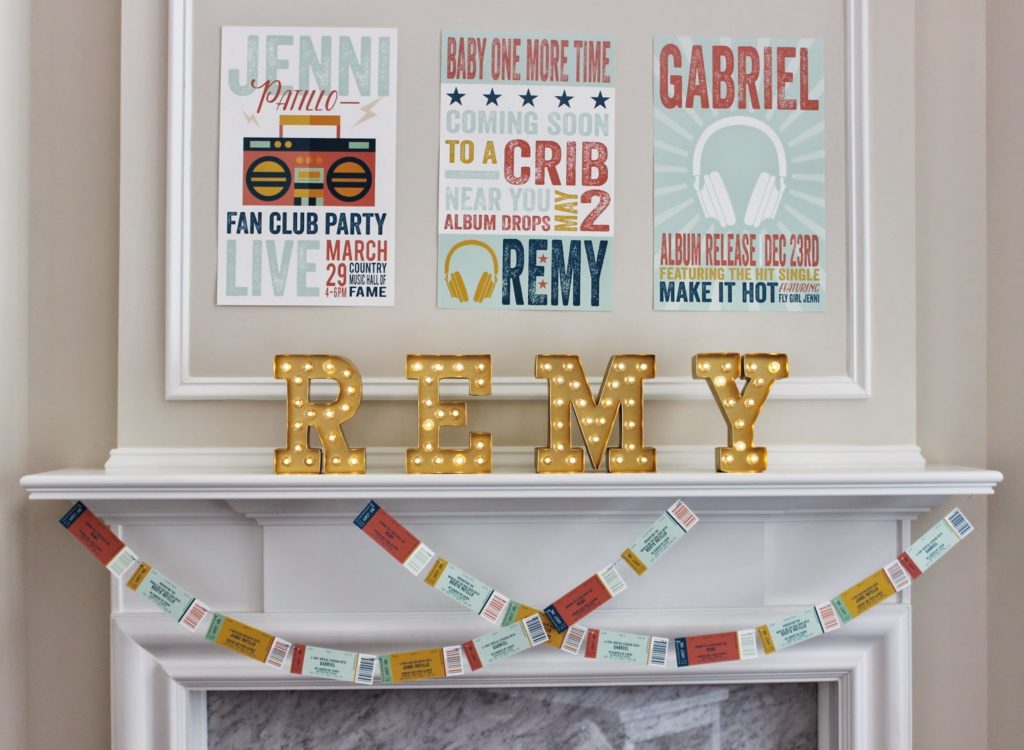
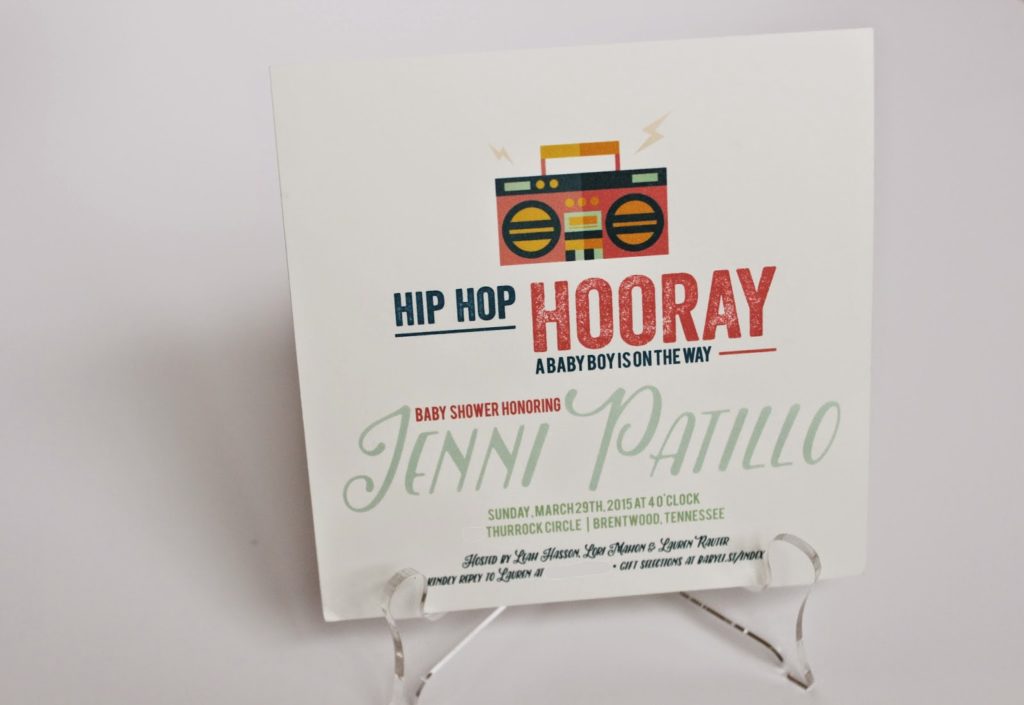
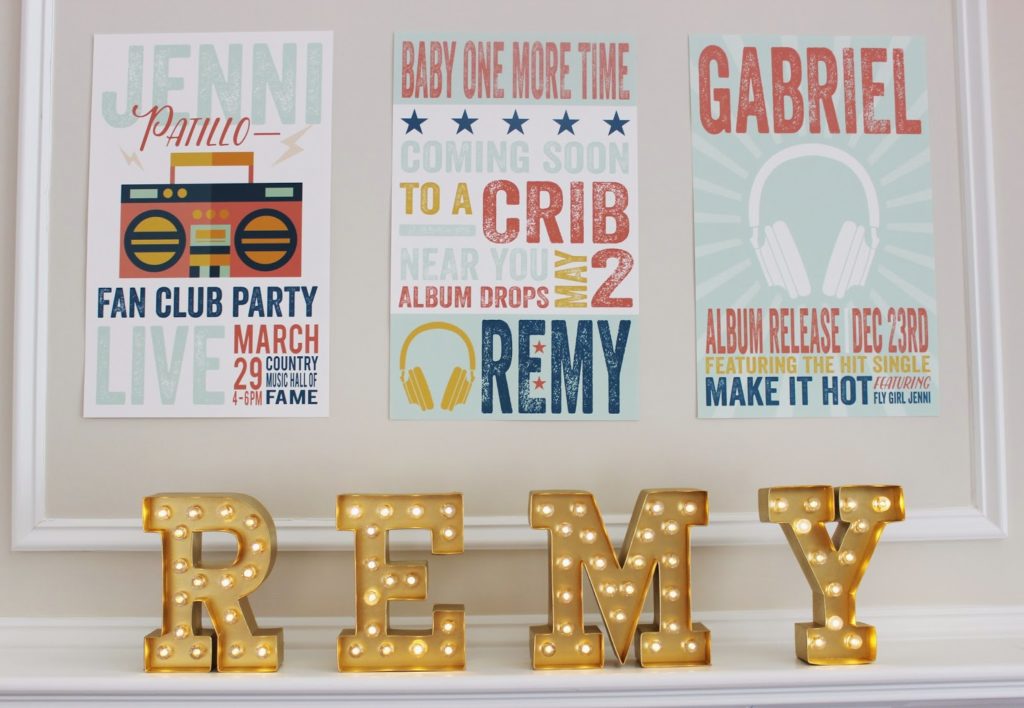
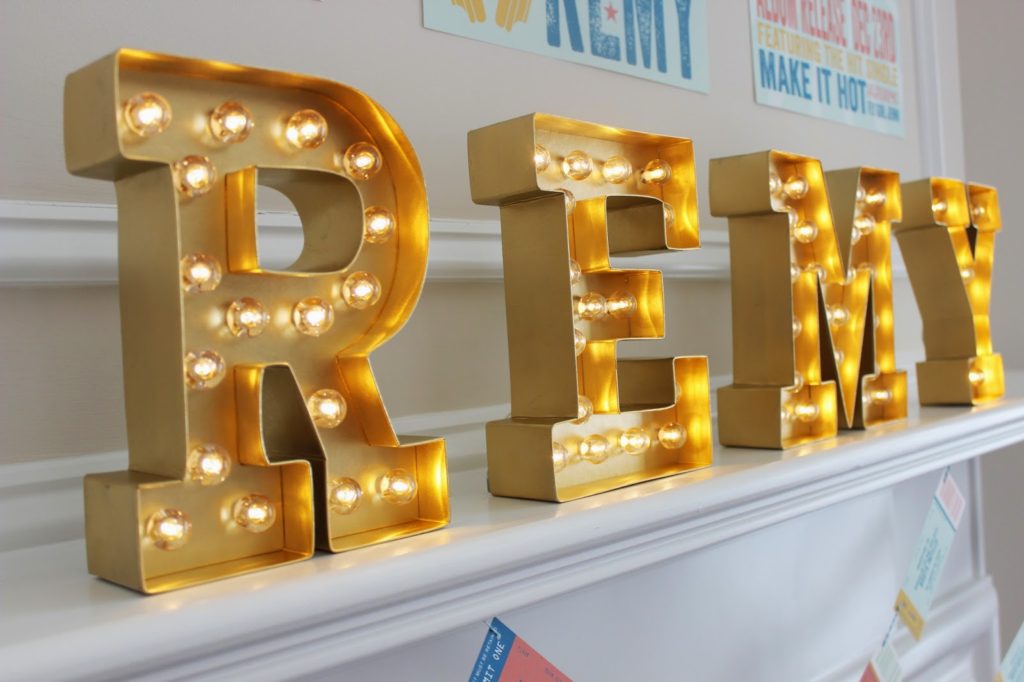
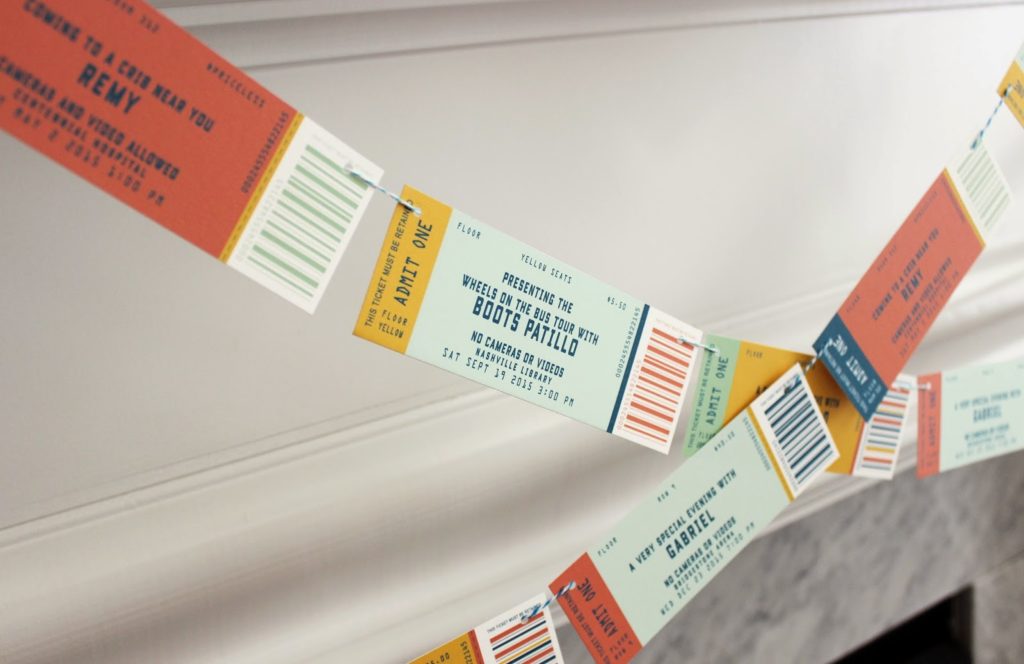
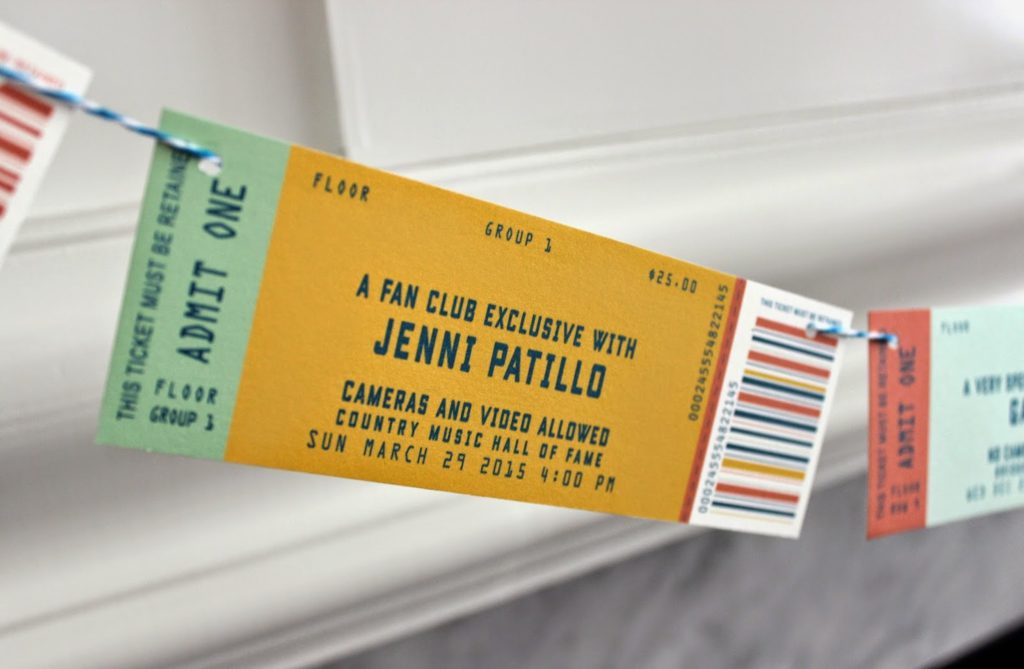
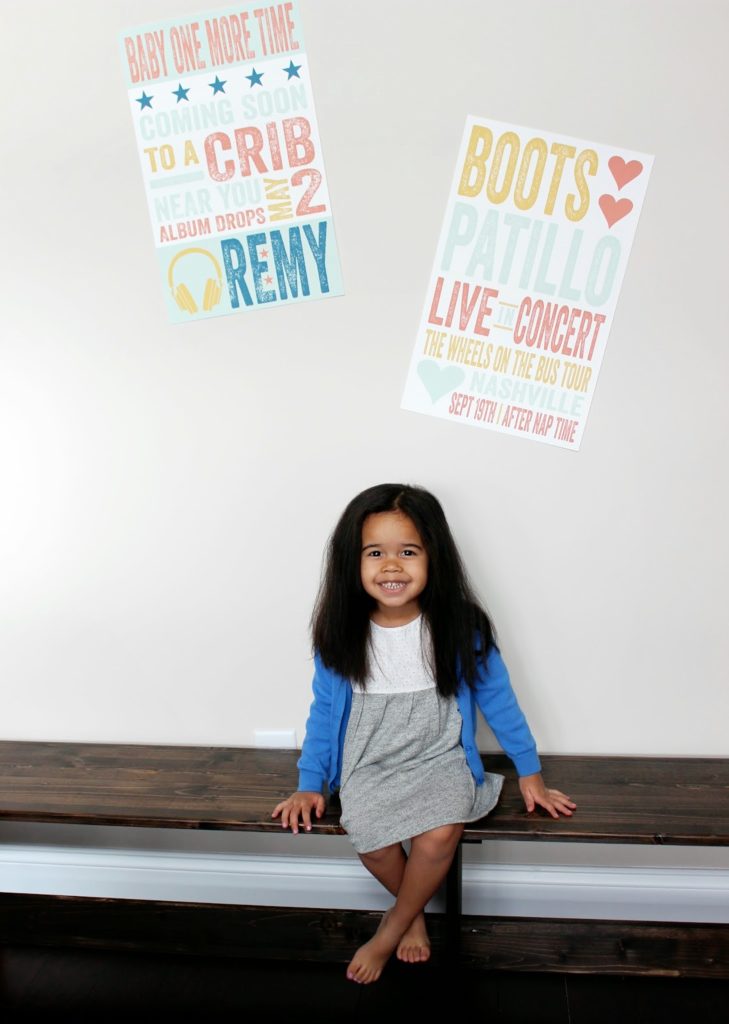
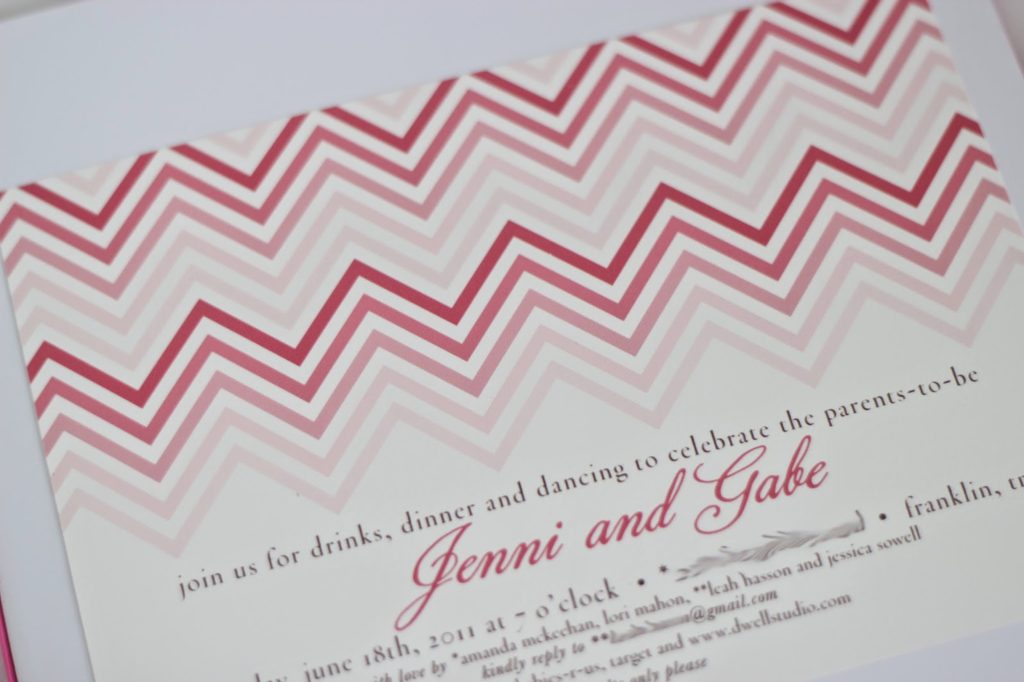
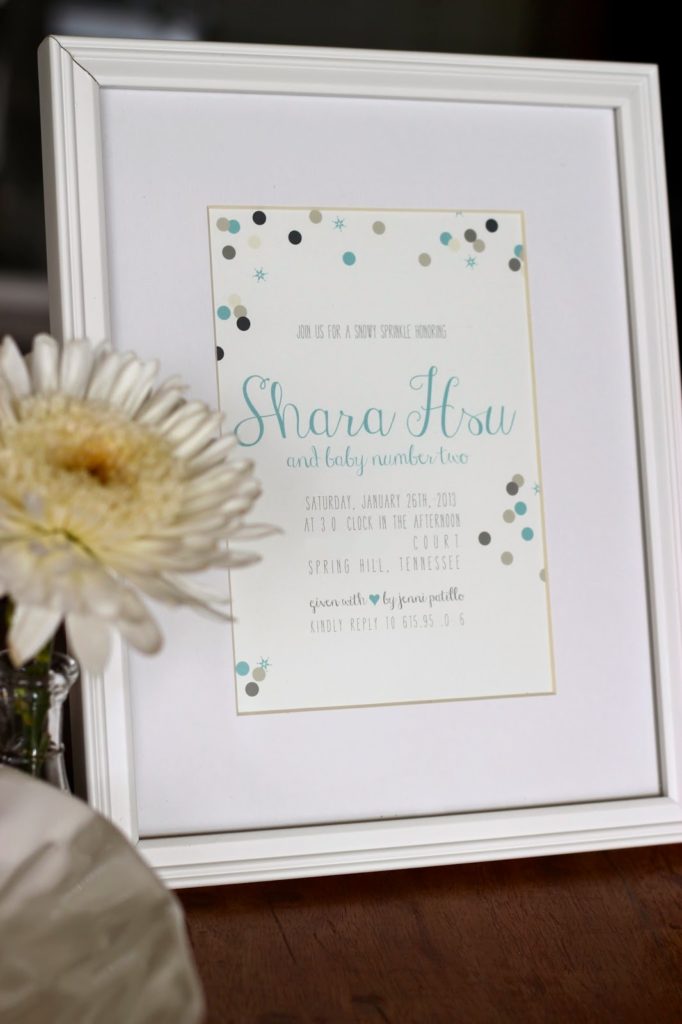
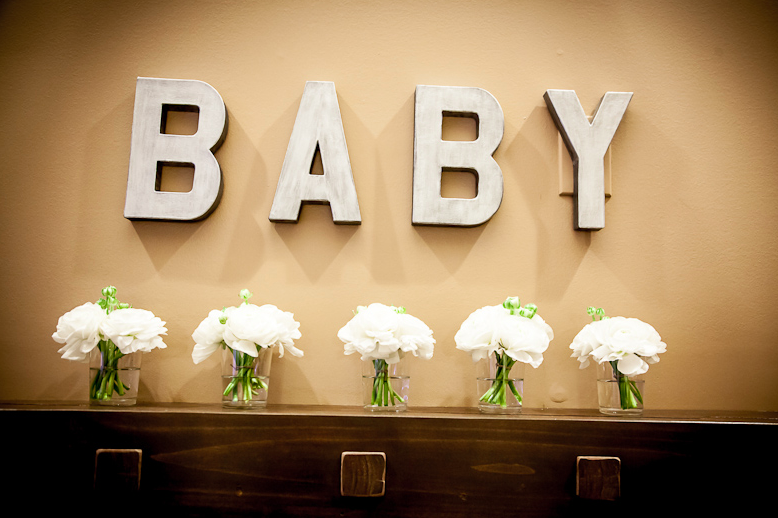
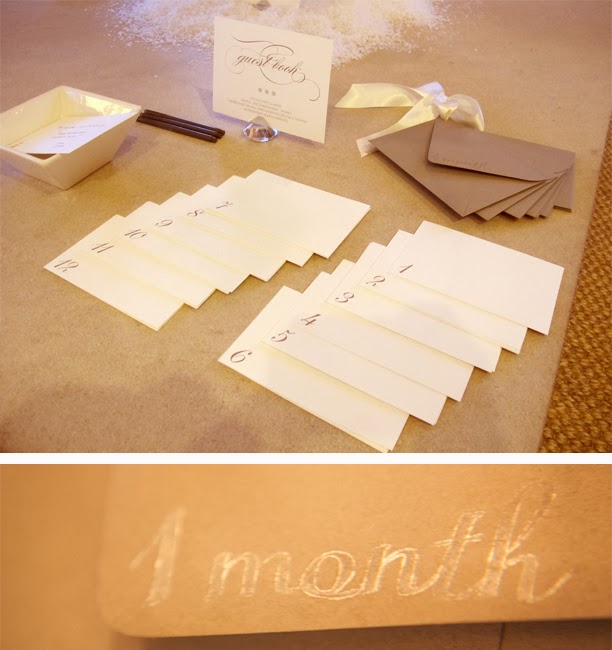
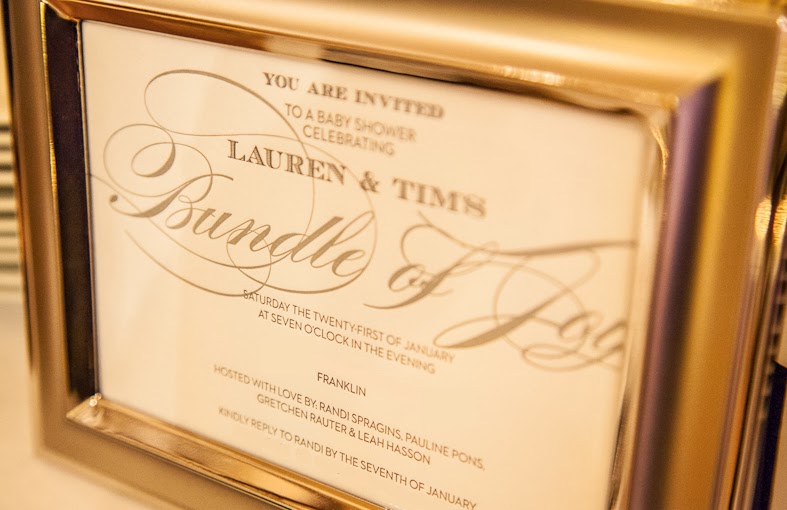
Lauren of Rock Paper Scissors designed the invitation, and I really went off of that for decor. It always starts with the invitation for me! The big letter “R” is just a paper mache letter from the craft store… use painters tape to mask off a straight line, paint, and remove tape. 
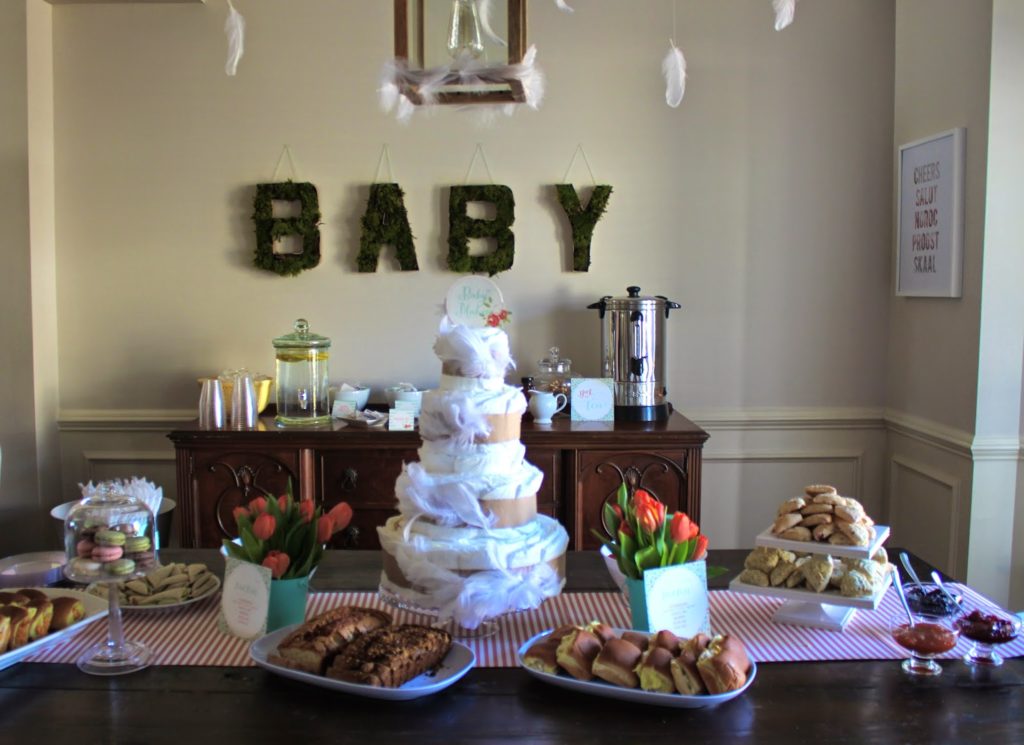
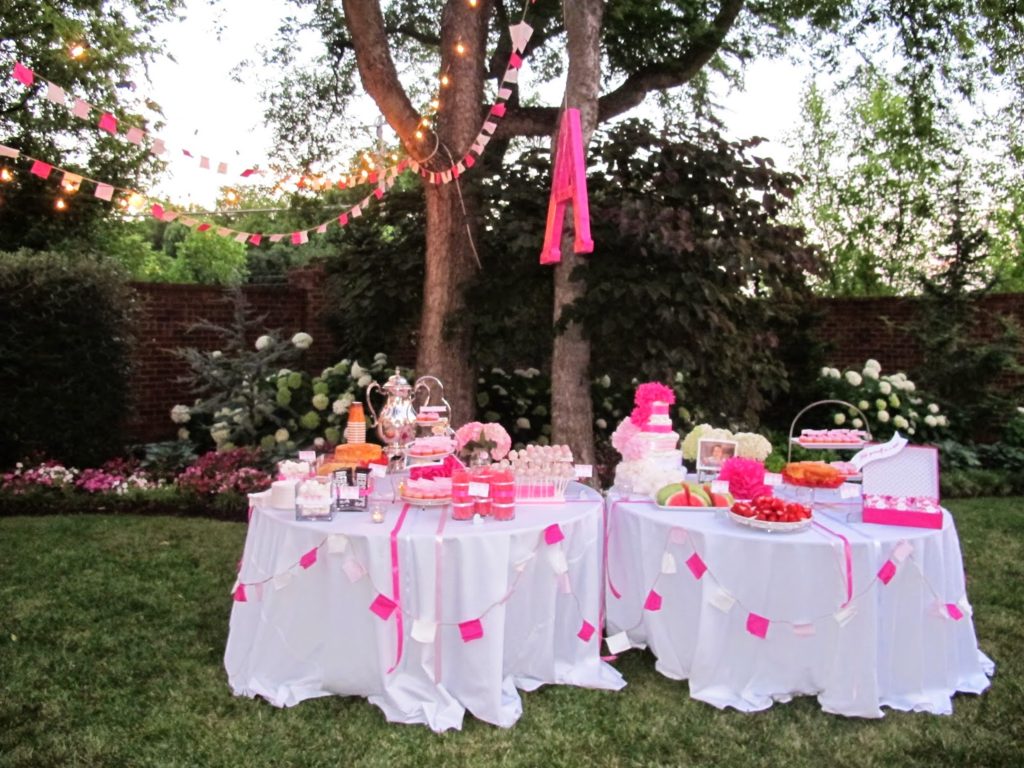
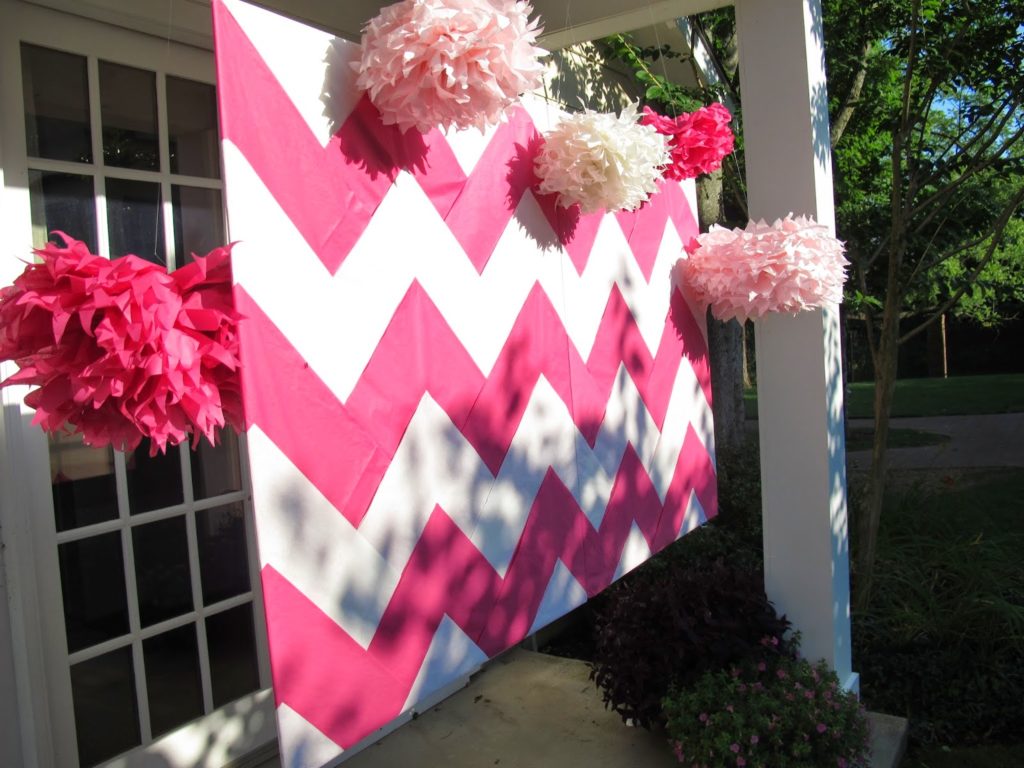
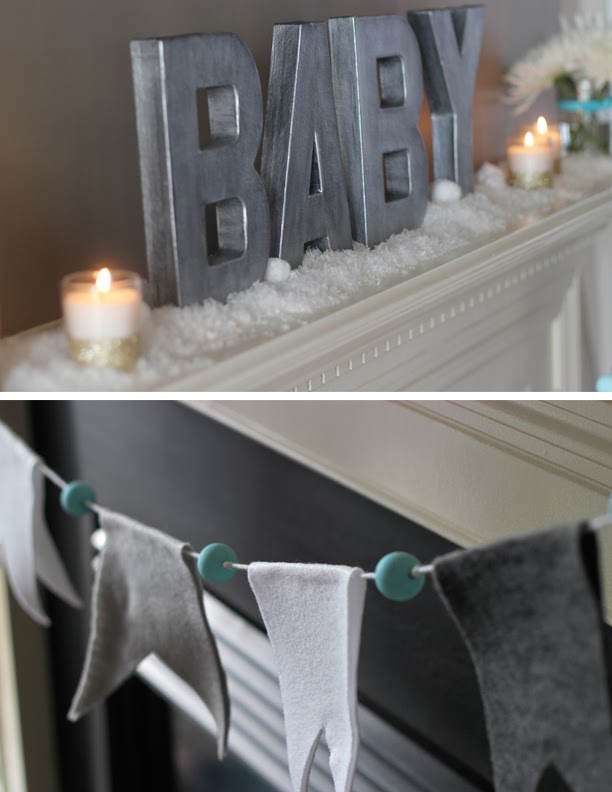
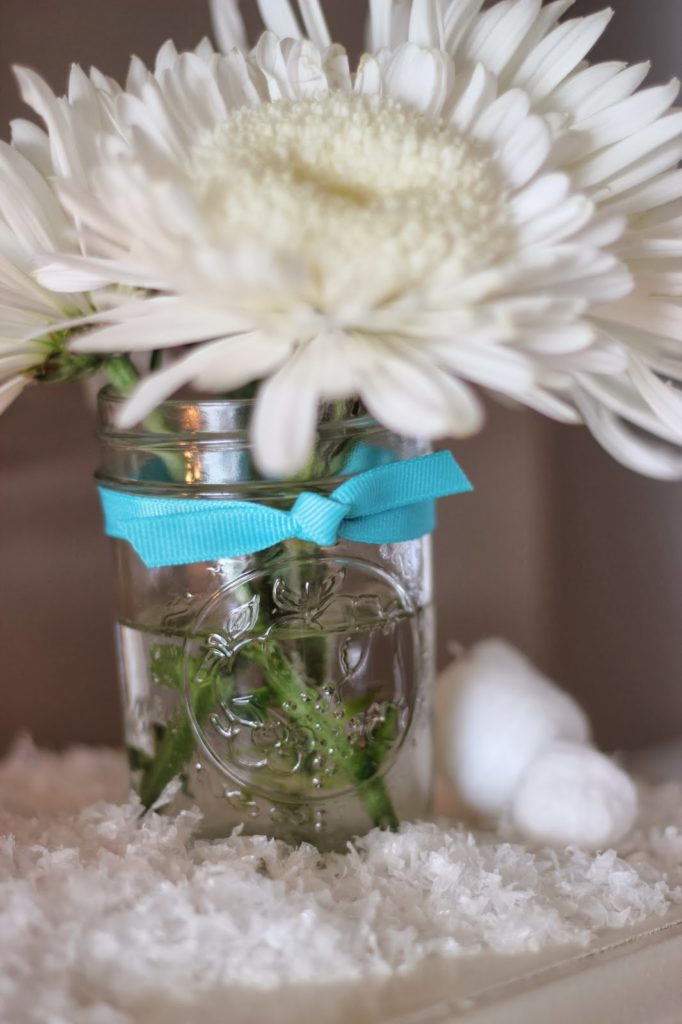
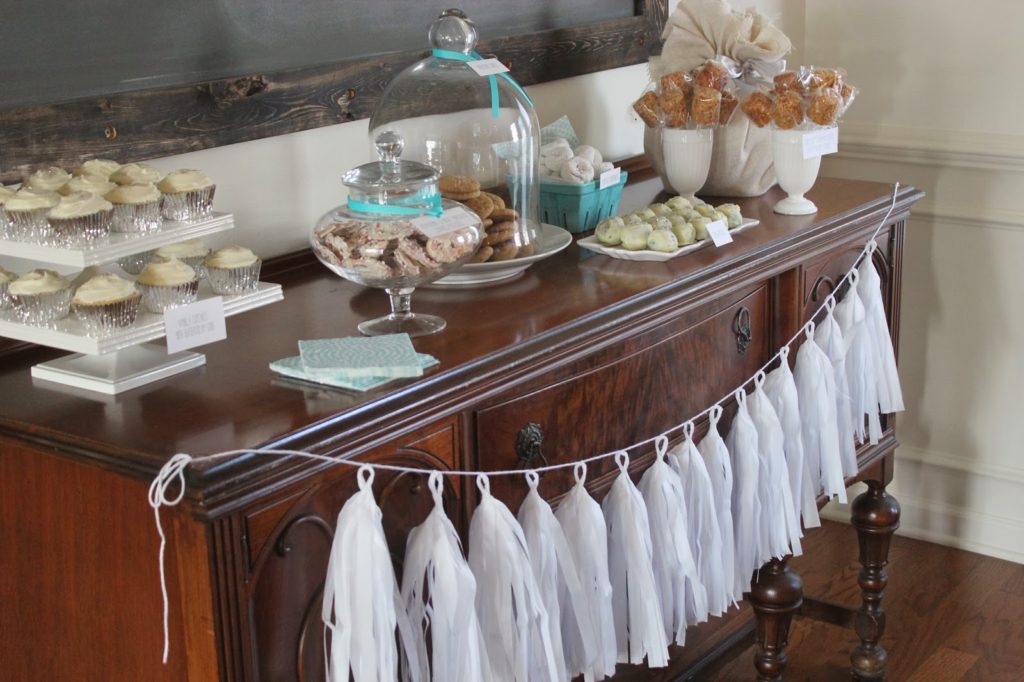
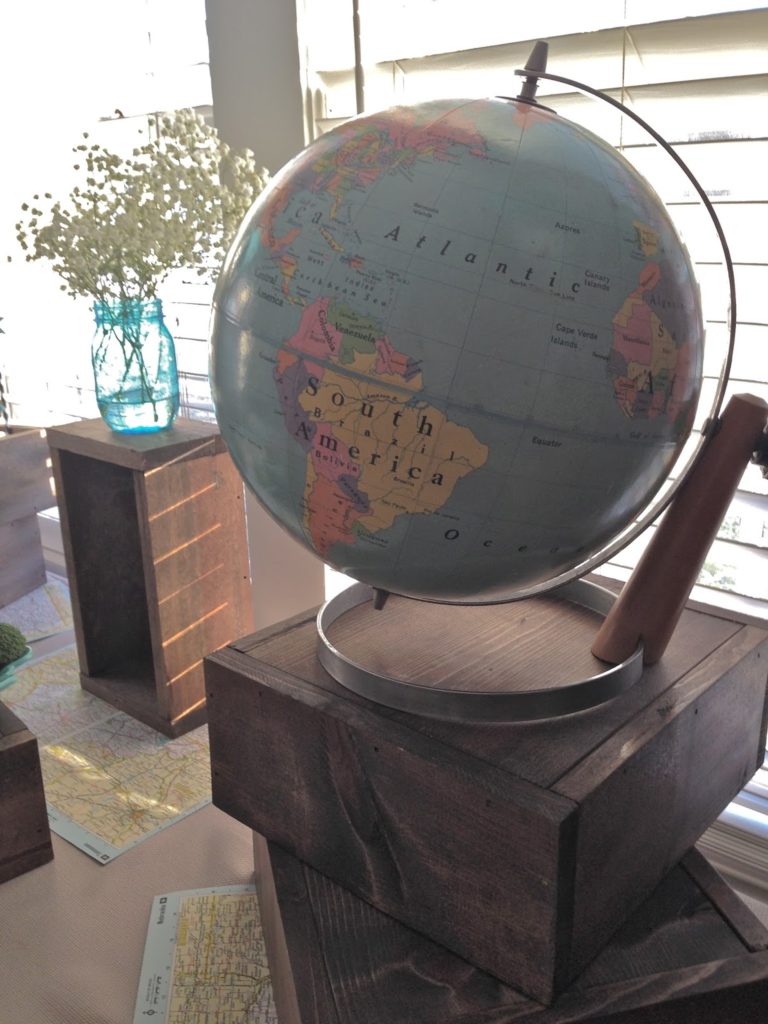
Diagonals, squares, and triangles mixed with all white flowers and live moss made for a simple and pretty party! 
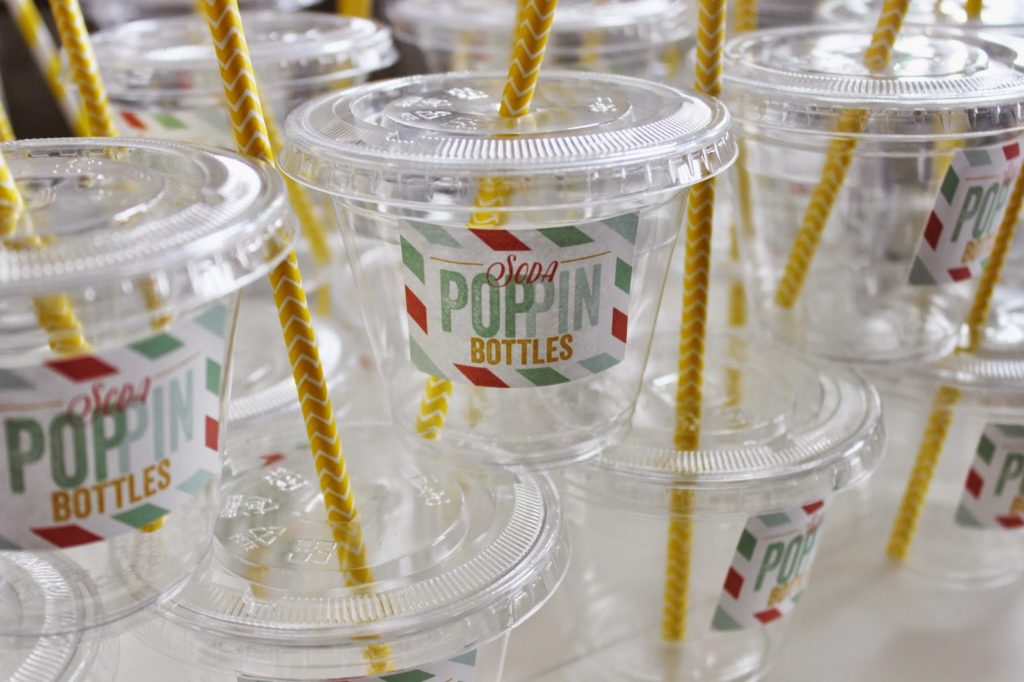
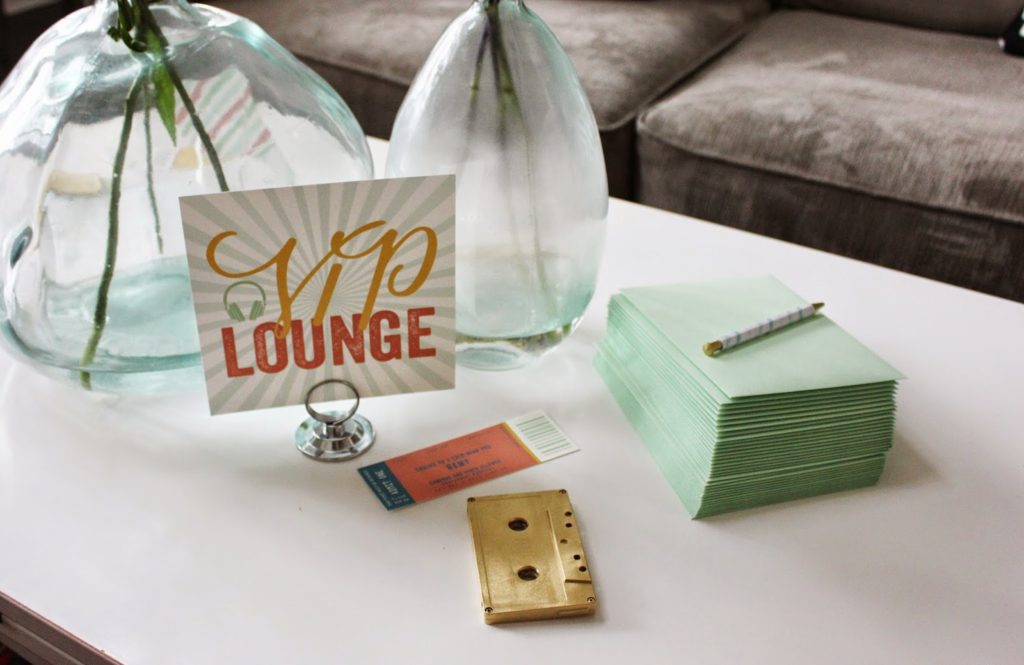
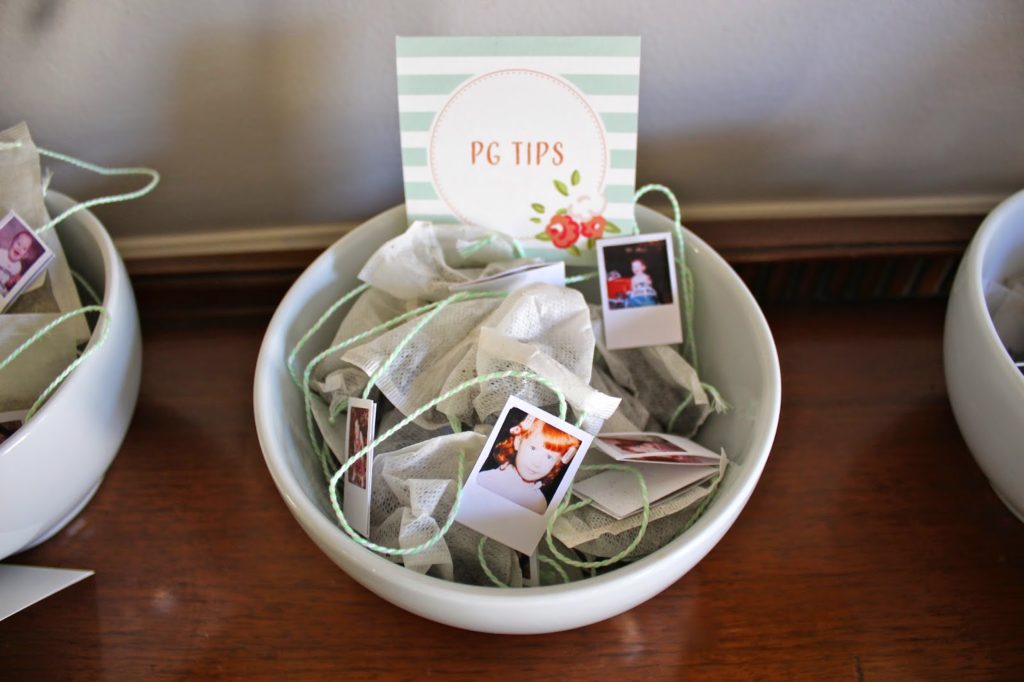
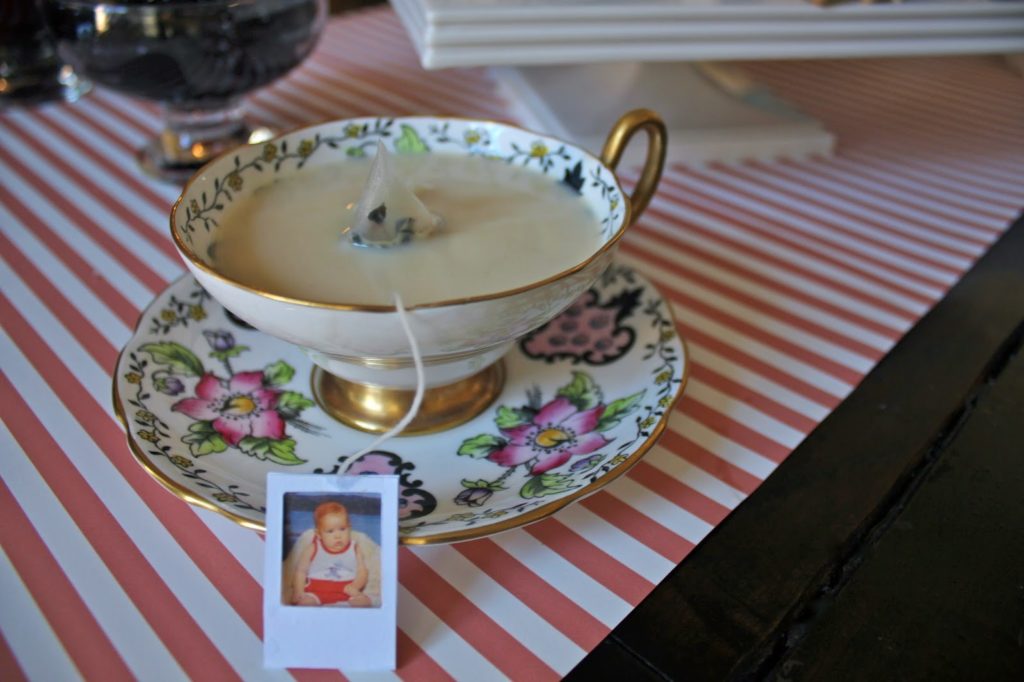
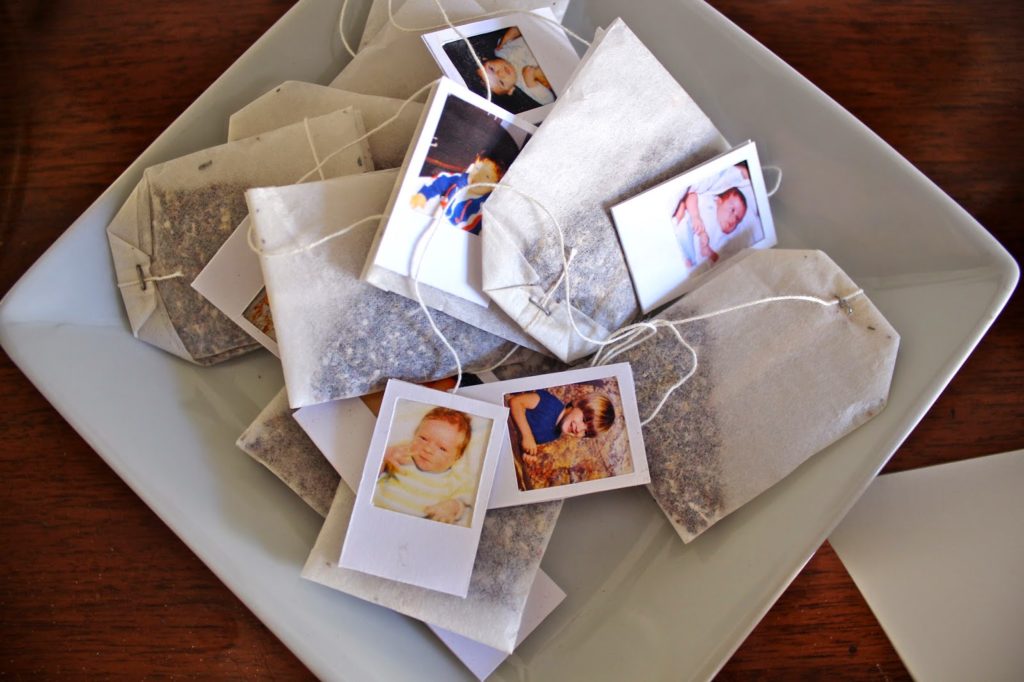
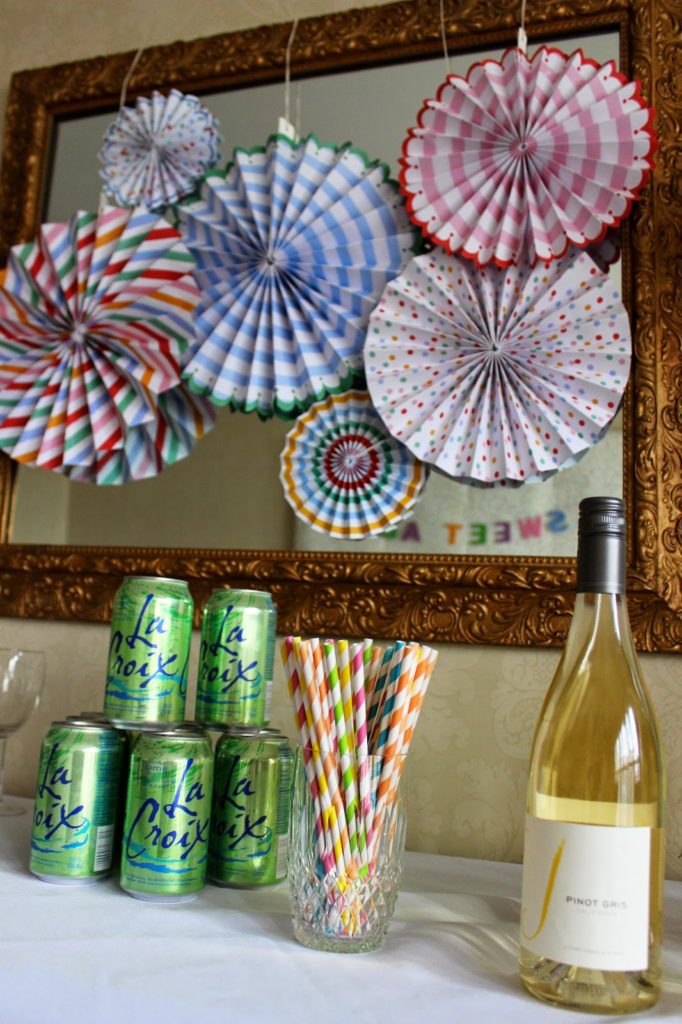
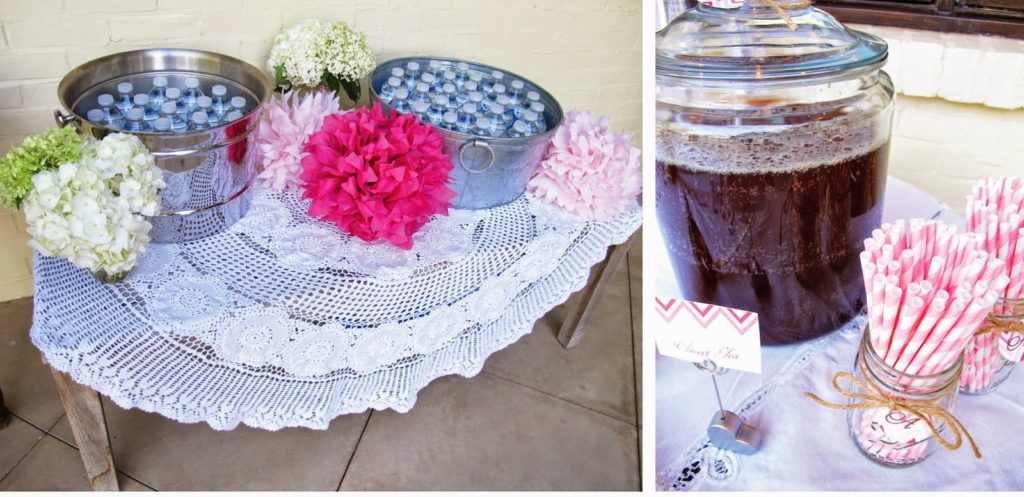
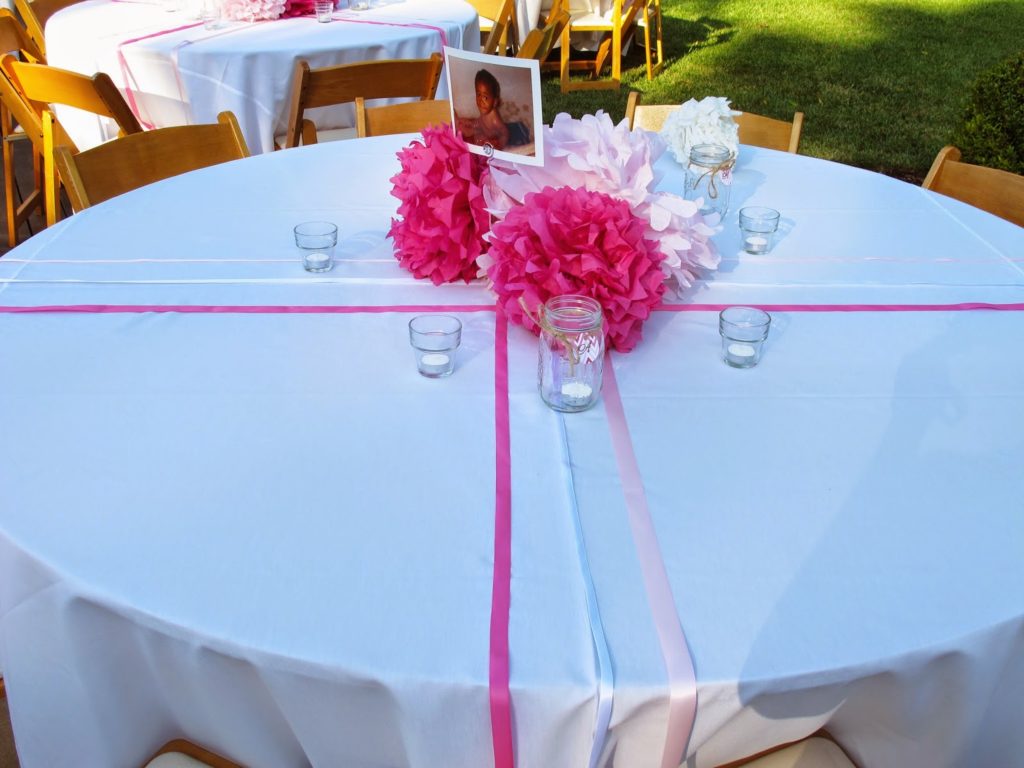
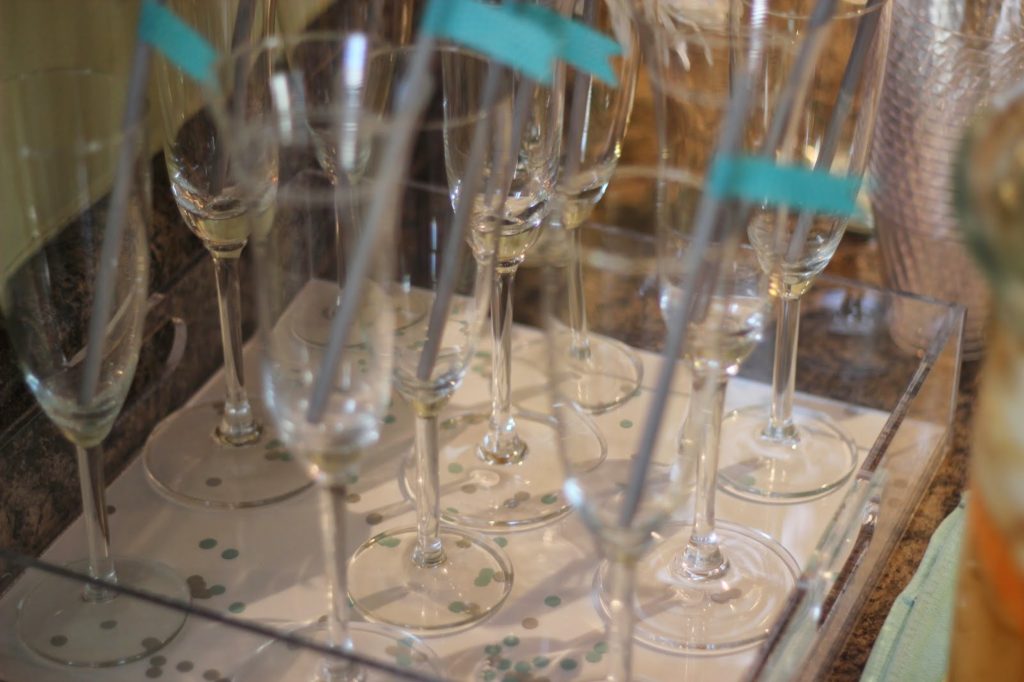
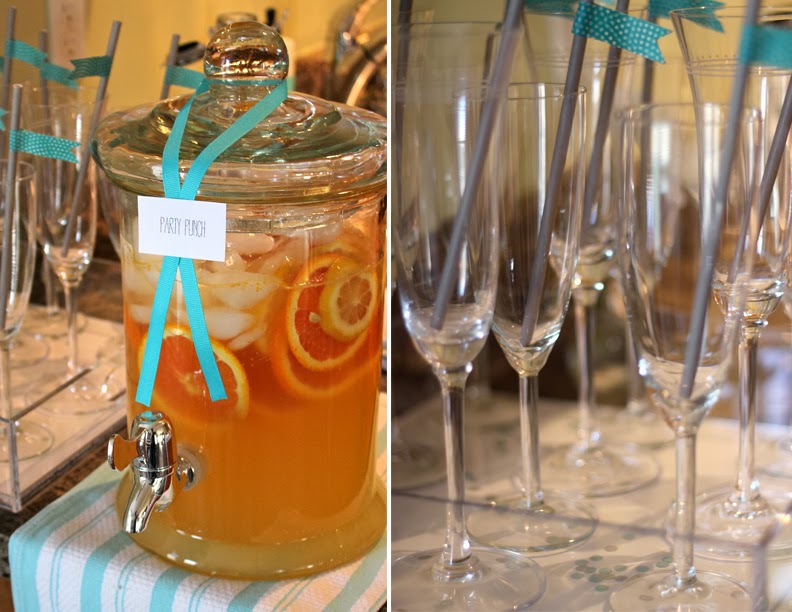
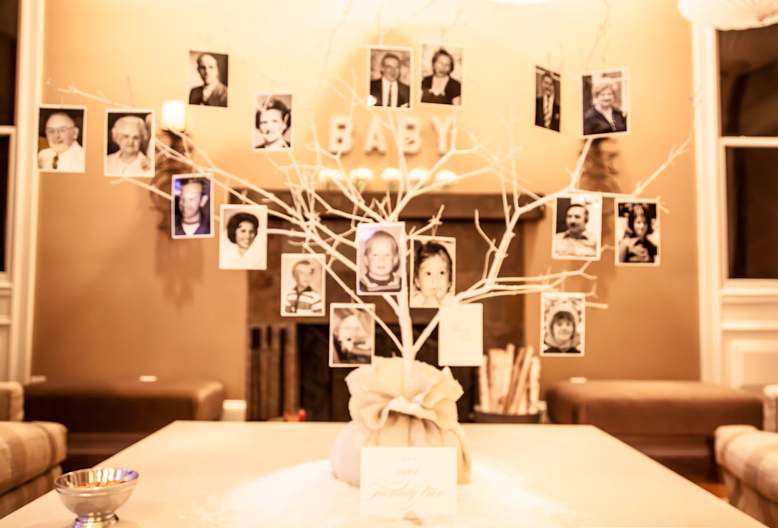
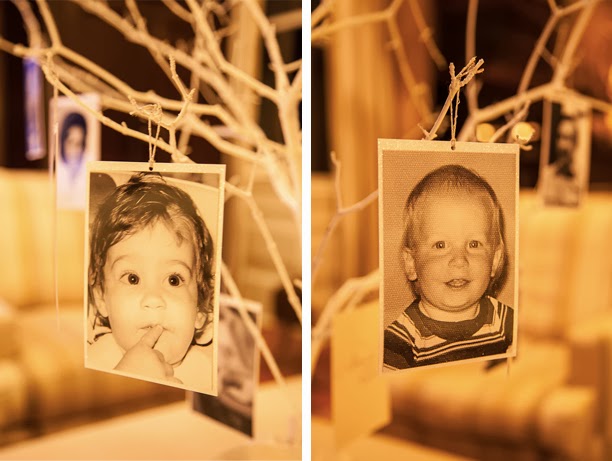
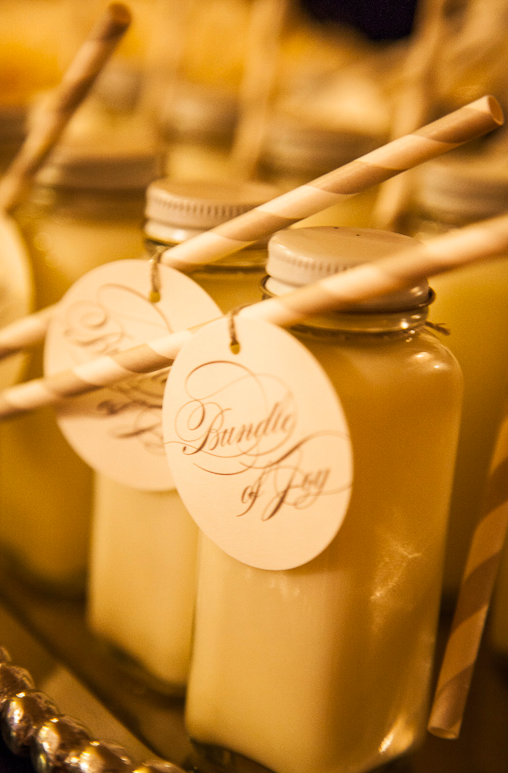
The drink tags were my fav! Guests remembered which drink was theirs by the baby picture of the mama and pop-to-be and the color tag. Leeron’s amazing husband, Matt, secretly emailed me their baby pics, I changed them to black and white in photoshop and cropped to a square. Just punch a hole in the corner of the picture and the colored square and tie with string. The color tag was nice so that you didn’t have to have a different baby pic for each guests. Just use different colors for each pic. Leeron was so surprised (and immediately removed that one embarrassing photo from her tween years)!
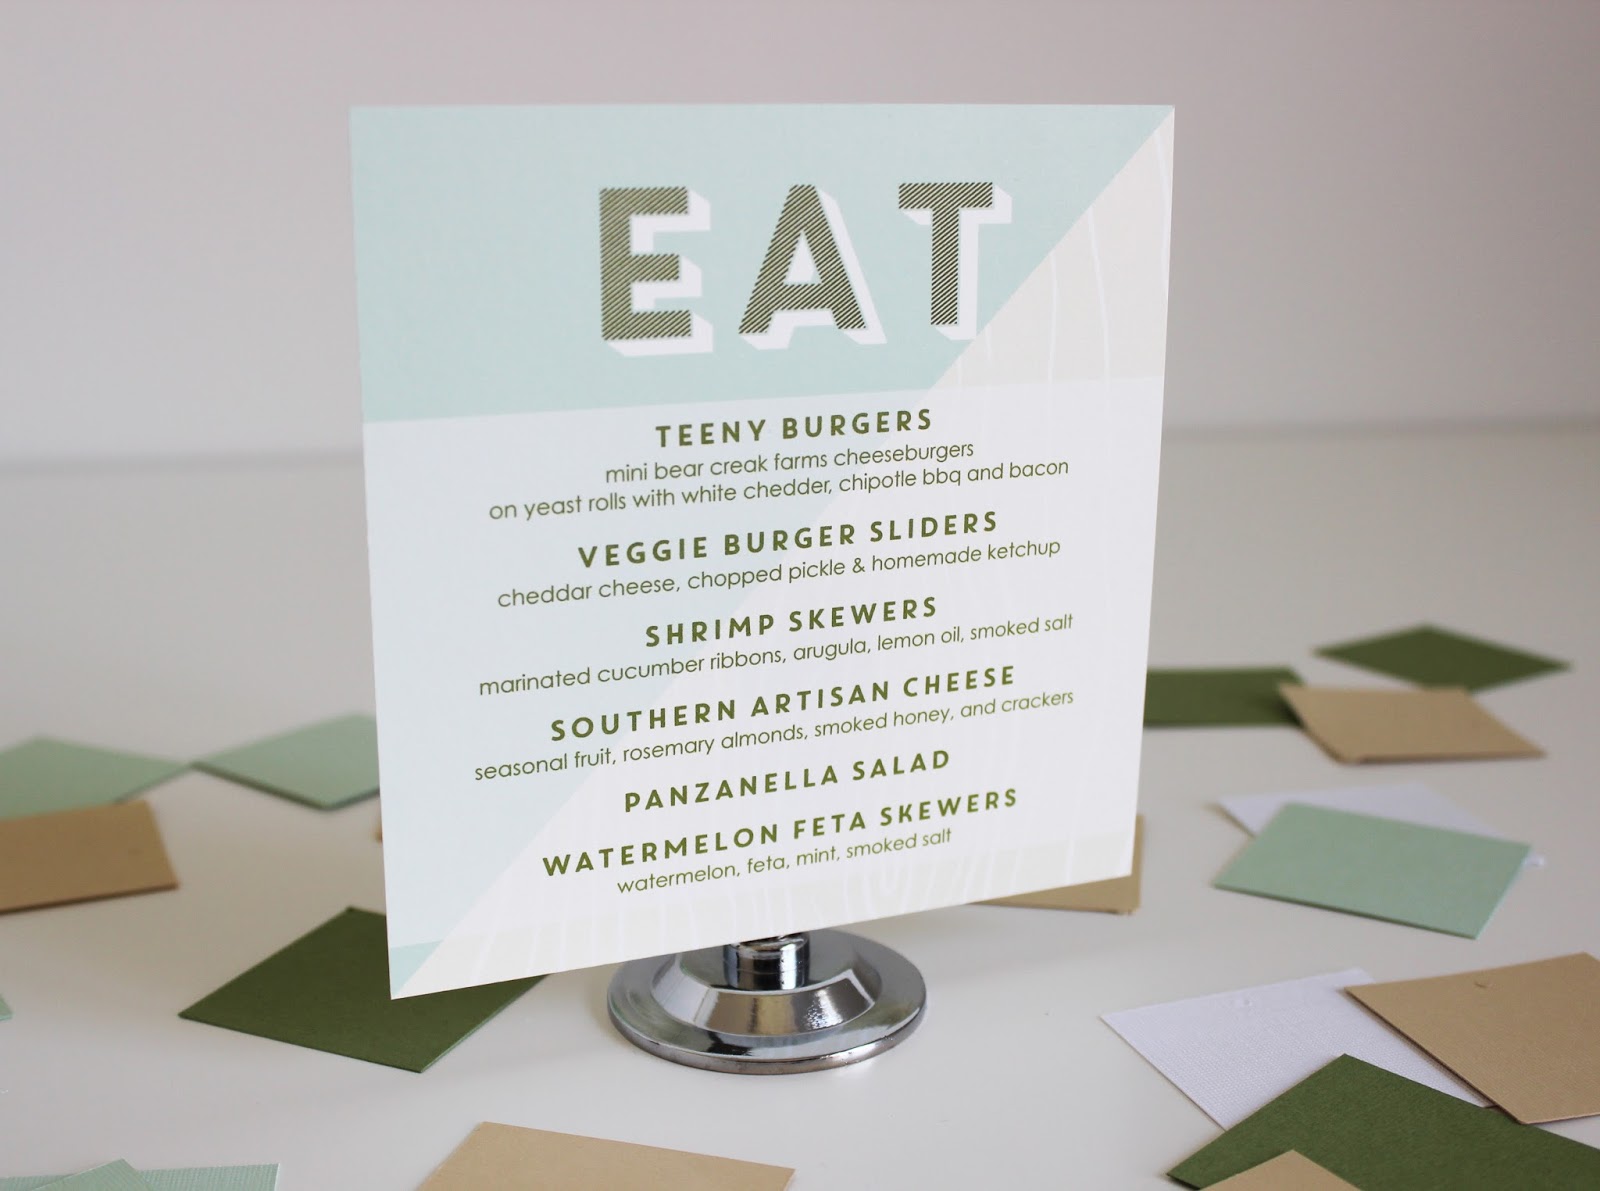
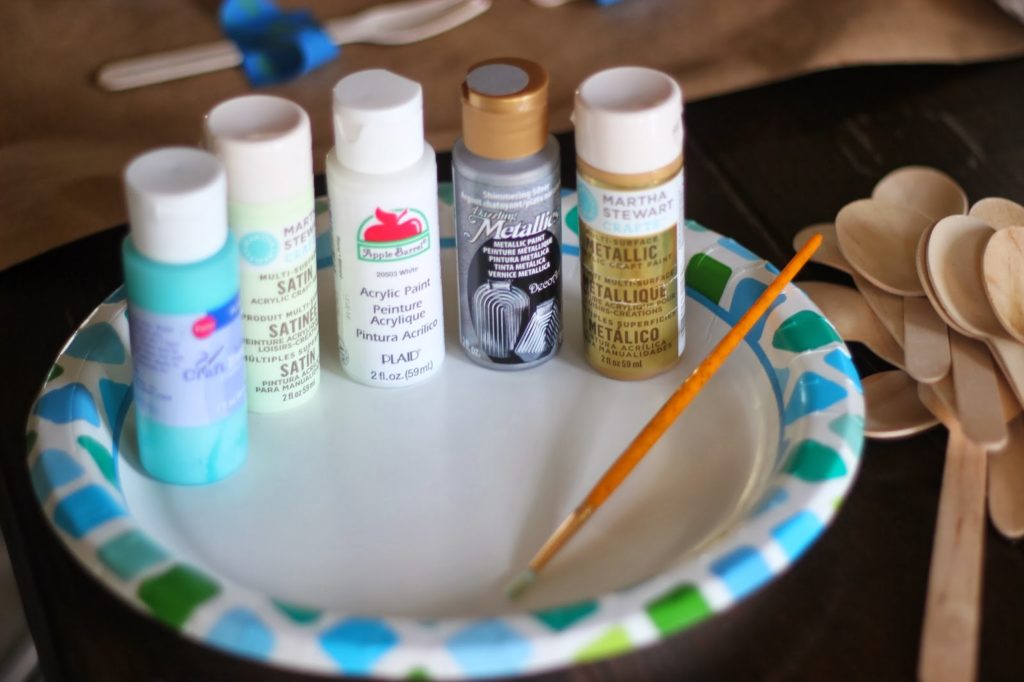
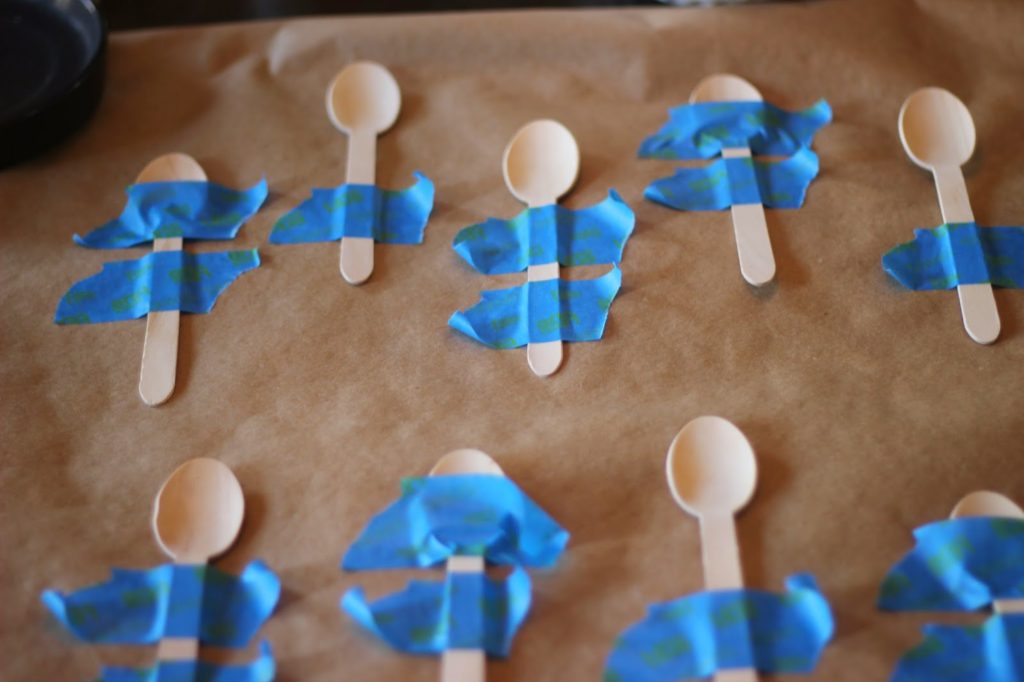
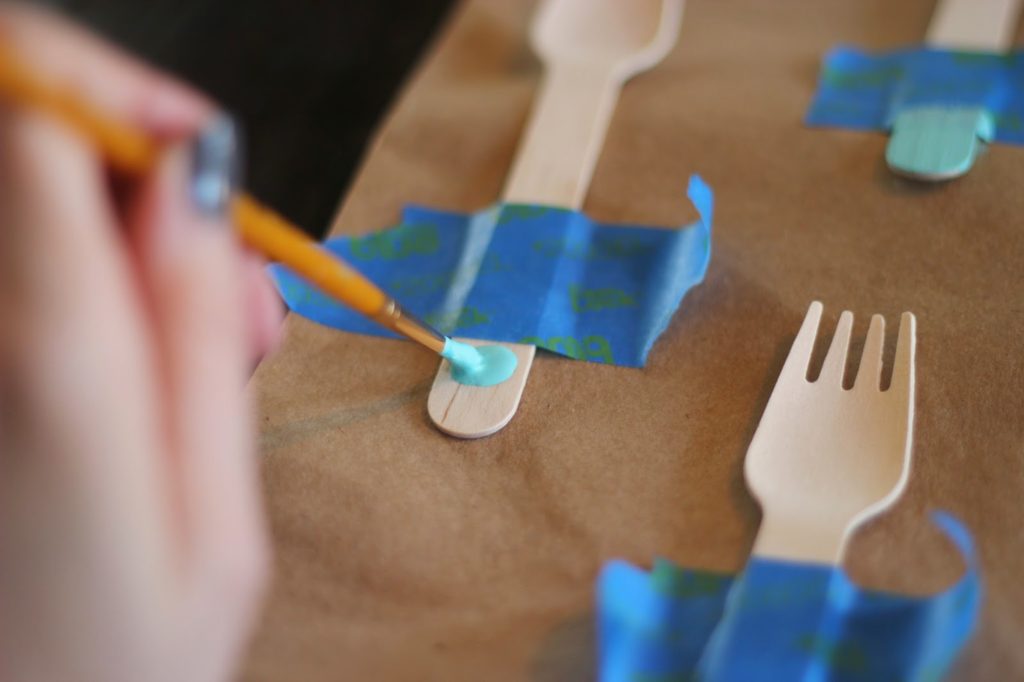
Use painters tape to mask off a diagonal line. Paint and remove tape when dry! Super simple!
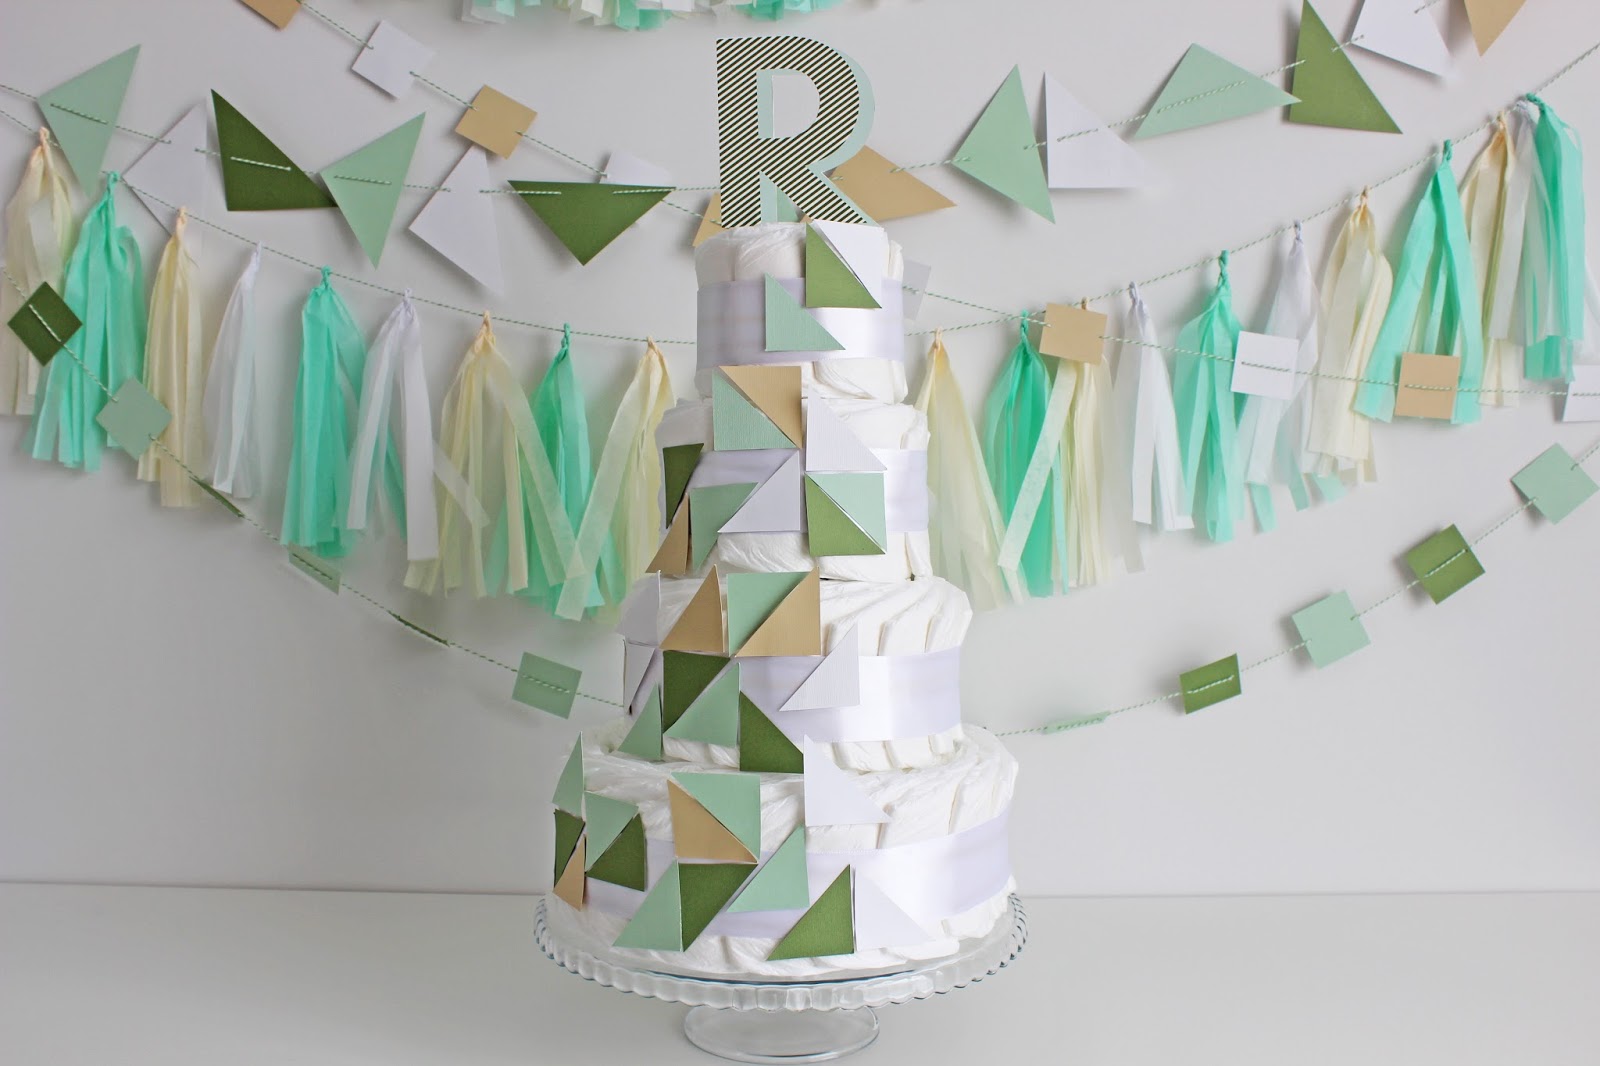
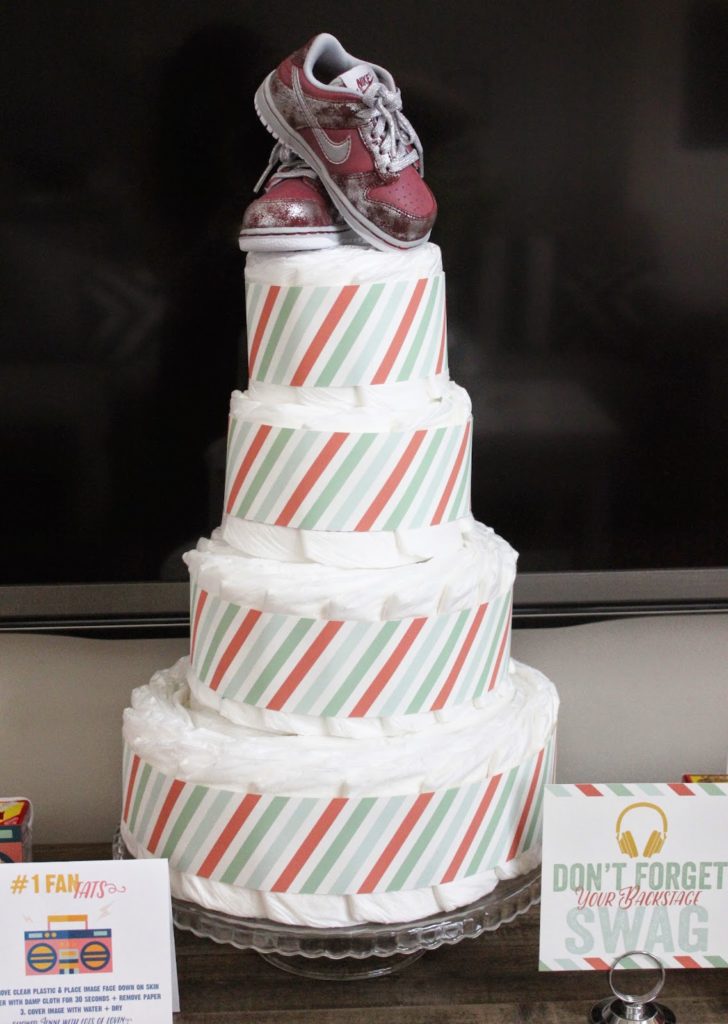
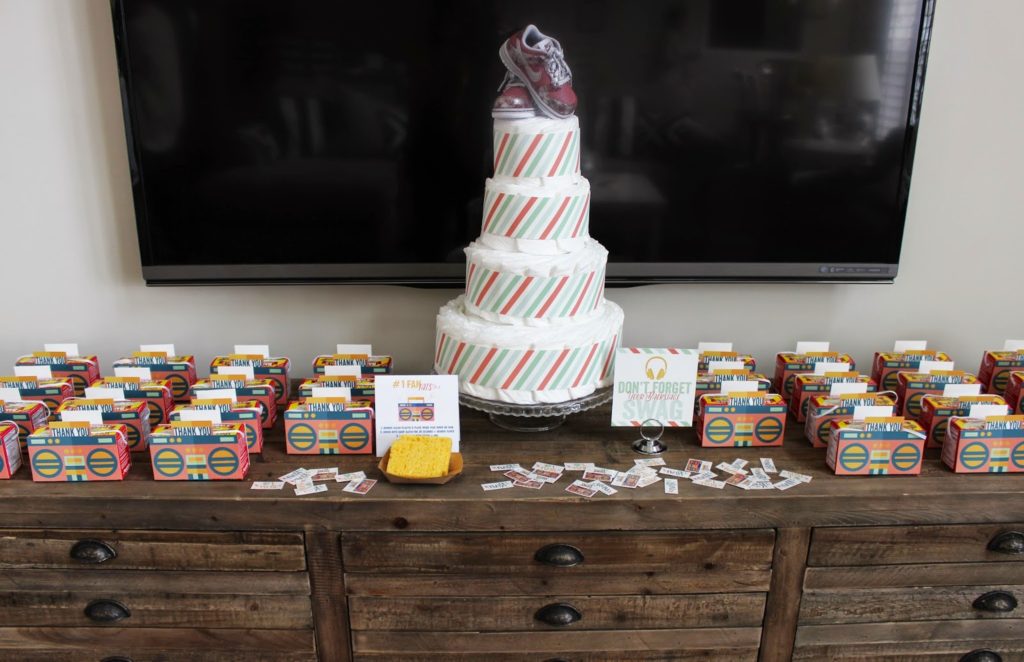
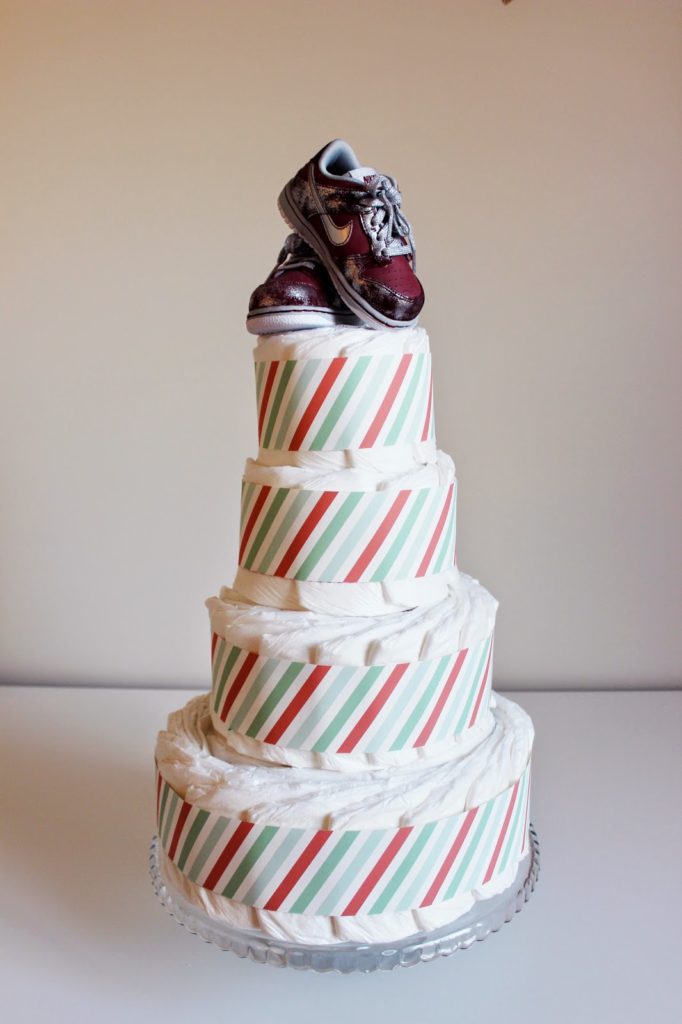
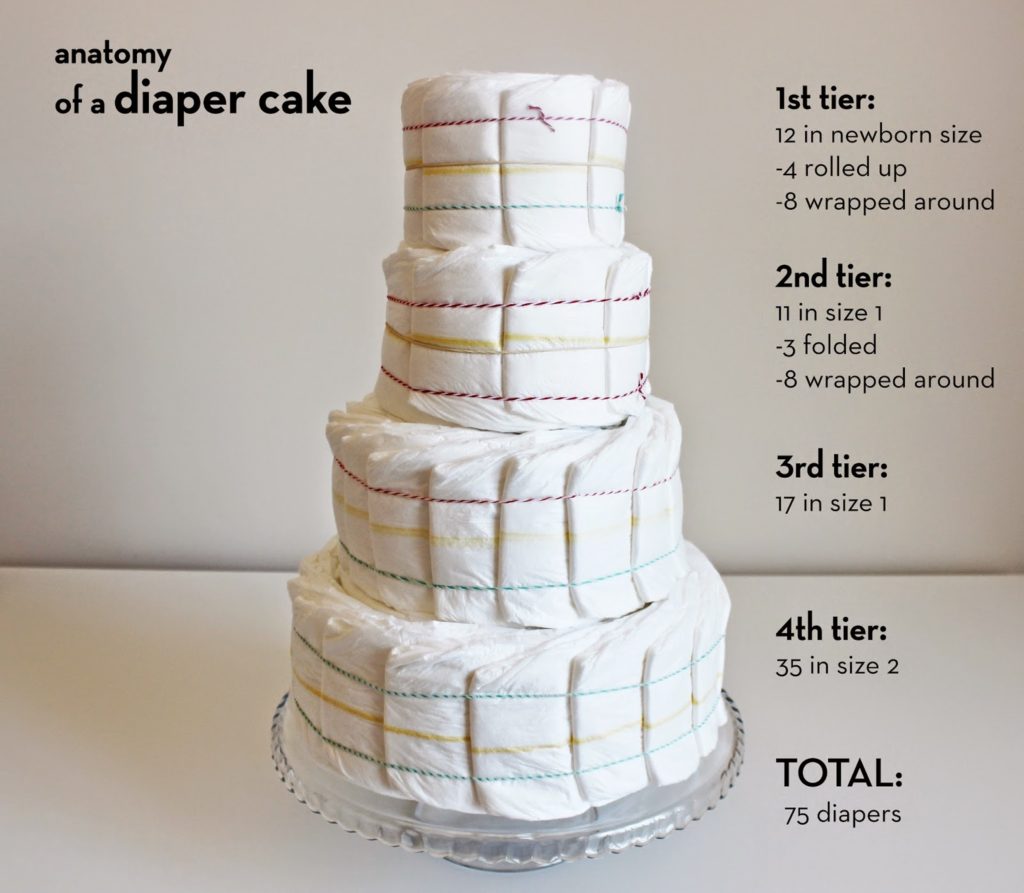
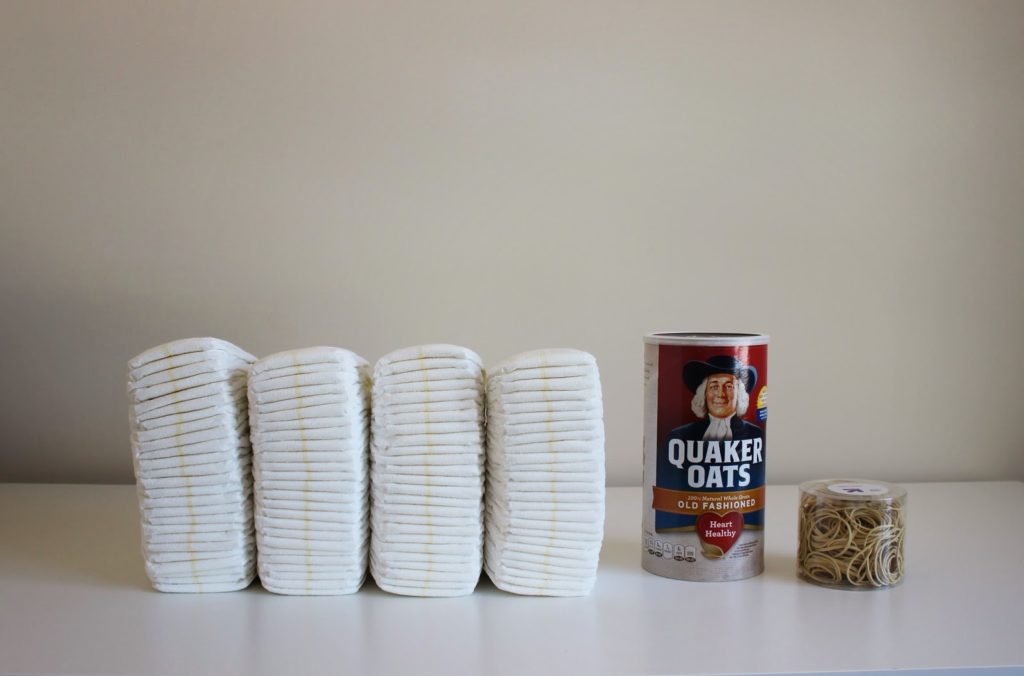
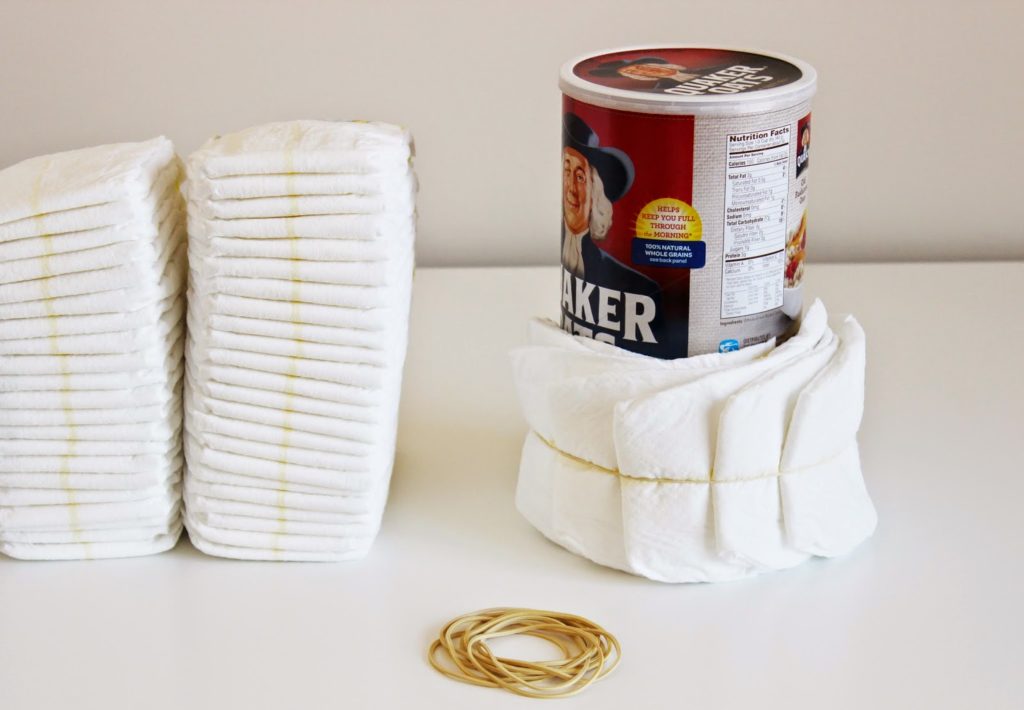
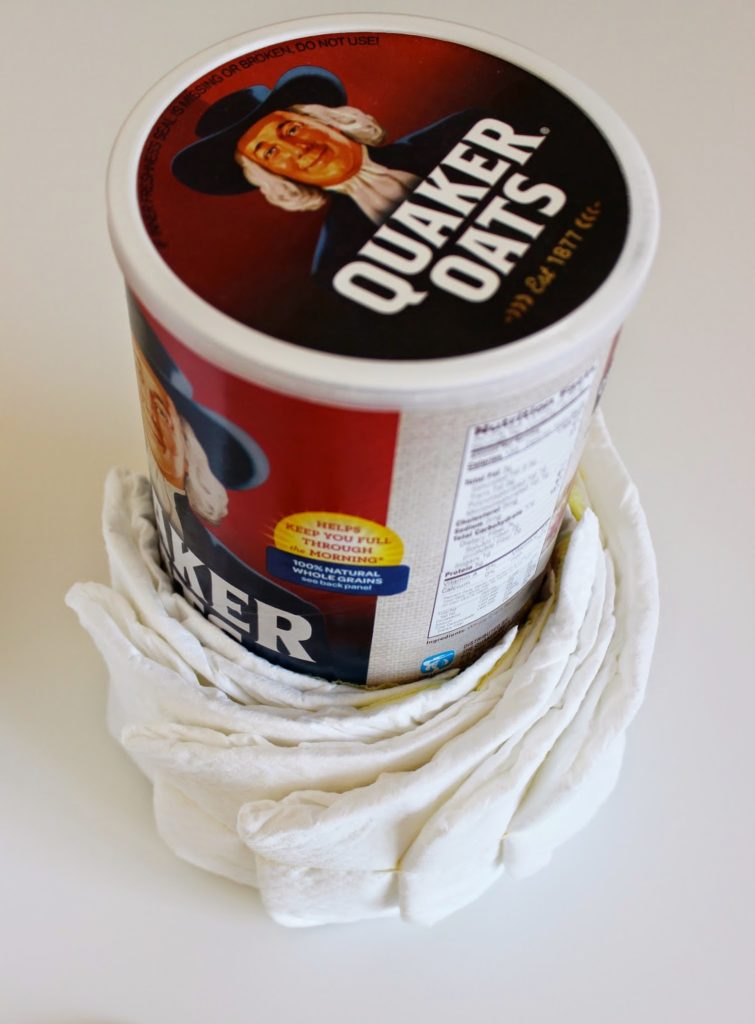
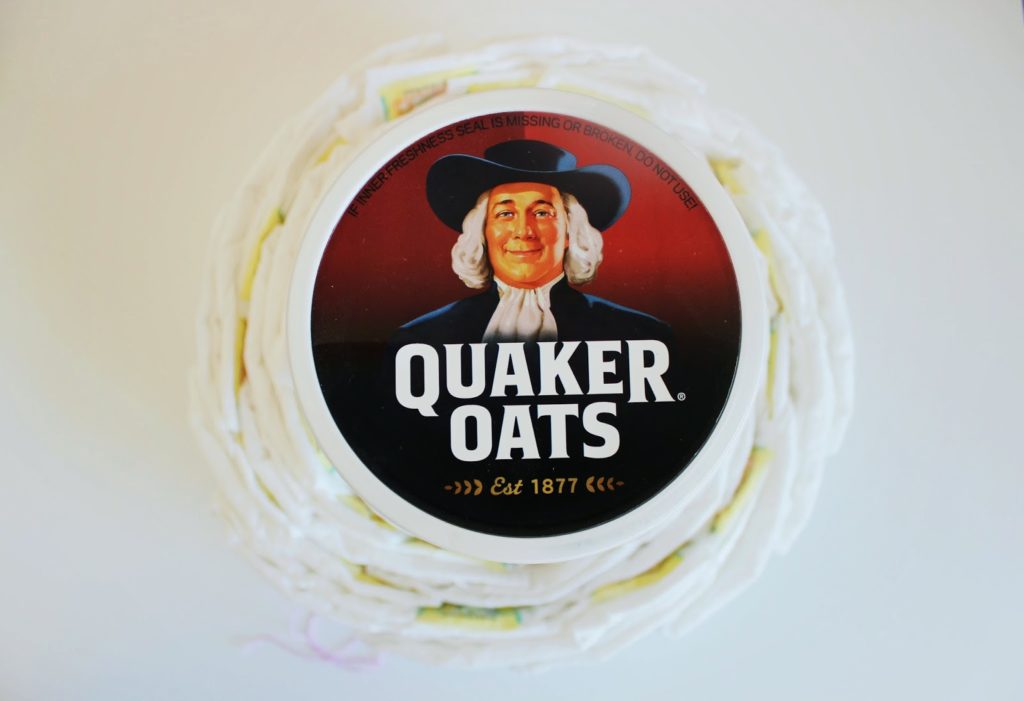
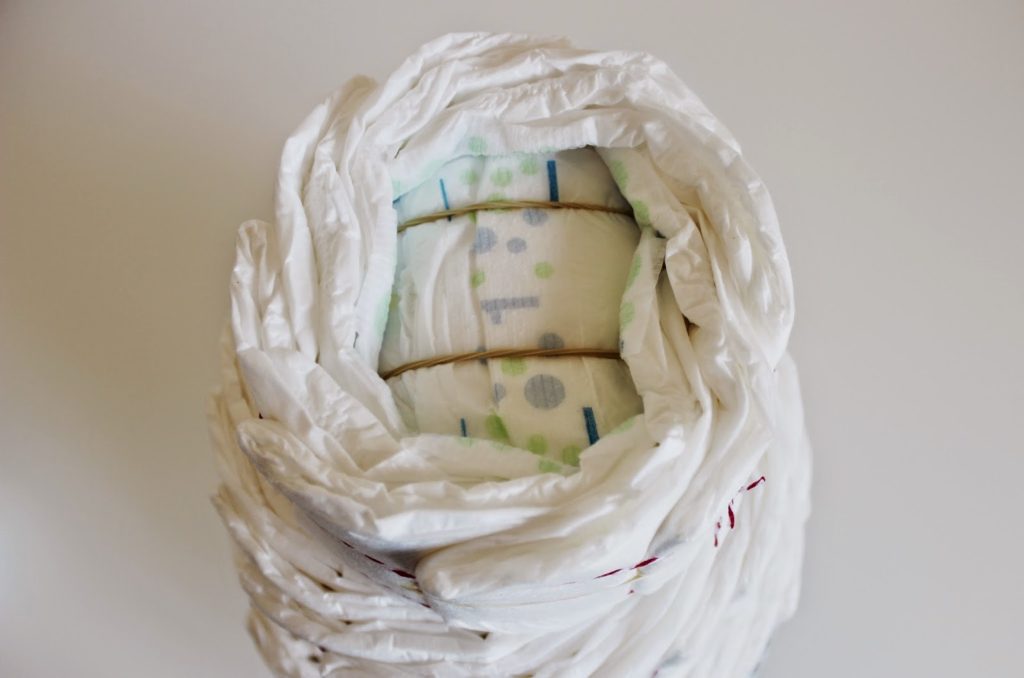
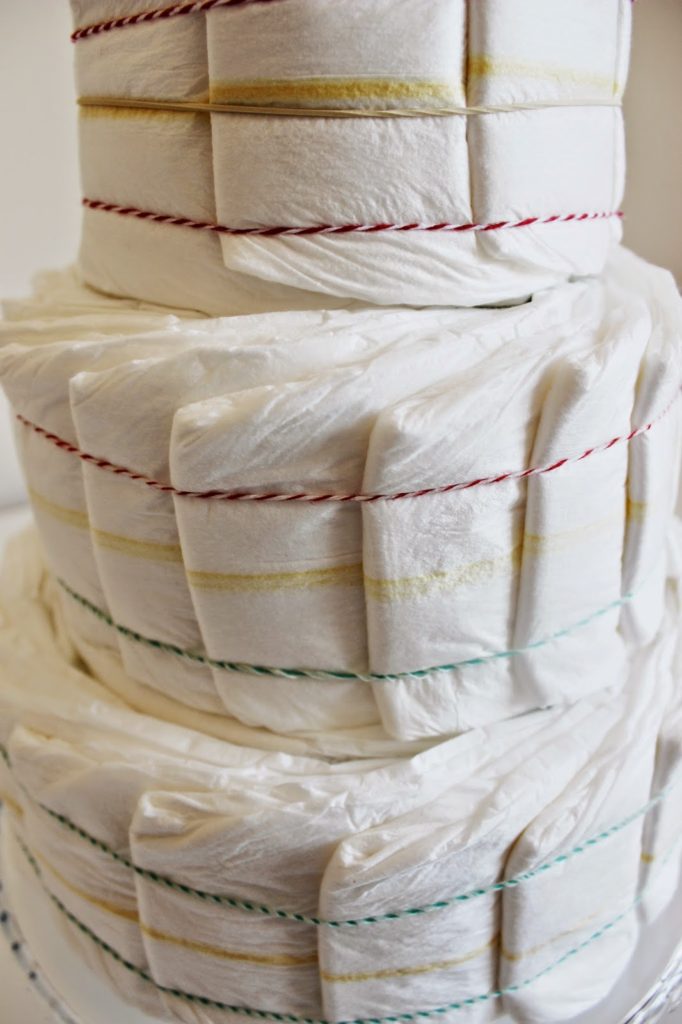
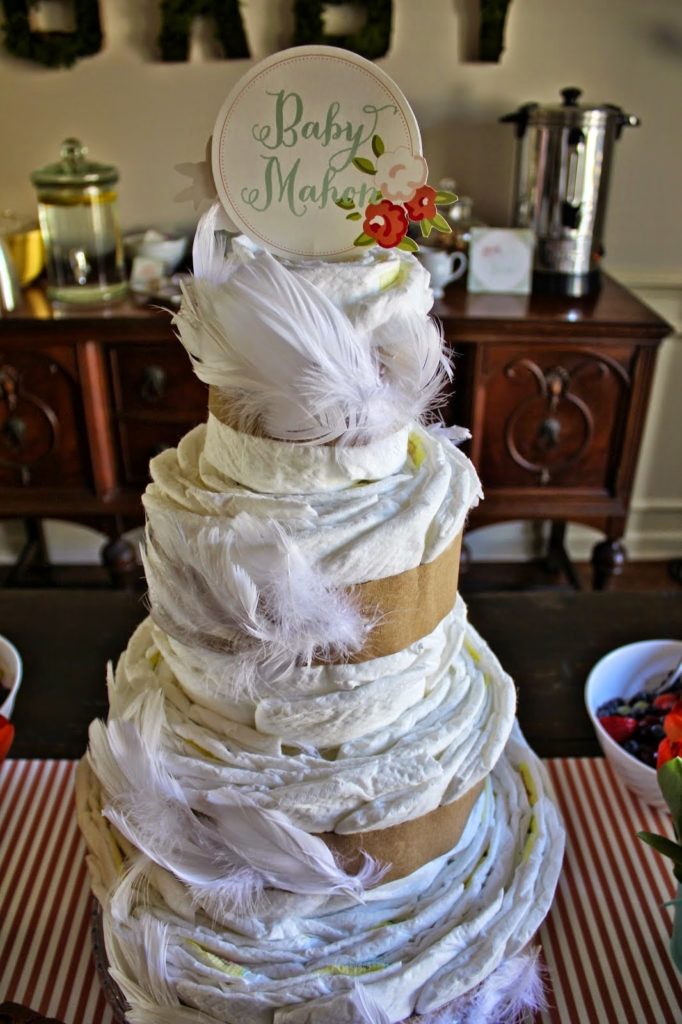
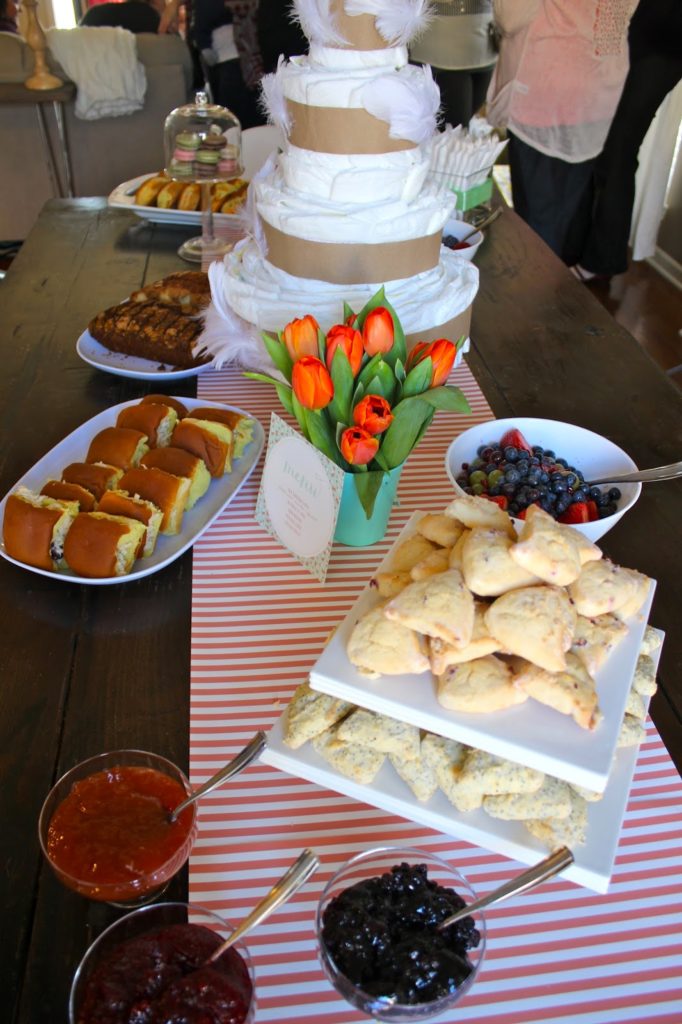
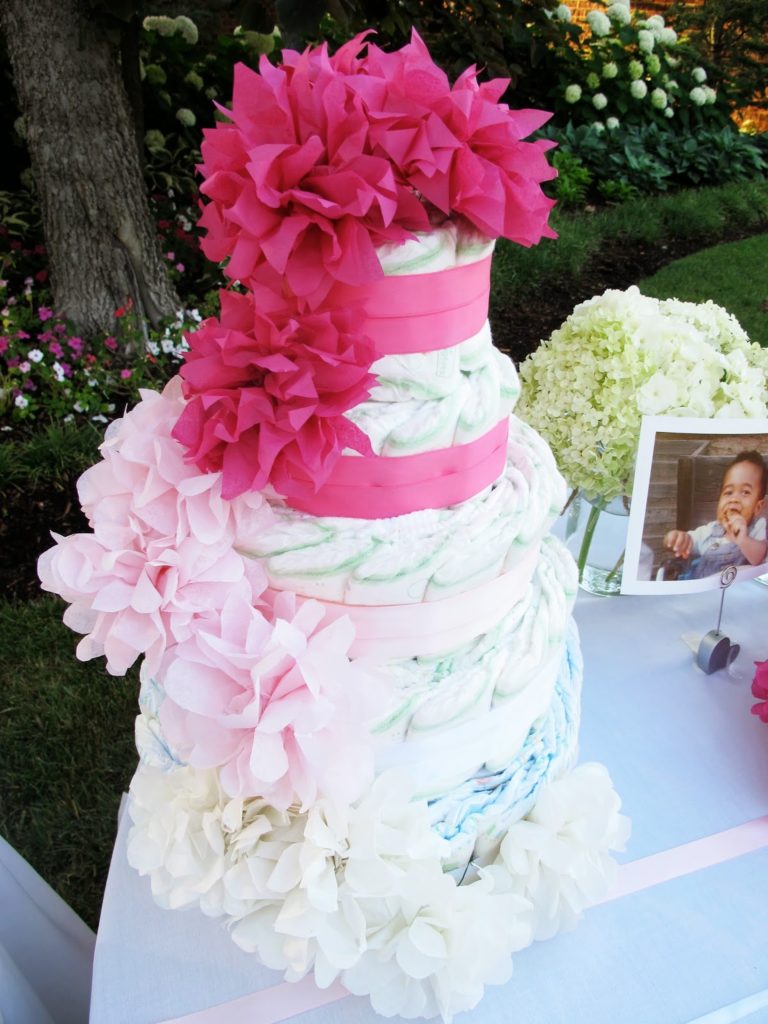
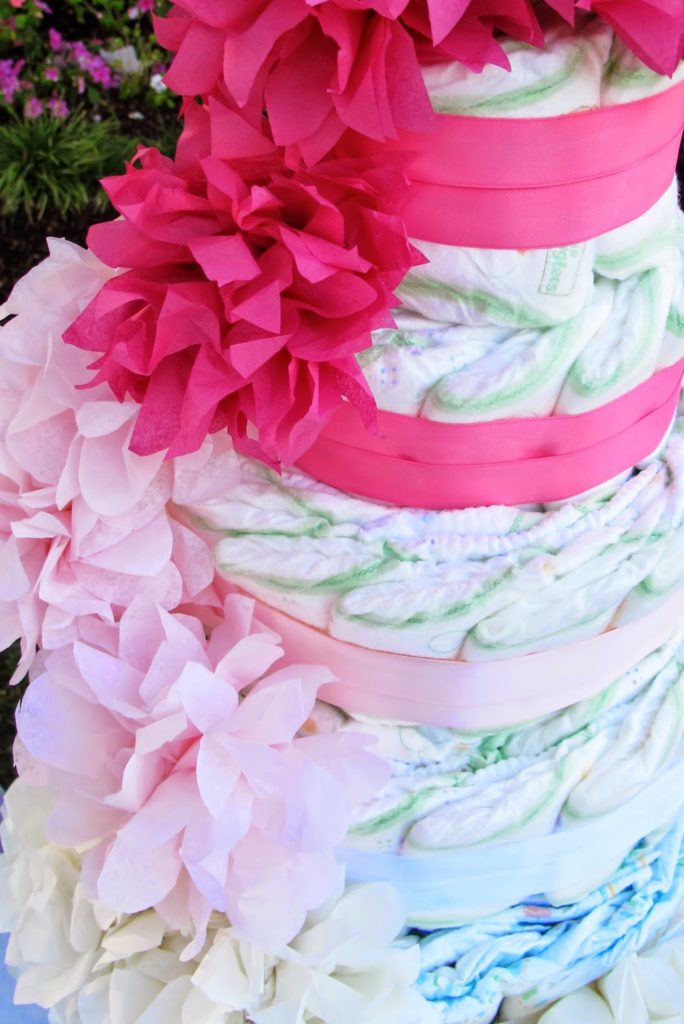
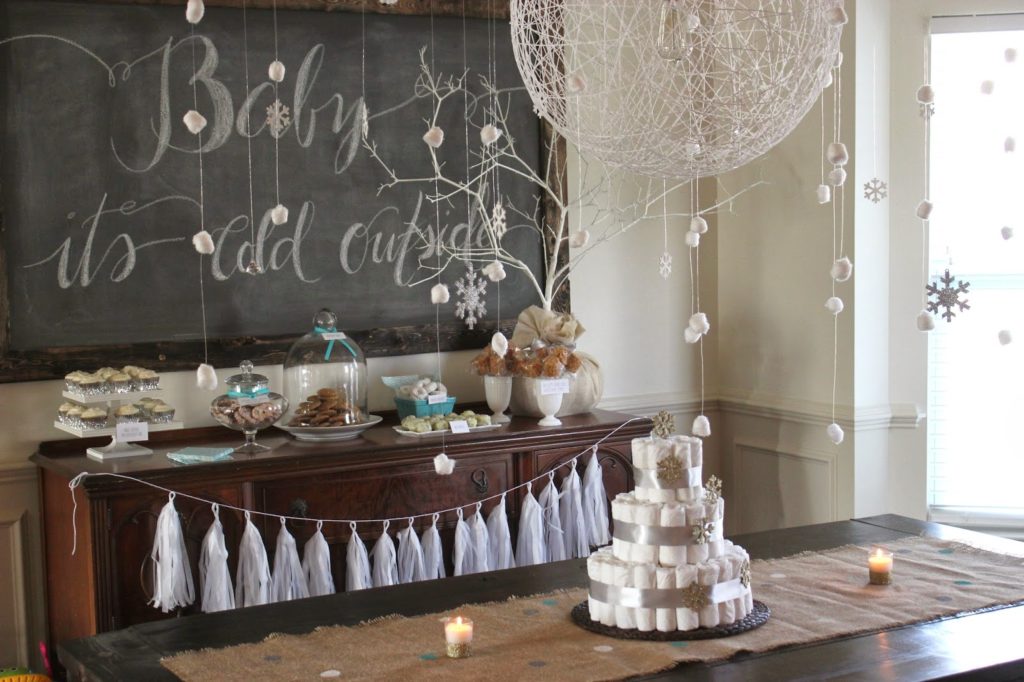
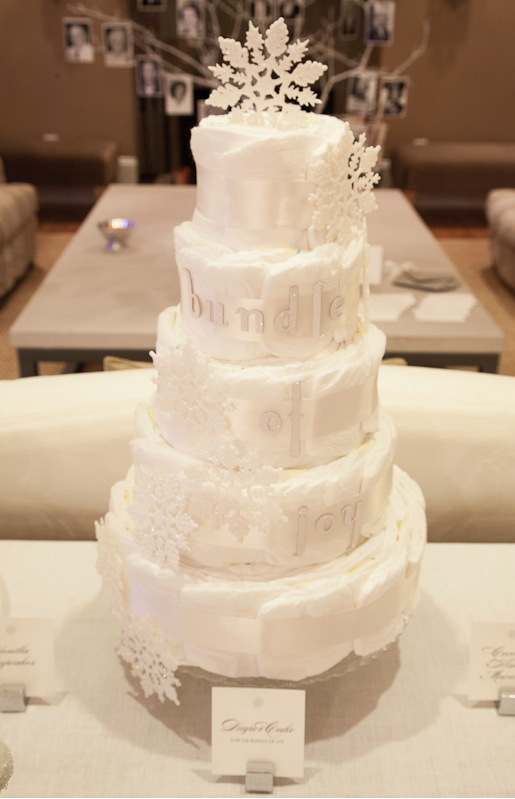
Every baby shower needs a diaper cake, right? See our TUTORIAL HERE. I used double stick tape to add on the triangles of leftover scraps from the garlands to keep that geo-mod vibe.
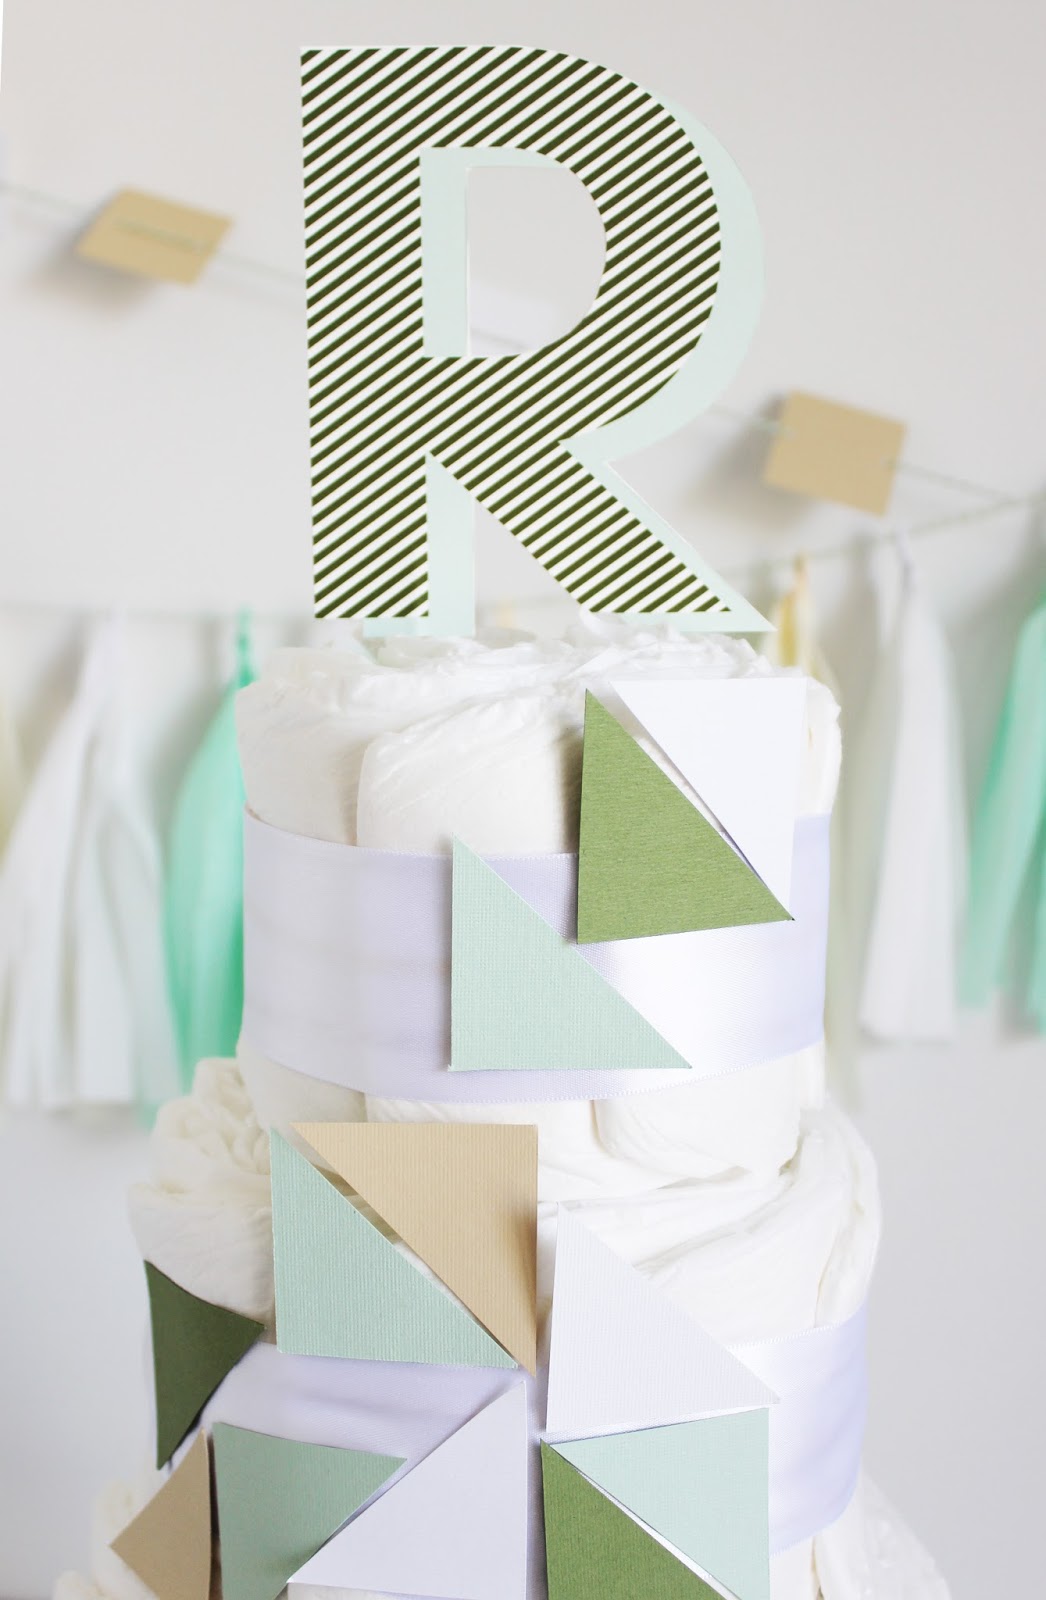
Cake topper by Rock Paper Scissors to match the invite.
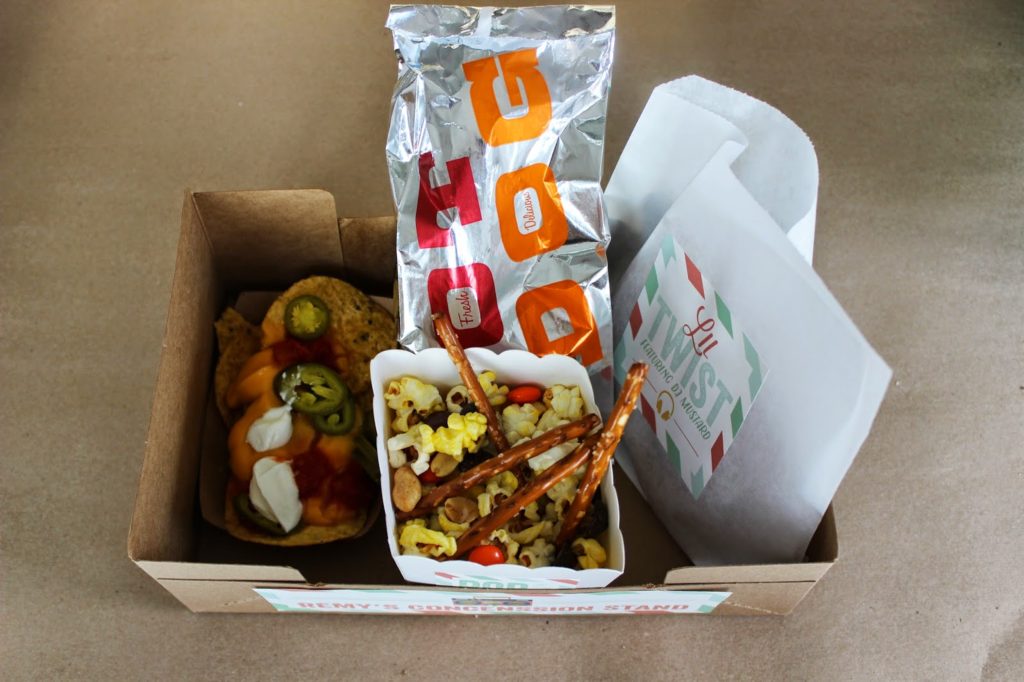
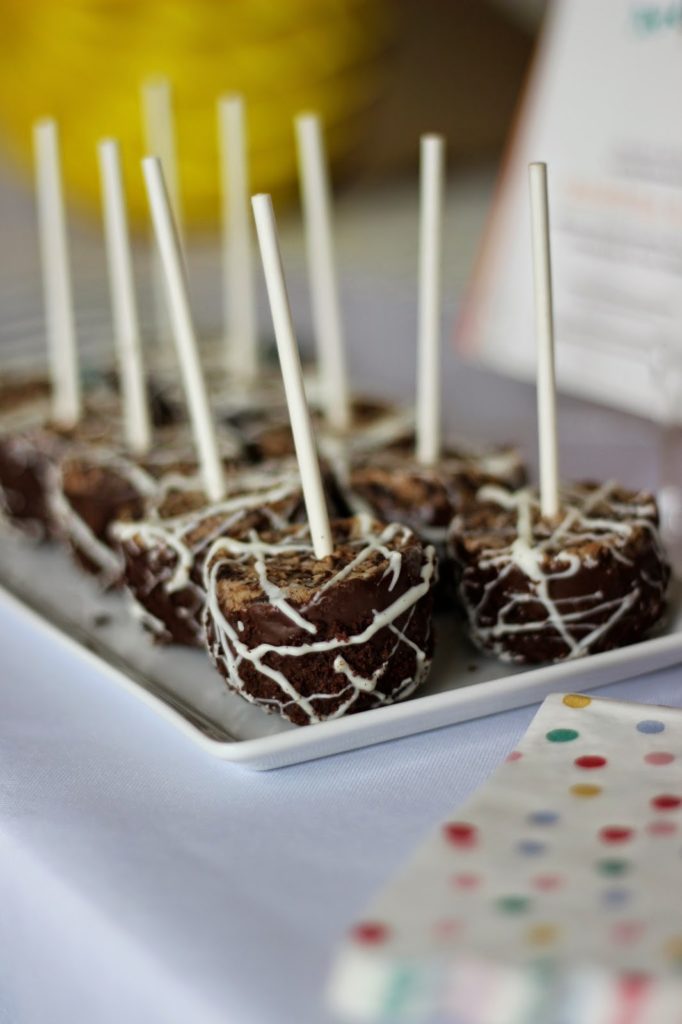
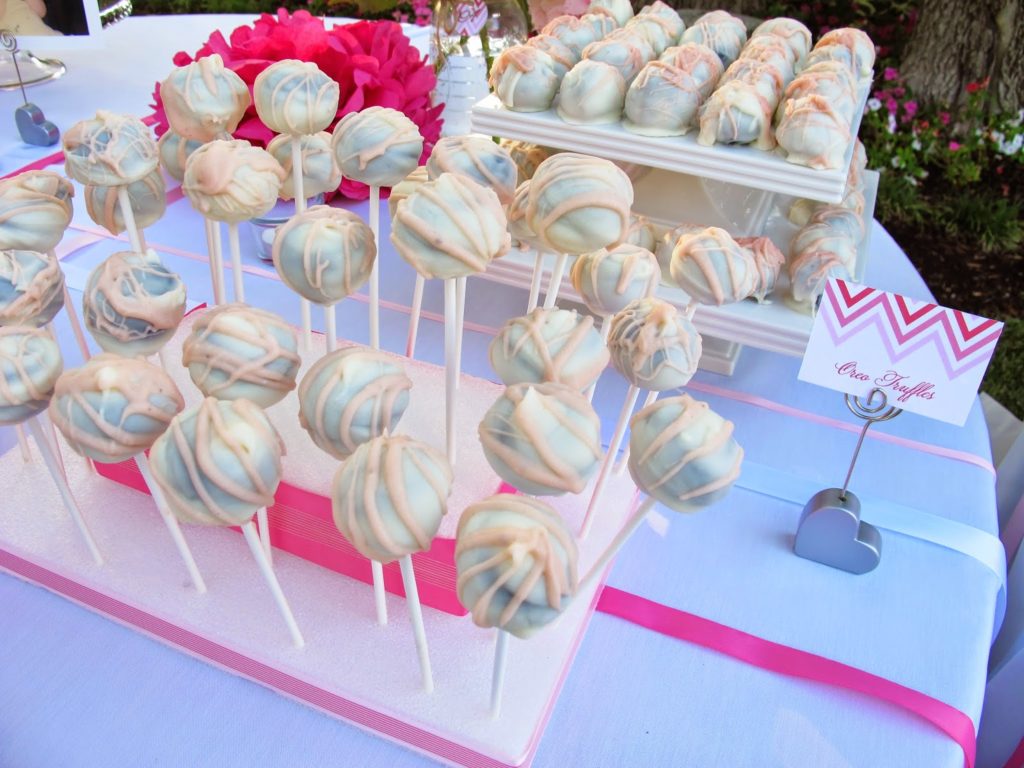
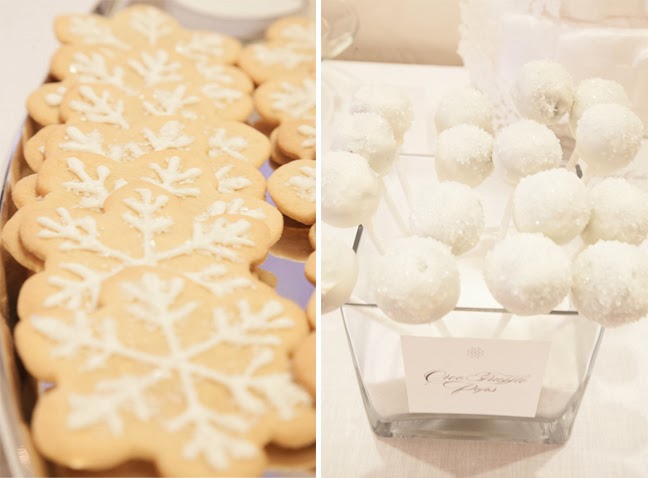
Every party needs Campfire Crispies, especially a baby shower when you can be punny and say “She’s about to POP!” These were SO. GOOD. Fluffernutter flavor: toasted marshmallow and peanut butter with a white chocolate peanut butter coating. Droooool. Order HERE.
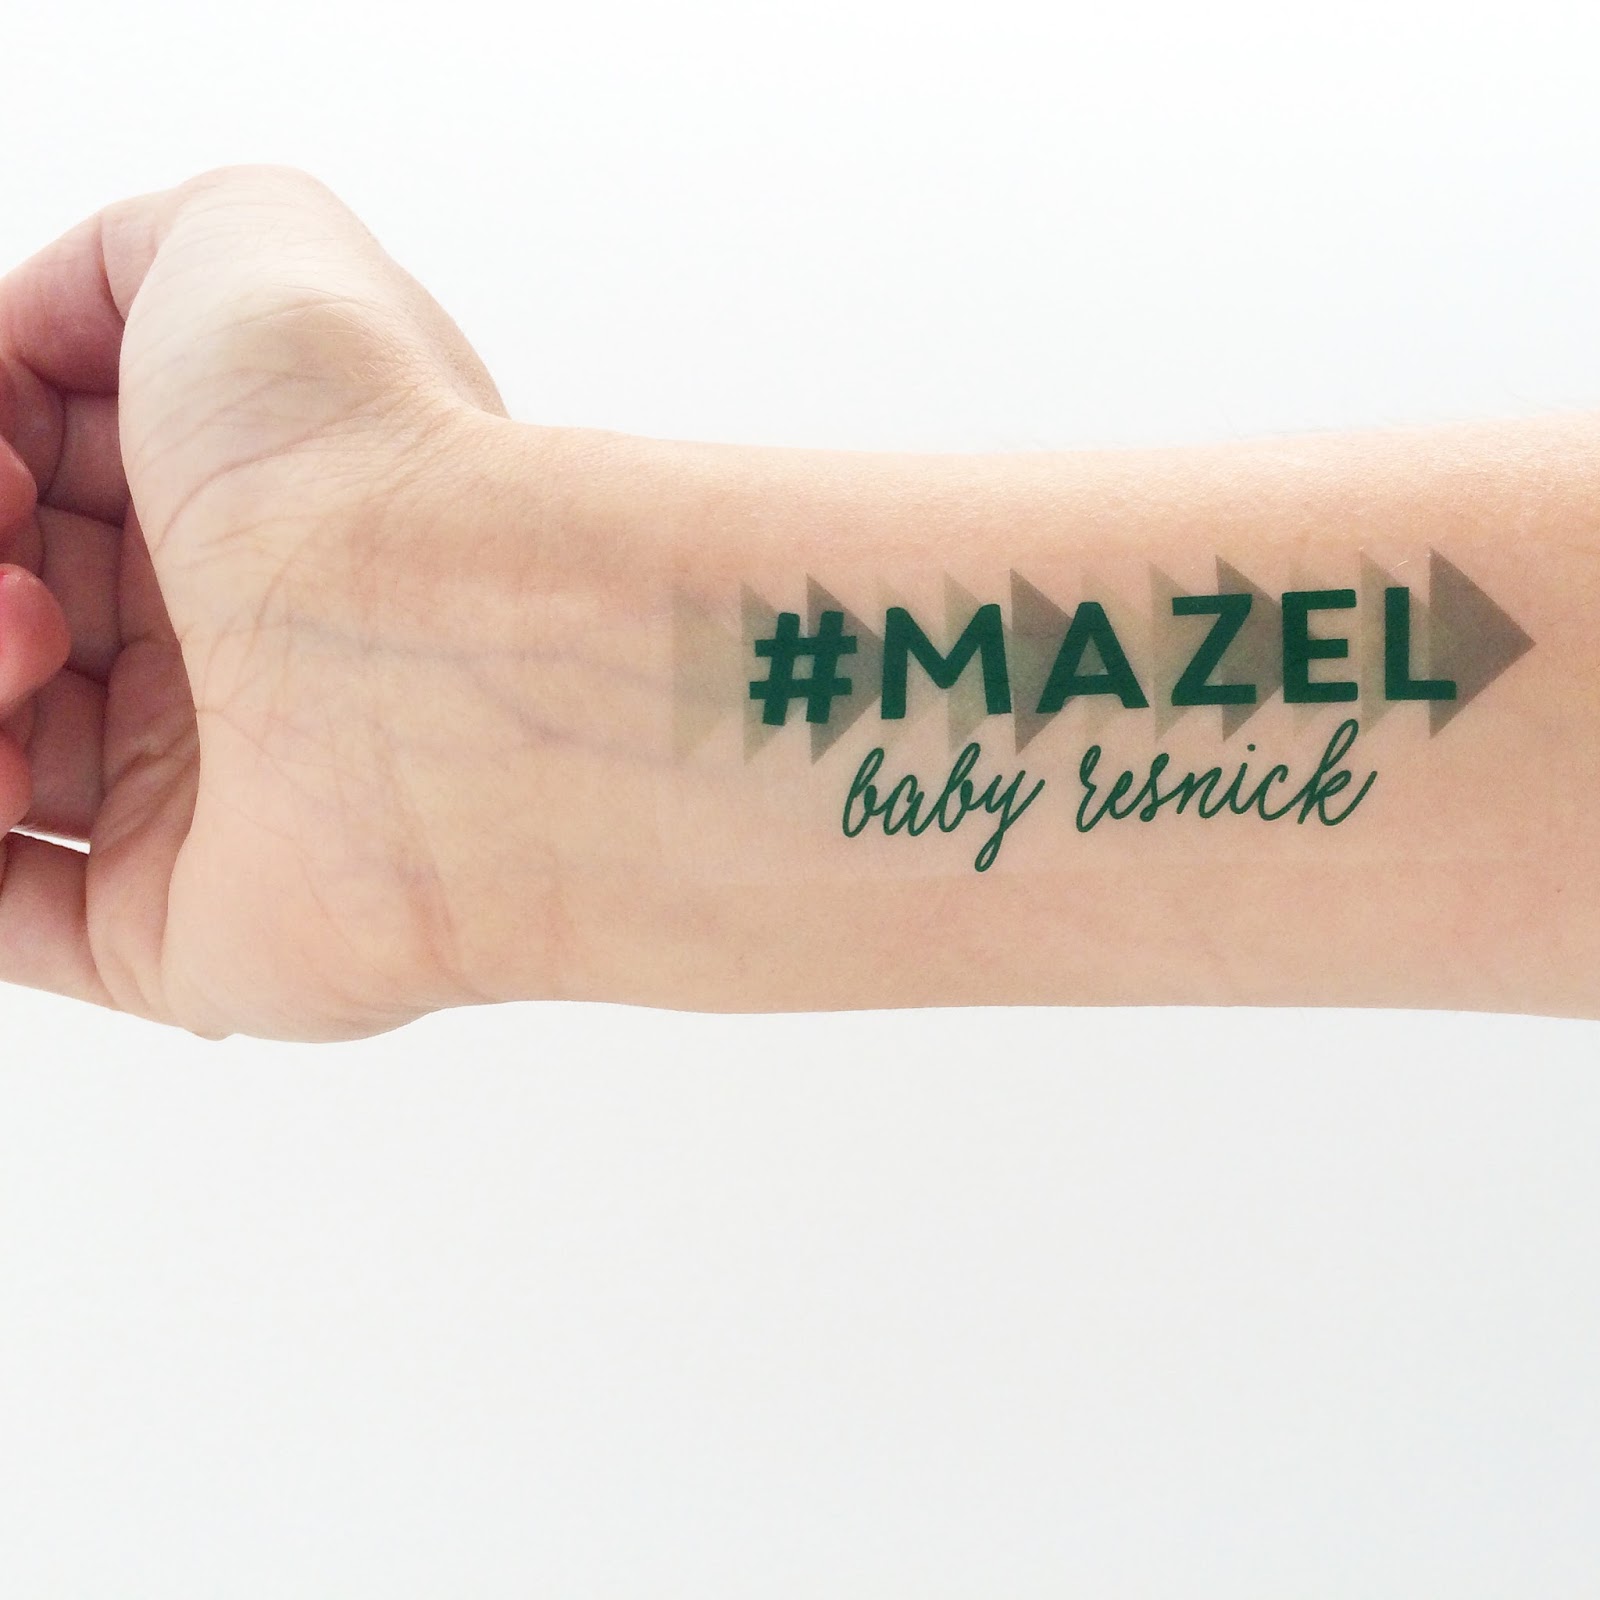
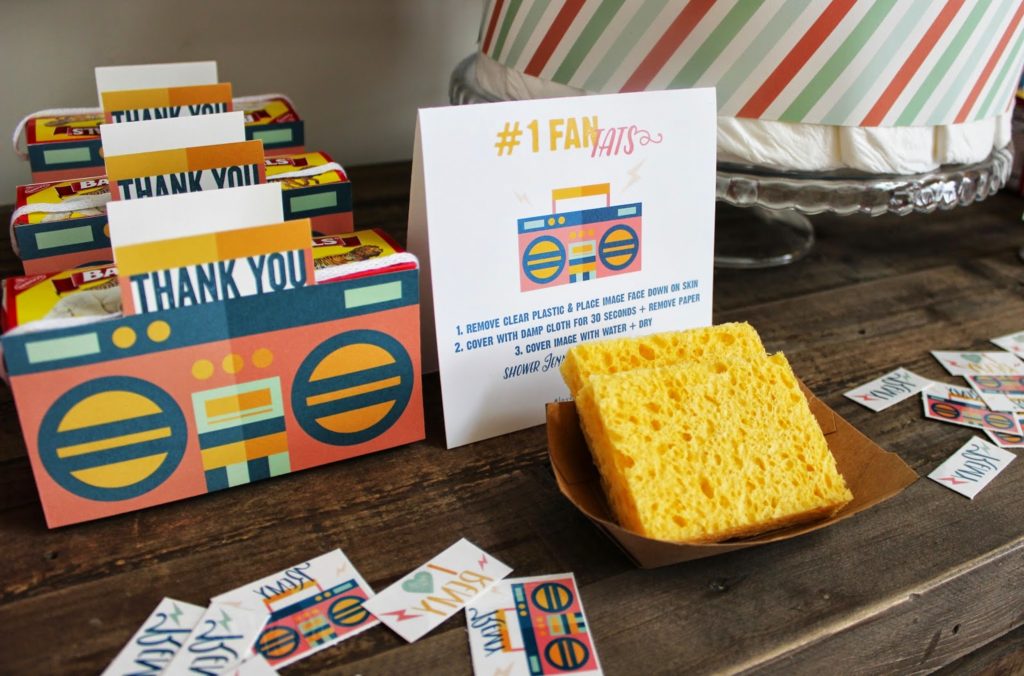
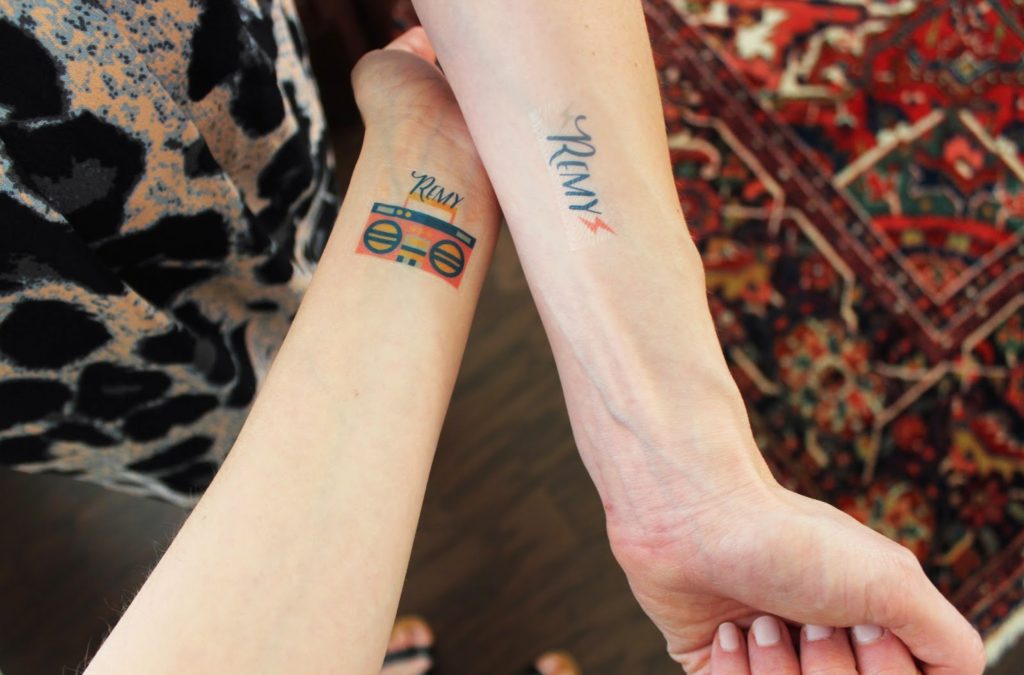
And of course us being us, we needed a tattoo station with the party’s hashtag (from our little shop HERE)! 
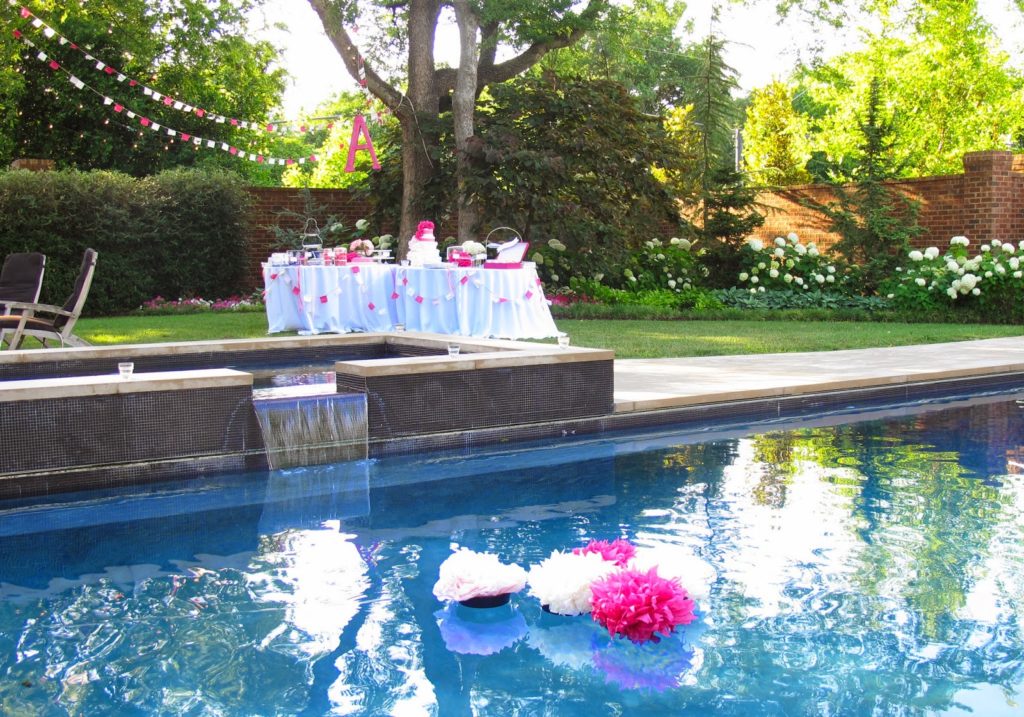
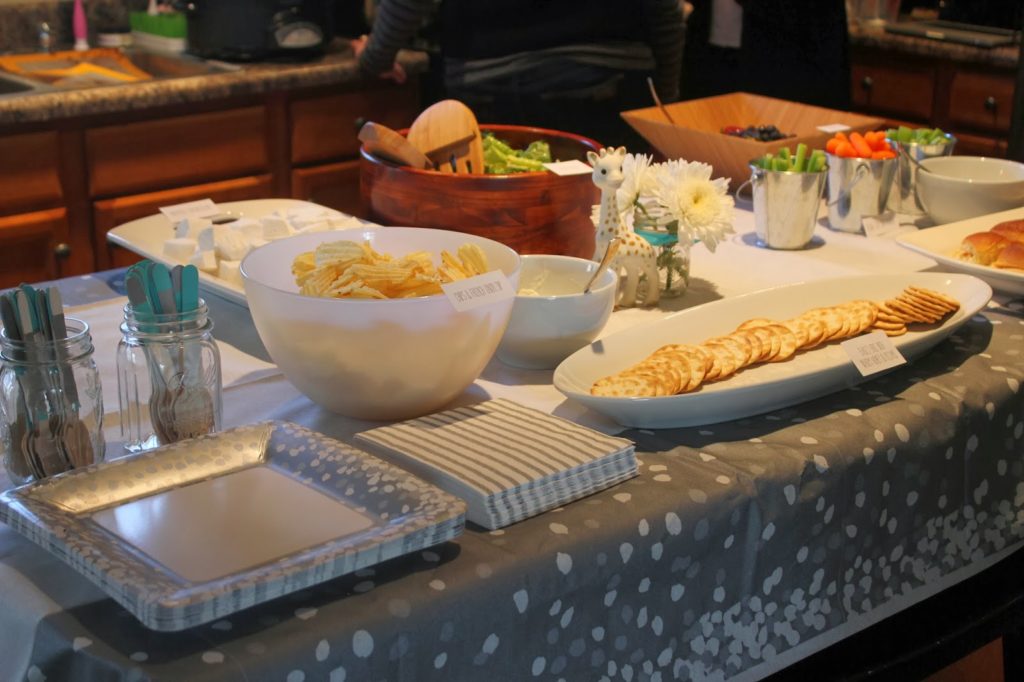
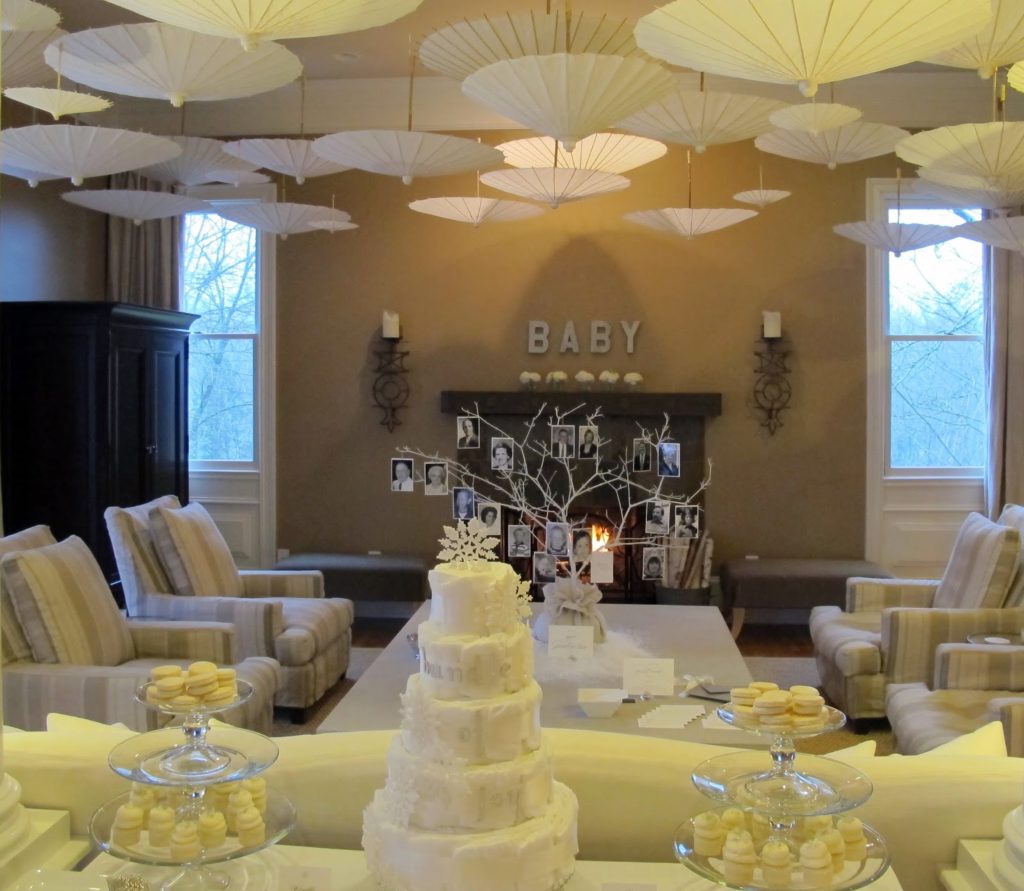
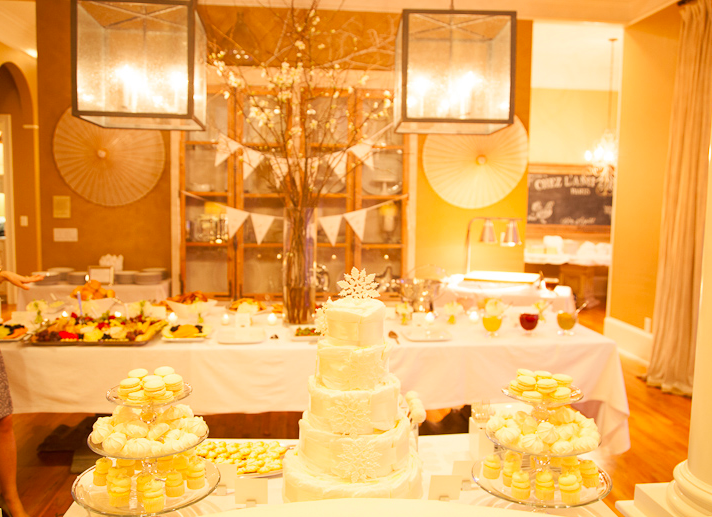
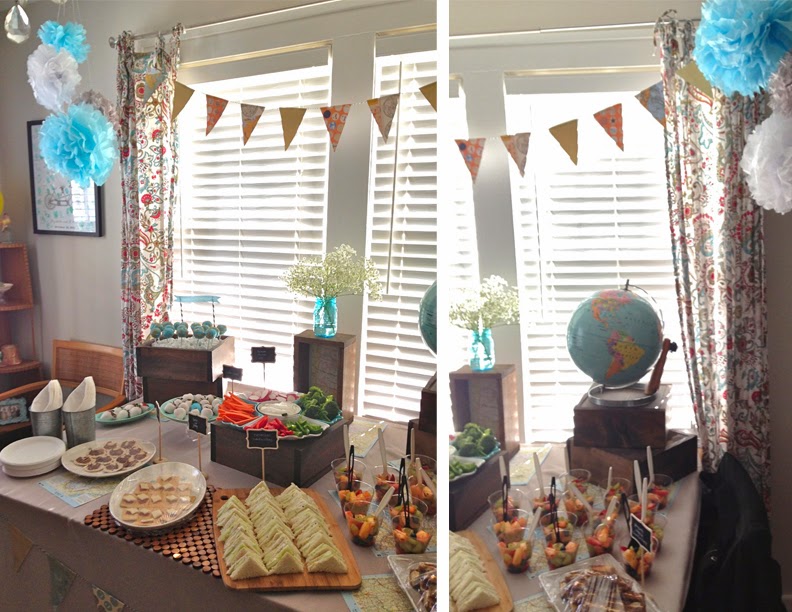
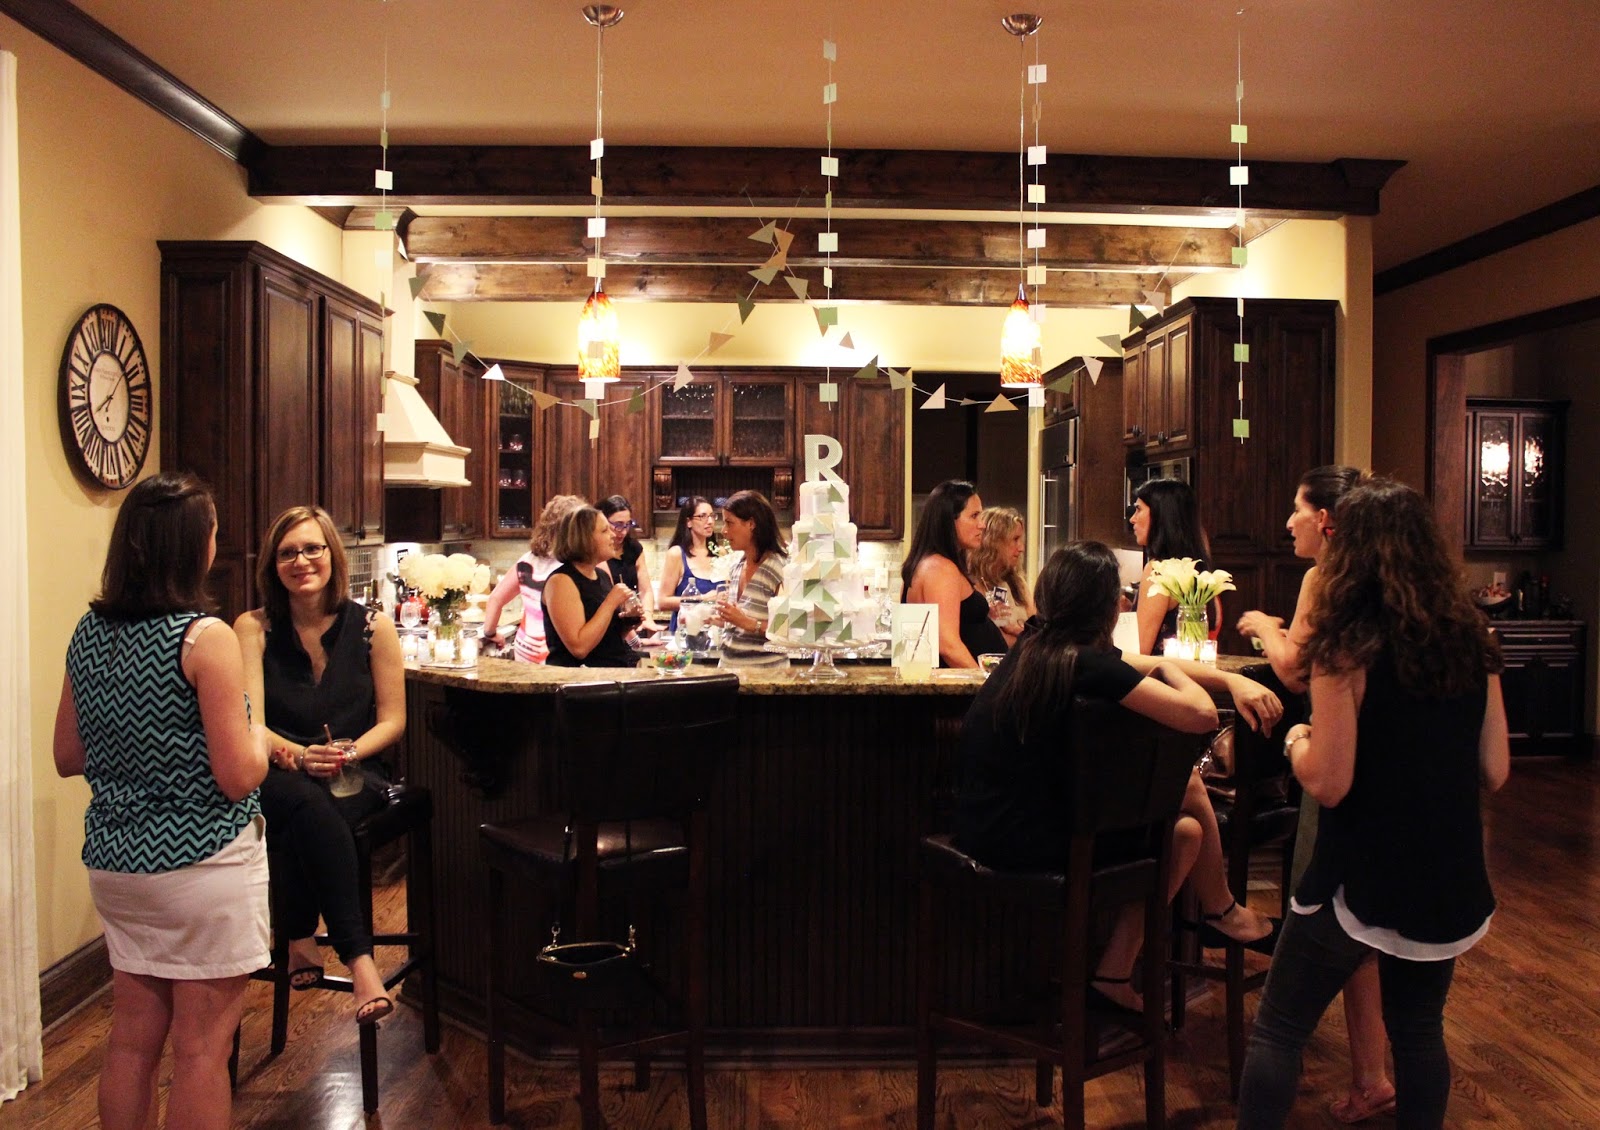
Here’s the actual party! It was at night, so I took the photos above so you could see the details!
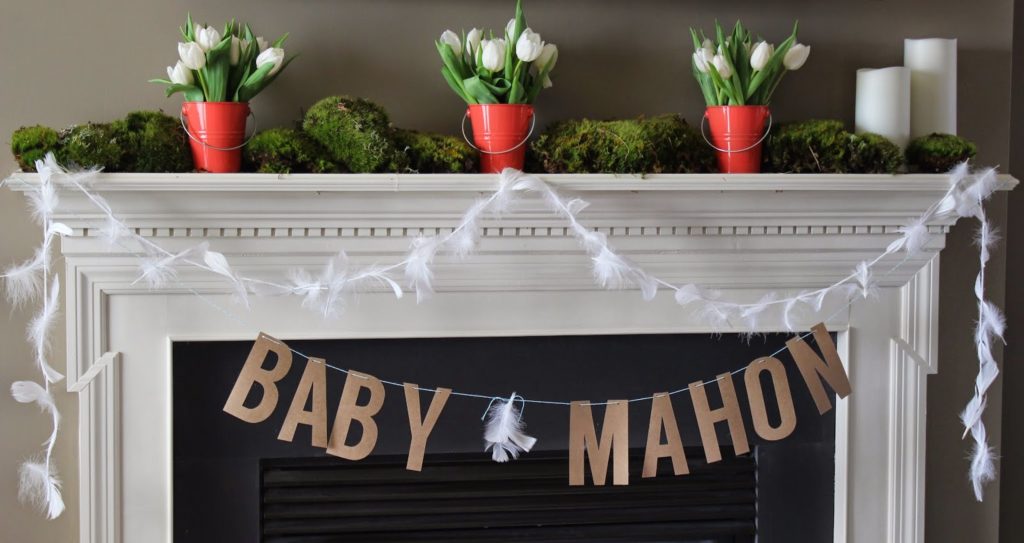
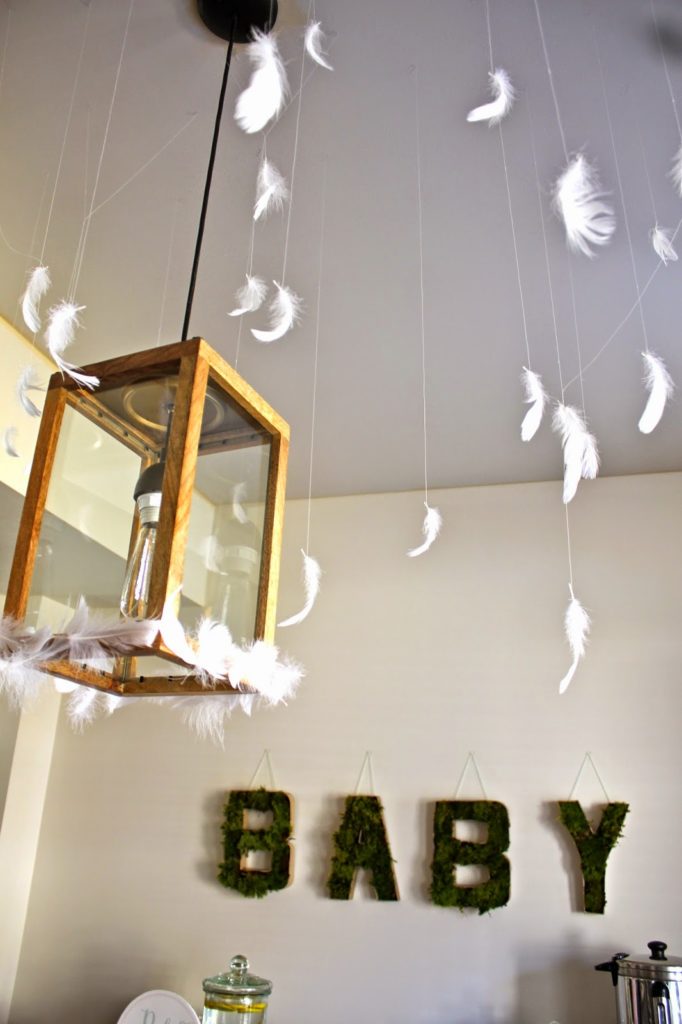
 The simplest projects make the biggest impact. Jenni and I have done these live moss letters several times. Simply cut the tops of paper mache letters you can find in any craft store, and stuff with live moss from your florist!
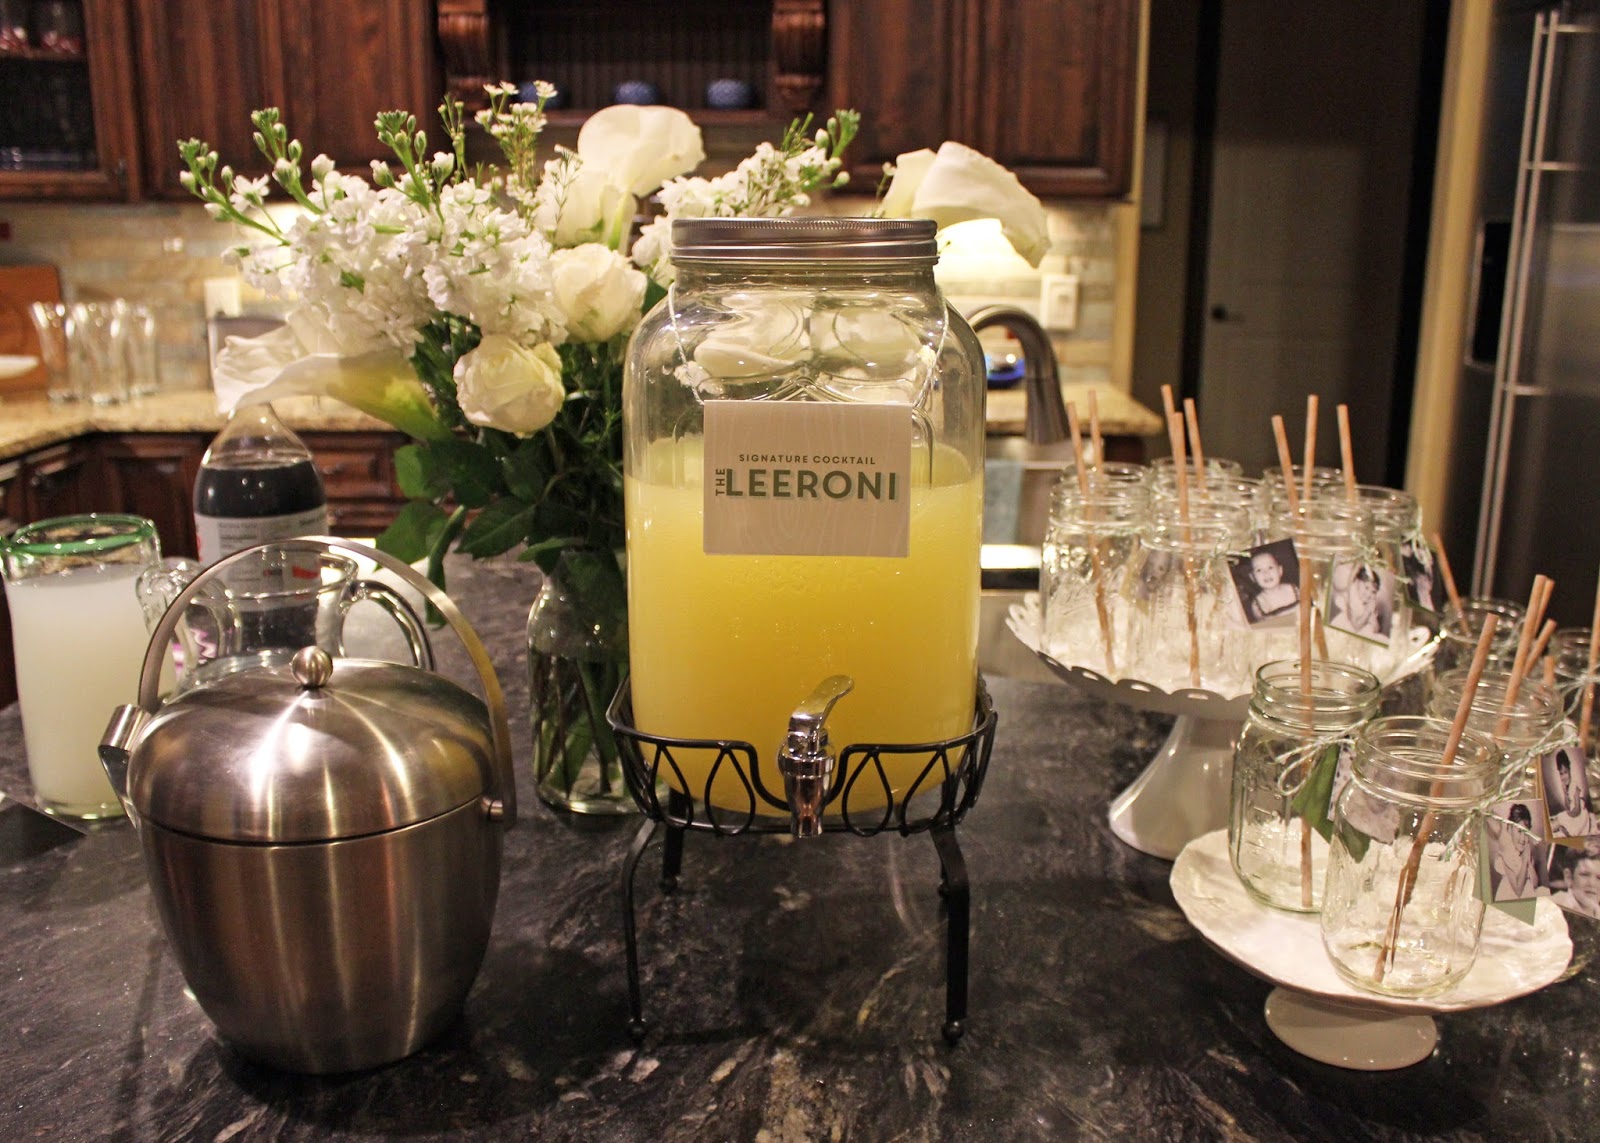
Even though Leeron couldn’t enjoy it, we all loved the signature cocktail “The Leeroni”.
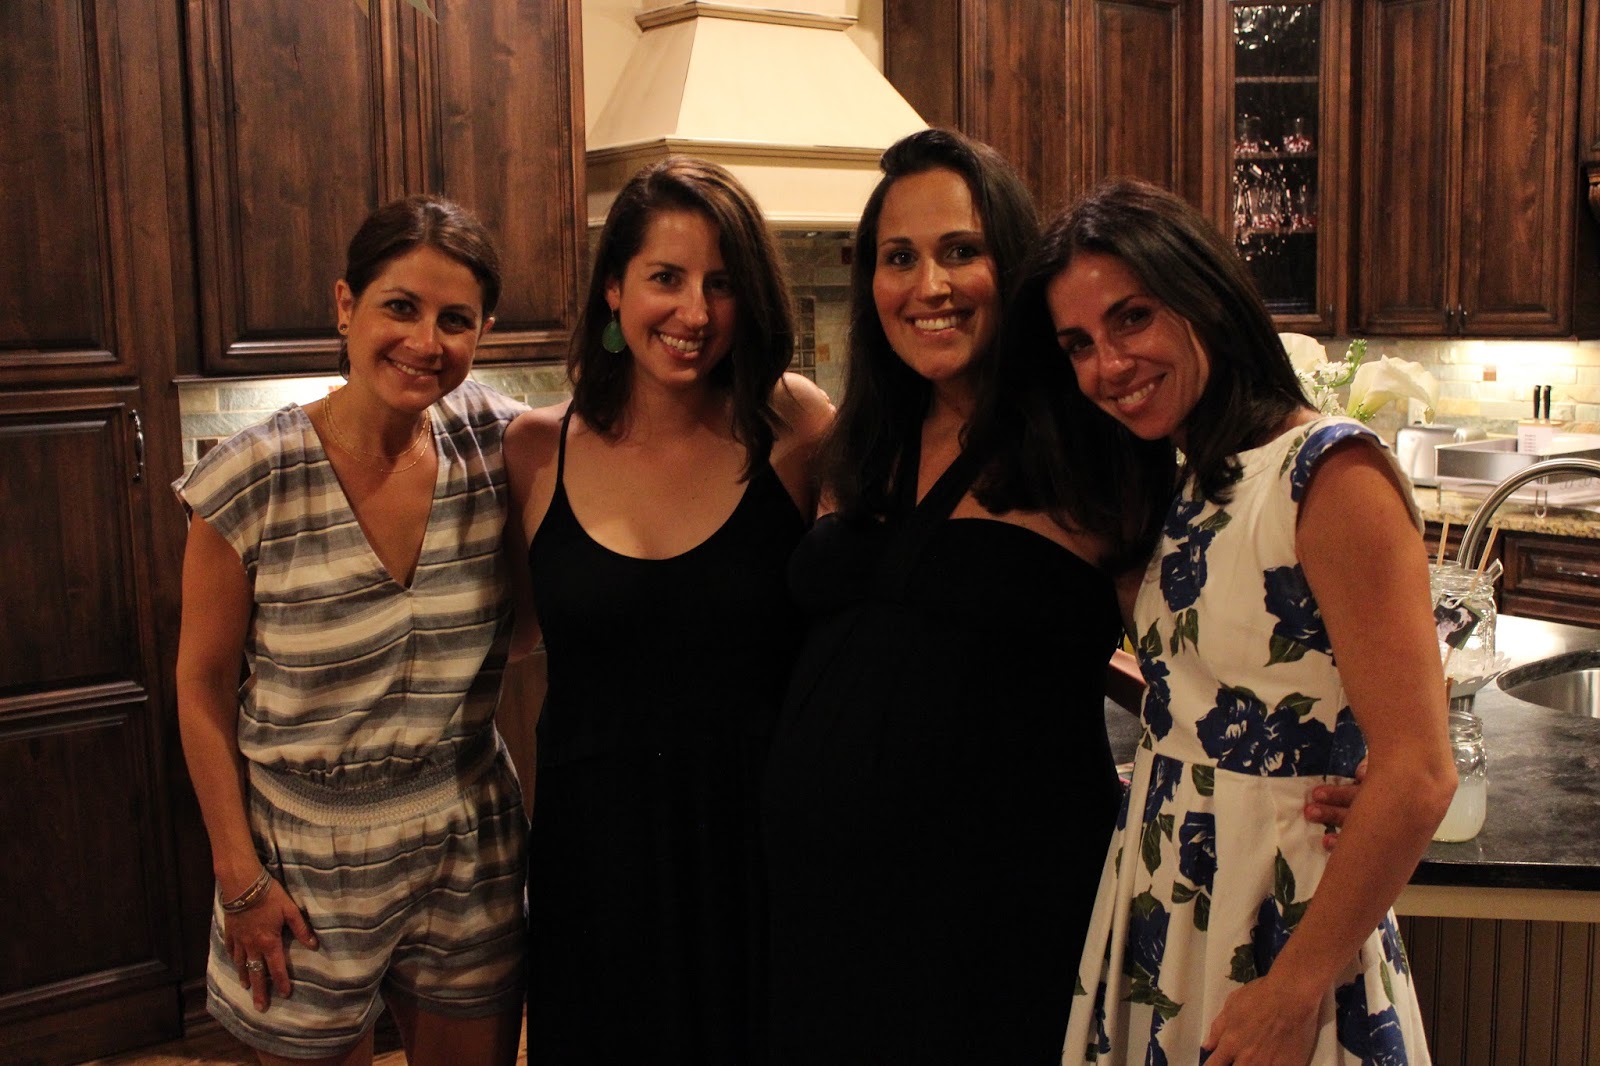
Hostesses with the mostesses: Dara, me, Leeron, Emily
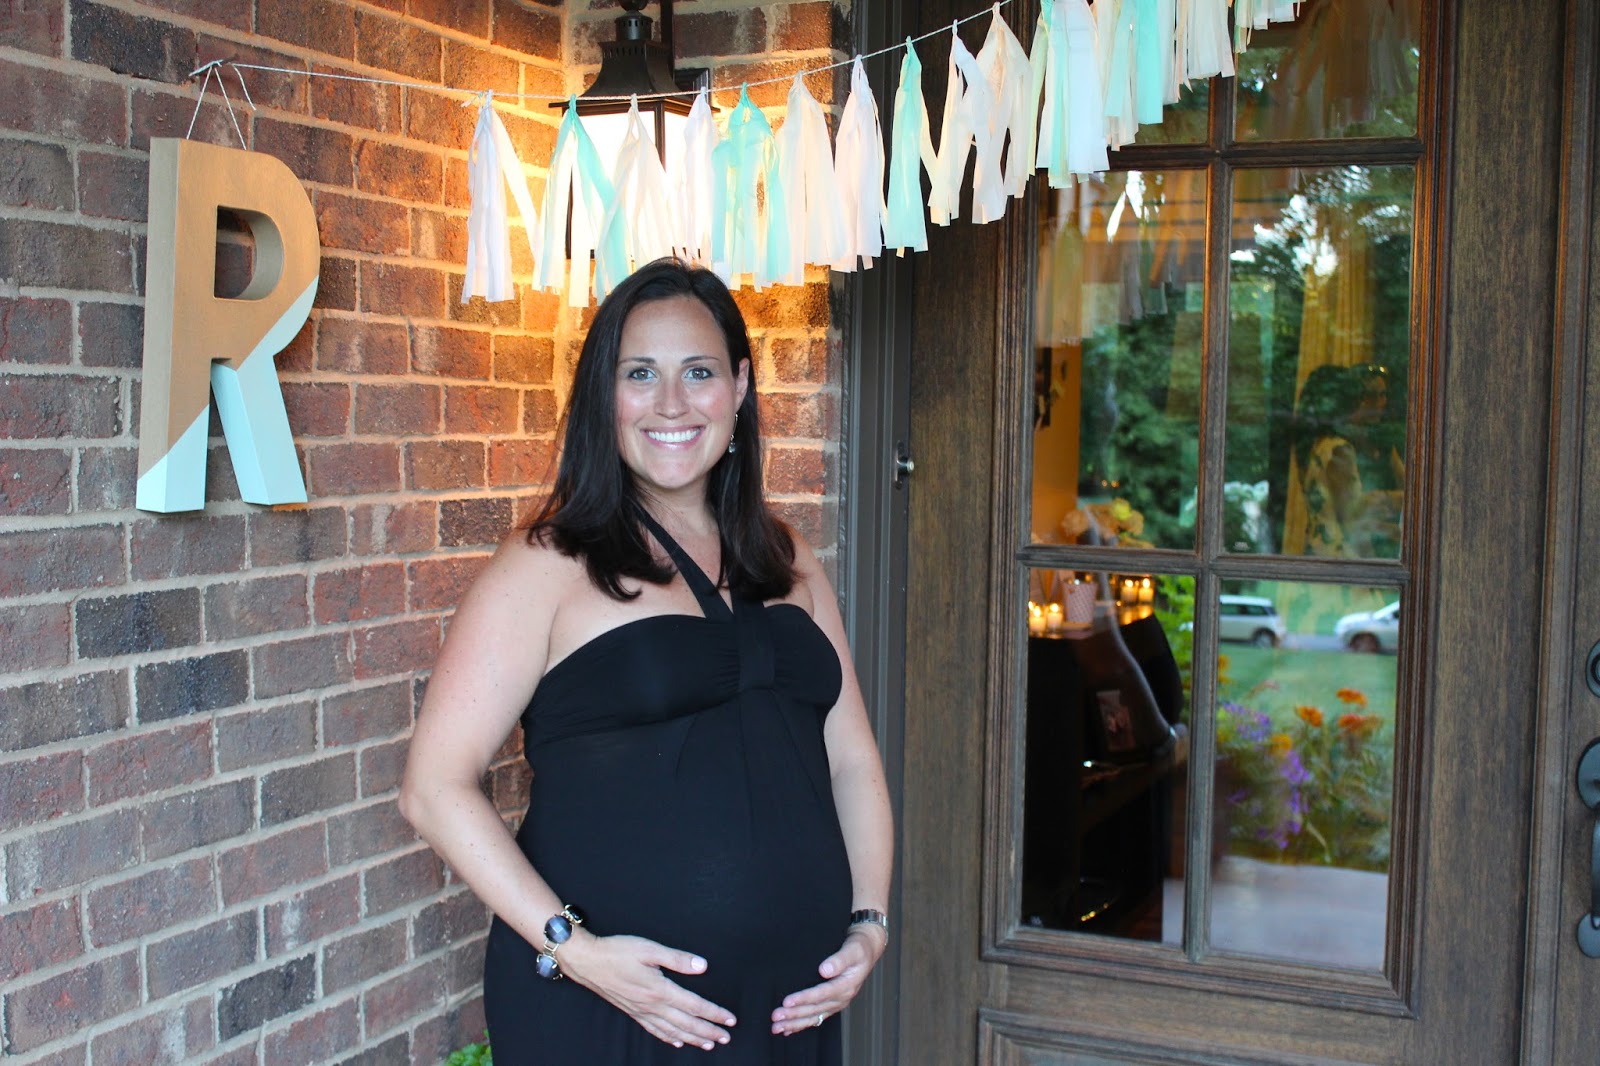
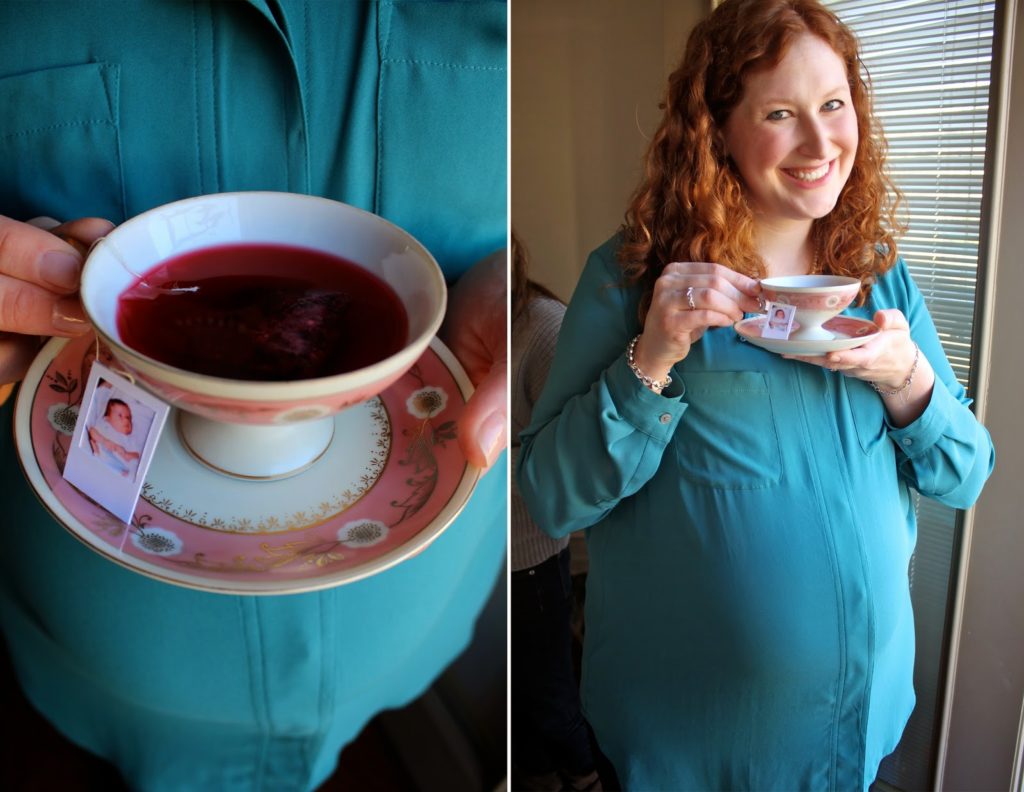
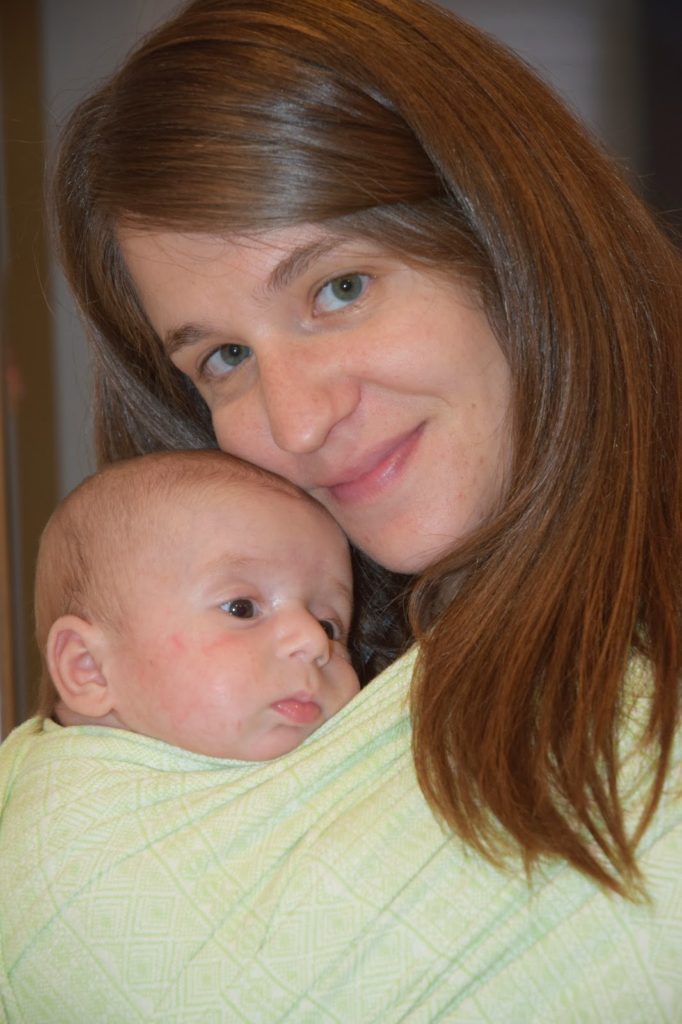
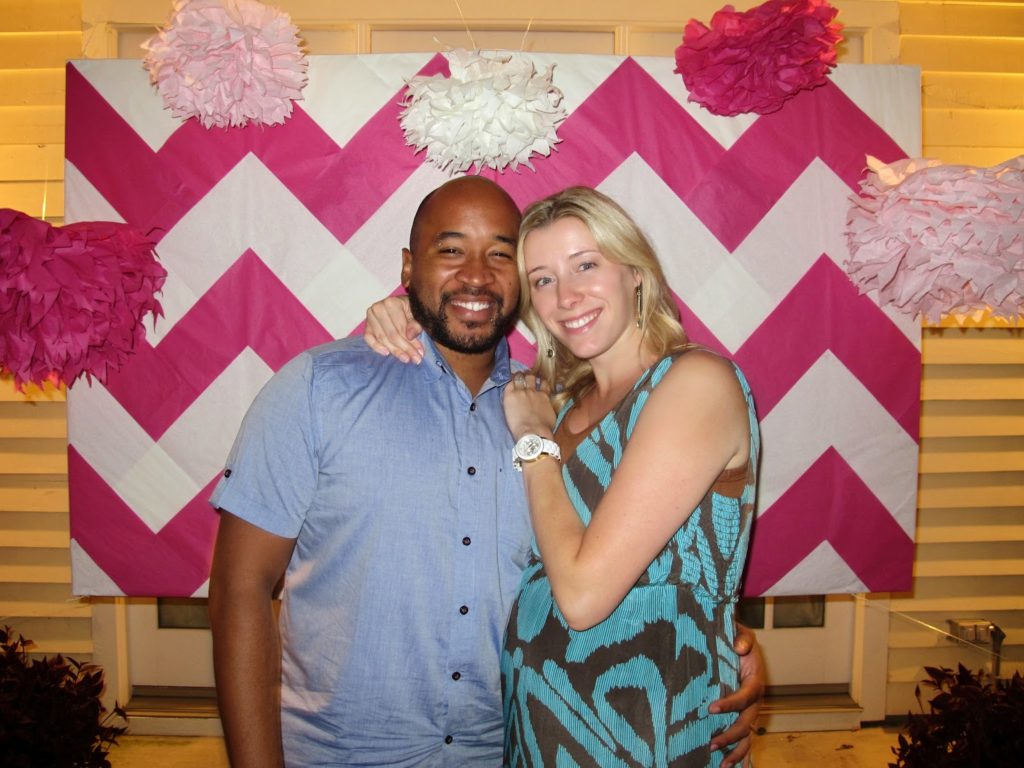
The gorgeous and glowing mama-to-be, Leeron!
Loved throwing this baby shower for a very deserving mama!!!
-L

JENNI’S CONCERT THEMED SHOWER

HIP HOP HOORAY! A baby boy is on the way!
Jenni is due soooo soon with her second baby, Remy! Don’t you love the name for a sweet baby boy by the way? Two great friends, Lori Mahon and Lauren Rauter, co-hosted with me. We decided to throw a concert-themed baby shower since Jenni currently thinks at one point thought she could be a country singer, and her husband Gabe a singer/performer/song writer (and for that matter Lori, Lauren’s husband, and my husband are all in the music industry as well! It is Nashville, after all). A nod to 90’s hip hop, Jenni’s love of country music, and concert references mixed together to create our decor.
It all started with the invitation, designed by Lauren of Rock Paper Scissors. Actually all of the paper materials you see here were all printed by Lauren. Geez it’s handy having a graphic designer bestie.
Concert posters, concert ticket garlands, and DIY marquee lights were the main decor, offset by cassette tapes and a boom box I got off of Ebay and spray painted gold!
Below is a DIY cassette tape mobile! I spray painted an embroidery hoop and cassette tapes gold, then used fishing line to attach. Command ceiling hooks held up perfectly.
For food, we did all concert food: hot dogs, nachos, soft pretzels, popcorn, and soda all held together in a food tray so it was easy for guests to carry around. 
Note the music themed names we gave all of the food… we crack ourselves up.
 Custom painted scoops sold on our Etsy shop.
Jenni’s fav Sugarfina gummies in the shape of sneakers! Perfect for our hip hop theme!

At every shower we throw, we like to have the guests write their address on the envelopes for Jenni’s thank you notes! Saves a ton of time for the mama-to-be.
Of course, we have the diaper cake – tutorial HERE – topped with baby Nike Dunks, Jenni’s request for her baby boy!
For favors, Lauren made these little boom boxes wrapped around an animal crackers box.
 Being a Love & Lion shower, we had to have a tattoo bar 🙂
Big sis-to-be, Amara, helped open all of the prezzies.
 Gorgeous mama Jenni!!
We LOVED throwing you this shower, Jenni! You’re already an incredible mom, and we know you’re going to be a pro with two. Love you!
-L

DIAPER CAKE TUTORIAL

At every baby shower we throw, there’s always a diaper cake centerpiece (scroll down for more of our cakes)! Not only is it visually super fun, but it’s also the perfect gift for a new mama. We try to embellish the tiers and topper to match the theme of the party, and this one pictured above was from Jenni’s hip hop/concert themed baby shower we threw last weekend… working on that post… promise! Jenni’s always talked about getting baby Nike Dunks for her baby boy way before she even had Amara, so I knew the topper had to be these little kicks.
I’ve made all the mistakes for you and come up with my fail-safe way to make a 4-tiered spectacular diaper cake!
I’ve found TARGET BRAND diapers to be the best!! First of all, they’re great diapers. When I had Ari I insisted on Pampers swaddlers (they are super soft after all) but when Max was born, I just went to Target brand and they’re just as good and way cheaper. Aesthetically for a diaper cake, they’re the best, because they are plain white and nice and flat. Pampers are a little puffier and look messy on a cake. Still works though- scroll down to see previous diaper cakes.
I bought one small pack each of newborn, size one, and size two. It’s nice to give the mom a variety and it also looks really nice on the cake to have the tiers be different heights.
 My secret to the perfect shaped diaper cake is…. an oatmeal can inside! Yep, that’s how I get that nice round shape, it fills in the middle nicely, and it keeps all the tiers sturdy.
WHAT YOU NEED:
1 Oatmeal Can
LARGE Rubberbands
String (anything will do!)
About 75 diapers 
(see anatomy picture above for size variety)
Embellishment for tiers and topper
Cake Platter (mine is about 13″)
INSTRUCTIONS:
*Tip- make sure each diaper for each tier is facing in the same direction
4th TIER
Start with the largest size diaper for the bottom tier.
Place a large rubberband around the can and start sticking diapers in, layering about 2-3 inches. You want to overlap them evenly all around. Soon your rubberband will get super tight and break in your face and your diapers will fly everywhere and you’ll say a non-baby-shower-appropriate-word and you’ll need to reinforce this layer with a piece of string. (See, told you I’ve made all the mistakes for you!) Just tie loosely around this layer in a bow so that you can adjust the length as you add more diapers.
As you layer the diapers all the way around, tuck the last diaper underneath the first so that it looks continuous and clean. Tie TWO pieces of string around this layer, one on the top and one on the bottom of the tier. This keeps the shape.
This bottom tier (4th tier) will have TWO rounds of layers. So just start layering again on top of the first round of diapers, this time with a string to hold this layer unless you have a huge rubberband! Can’t tell you how many times I thought a rubberband was big enough and -snap-! Tie two pieces of string around the layer, one near the top and one near the bottom. You’ll cover these up with embellishment at the end.
3rd TIER
This is one layer of diapers all around, about 17 diapers in size 1. Tie two pieces of string around the layer, one near the top and one near the bottom.
2nd TIER
If you’re using the same size diapers and oatmeal can that I did, you’ll notice that there’s only about 2-3 inches of space left on the oatmeal can for the next tier. That’s not going to be sturdy enough to keep the clean, round shape of the tier. You’ll need to take 3 diapers and simply fold them each in half, stack them, and wrap 2 rubberbands around them. Place on the top of the oatmeal can, and now you’ll keep that 2nd tier more sturdy and not falling in on itself.
Wrap only 8 or so diapers around and spread the layers a little wider than before. This keeps the tier thinner than the previous tier. Tie two pieces of string around the layer, one near the top and one near the bottom.
1st TIER
Roll 4 newborn size diapers up and individually wrap with a rubber band. Bring these 4 together and wrap all 4 up with a rubberband. This is the center of the top tier which will keep the shape since you’ve run out of room on the oatmeal can. Put another large rubberband around these 4 and start tucking in your diaper layers. Wrap about 8 diapers around, tucking the last one behind the first for that continuous look. Tie two pieces of string around the layer, one near the top and one near the bottom.
 You can see each tier has the string tied around the top and bottom which keeps that nice straight shape.
Voila! You’re ready to decorate!
Lauren of Rock Paper Scissors printed these patterned strips of paper to match the invitations she designed. You could use thick ribbon or any type of paper (taped together into strips) to cover the strings and rubberbands.
 Don’t forget your cake topper!
Here are some of our earlier cakes to give you decoration ideas: 
Modern mint an neutral baby shower HERE.
 This was from Jenni’s baby shower for Amara almost 4 years ago! (HERE) This was one of my first diaper cakes, so I used colorful diapers, but I think it still turned out okay not being all white.
Lori’s stork-themed baby shower (HERE) These were Pampers diapers- see a little too puffy and not uniform enough for OCD me. For embellishment, I taped strips of kraft paper together, wrapped around each tier, and glued feathers on top.
Lauren’s Winter White Baby Shower (HERE). I loved this one! I used white silk ribbon so that everything was white…. can’t tell you how many people thought this was a real cake. They were super disappointed.
Please let me know if you have any questions on construction! It can be a little confusing! If you’re in Nashville, we can totally make this for you! Convo us on our Etsy shop or email us 🙂
XO
-L

YOU’RE INVITED…. STORK THEMED TEA PARTY BABY SHOWER

We recently threw our dear friend Lori a baby shower for her FIRST baby!!! There is just nothing more exciting, huh? We have been “planning” her shower since the day she even spoke about a baby. We couldn’t have asked for a better day!! It was the first day of sunshine and warmth we had had in a while, and it was such a mood lifter. Lori loves her “tea time”, especially ever since our trip to JA together with our husbands’ work family. See here for those photos! So, we opted for a tea party/stork theme. What more could you need for a beautiful afternoon?…. feathers and tea! Ha!
Ok, so all of our little details…
The invite…. beautifully designed and assembled by Lauren @ Rock Paper Scissors. She completely saved us and tied everything together with all of the printed goods you will see throughout the post.
Leah and I scored with a major tulip sale from Whole Foods. Tulips are our fav!!! We used mini tin pails from the Target dollar section as vases. It was so fun to send Lori home with these beauties for her to place around her home! Just a little reminder of her special day and all of those that came to love on her and baby Mahon.
Leah and I gathered as many teacup sets as we could get our hands on! Thank God for thrift stores 🙂 I walked into a Goodwill near my home one day, and literally bought an entire table of teacup sets. They were just waiting to be used for this shower.
Nothing goes better with tea than sweets….duh! Poundcake, scones, macrons, and tea sandwiches were our food groups of choice :). These are food groups, right?
Can we talk about that diaper cake? Leah did such a great job! We always love a good diaper cake that coordinates with the shower theme. They make beautiful center pieces, and are totally practical for the mommy-to-be. We really want to get a tutorial up on the blog for you to see how we make our diaper cakes!
I ended up tying white feathers to aqua thread, and taping each feather to the ceiling and adding other feathers to the bottom of my light fixture to resemble a “nest”. Again, a time consuming project, but it really made for a beautiful centerpiece above the table. 
These moss letters were the perfect “springy” touch for our little tea party. I actually left them up for a week after the shower because I have an serious infatuation with moss. Why is it so beautiful??
I simply cut the tops of the letters off with an xacto knife, and just stuffed fresh live moss in there. It stayed beautifully, and took a total of 5 minutes!
Our favorite tea cup find! Isn’t it lovely? Leah totally beat me to the punch when it came to who would get to sip from this beauty while socializing with guests. 
These DIY tea tags were by far my favorite touch of the shower! We love showing baby pics of the mom and dad to be, and this was such a unique way to do it. VERY tim3e consuming, but totally worth it. Guests absolutely loved picking their tea and admiring the pictures. You can find the tutorial I followed here. For the tea selections that came without a string, I simply threaded a piece of green and white twine through the tea bag and tied a knot on the end so that I could add a tag 🙂 
The absolute cutest “pickles and ice cream” wrapping job by our friend, Lauren! 
The stunning mama to be sipping her tea of choice… Tazo Passion tea with a baby pic of her sweet hubby on there of course!
As guests said their goodbyes, we made sure they left with an “egg from the Stork’s nest”. We purchased little EOS organic lip balms for each of them!

ICE CREAM SOCIAL – SIP AND SEE

My oldest friend, Rebecca, just had Ada, the sweetest little bean you ever did see! Remember her baseball themed bridal shower HERE? We had an ice cream bar then (her fav), so my mom and I went with a whole ice cream theme for her sip and see! I basically have no imagination and wanted ice cream. BTW a sip and see is a baby shower AFTER the baby is born- you sip drinks and see the baby. Get it? Might be a southern thing, I don’t know!
Colors and design began with this adorable invitation by Rock Paper Scissors.
Frozen water balloons = the cuter cousin of ice cubes.
Loooove how Rock Paper Scissors designed the ice cream cup labels and cone wrappers!
DIY GIANT ICE CREAM CONES:
-honeycomb balls (here and here)
-kraft wrapping paper
-double stick tape
For the cone, follow THIS template… just eyeball it and make it giant! It’s a little tricky, not gonna lie. Cut out and tape the ends of the cone together. Stick the honeycomb ball in and gently tape with double stick tape. I was laying mine flat on the table, so I didn’t need to secure it well. If you’re hanging them, I’d make them with the tiny honeycomb balls so they’ll be lighter.
Pinwheels, plates, and napkins by Meri Meri.
It’s not a party without Aunt Ellie’s Campfire Crispies! This time we went with gluten free Oreo flavor. Yuuuuum.
We got these adorable scoops HERE and painted them. We’re thinking about selling these little scoopity scoops painted custom in our ETSY shop- what do you think? They were perfect for ice cream toppings.
Table runner by Kitchen Papers.
I used THIS tassel tutorial and used my Silhouette for the letters.
Here’s the new mama Rebecca and sweet Ada! Imagine knowing someone for your entire life, then they’re in labor, and you’re crying alone in your car just sitting in your driveway so your kids don’t get freaked out that you’re crying. Yep, that was me.
Ice cream parties are the easiest because there’s no cooking or baking! Everything is store bought but looks special depending on how you display it. Sweet and simple!
-L 

JENNI’S PINK POM POM BABY SHOWER

I’ve been waiting (impatiently) to share one of my favorite events… Jenni’s baby shower! Almost three years ago I co-hosted this charming fete for my bestie along with two incredible and important women in Jenni’s life, Lori and Amanda. Although it was a couple’s shower, we decided on a pink pom pom / chevron theme to match Amara’s nursery (scroll down to see) and just told the boys to get over it! Plus I guarantee 99% of the guys never noticed the girly theme when there was plenty of drinks, great food, and lots of late-night dancing going on! And Jenni and Gabe’s friends can DANCE, people. Actually the dance floor was my favorite area strung with tons and tons of pom poms!
The dessert table laden with all pink desserts and a garland of little tissue paper squares.
Gabe and Jenni! Youngin’s…
I found this pink box in the office section at Walmart!! and filled it with teeny treat bags full of Gabe’s favorite candies, Reeses Pieces. Gotta give the dad one thing, right?
Lori made the BEST oreo truffles…omg 
We wrapped the vases and tables with ribbon – simple!
Late night s’mores around the fire pit were the perfect way to end the night!
My favorite thing to make for baby showers- a diaper cake! To fit with the pom pom theme, I just made tiny ones and stuck them in with floral wire.
To give the cake an ombre look, use matching tissue paper and ribbon: two fuschia tiers, one light pink tier, and two white tiers. Normally I use Pamper Swaddlers diapers since they’re all white… but honestly I had these on hand and didn’t mind the touch of green.
More of our diaper cakes HERE and HERE.
We asked Jenni and Gabe’s parents to send us pictures of them when they were little for the centerpieces, so we could imagine what Amara will look like! (Spoiler: exactly like Gabe).
We even anchored some poms in the pool to carry the theme throughout the yard. Amanda’s home is stunning, right??
I made this chevron photo booth backdrop with just squares of pink and white tissue paper. Just layer the squares- no cutting! I used double stick tape on two large pieces of foam core and Lori’s insanely handy hubby hung them with fishing line. 
Photo booth props: empty barnwood frames from Hobby Lobby, and a baby bump pillow were favorites. We also left a blank scrap book out for guests to write their best advice and wishes!

Here’s the gorgeous Jenni in Amara’s nursery- the inspiration for the whole shower! She and Lori hand painted this wall! To see Amara’s white and modern big girl room, click HERE, though after all that hard work painting, I can’t believe Jenni switched the look!
The invite! Inspired by the pink chevron wall above. By Rock Paper Scissors.
What a joyful night! We celebrated the crap out of these two. Deserving people who created the most special little lady, Amara. Let’s do it again, Jenni! (She’s reading this going, noooo way!)
-L

A “WINTER WONDERLAND” BABY SPRINKLE

Our #TBT (Throwback Thursday) Party this week is a baby shower I put together for our sweet friend, Shara. Baby number two was on the way, and I wanted to do something simple, not over the top, but still oh so special. 
It was a “winter wonderland” theme with some confetti markings as well. My main focus was to have “snow” hanging from the ceiling and an amazing dessert table. It was January, so it just felt right. 
^^The invite (Rock Paper Scissors) ^^
I actually put confetti in the envelopes as well! That always a nice surprise for the recipient! yay! 
^^ I did simple mantel decor by using fake snow and cotton balls, flowers, candles, DIY anthro inspired letters and a handmade felt banner. I put modge podge on the bottom of the votive candle jars and sprinkled glitter on them to give them a little something extra. Also, the banner consists of felt flags and wooden beads from JoAnn’s that I painted an aqua blue…. shara’s favorite color.^^
^^ White flowers are just so classy to me. They ALWAYS work!! ^^

^^ The dessert bar was my favorite part! So many yummy treats, especially those Aunt Ellie’s Campfire Crispies! I mean…. seriously. ^^
^^ Hand-lettering on the chalkboard. Always fun! ^^
^^”To go treat bags” are always a good idea when you are serving lots of sweets. Guests took extras home to their kids. That is what they said at least. I am SURE that they probably had a treat or two in their car…. in private! ^^
^^ Anything you can do to make writing “thank-you” notes a little easier on a new mom really helps. I had each of the guests address their own envelope, and I had already written Shara’s address on the back as well. All she had to do was write the simple note, and put a stamp on it. Easy! ^^
My only tutorial I took pics of because I am the worst at stopping throughout my projects to take tutorial pics, as I get too excited favorite tutorial that I can share with you are the DIY color-blocked spoons I made. Pretty self-explanatory…. just tape your utensils down with painters’ tape while blocking off different sections. Paint your first color, allow drying time, move your tape and block off another section, and repeat until you get the desired look. It was time consuming, but man… I am such a sucker for little details! ^^

P.S. Tomorrow is Friday!!! WHOOP WHOOP!
-J

WINTER WHITE BABY SHOWER FOR LAUREN

As part our #TBT Party Series, we’re sharing Lauren’s baby shower today! Lauren is our bestie and the owner of Rock Paper Scissors, where Jenni and I met and worked pre-babies. It’s quite possibly the cutest and most creative paper boutique… we’re planning a comprehensive post on this later, but for now, here is her baby shower for little Piper (who is turning 2 next week!). She and husband, Tim, wanted a party that wasn’t too girly since it was a couple’s shower, so we decided on a winter white theme. The party was in January and the weather certainly fit the theme. Lauren’s good friends Pauline (who’s gorgeous home you see here), Randi, and  sister-in-law Gretchen were the gracious co-hostesses.

We hung parasols from the ceiling using fishing line and clear 3M Command hooks.
All white dessert table with vanilla cupcakes, macarons, meringues, sparkling sugar cookies, and white candy covered oreo truffle pops to match the winter white theme. The middle… is a diaper cake! 
Most of the guys were truly disappointed to find out this was a diaper cake and not a real cake. I’ll share the tutorial with you soon! It’s pretty easy and is a great gift for the parents-to-be.

My favorite project to make was this “family tree”. I asked Lauren and Tim’s parents to secretly send me three generations of family photos. I scanned in the photos and made them the same size, mounted them on sparkly white paper to match the theme and hung on a branch spray-painted white. On the bottom level, I hung a blank card that said “Baby Rauter”. Oh, and Maggie, their sweet dog, is on there too! She’s the big sis after all.  
Little babies Lauren and Tim! 
Instead of a traditional guest book I tied 12 envelopes together, one for each month of Piper’s first year. Then we asked the guests to write advice or encouragement on the cards and place it in the corresponding envelope. Lauren and Tim opened an envelope each month and got to read what their family and friends wrote throughout the year!
Gorgeous letterpress invitation designed by Lauren’s BFF, Dabney of Dabney Lee. The back was covered in a silver snowflake pattern. Perfection.
Lauren and Tim sipped hot chocolate with homemade marshmallows and opened gifts in style in the all white indoor tent. 
Party favors were tiny milk jars and mini pumpkin donuts from Ellie’s Donuts– everyone’s fav in Franklin, Tennessee. Drooling right now.
Pauline’s insanely beautiful home with projected snowflakes and faux snow lining the walk way. That’s how you enter a party, am I right?
*Photographs by Twinkle Twinkle Images
-L

A “TRIP AROUND THE WORLD” THEMED BABY SHOWER

We are going on a little “trip around the world” on this lovely Friday! We wanted to share a sweet shower that is just too cute to keep to ourselves. We love big over the top celebrations just as much as the next party enthusiast, but honestly swoon over small, charming celebrations such as this one. All of the little details are so perfect and sentimental. 
Sara is awaiting the arrival of her baby boy, and her sister, Beth, was the creative mind behind all of this perfection. Even her home is stunning and full of charming details.
Beth’s blurb:
It took me a while to come up with a theme for the shower.  I didn’t want to use cheesy baby blue bottles and the generic “it’s a boy” banner.  Sara was obsessed with maps growing up and I think still is, and I knew she was using a globe in her nursery, so I thought it would be a fitting theme.  It all fit – Welcoming baby into the world, had Sara’s personality, prepping baby for all the travels and experiences he’ll have in life, and it wasn’t a cheesy landscape.  So, with the globe idea, I scoured pinterest for ideas.  I found a cardstock book of travel theme scrapbooking paper and went to work! I made bunting with leftover twine and my hot glue gun.  I had extra old wooden boxes left over from my wedding, so I used those for different levels of display.  The wreath and framed welcome sign were made from paper of an atlas and I just freehanded the words in silver sharpie, and outlined them with black sharpie. My husband made most of the food, with the exception of the cake pops.  Those were a trial and error process as they were the first ones I had made.  I used blue candy melts from Joanns and gold sprinkles to give them a “globe” look and stuck them in styrofoam for stability and covered it with white rocks to continue the travel/world theme. Everything else just kinda fell together.  All of the little touches were completed last minute by things I had laying around my house.  The birds, books, extra globes, etc. were just extra items I use in my everyday decor. 

Sara’s blurb:
I loved that beth tied items I love into the decor – maps, vintage plates, globes for the decor. In one of the wood crates on the mantle, she had vintage Nebraska and Pennsylvania state plates – the states my husband, Brad, and I were born in.  I also loved that she had the Dr. Suess “oh, the places you will go” book and used it as a guest book. it fit the theme perfectly and I’ll treasure that with the written notes inside from my girls!
Thank you SO much Sara and Beth for sharing your photos with us!! Enjoy your weekend friends! When we are not posting here, we are Instagramming….. keep up with us here!