MAX’S NAVY AND GOLD NURSERY

Very excited to show you all Max’s nursery! I had so much fun finding little details to personalize the room. Max loves looking at all of the animal-themed artwork and the shiny gold details, and I love the cozy retreat from the chaos of toddler-world. 
These wall letters were the first things I bought for the nursery… just a little excited when we finally picked a name!
Paint color is Valspar Mystified
 Pretty obsessed with Mr. Moose
The gold theme began with this lamp from Land of Nod.
Had to add this framed pic of big brother for Max to worship 🙂

Dog photograph by William Wegman
Wall shelves and toy bin from Land of Nod

This was a fun embroidery project! It comes as a DIY kit, but I added a little pompom to his hat.
1 / 3 / 5 / 6 / 7 / 9 / 10
2) I may have cut this out of my Picasso coffee table book!
4) Incredible paper cut made by my sister’s friend. Leave a comment if you’d like the artist’s info.
8) DIY inspired by this talented artist
Enchanting LED lights!
Mr. Max
-L

CONFETTI-FILLED LIGHT BULB GARLAND

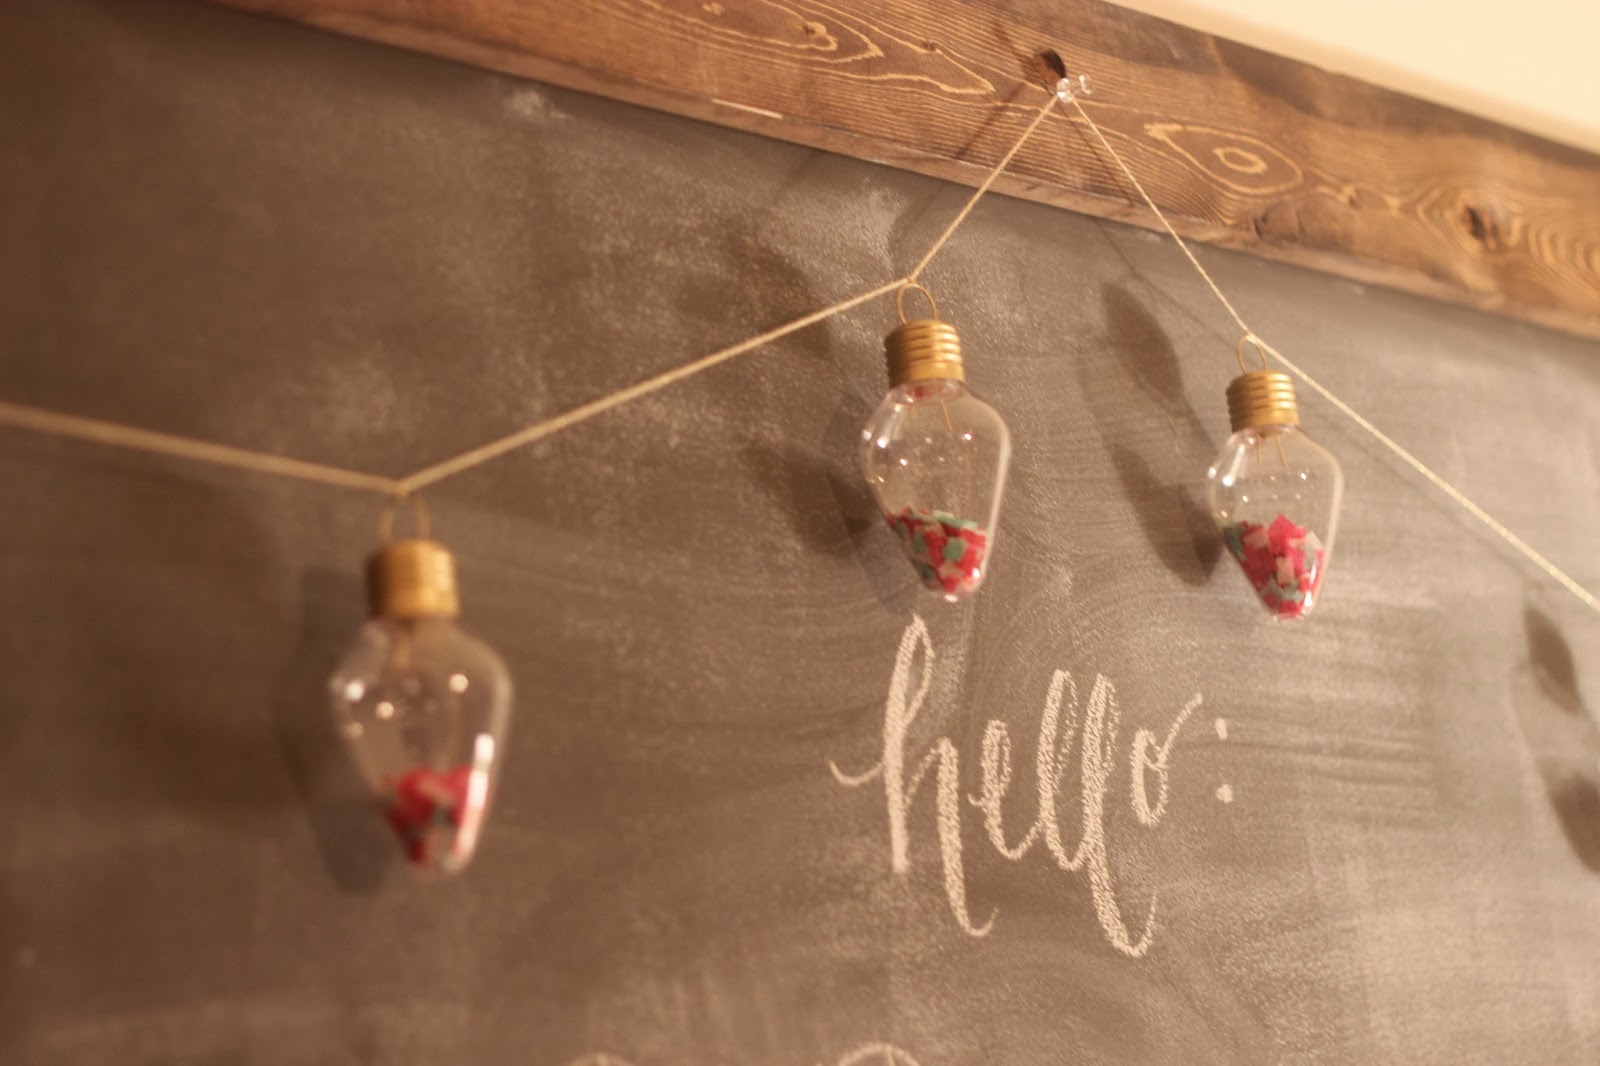
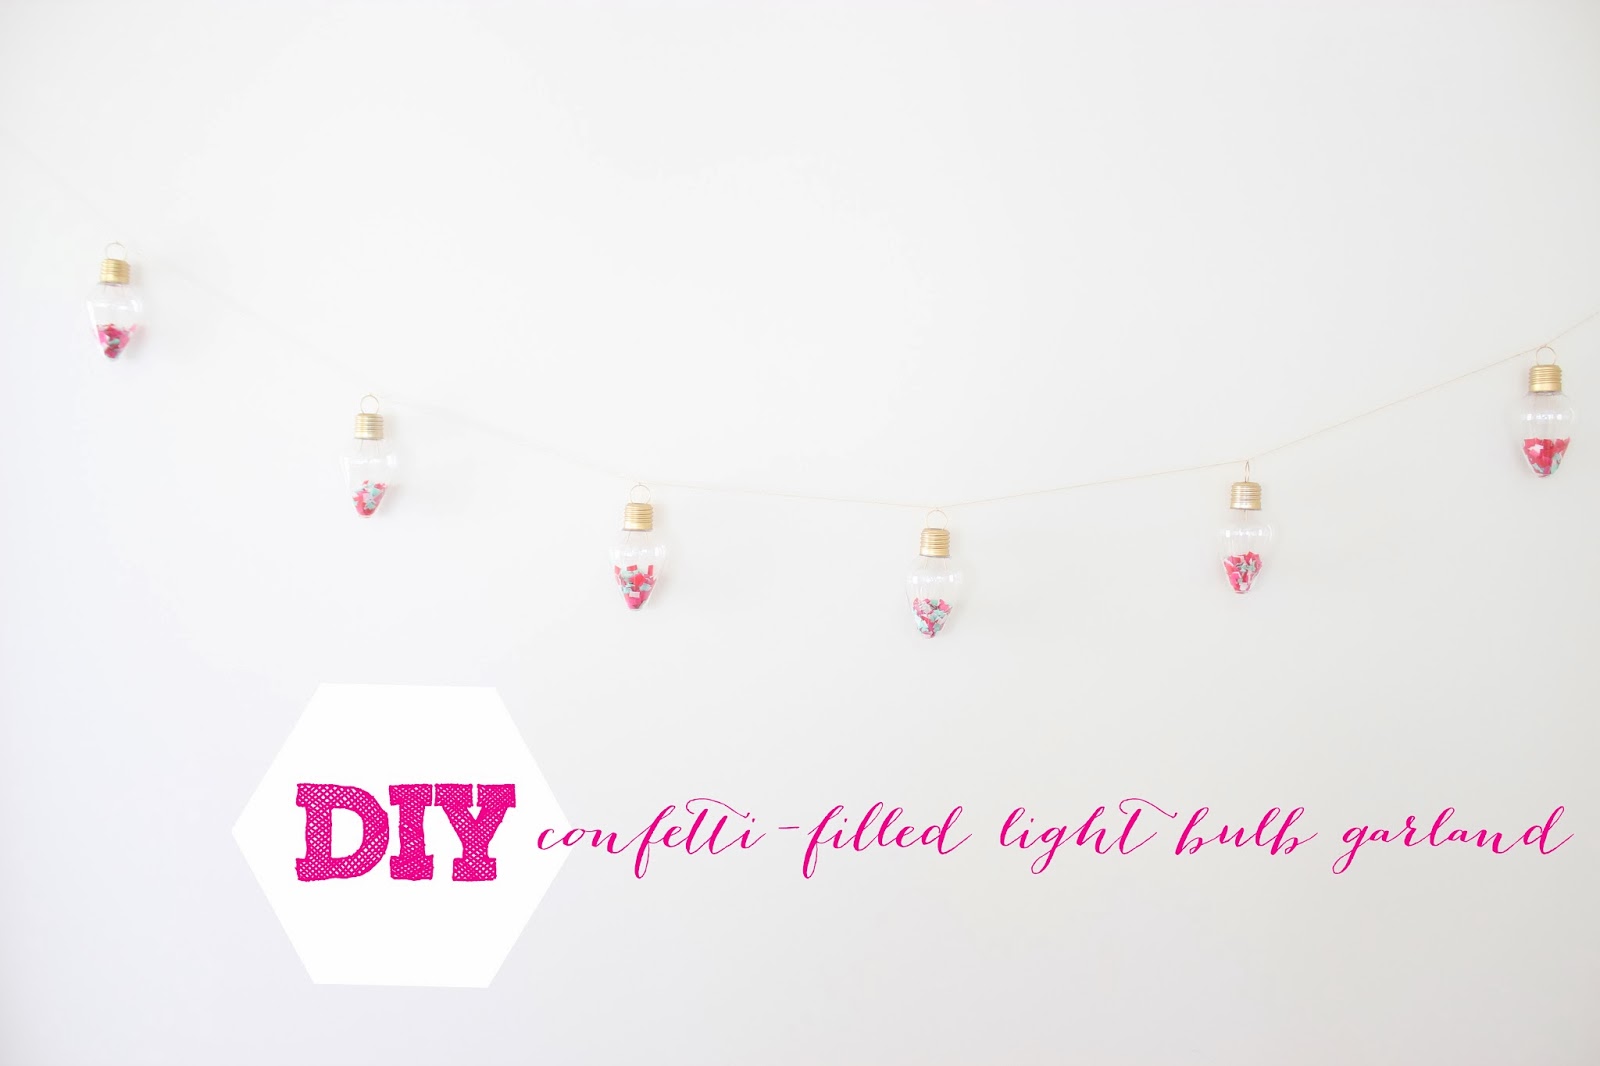
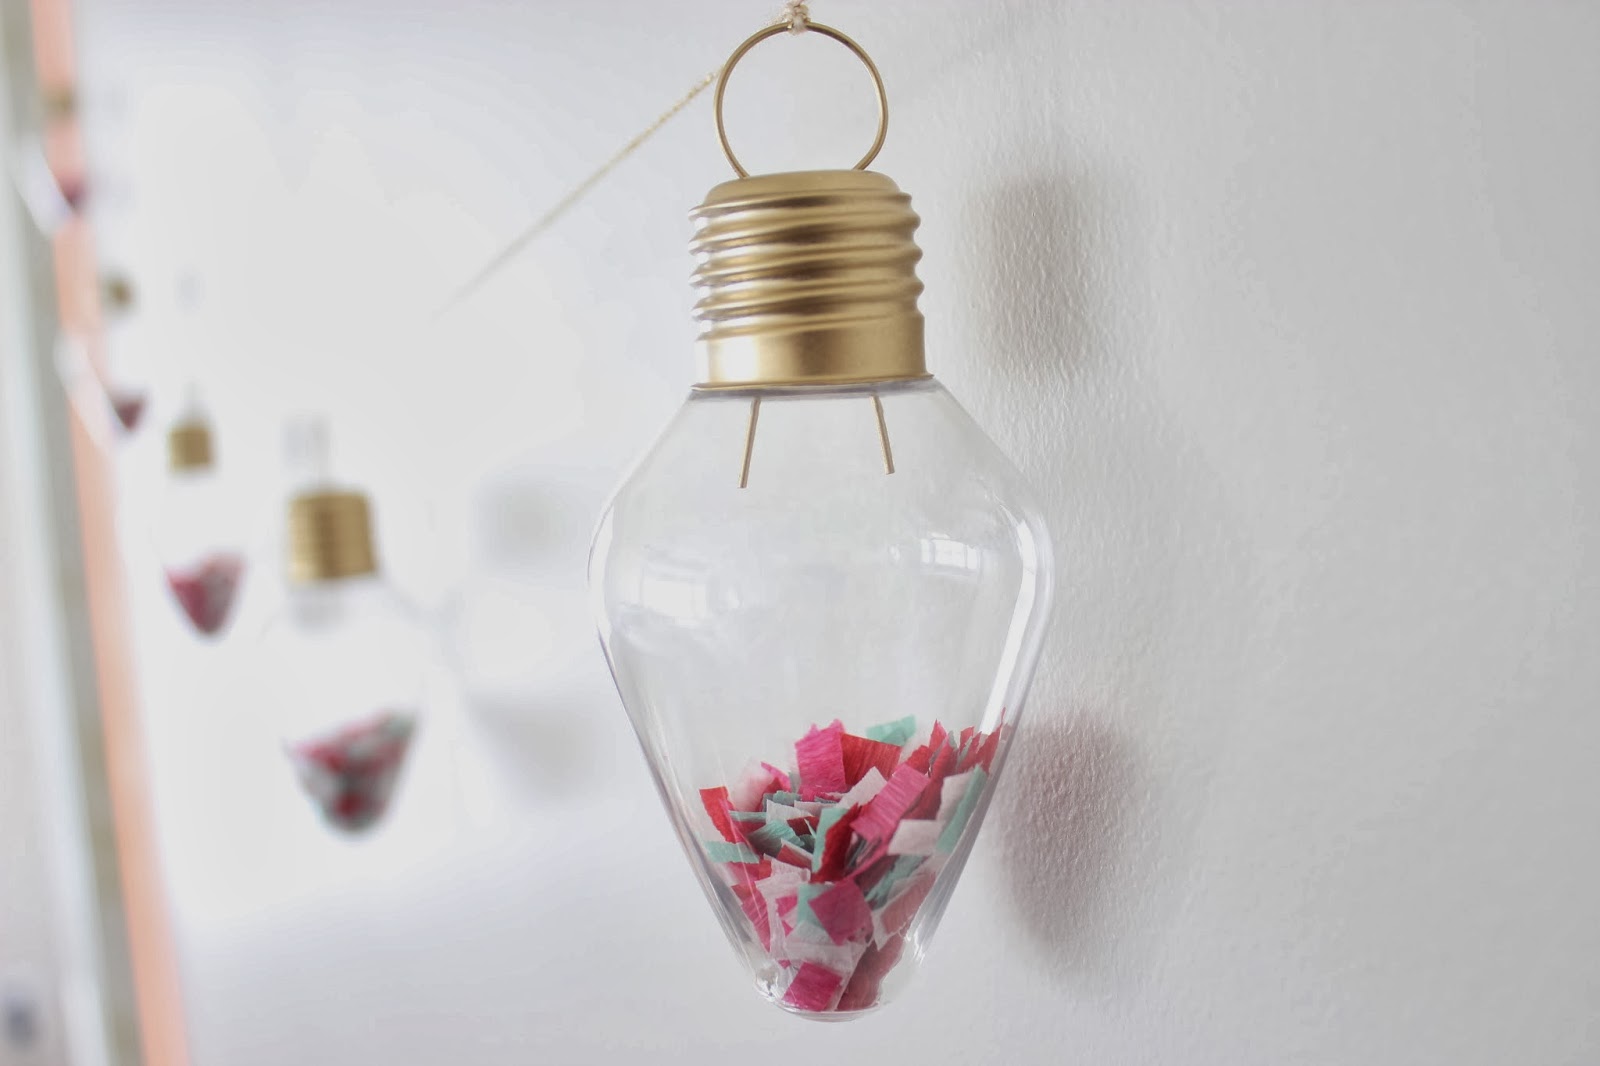
Hey friends! We apologize for the late start to our week. Holiday travels and sick babies have kept us mamas busy! Christmas day is approaching, parties are still being thrown, and decorating is still taking place. If you are anything like me, the decorating never stops!! I just wanted to share a simple tutorial for the confetti filled light bulb garland I made for our wrap party last week. I love it so much, and I am definitely keeping it around for next year!
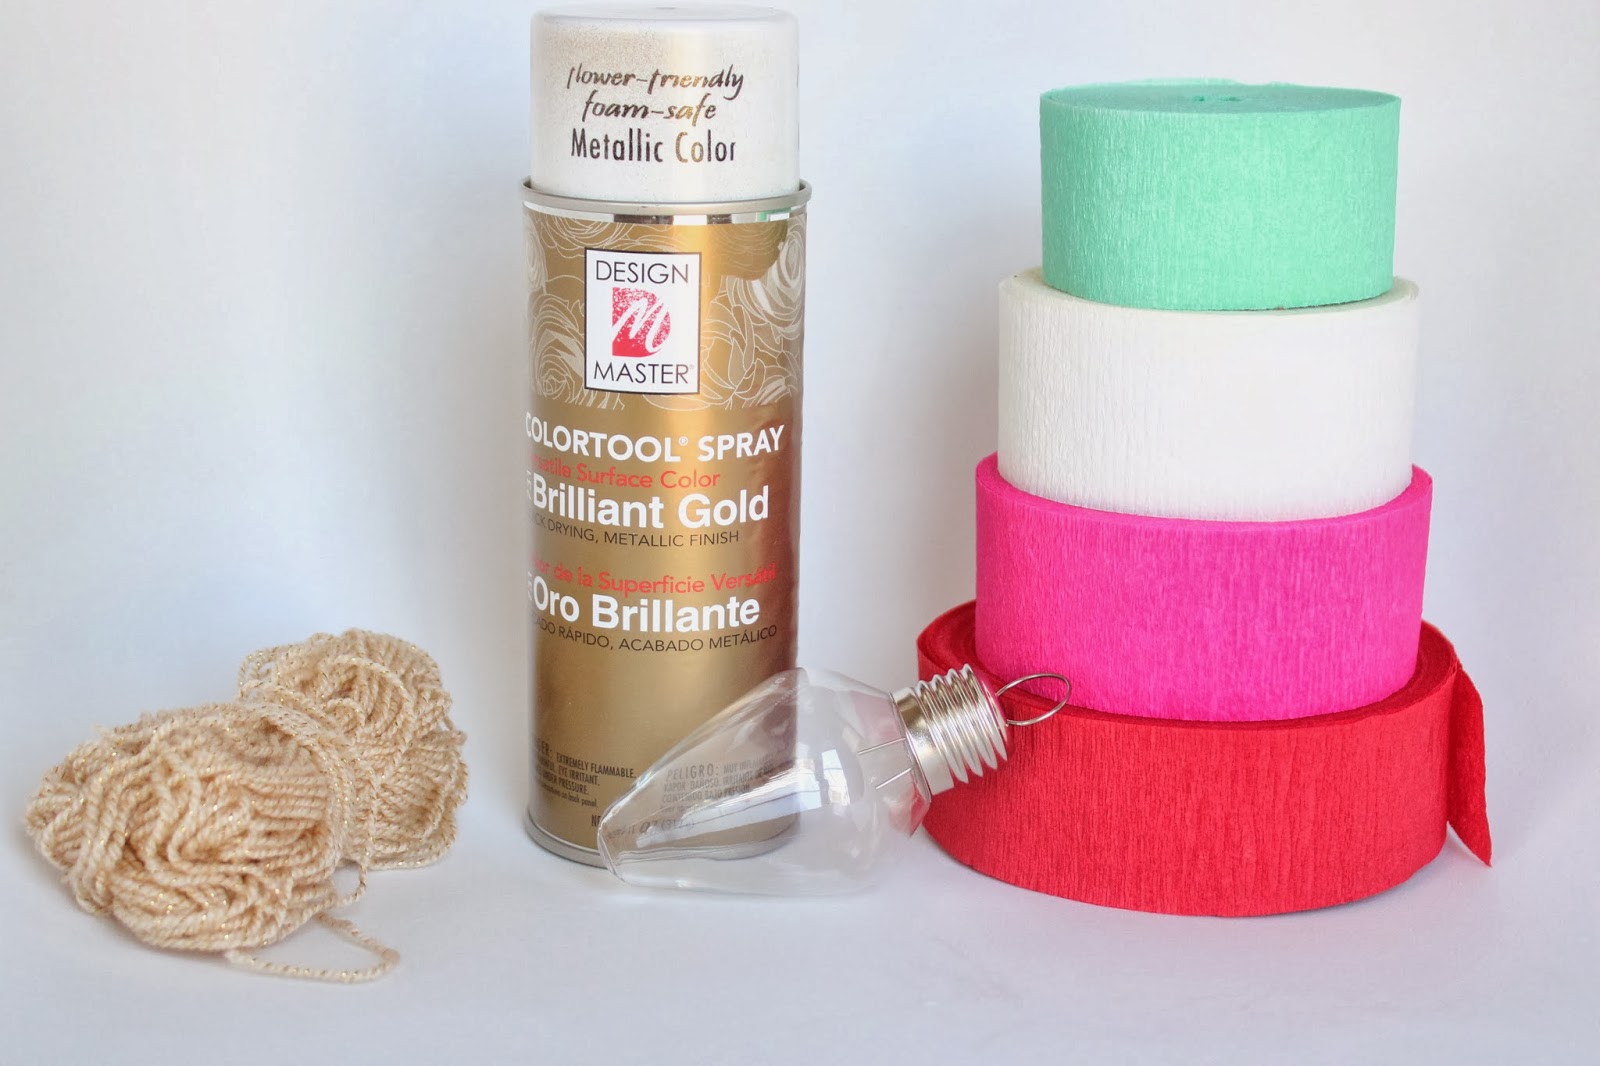
^ What you will need: yarn or twine, gold spray paint, clear light bulb ornament (purchased at Joann’s Fabrics) and crepe paper (festive colors a must!) ^
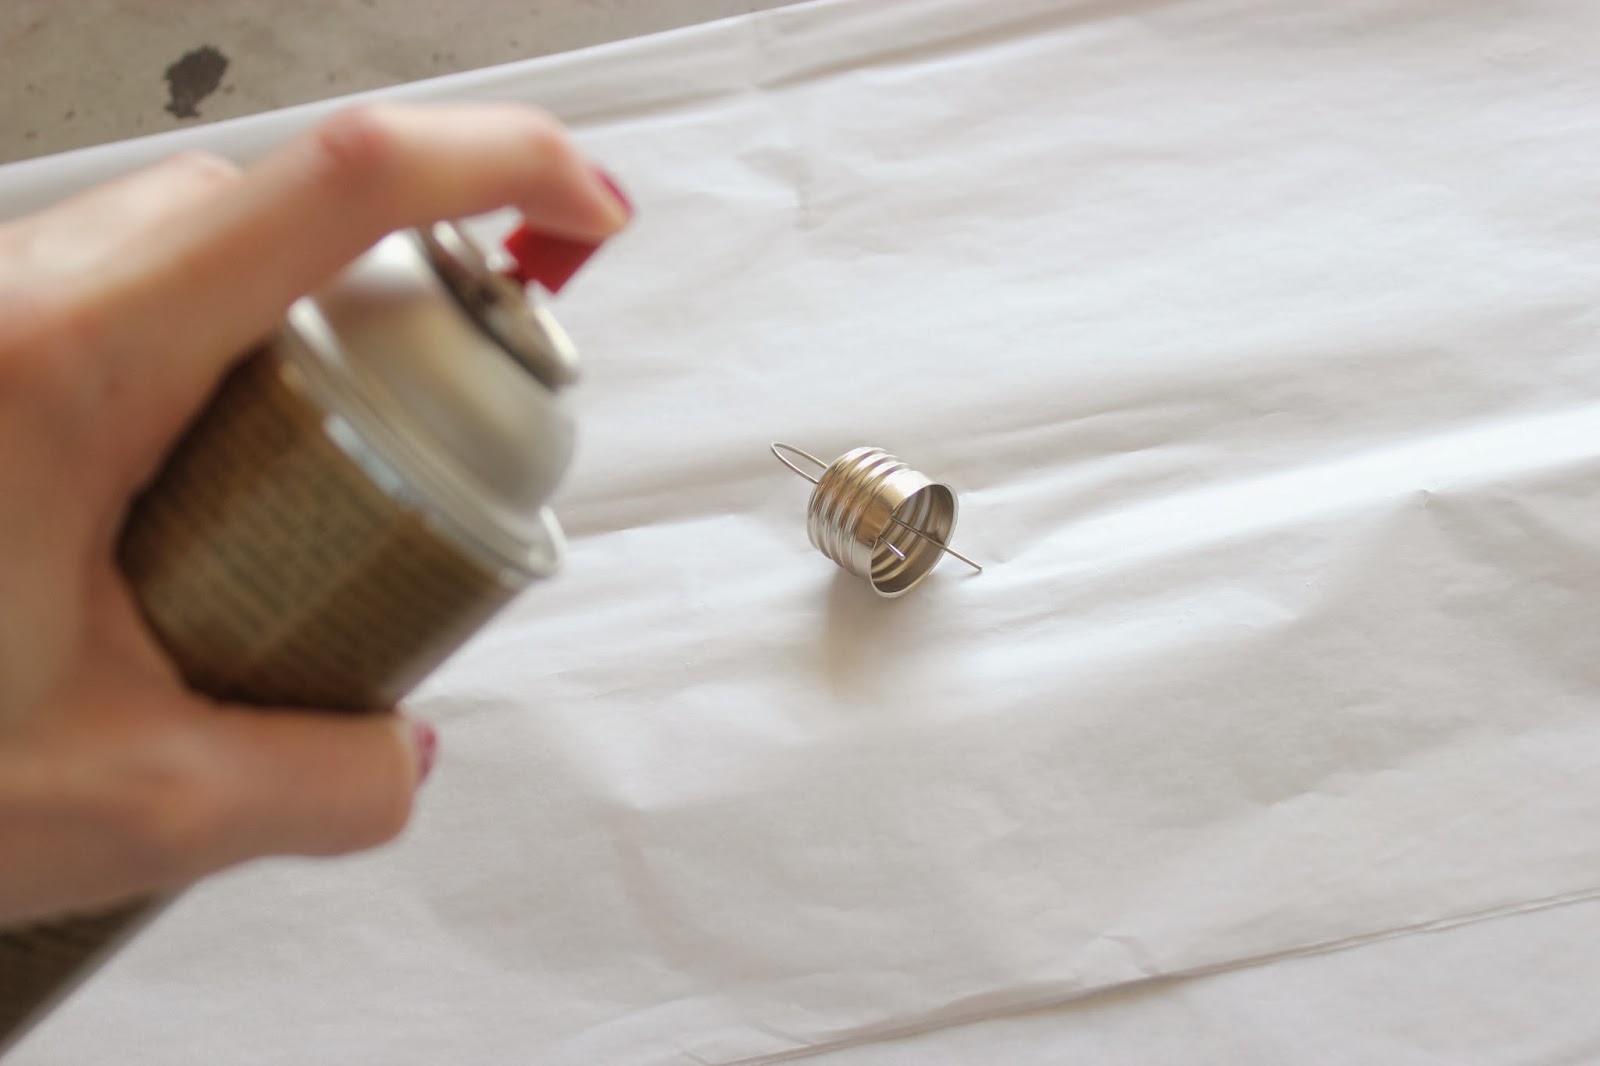
^ Remove top of ornament and begin spray painting. Allow time to dry, and then spray the opposite side. I began working on the steps below in between drying times. ^
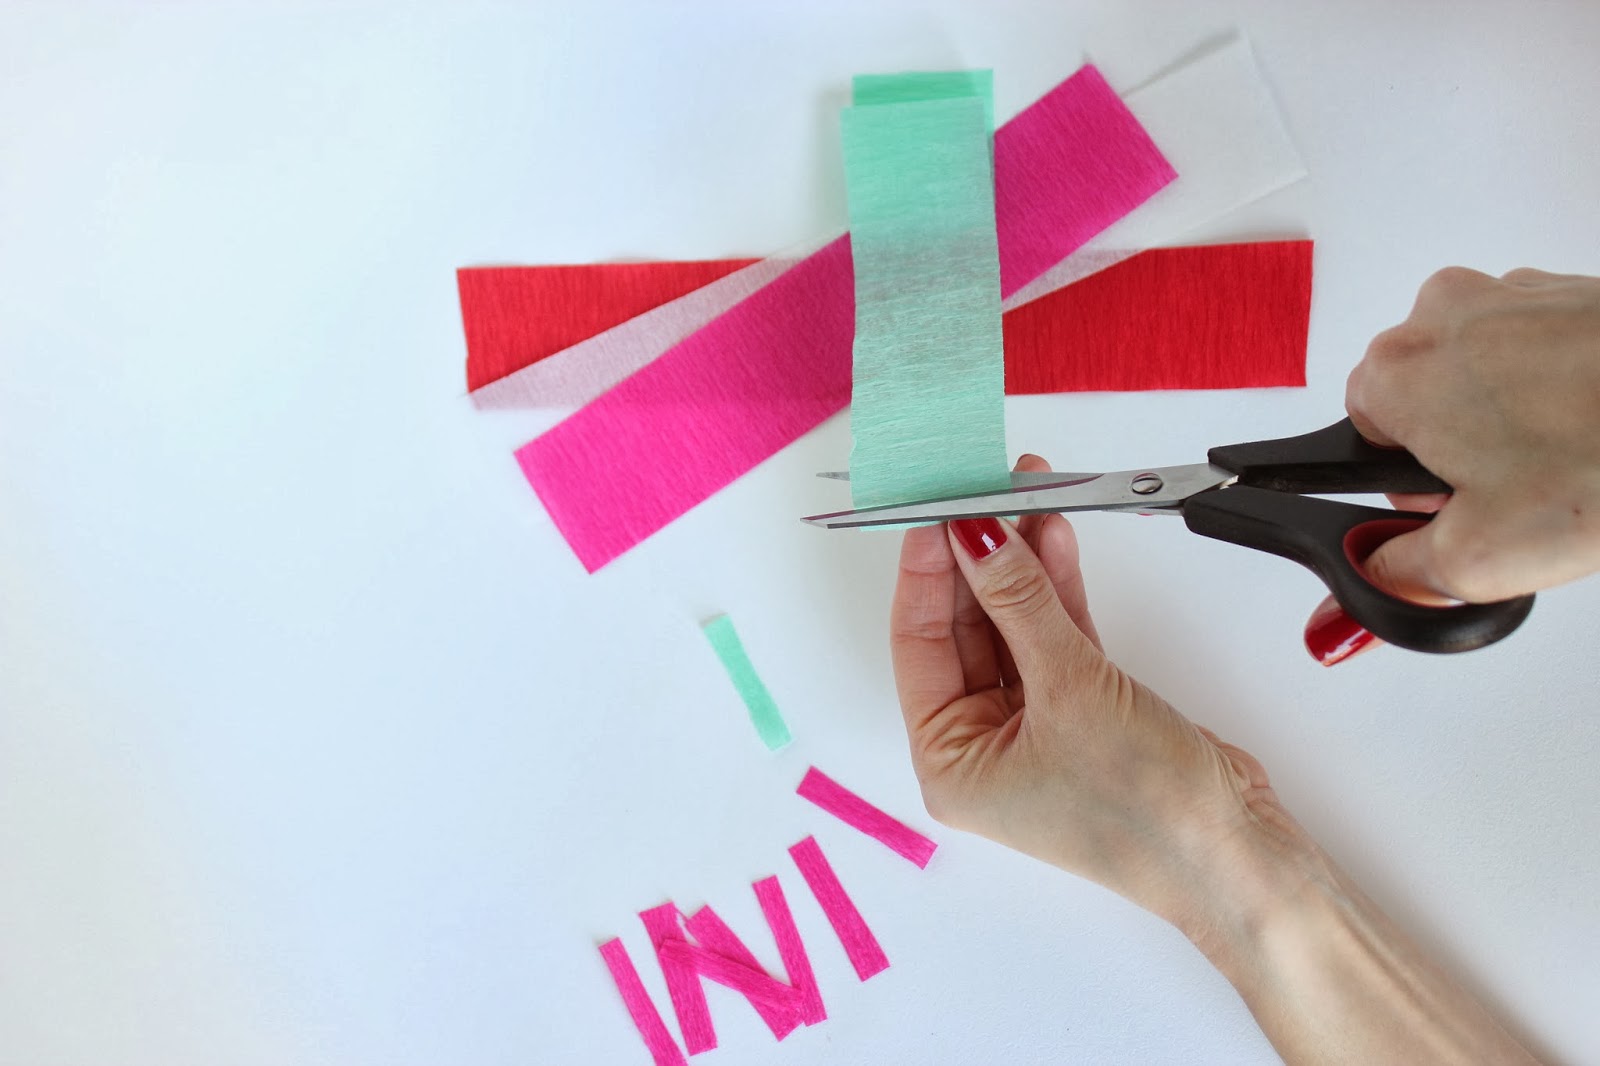
^ Cut crepe paper into small strips. I cut roughly 10 strips of each color per ornament. ^
^ Then, cut those strips into small squares. ^

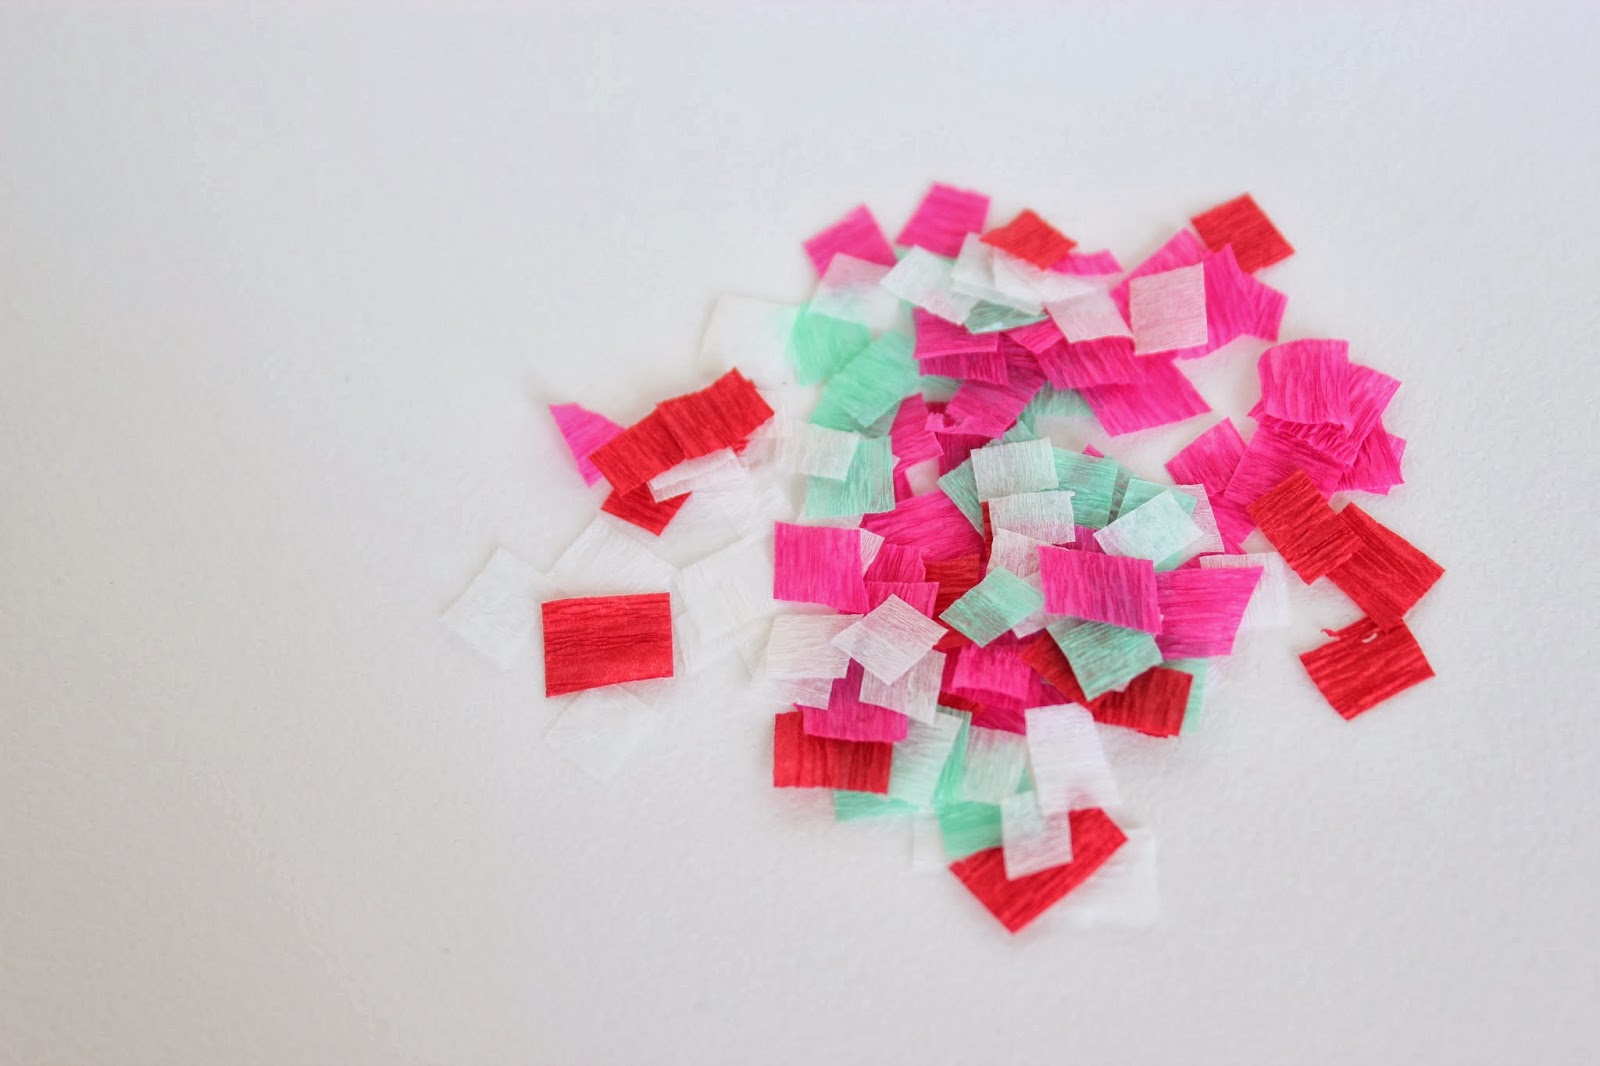
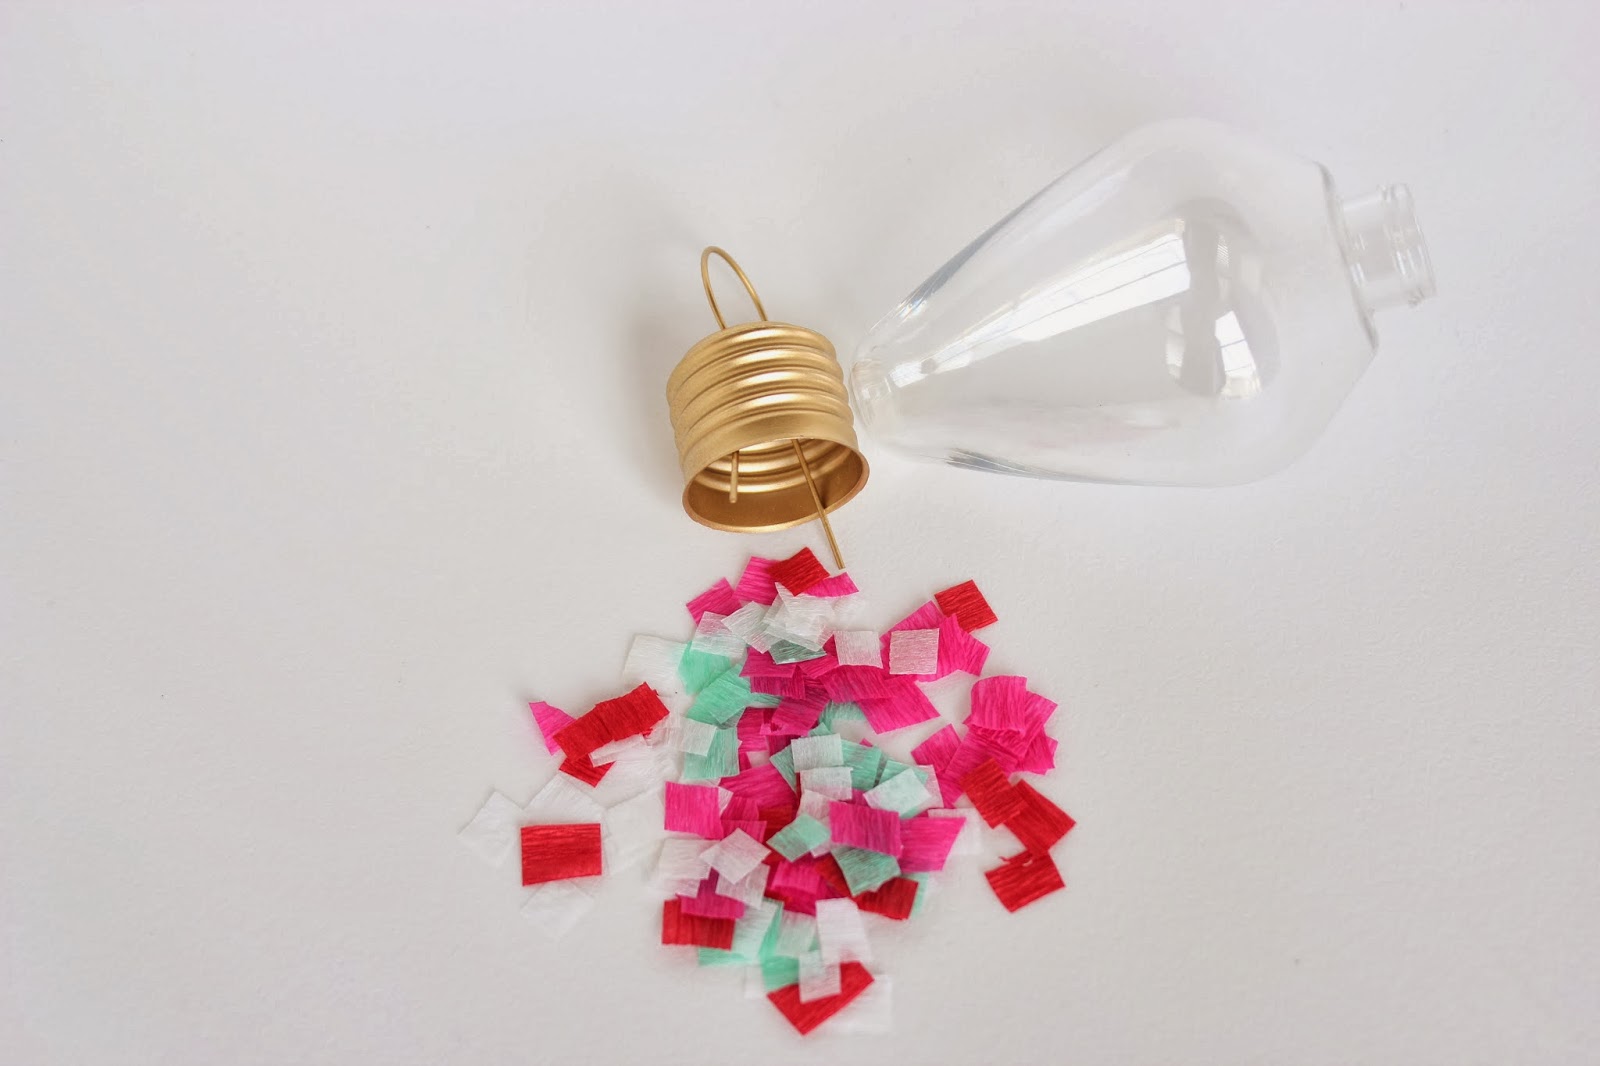
^ Begin filling the bulb ornament with the confetti. I only wanted to fill mine about a quarter of the way. ^
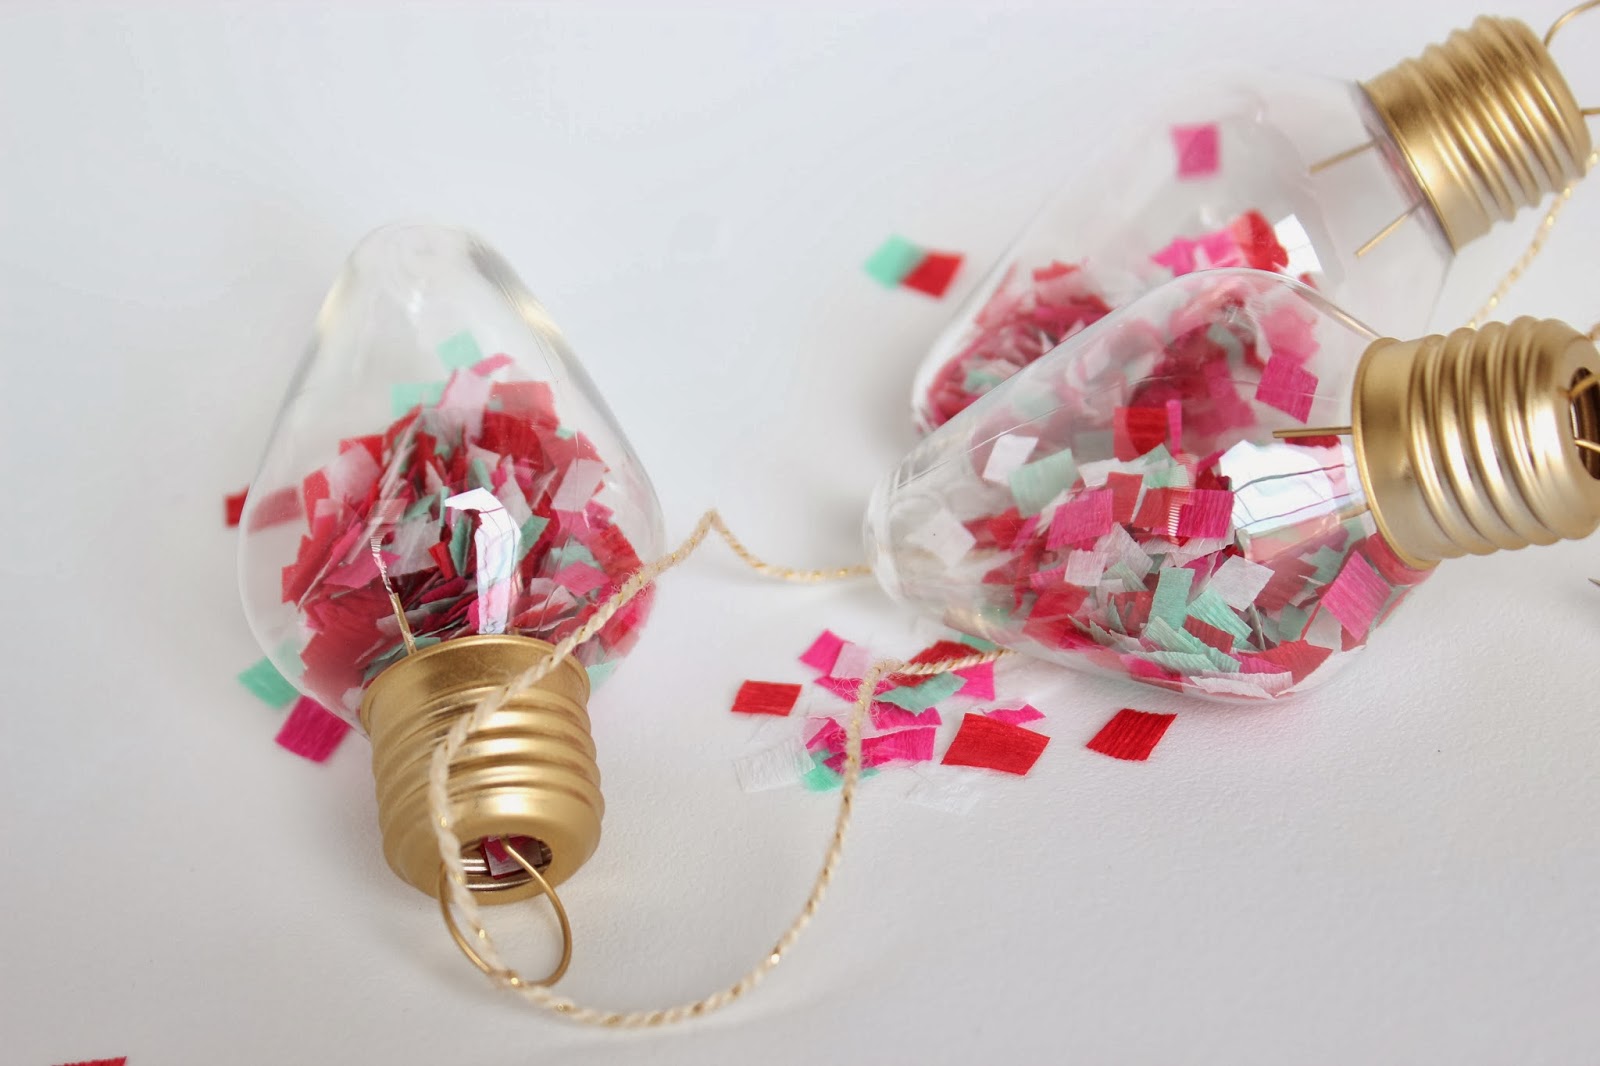
^ String those lights!! Space your bulbs out to your liking, and tie a small knot to hold each one in place. ^

-J

DIY MONOGRAM DOOR DECORATION

Here’s a simple DIY weekend project for you… grab your glue guns, ladies! I was inspired by a spring project by Urbanic and just filled my paper mache letter I found at Hobby Lobby with ornaments! I love how it sparkles when I’m driving up to my house. And it’s always nice to make your decor a bit more personalized instead of doing an ornament wreath (though I love those too!). Click here for the tutorial.
I’m planning on filling an “A” for Ari’s room with found objects when I have the time… soooo next year probably. 
You could even spell out a word like “JOY” and place on your mantle! 
Happy crafting,
-L

THAT’S A WRAP! [PART 2]


As if receiving a gift from someone isn’t enough to make you feel special already, we think that it takes it over the top when its wrapped with love. Just knowing that someone really took some time to add a decorative ornament, layer some ribbon to make the perfect bow, or even just writing your name out really beautifully makes it feel that much more special to receive. 
We absolutely believe that what is inside the box is made even better by the wrapping. We have some pretty creative friends, and it’s always fun around the holidays to give and receive each other’s gifts! Here are some packages that got a holiday makeover during our wrap party. Believe it or not, postal wrap and baker’s twine go a long way!! So simple, but it looks so stunning. Most of the ribbon we used was found in the Target dollar section, along with some metallic markers and ornament embellishments. We also purchased some clear ornaments to fill with glitter, jewels and snow. They would look awesome filled with confetti too. OBVIOUSLY! Ha! 
We had so much fun, and highly encourage you to get together with some friends or just members of your family and wrap together! Turn on some holiday tunes and sip some hot chocolate (after your champagne) and make some super special memories.

Confetti-filled ornaments, glitter glue, and simple kraft paper makes these gifts pop!
Love this “A” wrap by Rock Paper Scissors!

We topped off this Haute Papier wrap with an ornament filled with glitter and jewels.


Simple washi tape bunting banner- cut triangles and stick onto twine.

Glue jewels to Rudolph’s nose!

A washi tape mosaic!
Happy wrapping!

THAT’S A WRAP! [PART 1]

It is nearly impossible to make it through December without hosting or attending a holiday party of some kind. We decided to be on the hosting end this year, and throw a wrapping party. Wrapping gifts and eating every holiday treat out on the market is truly our idea of the perfect night! 
Cocoa drizzled popcorn cups with peppermint Oreos!

Wrap buffet…
We served Prosecco and peppermint hot chocolate. We are so in love with these drink toppers. Wouldn’t they be perfect for a NYE party as well!?!

Our bestie, Lauren of Rock Paper Scissors, came with these beautiful and tasty antipasto skewers.

No cup of hot chocolate is complete without christmas tree marshmallows. 
We placed mini ornaments (found in the Target dollar section) in shot glasses to add to the “buffet/bar” theme. They just looked so pretty!
You can find these little guys almost anywhere. We got ours from the dollar section as well. We spray painted him gold, and added a festive Santa hat. 

We are so in love with this garland, it pains me to think of taking it down in a couple of weeks!
(Tutorial coming this week incase you would like to make one of your own!)
Remember that large branch that adorned the top of my Thanksgiving tablescape? Well, I kept it around and hung “falling snow” and a couple of snowflakes on it. Just string cotton balls onto fishing line, and voila! So easy, but so beautiful we think!
Our finished products coming up in the next post!
We hope you all are enjoying your holidays and spending time with the people you love so dearly! It truly is the most wonderful time of the year!