holiday decor

FEATURED: HOLIDAY CENTERPIECE TUTORIAL

Anyone else in need of an incredible centerpiece for the holidays and have no clue how to do it? Luckily, my extremely talented friend, Matt Bollwinkel, just started a new floral business THISTLE BE FLORAL based out of LA and is graciously giving us a tutorial! I love how he uses unique textures, colors, and shapes that you’d never think of for a centerpiece. He’s seriously so talented and funny, and his wife happens to be the same. My face literally hurts from laughing after I hang out with them. They’re pretty much one of my fav couples ever.
If you’re in the LA area, contact Thistle Be Floral. Immediately. 
He’s the next big florist that you wish you knew before everyone else did… and now you do!

“MOM’S FAVORITE CHILD” HOLIDAY CENTERPIECE
Photographs by Sara Bollwinkel
Is your holiday table naked? Hide your shame with a homemade centerpiece that suggests you have your s*#t together. 

Here is what you will need… 

1. Fancy Shmancy Japanese flower arranging scissors. Or regular kitchen shears… (Anything between a machete to safety scissors will do)

2. Robert Goulet – “This Christmas I Spend with You”. This is not optional.
3. Oasis Floral Foam
4. A cool vessel…such as this tremendous silver antique champagne bucket.
5. Flower Food – pro tip: One packet of flower food and a quarter teaspoon of bleach in your water will make your plants die slower…or last longer if you are an optimist. Pro tip: if you don’t have bleach, use mouthwash!
6. Human Food – Your favorite holiday beer (or wine/scotch/kool-aid)

To prep your vessel for the flower invasion, cut the Oasis floral foam to fit and fill with water, flower food, and bleach. Allow this mixture to soak for a few minutes and pop open your human food.
Let’s get down to business.

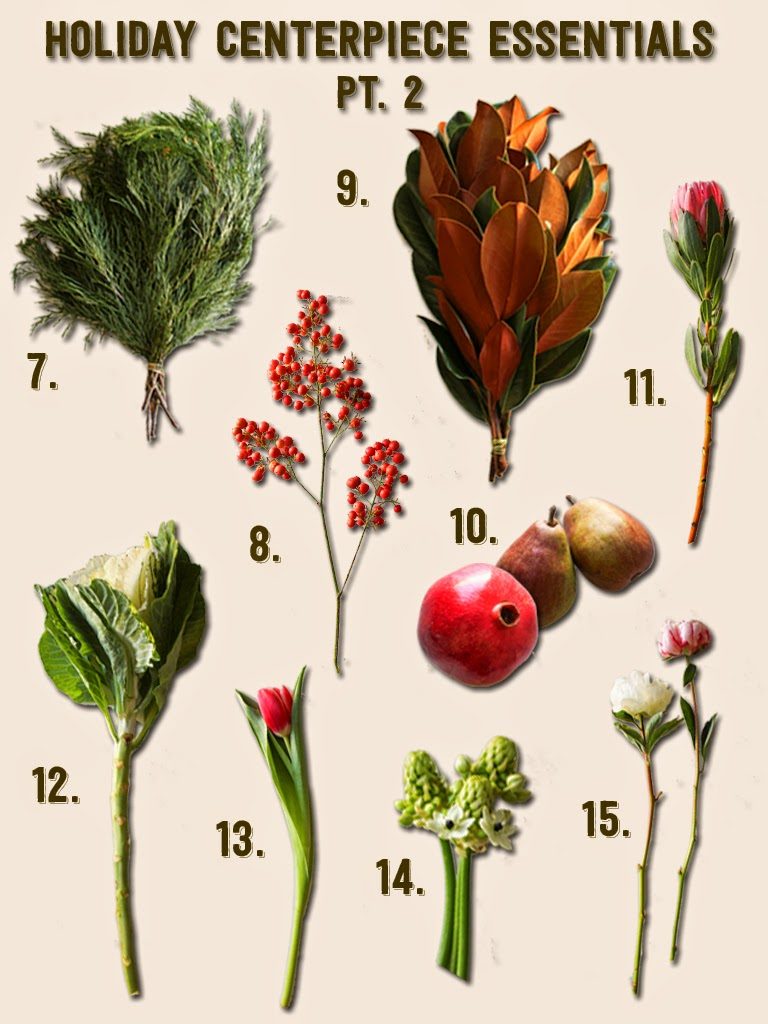
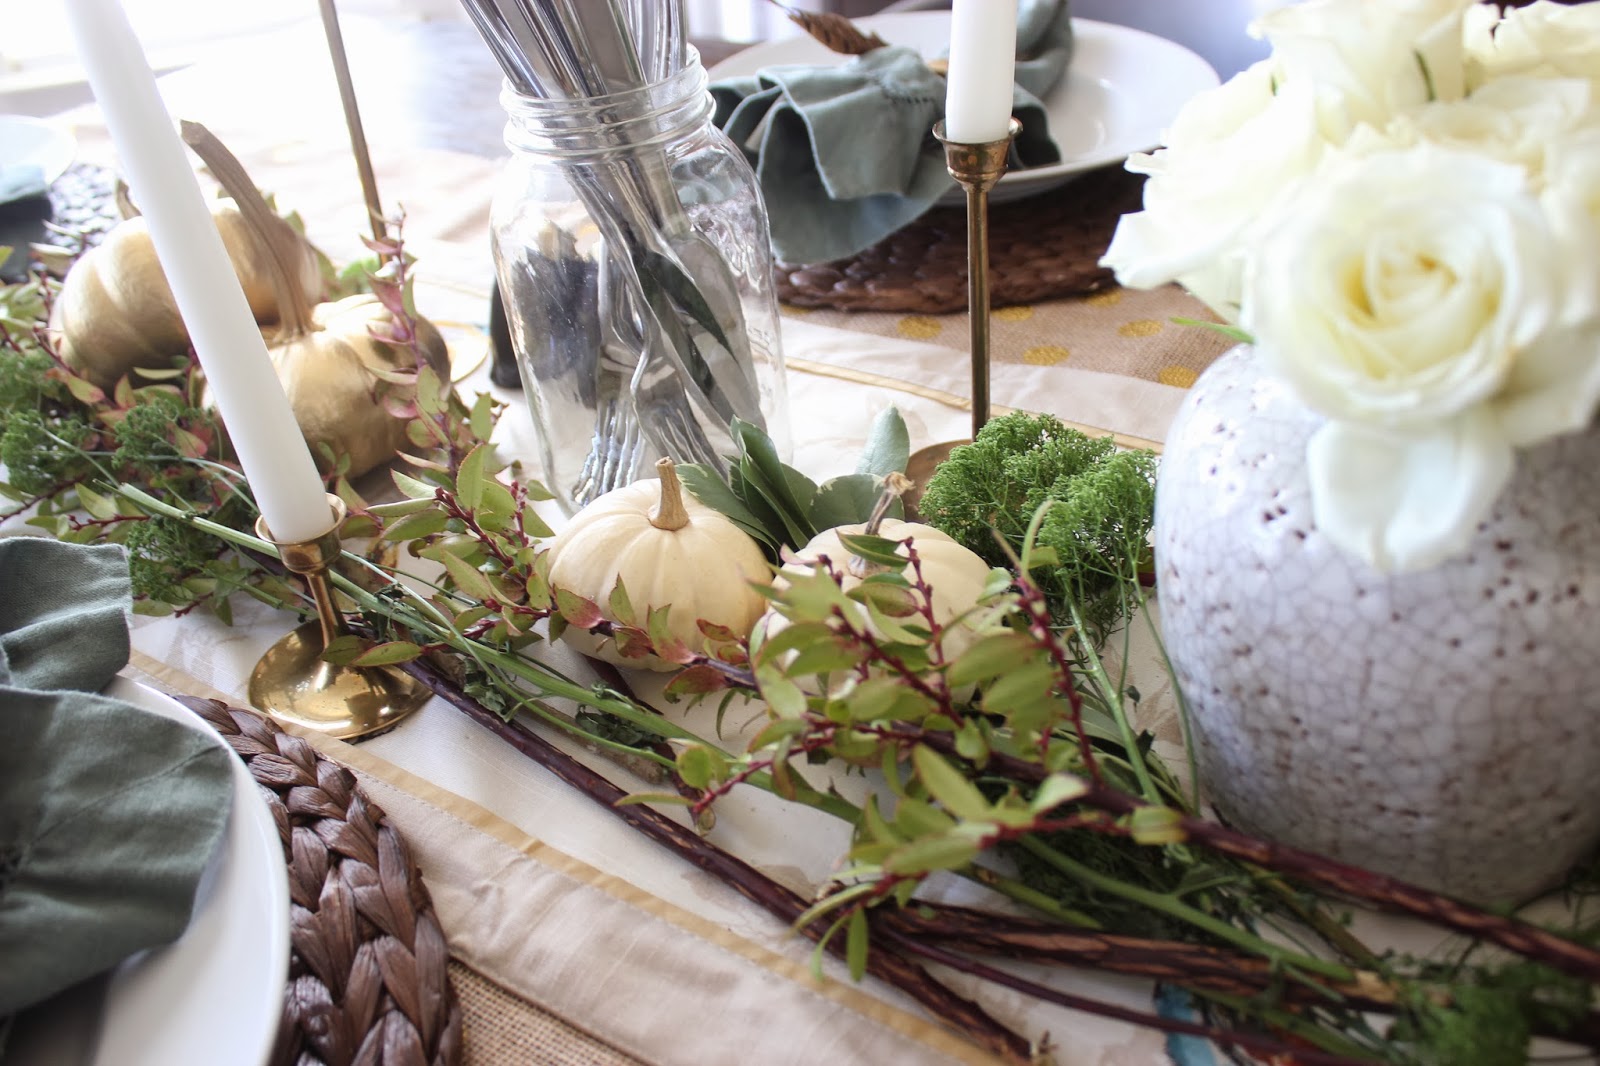
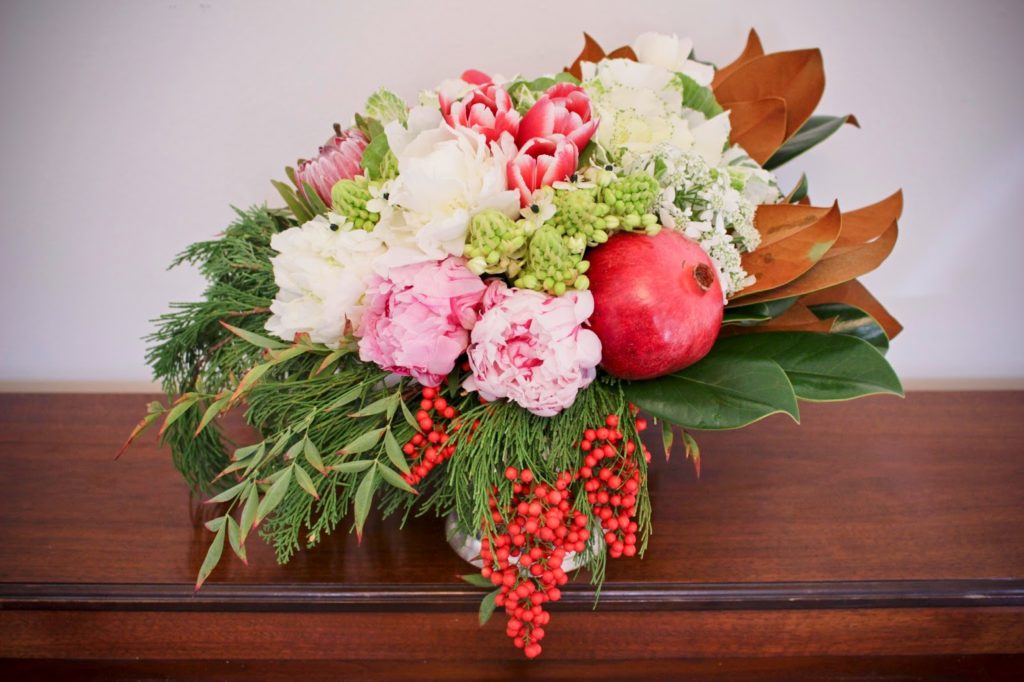
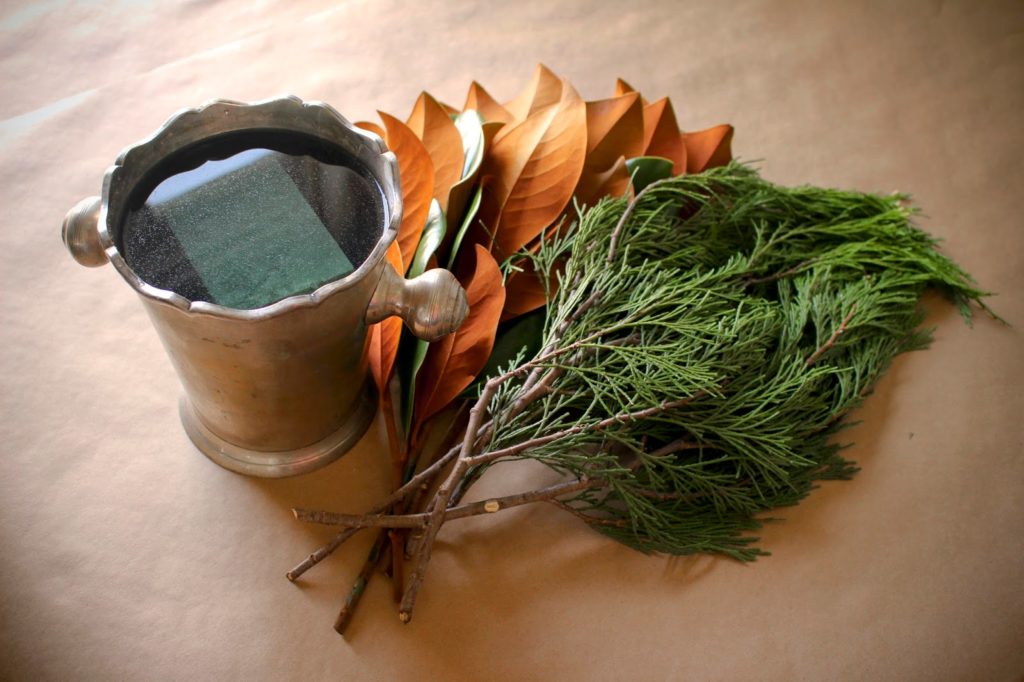
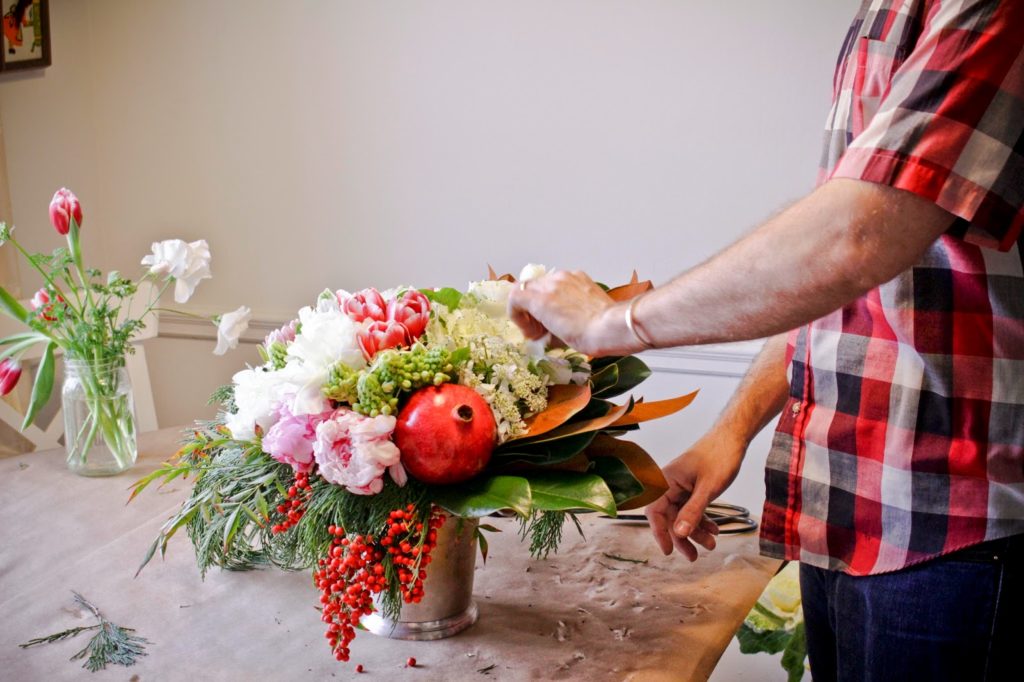
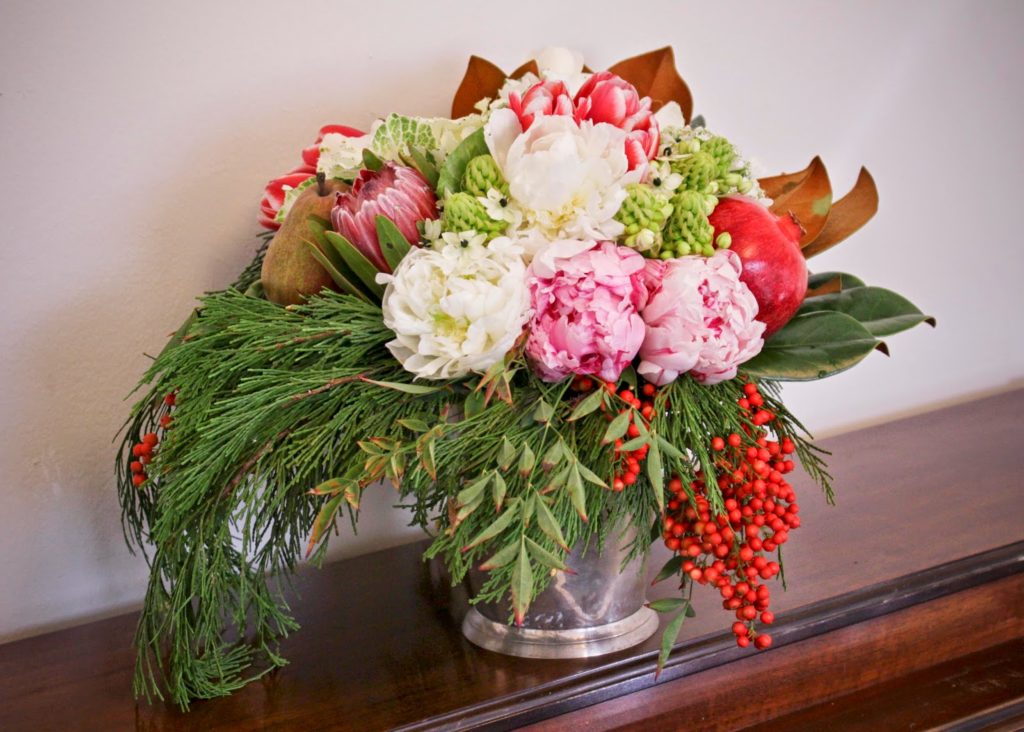
7. Greenery – take some clippings from the christmas tree, your local forest, or a neighbor you feel like stealing from. Source your pretty greens as this is where it all begins. 


8. Random “Foraged” (stolen) Berries – If you have dogs or children, use with caution.

9. Magnolia Leaves – these are a classic holiday accent to any arrangement or wreath. Some people spray paint them gold, but who has time for that?

10. Holiday Food – Pomegranates, Pears, Persimmons, Pumpkins etc. Anything that starts with the letter P will do. (Pinecones…not food but totally acceptable)

11. Protea – This is a great “focal flower” that will last the duration of your family’s stay and into the new year. Succulents are another great option.

12. Ornamental Kale – Hippie/Hipster approved. These take up a lot of real estate. If you are super lazy, this is a solid addition.

13. Tulips – Great color splash – check out french tulips if you want a sassy option.

14. Star of Bethlehem – Cause its Christmas y’all. (Note they also last for a long time and will continue to bloom for weeks).

15. Peonies – This is the popular girl in school. She hangs out with the funny chicks (tulips) but steals their boyfriends. This is your other focal flower of choice. (Caution: much like the popular girl in school, they are fragile and fall apart easily)

Now that you have your flowers together, you need to process them by removing excess leaves from your stems. The idea is to keep all vegetation other than stems out of the water. The longer your water stays clean (and free of flower goo) the longer your flowers will last! 

The first stems to enter your vessel should be the greens.
Follow up the greens with accent greenery such as your magnolia leaves, or the berries I “borrowed” from my neighbors yard. This is the fitted sheet…totally necessary.
Next add your ornamental kale and focal flowers. Do this in a not boring way.
Fill in gaps with beautiful pieces of fruit or pine cones etc. To do this, carefully stab a wooden skewer into your fruit (make sure you don’t run the skewer all the way through). Cut the exposed skewer to the depth of your vessel (so no stick is showing and the fruit sits in the arrangement snug as a bug.)
After you have gotten this far, take a step back, grab a drink and give your eyes a minute to rest. Revisit it with fresh eyes in 10 minutes.
Now add your finishing detail elements. Tulips and star of bethlehem are great at filling in the gaps and will add lovely bursts of color as they continue to blossom.
Now step back, admire your work, quit your job, and become a florist.
Happy Holidays Yall!
<3 Matt 
INSTAGRAM: @thistlebefloral
EMAIL COMPLAINTS: info@thistlebefloral.com

Thistle Be is Matthew P. Bollwinkel, who was born in Sibu Sarawak Malaysia in the winter of 1980 to missionaries Mark and Elizabeth (Bonnie) Bollwinkel. Upon their return to the United States, the family spent the subsequent years moving from town to town in California and Nevada with various churches. To this day, the place Matt calls “home” is the San Francisco Bay area.

Matt’s artistic inspiration includes Japanese imagery and culture, feminism, loud and dissonant music, photographs in old medical encyclopedias, animals, rust, dirt, gold, and and the love he has for his wife Sara and their two dogs Albert and Norman. Matt is a studio musician, a baker, and a business man. His love for flowers began when he was a young boy, but his draw to floral design began in the winter of 2013 when his community began commissioning his work. Matt’s notoriety has circulated primarily by word of mouth, as he operates out of his home in Los Feliz in Los Angeles, CA (or in a glass case of emotion….or on location).

For more information or to set up a consultation please contact: 

DIY HOLIDAY CARDS DISPLAY

This is so easy… I don’t even know why I’m posting it. BUT I think it turned out pretty cute. So. I’m also procrastinating cleaning my house. Typically when I’m at my most creative.
I just received my first two holiday cards! One from my bestie since college, and one from my sweet little nieces and nephews! Last year I was so lazy (read: just had my second baby) that I put all of my cards in a pretty bowl on the coffee table. This year I’m stepping it up a tiny notch. 
All you need for this easy DIY is:
– 1 wire wreath form
– 1-2 packs of plain clothes pins
– 1 roll of fun washi tape
– 1 clear command hook (sticks on the wall and removes without damaging the paint!) See below:
I found this pretty Meri Meri washi tape at our fav shop Rock Paper Scissors.
 Measure by sticking a clothes pin on the tape
 Cut tape
Bend around the sides of the clothes pin. Use the back of your finger nail to really stick it on there well. And… that’s it. Told you it was easy! You could totally spray paint the wreath form gold or silver first, but it’s going to get covered up with cards anyway, right? She says to convince herself.
I still have to finish decorating my mantel. Cannot find the rest of my decor!! It’s probably in storage somewhere. Ugh. Ooh and I’m waiting on a sparkly banner from The Bannerie! I’m a tad obsessed.
Happy decorating!
-L

DIY DOOR MONOGRAM

Some say I’m a hoarder (Jenni), some say I’m lazy (me), but I think we can all agree this DIY I did last year was worth keeping, right? It was so easy that I wanted to share with you again. And I haven’t gotten around to decorating my mantle yet… so….here ya go.
See the full tutorial HERE that I used for Ari’s room. Just switch out the junk keepsake treasures for ornaments. Obviously 🙂
Up for next week: more holiday gift guides and holiday style posts just in time for your party circuit!
-L

DIY MONOGRAM DOOR DECORATION

Here’s a simple DIY weekend project for you… grab your glue guns, ladies! I was inspired by a spring project by Urbanic and just filled my paper mache letter I found at Hobby Lobby with ornaments! I love how it sparkles when I’m driving up to my house. And it’s always nice to make your decor a bit more personalized instead of doing an ornament wreath (though I love those too!). Click here for the tutorial.
I’m planning on filling an “A” for Ari’s room with found objects when I have the time… soooo next year probably. 
You could even spell out a word like “JOY” and place on your mantle! 
Happy crafting,
-L

MODERN THANKSGIVING TABLESCAPE

One day until our Thanksgiving feast, and my table is already set! I may be a little excited. Creating a tablescape is my absolute favorite part of Thanksgiving ( well, second favorite to devouring all of the delicious food).
This year, I tried to use things that I mostly had on hand. I couple of Thanksgivings ago, my mom purchased some beautiful linen napkins from Pottery Barn. They weren’t cheap, but I just HAD to have them. Therefore, I owe them several appearances on my table. I absolutely love the dark teal color, and really wanted to create a table around that color with hints of gold. 
I spray painted pumpkins with a metallic gold spray paint, which has to be the easiest project ever. It makes such an impact too! I purchased some brass candlesticks a couple of years ago at a thrift store, and this is my first time using them! Sometimes you just have to wait for the perfect time to pull things out, ya know? I also had a gold dotted burlap runner from a previous event I hosted. I purchased a set of salt and pepper shakers and a Threshold runner from Target. I put the final touches on the table with some greenery, roses and pheasant feathers. Now we are ready to stuff our faces!

I hand painted a small “say grace” print with water color. I think it may be a permanent framer for my dining room.

My favorite part of my Thanksgiving decor is the floating branch above the table. I found it on the side of the road while on a walk with my daughter. I strung it up with fishing line and commando hooks. I am really considering leaving it up and stringing “snow” from it for winter, so this may not be the last you see of it.

Happy Thanksgiving everyone!
-J

CUSTOM HOLIDAY WRAP FOR THE LITTLES

Remember the chain link garlands you made in grade school? Well, we’re reinventing them! They make perfect gift wrap toppers for the holidays. At Love & Lion we celebrate both Hannukah and Christmas, so we’ll show you how to wrap using all the same supplies. This is the perfect craft for your littles! My three-year-old Ari stamped the Hannukah wrap paper all by himself. Great for small motor skills and shape recognition. 
Grab your toddler and get to stamping!

Here’s how to make your chain link garland topper:

Voila!

Here are some shots of our Hannukah party. We used the extra stamped wrapping paper as a table runner and kinda went crazy with the chain links!

We tied the napkins with candles – Hannukah is the Festival of Lights after all! 

Any great holiday crafts you like to do with your kids?
-L