silver

DIY HOLIDAY CARDS DISPLAY

This is so easy… I don’t even know why I’m posting it. BUT I think it turned out pretty cute. So. I’m also procrastinating cleaning my house. Typically when I’m at my most creative.
I just received my first two holiday cards! One from my bestie since college, and one from my sweet little nieces and nephews! Last year I was so lazy (read: just had my second baby) that I put all of my cards in a pretty bowl on the coffee table. This year I’m stepping it up a tiny notch. 
All you need for this easy DIY is:
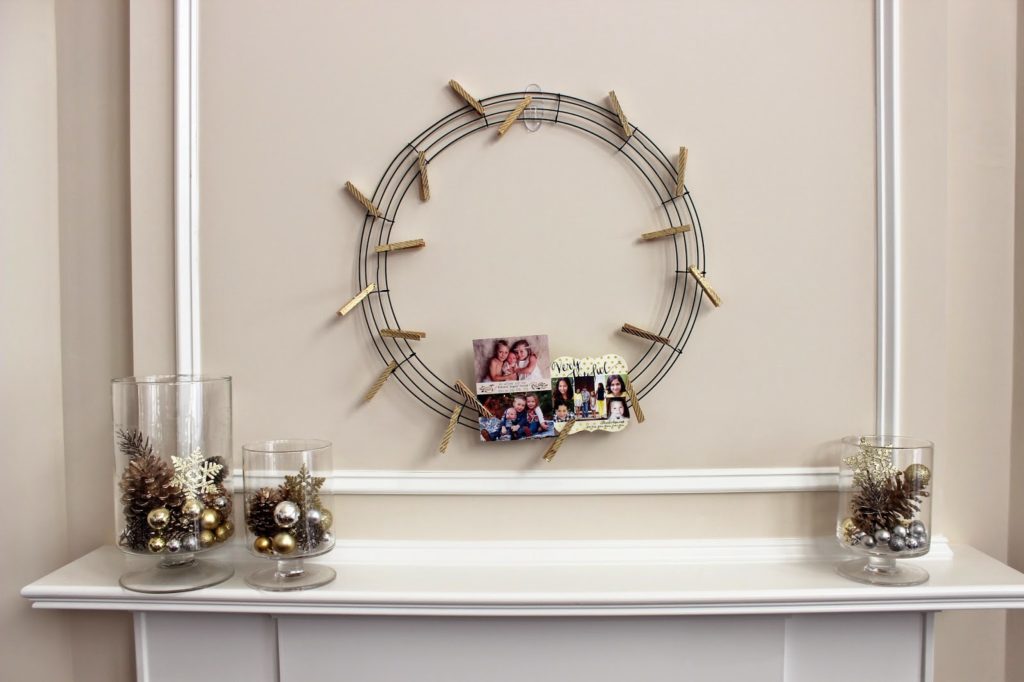
– 1 wire wreath form
– 1-2 packs of plain clothes pins
– 1 roll of fun washi tape
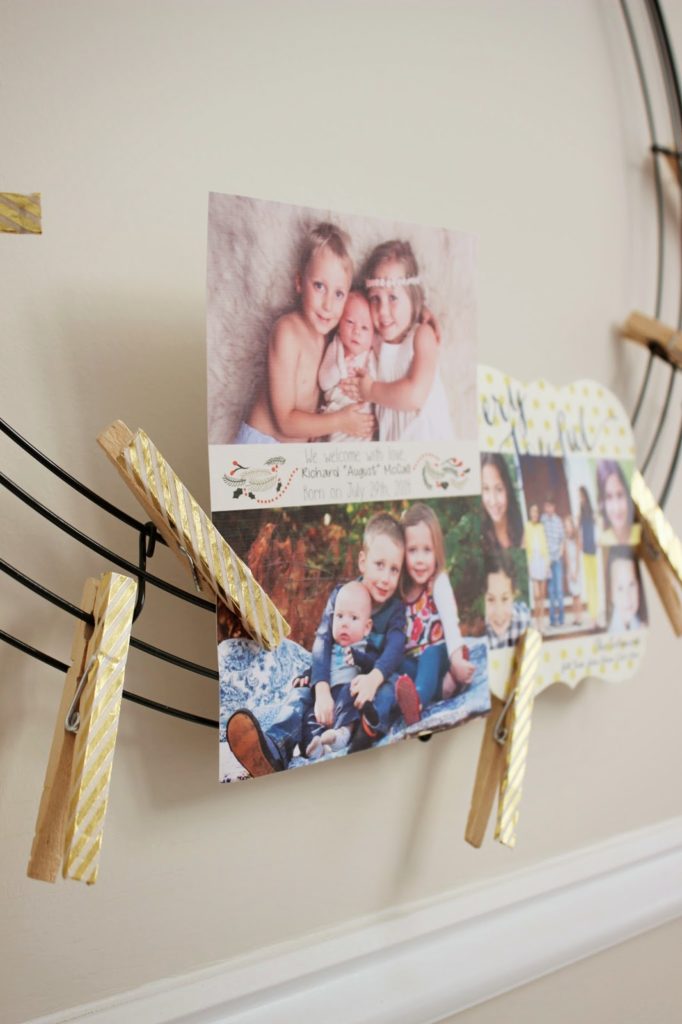
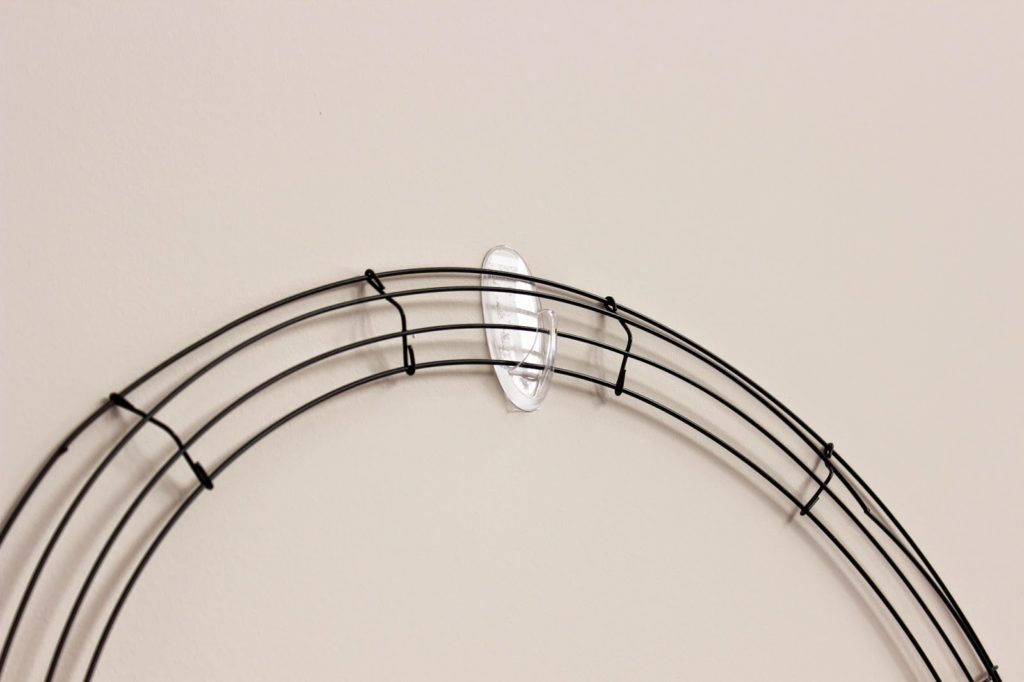
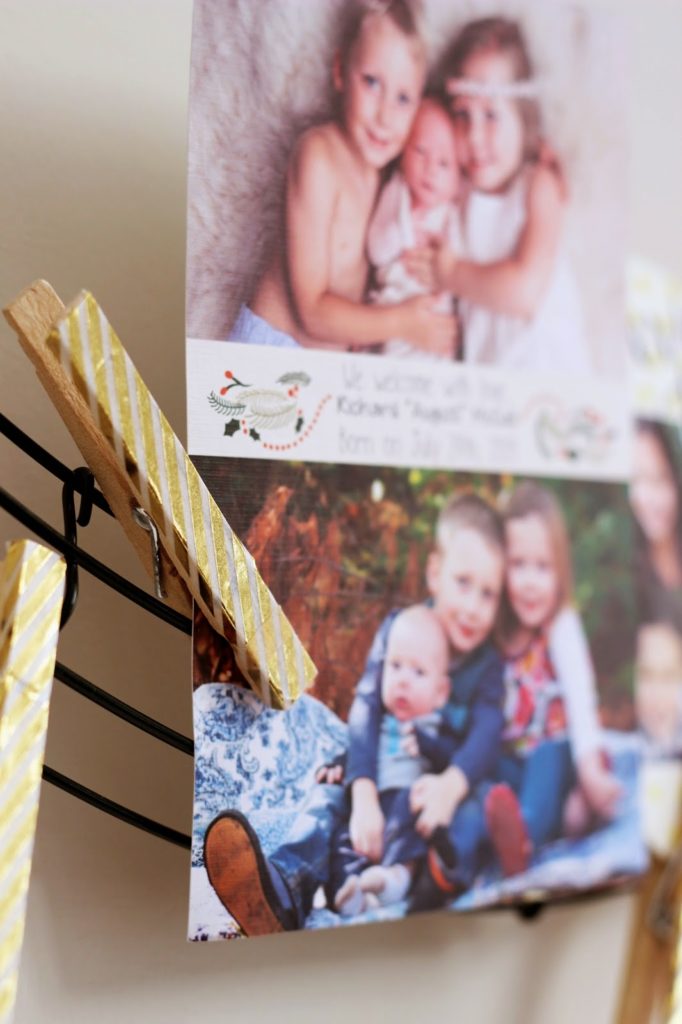
– 1 clear command hook (sticks on the wall and removes without damaging the paint!) See below:
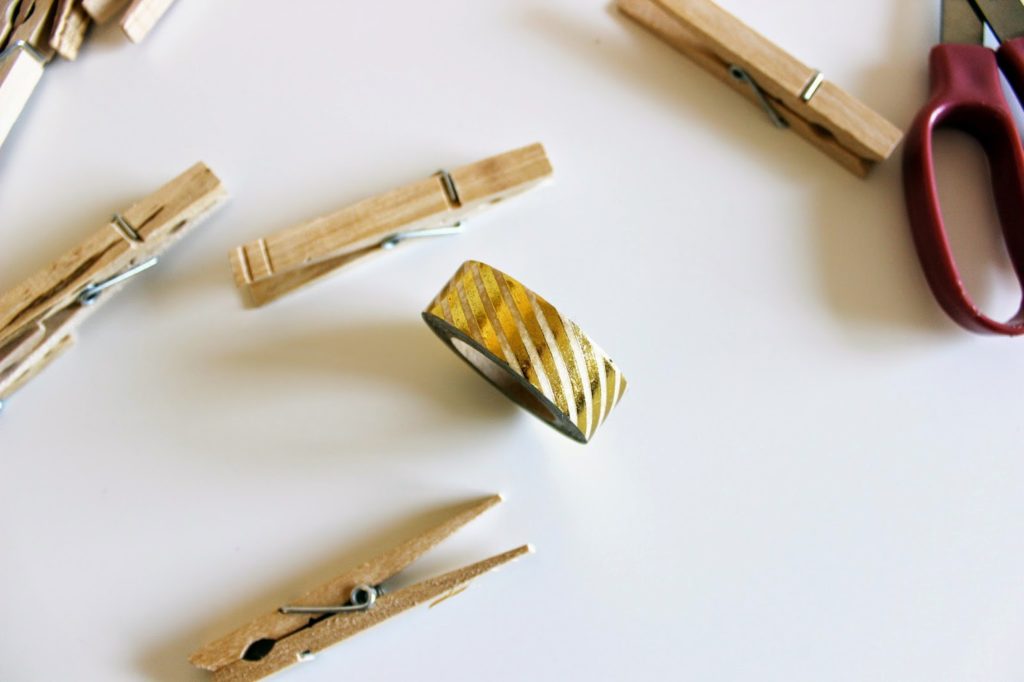
I found this pretty Meri Meri washi tape at our fav shop Rock Paper Scissors.
 Measure by sticking a clothes pin on the tape
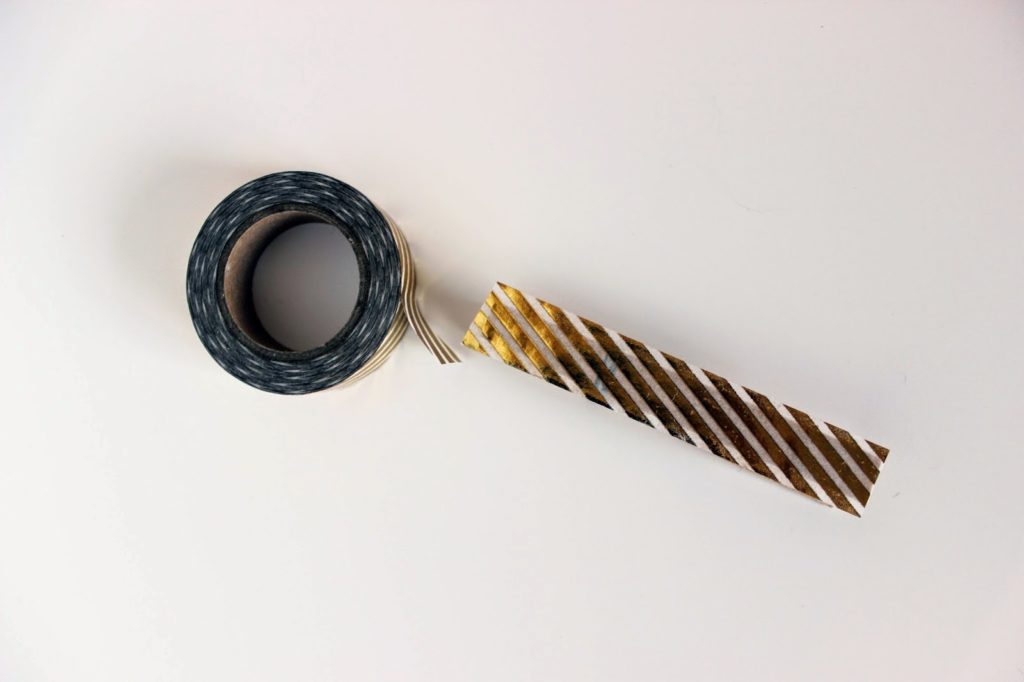
 Cut tape
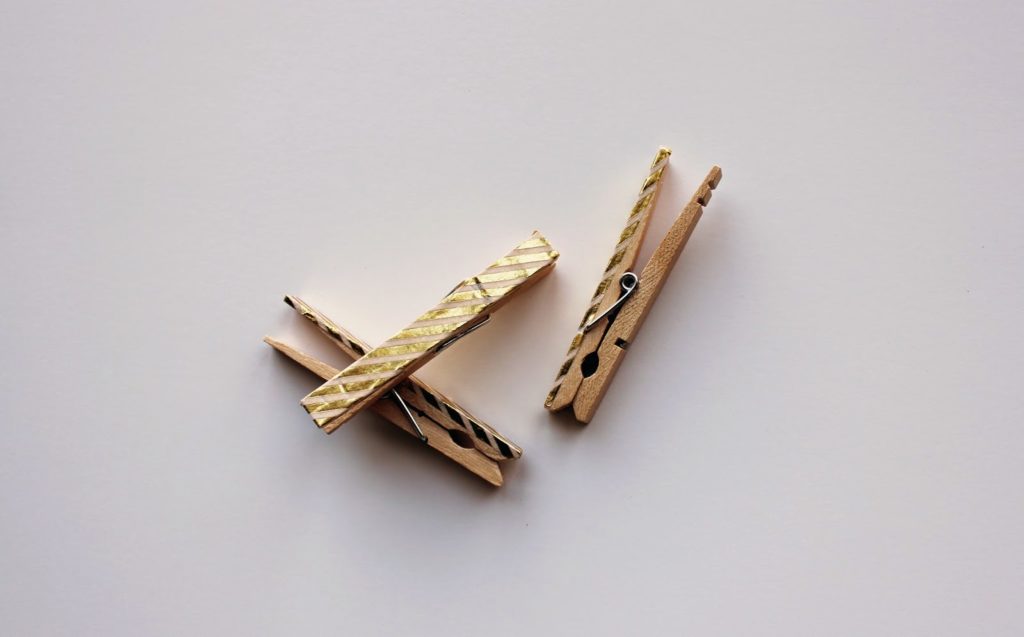
Bend around the sides of the clothes pin. Use the back of your finger nail to really stick it on there well. And… that’s it. Told you it was easy! You could totally spray paint the wreath form gold or silver first, but it’s going to get covered up with cards anyway, right? She says to convince herself.
I still have to finish decorating my mantel. Cannot find the rest of my decor!! It’s probably in storage somewhere. Ugh. Ooh and I’m waiting on a sparkly banner from The Bannerie! I’m a tad obsessed.
Happy decorating!
-L

A “WINTER WONDERLAND” BABY SPRINKLE

Our #TBT (Throwback Thursday) Party this week is a baby shower I put together for our sweet friend, Shara. Baby number two was on the way, and I wanted to do something simple, not over the top, but still oh so special. 
It was a “winter wonderland” theme with some confetti markings as well. My main focus was to have “snow” hanging from the ceiling and an amazing dessert table. It was January, so it just felt right. 
^^The invite (Rock Paper Scissors) ^^
I actually put confetti in the envelopes as well! That always a nice surprise for the recipient! yay! 
^^ I did simple mantel decor by using fake snow and cotton balls, flowers, candles, DIY anthro inspired letters and a handmade felt banner. I put modge podge on the bottom of the votive candle jars and sprinkled glitter on them to give them a little something extra. Also, the banner consists of felt flags and wooden beads from JoAnn’s that I painted an aqua blue…. shara’s favorite color.^^
^^ White flowers are just so classy to me. They ALWAYS work!! ^^

^^ The dessert bar was my favorite part! So many yummy treats, especially those Aunt Ellie’s Campfire Crispies! I mean…. seriously. ^^
^^ Hand-lettering on the chalkboard. Always fun! ^^
^^”To go treat bags” are always a good idea when you are serving lots of sweets. Guests took extras home to their kids. That is what they said at least. I am SURE that they probably had a treat or two in their car…. in private! ^^
^^ Anything you can do to make writing “thank-you” notes a little easier on a new mom really helps. I had each of the guests address their own envelope, and I had already written Shara’s address on the back as well. All she had to do was write the simple note, and put a stamp on it. Easy! ^^
My only tutorial I took pics of because I am the worst at stopping throughout my projects to take tutorial pics, as I get too excited favorite tutorial that I can share with you are the DIY color-blocked spoons I made. Pretty self-explanatory…. just tape your utensils down with painters’ tape while blocking off different sections. Paint your first color, allow drying time, move your tape and block off another section, and repeat until you get the desired look. It was time consuming, but man… I am such a sucker for little details! ^^

P.S. Tomorrow is Friday!!! WHOOP WHOOP!
-J